-
June Take-and-Make Kits
Bring home a fun new project! Sign up from our Library Calendar and pick up a kit at the Youth Services desk or through our Parking Lot Pickup service between June 13-24.
Toddler & PreK: Rainbow Rice Sensory Bin
Dye rice to use for a fun sensory experience. Register for the June Toddler & PreK Take-and-Make Kit here.
Your kit includes:
- 3 bags of rice in ziploc bags
- 3 bottles of food coloring
- 1 container containing 3 teaspoons of vinegar
- 1 spoon
- 1 cup
- 3 dinosaur fossil figurines
- 1 rubber ducky
1. Take 1 ziploc bag of rice and pour into a container with lid.
2. Measure 1 teaspoon of vinegar from the condiment container and pour into the container with rice.
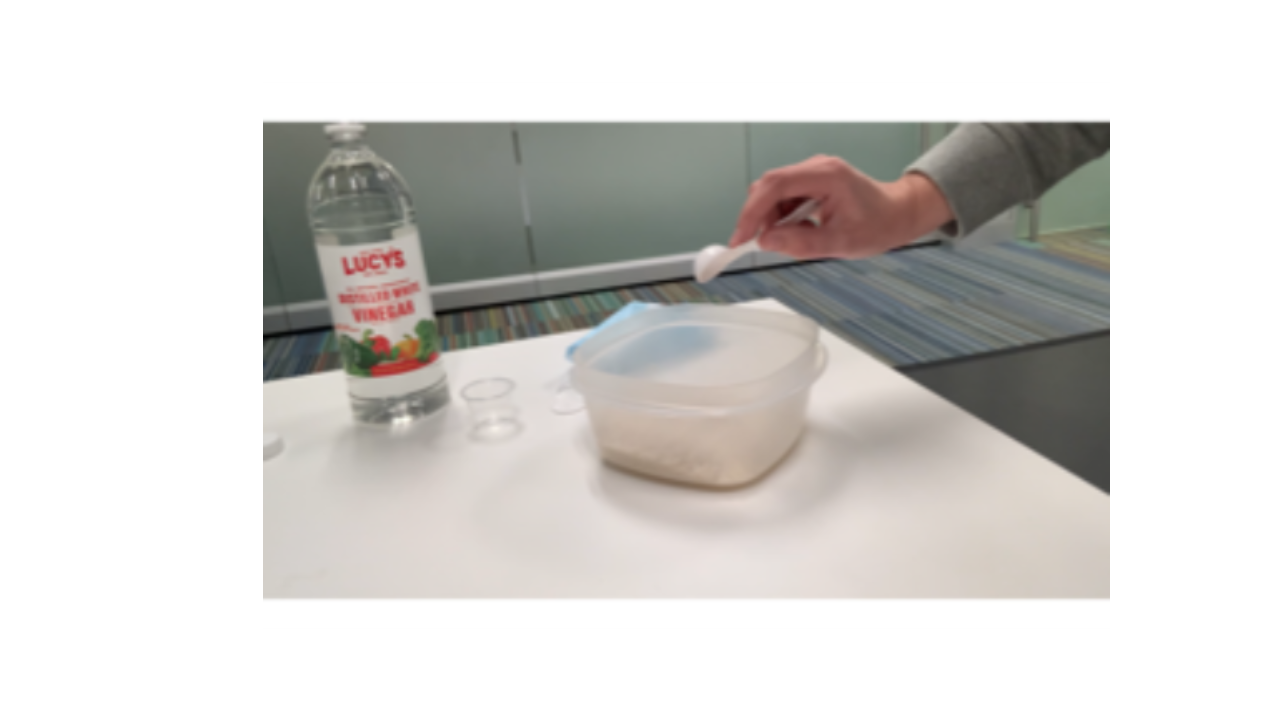
3. Add drops of food coloring to the container. Pick one color.
4. Place lid on container and shake rice until rice is completely covered in food coloring.
5. Spread the rice out on a tray or paper towel to dry.
6. Repeat steps 1-6, with remaining 2 bags of rice and different colors.
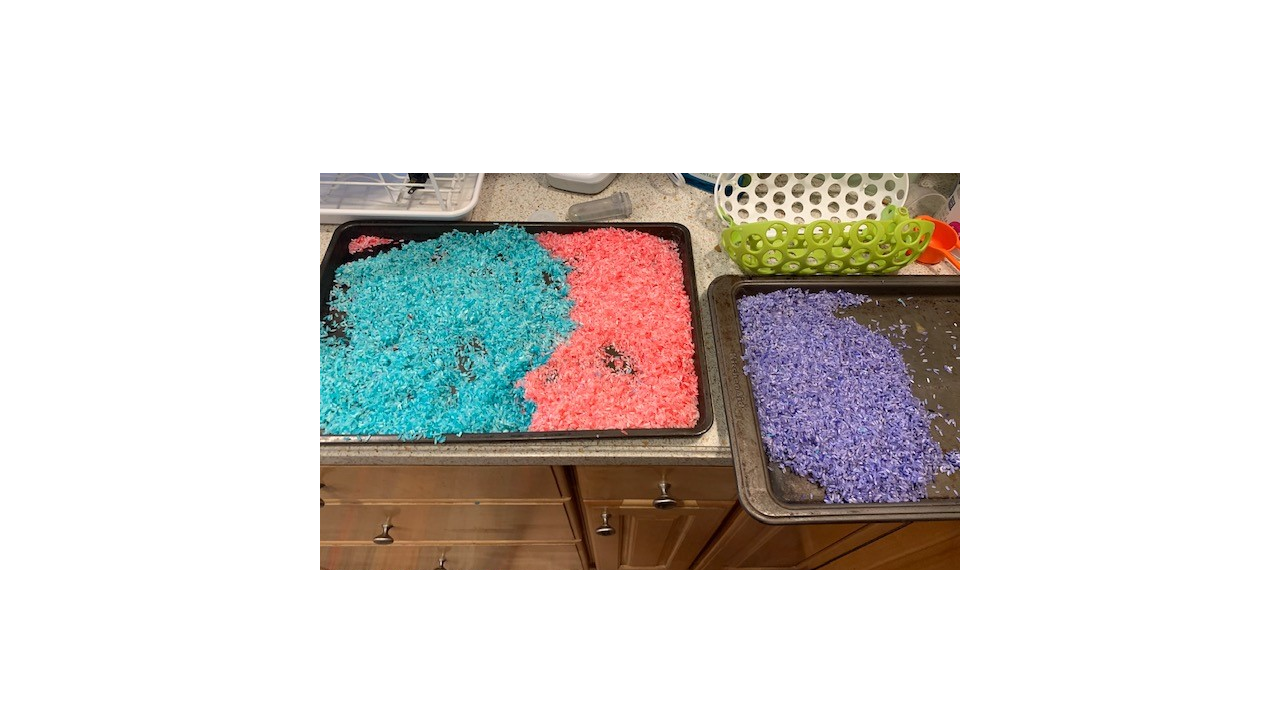
7. Once rice is dry, pour into a bin.
8. Add the rubber ducky, dinosaurs, spoon, and cup to the bin.
9. Play! Please note: RICE IS NOT FOR CONSUMPTION
10. Try adding other items to your sensory bin, such as bowls, different sized cups, funnels, and other small toys.
Show us what you created! Send us pictures at youthservices@balibrary.org.
Grades K-8: Red Thread Connection
Use foam board and thread to map the many connections among your family and friends. Inspired by our Book of the Summer, Where the Mountain Meets the Moonby Grace Lin. Register for the June Grades K-8 Take-and-Make Kit here.
Kit contains:
- 1 foam board
- small portrait papers
- set of colored pencils
- push pins
- red thread
You will also need:
- Scissors
- Glue (optional)
- Scrap cardboard (optional)
Instructions:
- Decorate the small pieces of paper with people you care about: family members, friends, and/or pets. Use the colored pencils or your own art supplies. You could also print and cut photos. Make sure to make one that represents yourself!
- Optionally, glue a piece of cardboard to the back of the foam board. This will help keep the pins secure, and protect your table top from the pins.
- Arrange the portraits on the foam board. Use the pins to fix the portraits in place.
- Tie the end of the red thread to your portrait’s pin. (It may be easiest to tie a knot in the thread, and then pierce the pin through the knot and board.)
- Connect your portrait with everyone else’s, wrapping the thread around each pin.
- You can connect other people to represent their bonds with each other.
For more information about the Book of the Summer, visit: balibrary.org/bookofthesummer
Show us what you created! Send us pictures at youthservices@balibrary.org.
 Youth Services Assistant Librarian Alyssa
 -
April/May Take-and-Make Kits
Bring home a fun new project! Sign up from our Library Calendar and pick up a kit at the Youth Services desk or through our Parking Lot Pickup service between April 18-May 1.
Toddler & PreK: Bubble Wrap Stomp Painting
Be ready to get messy with this active art technique. Register for the April/May Toddler & PreK Take-and-Make Kit here.
This activity would be best done outdoors, it can be messy! Use caution when stomping on the paper, it can get slippery. Alternatively, you can use your hands to press the bubble wrap, instead of stomping.
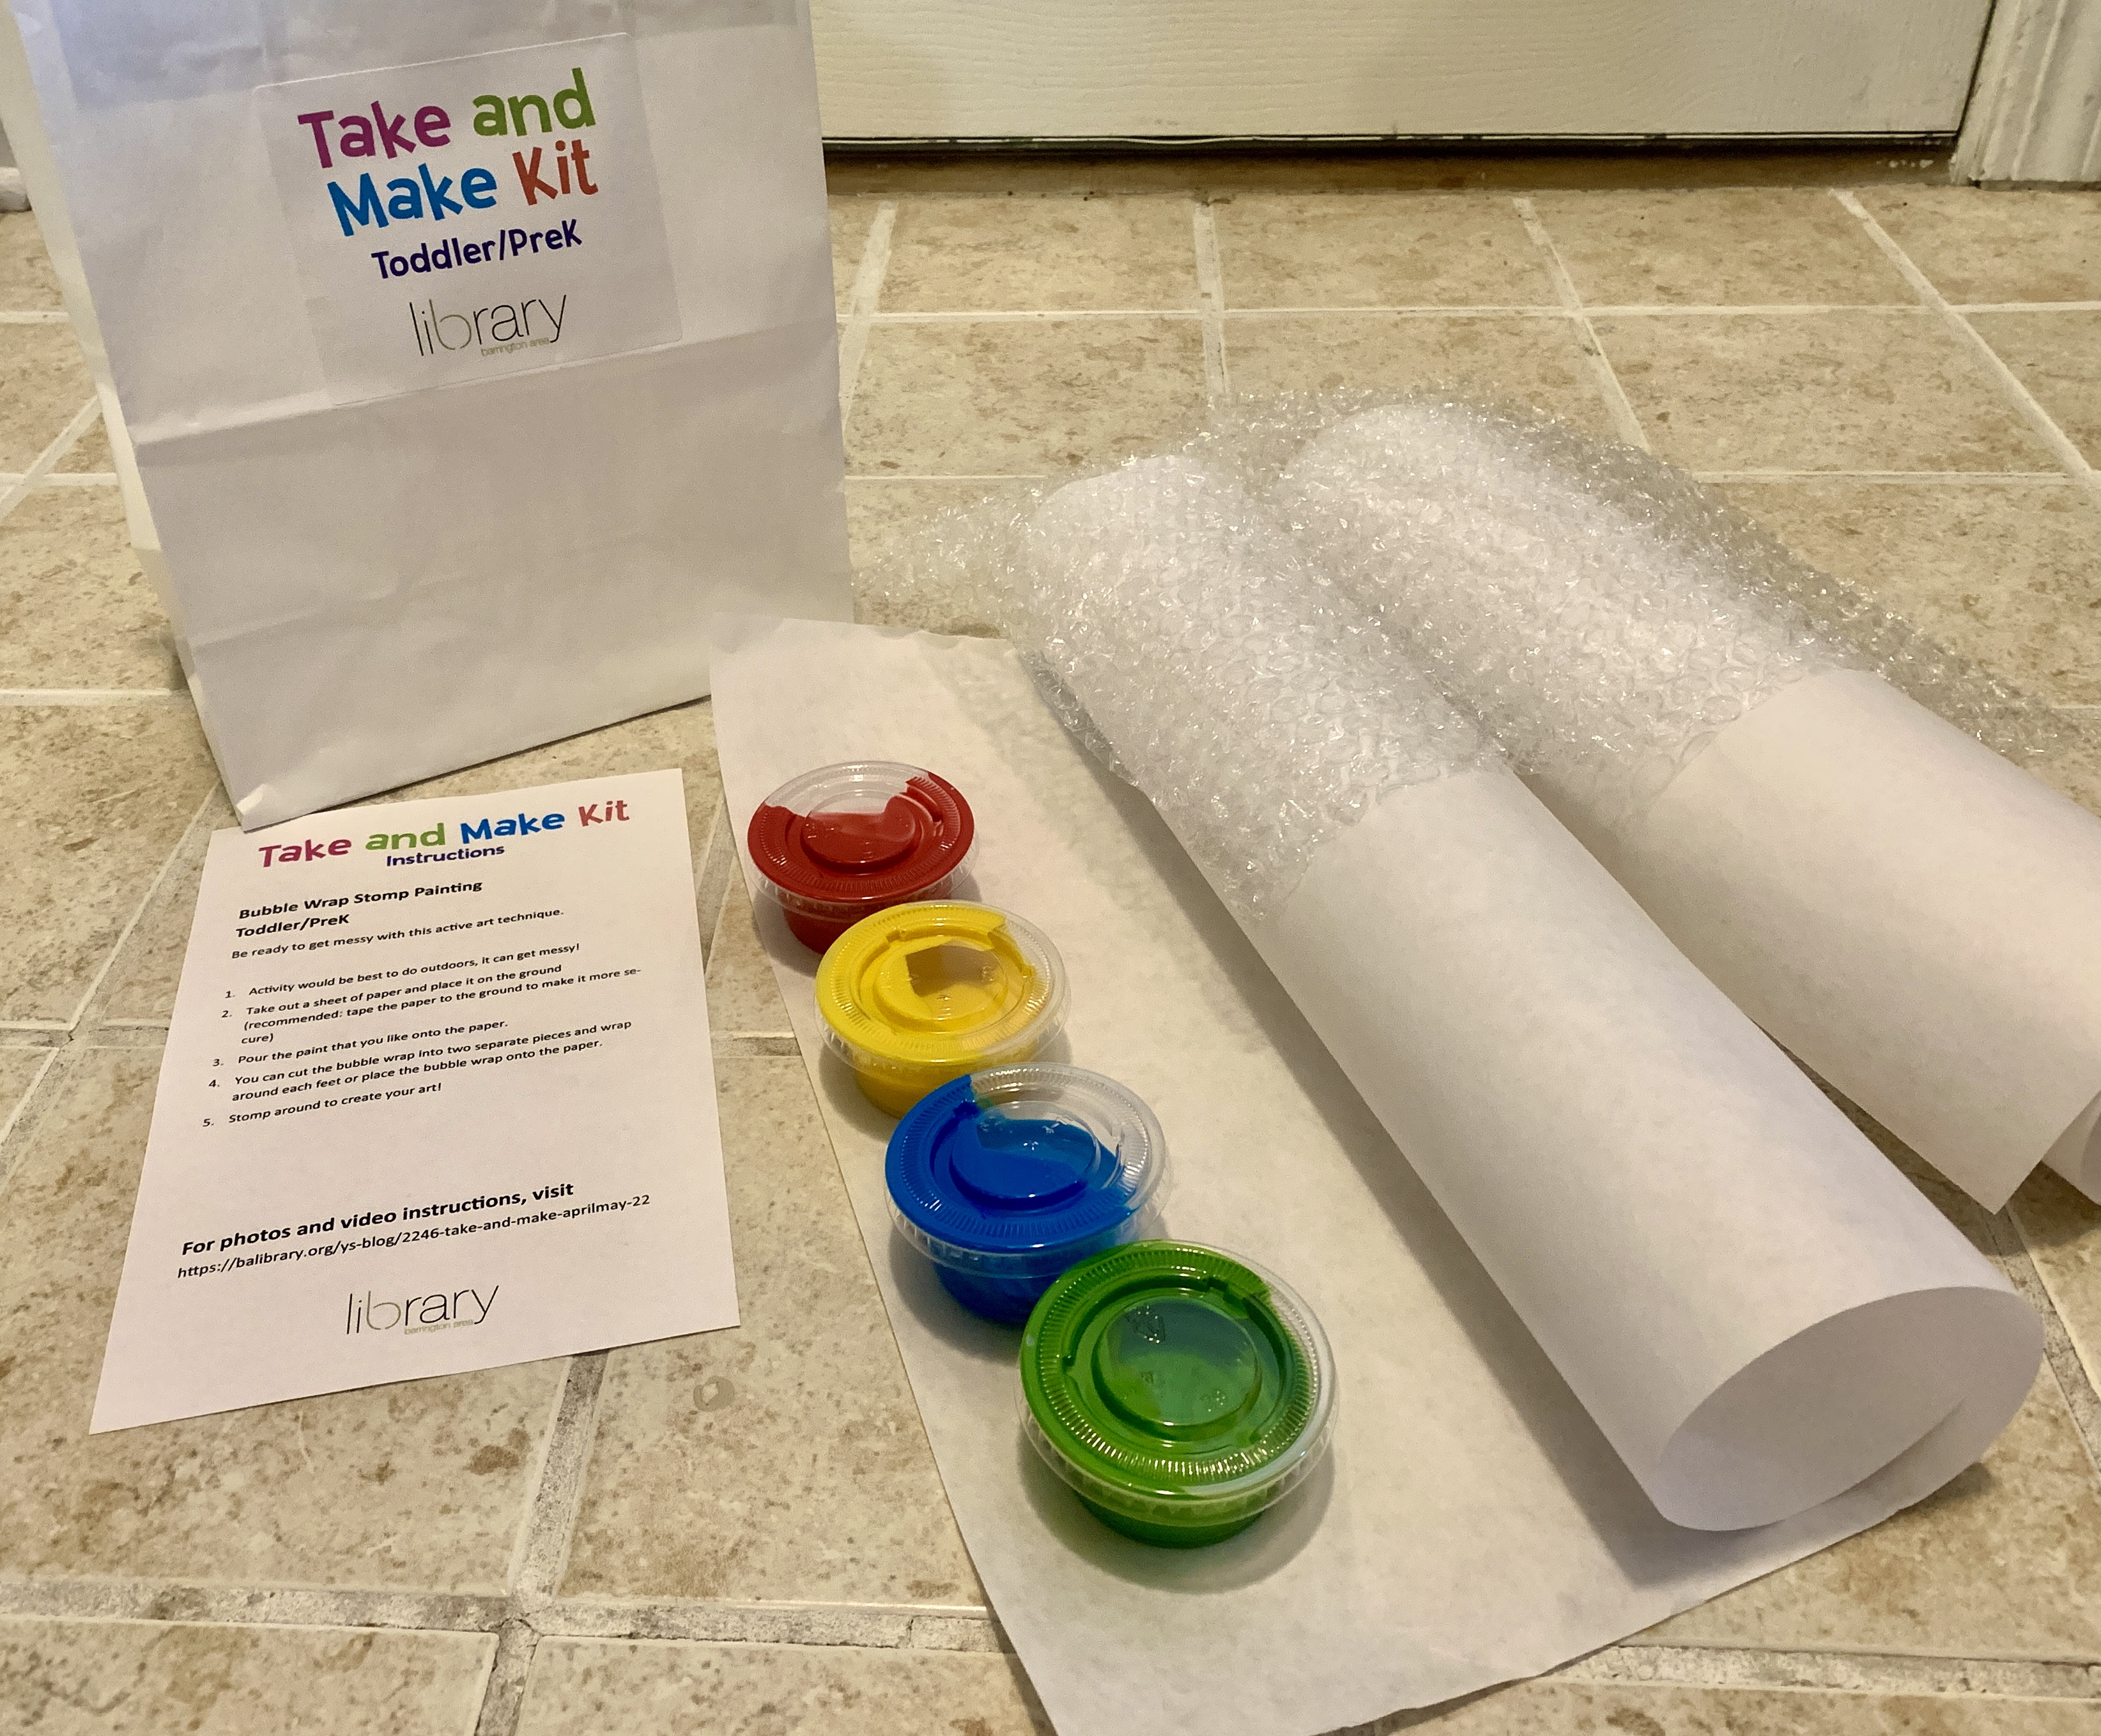
The kit includes: 2 large pieces of paper, 1 bubble wrap, 4 different types of washable tempura paint.
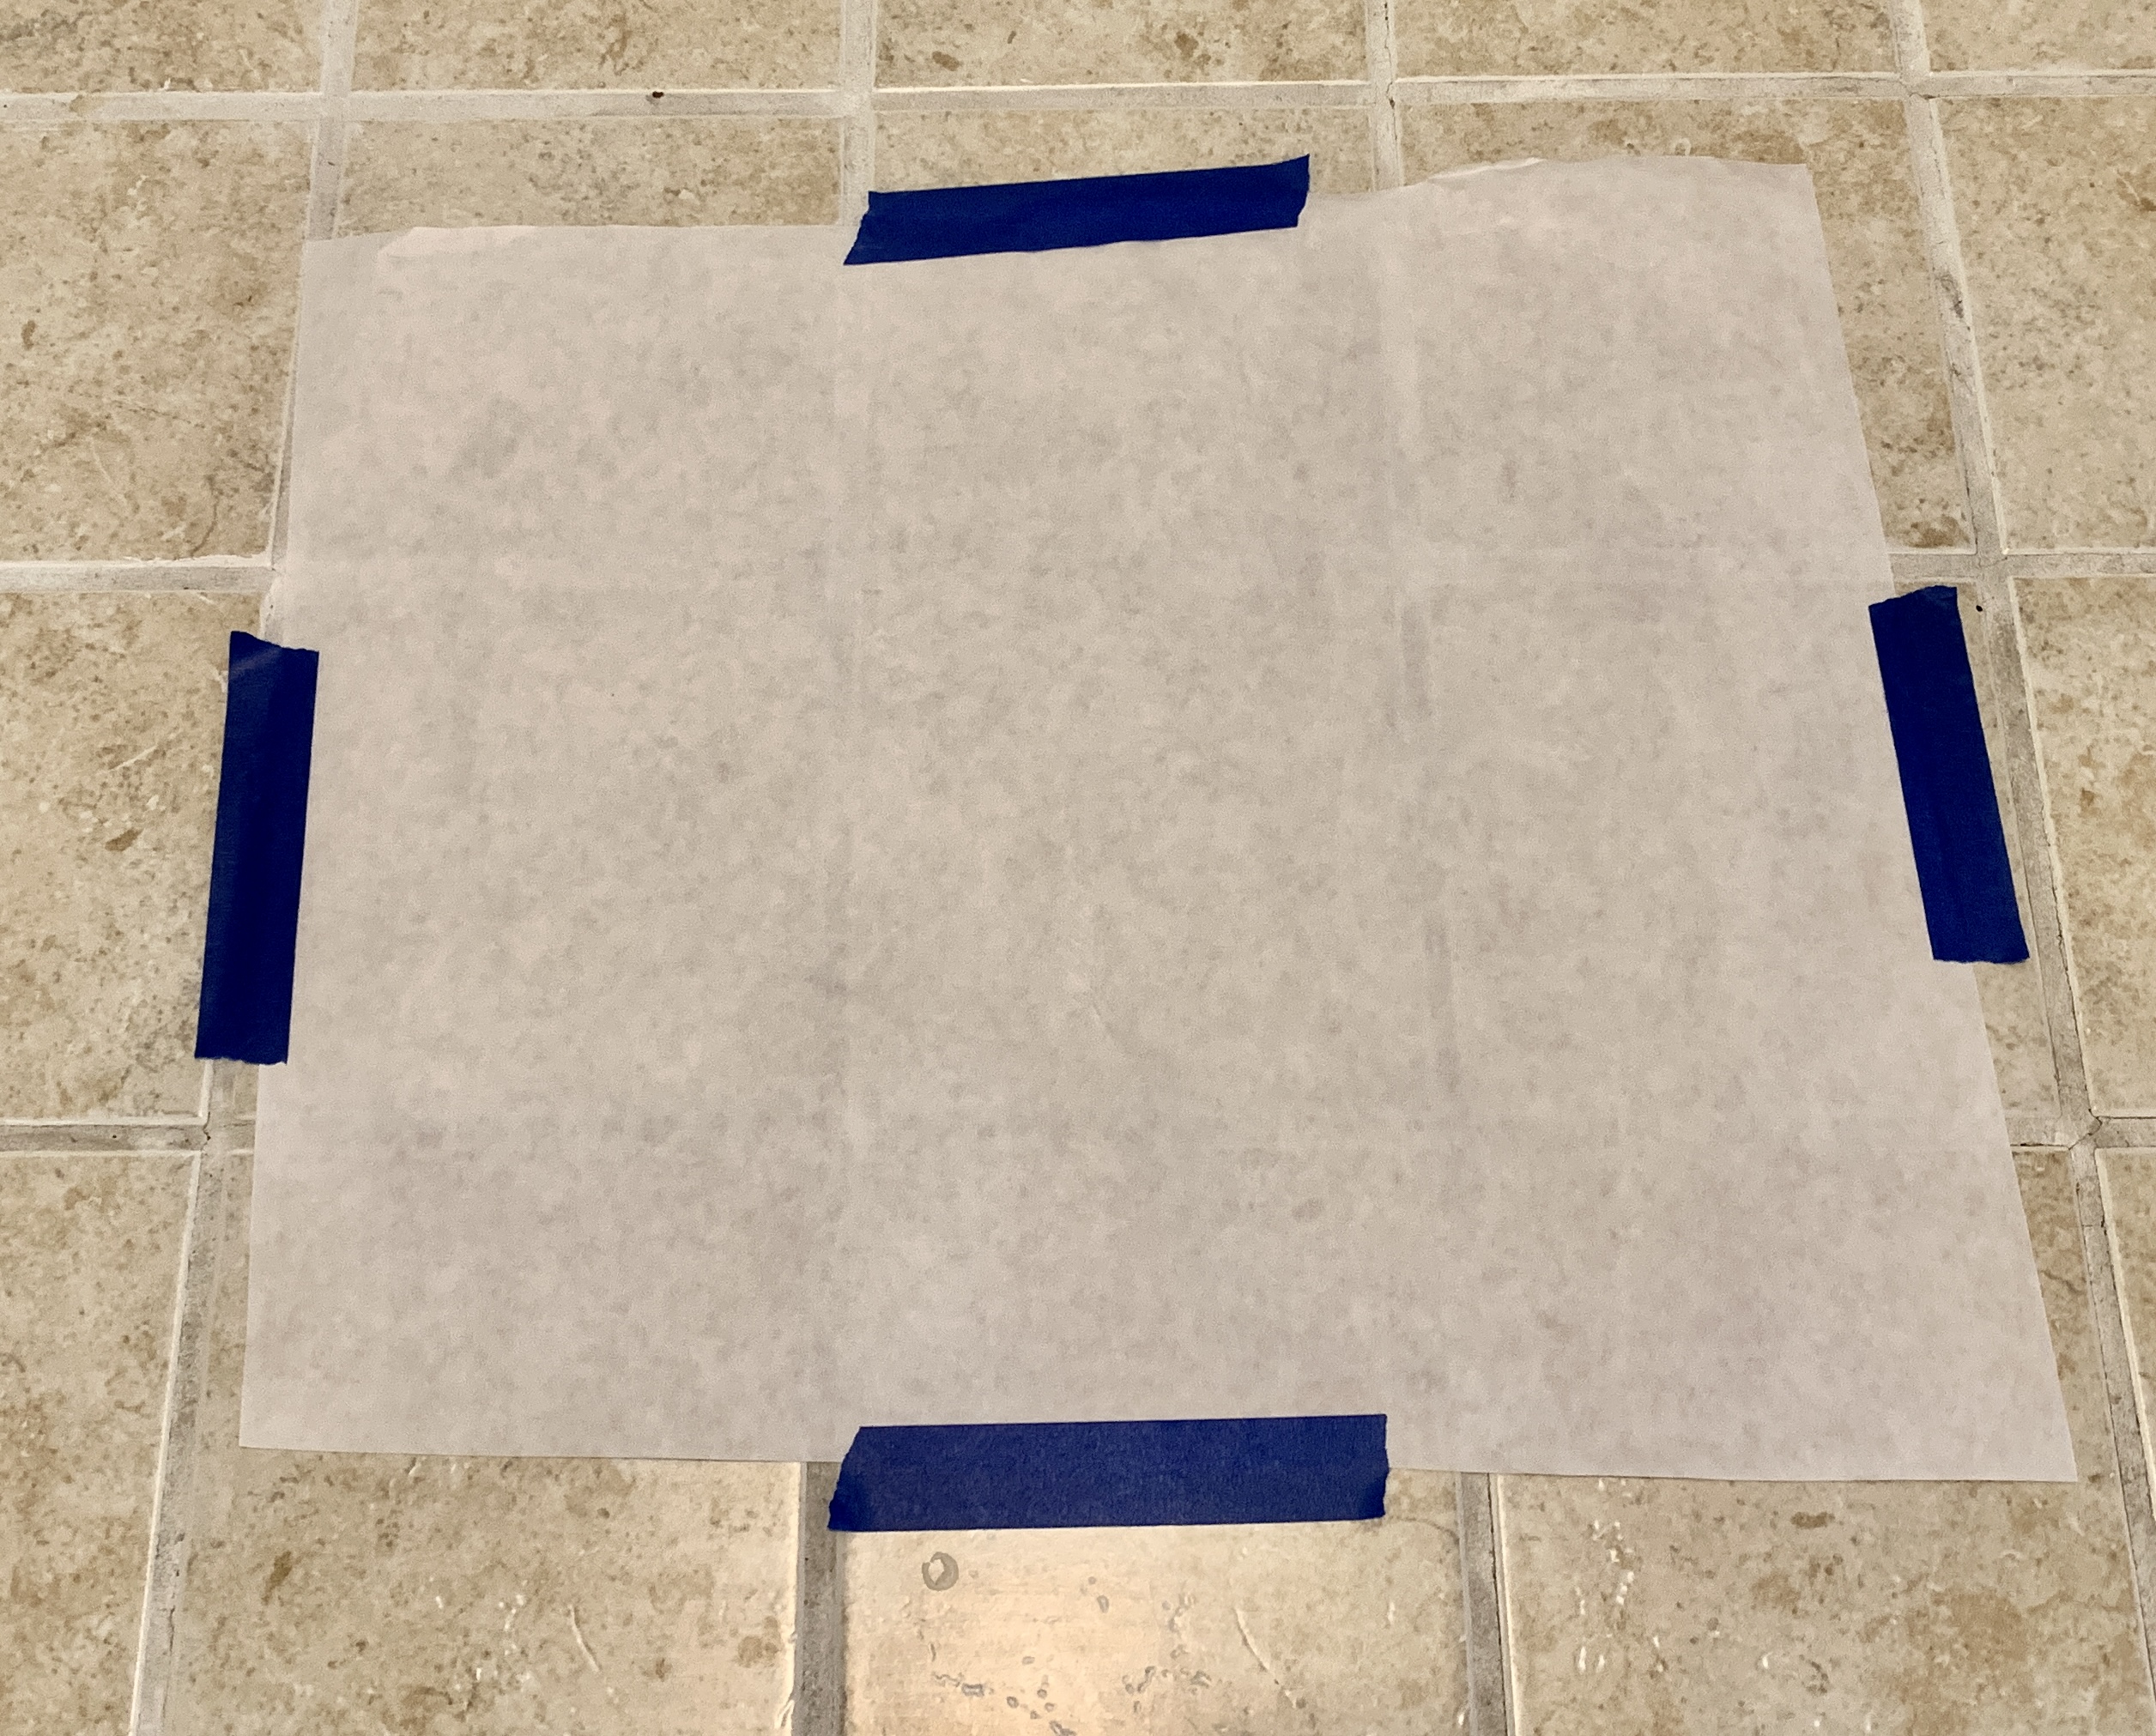
Tape the paper down for extra security.
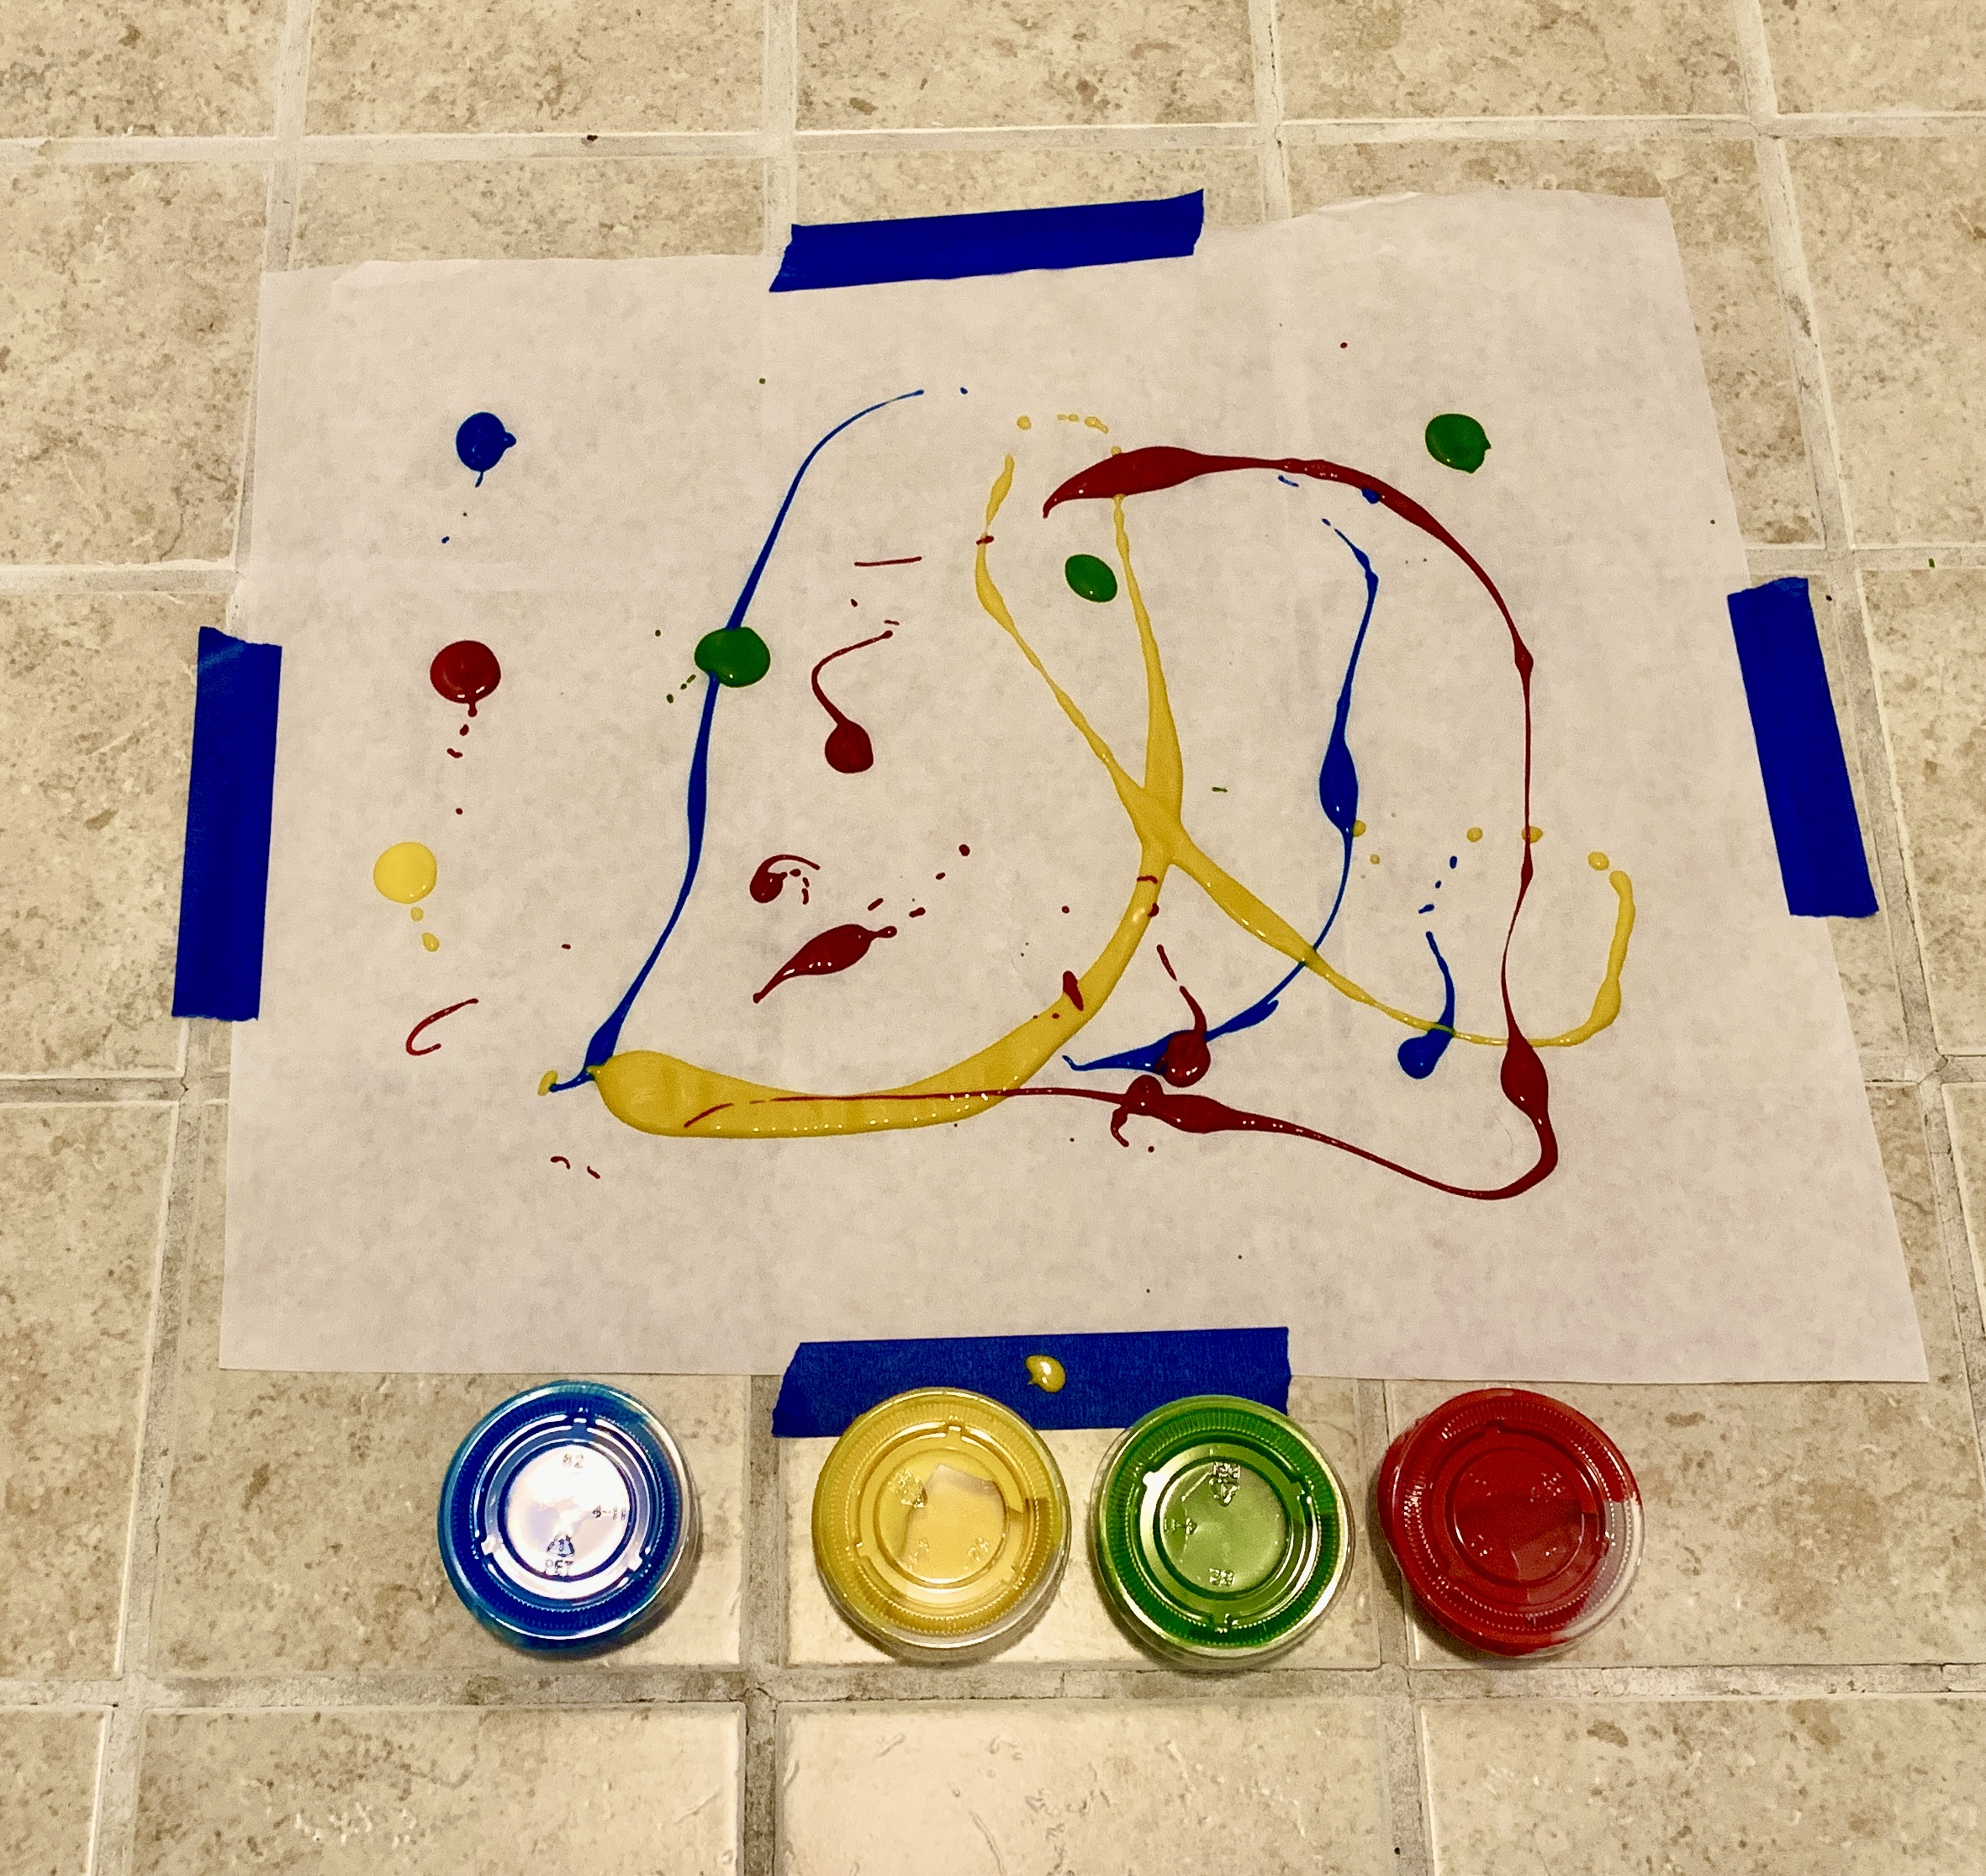
Pour the paint that you like onto the paper.
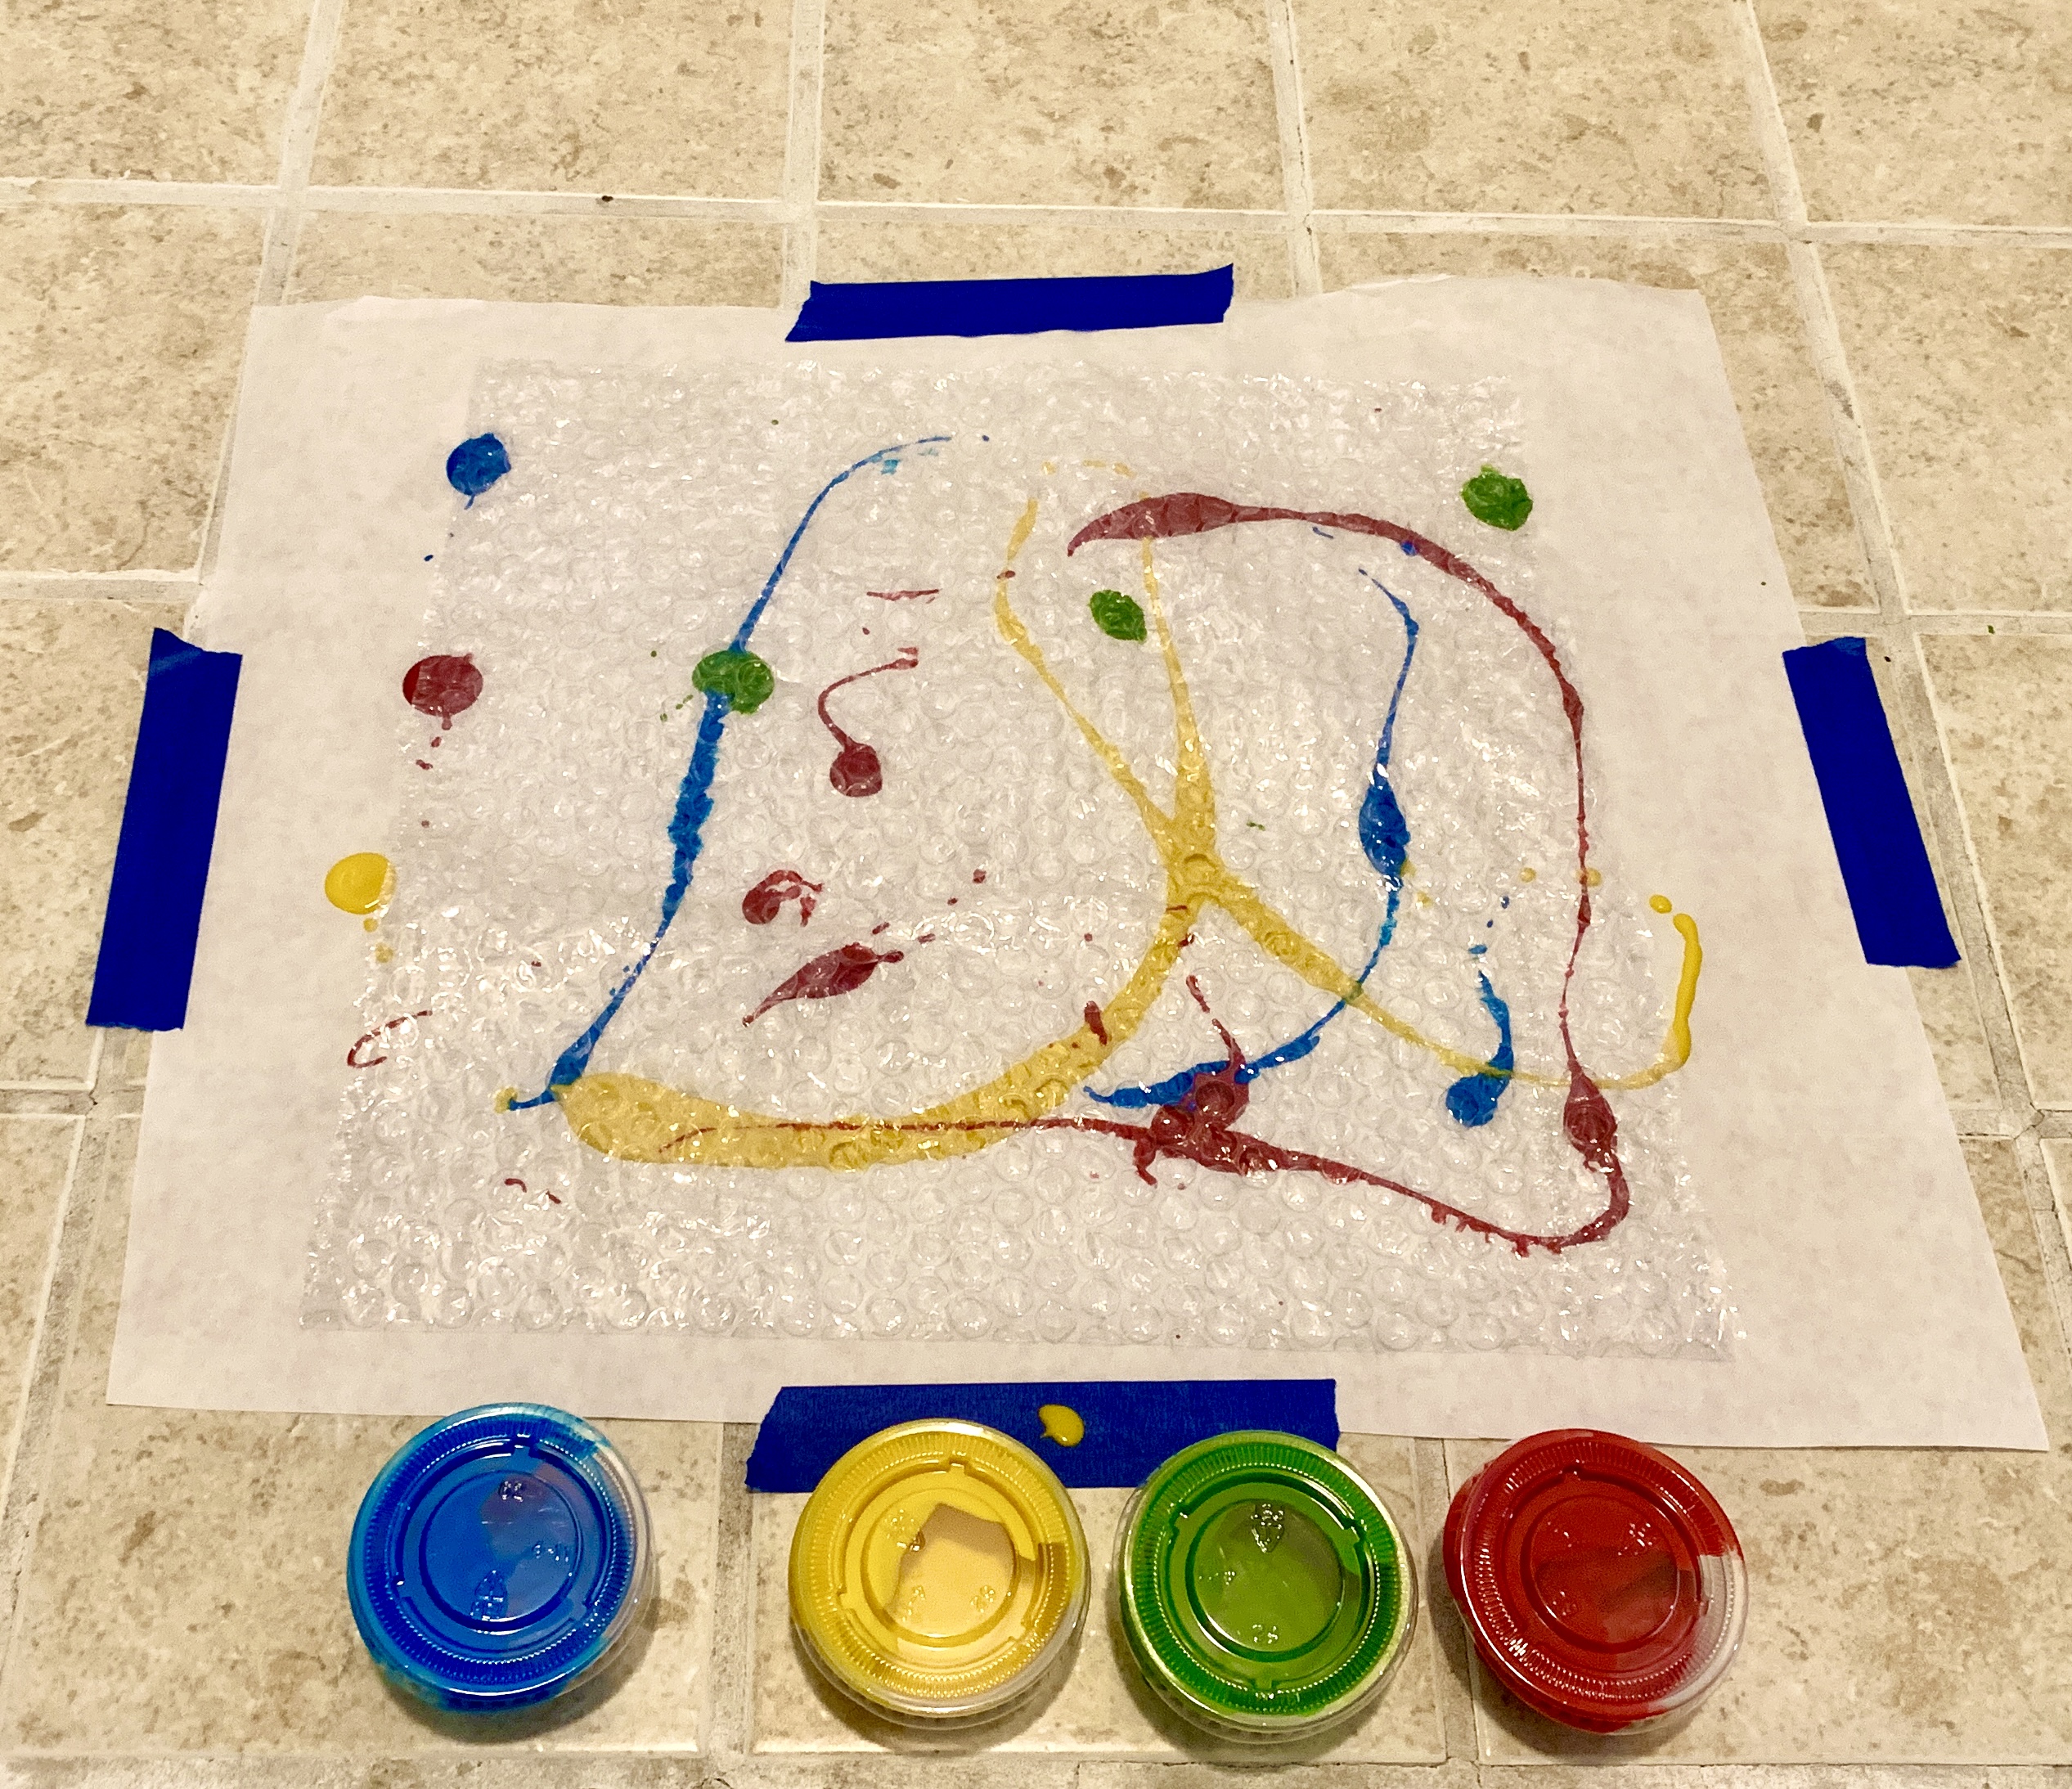
You can cut the bubble wrap in half and wrap it onto your feet, or you can just simply place the bubble wrap onto the paper.
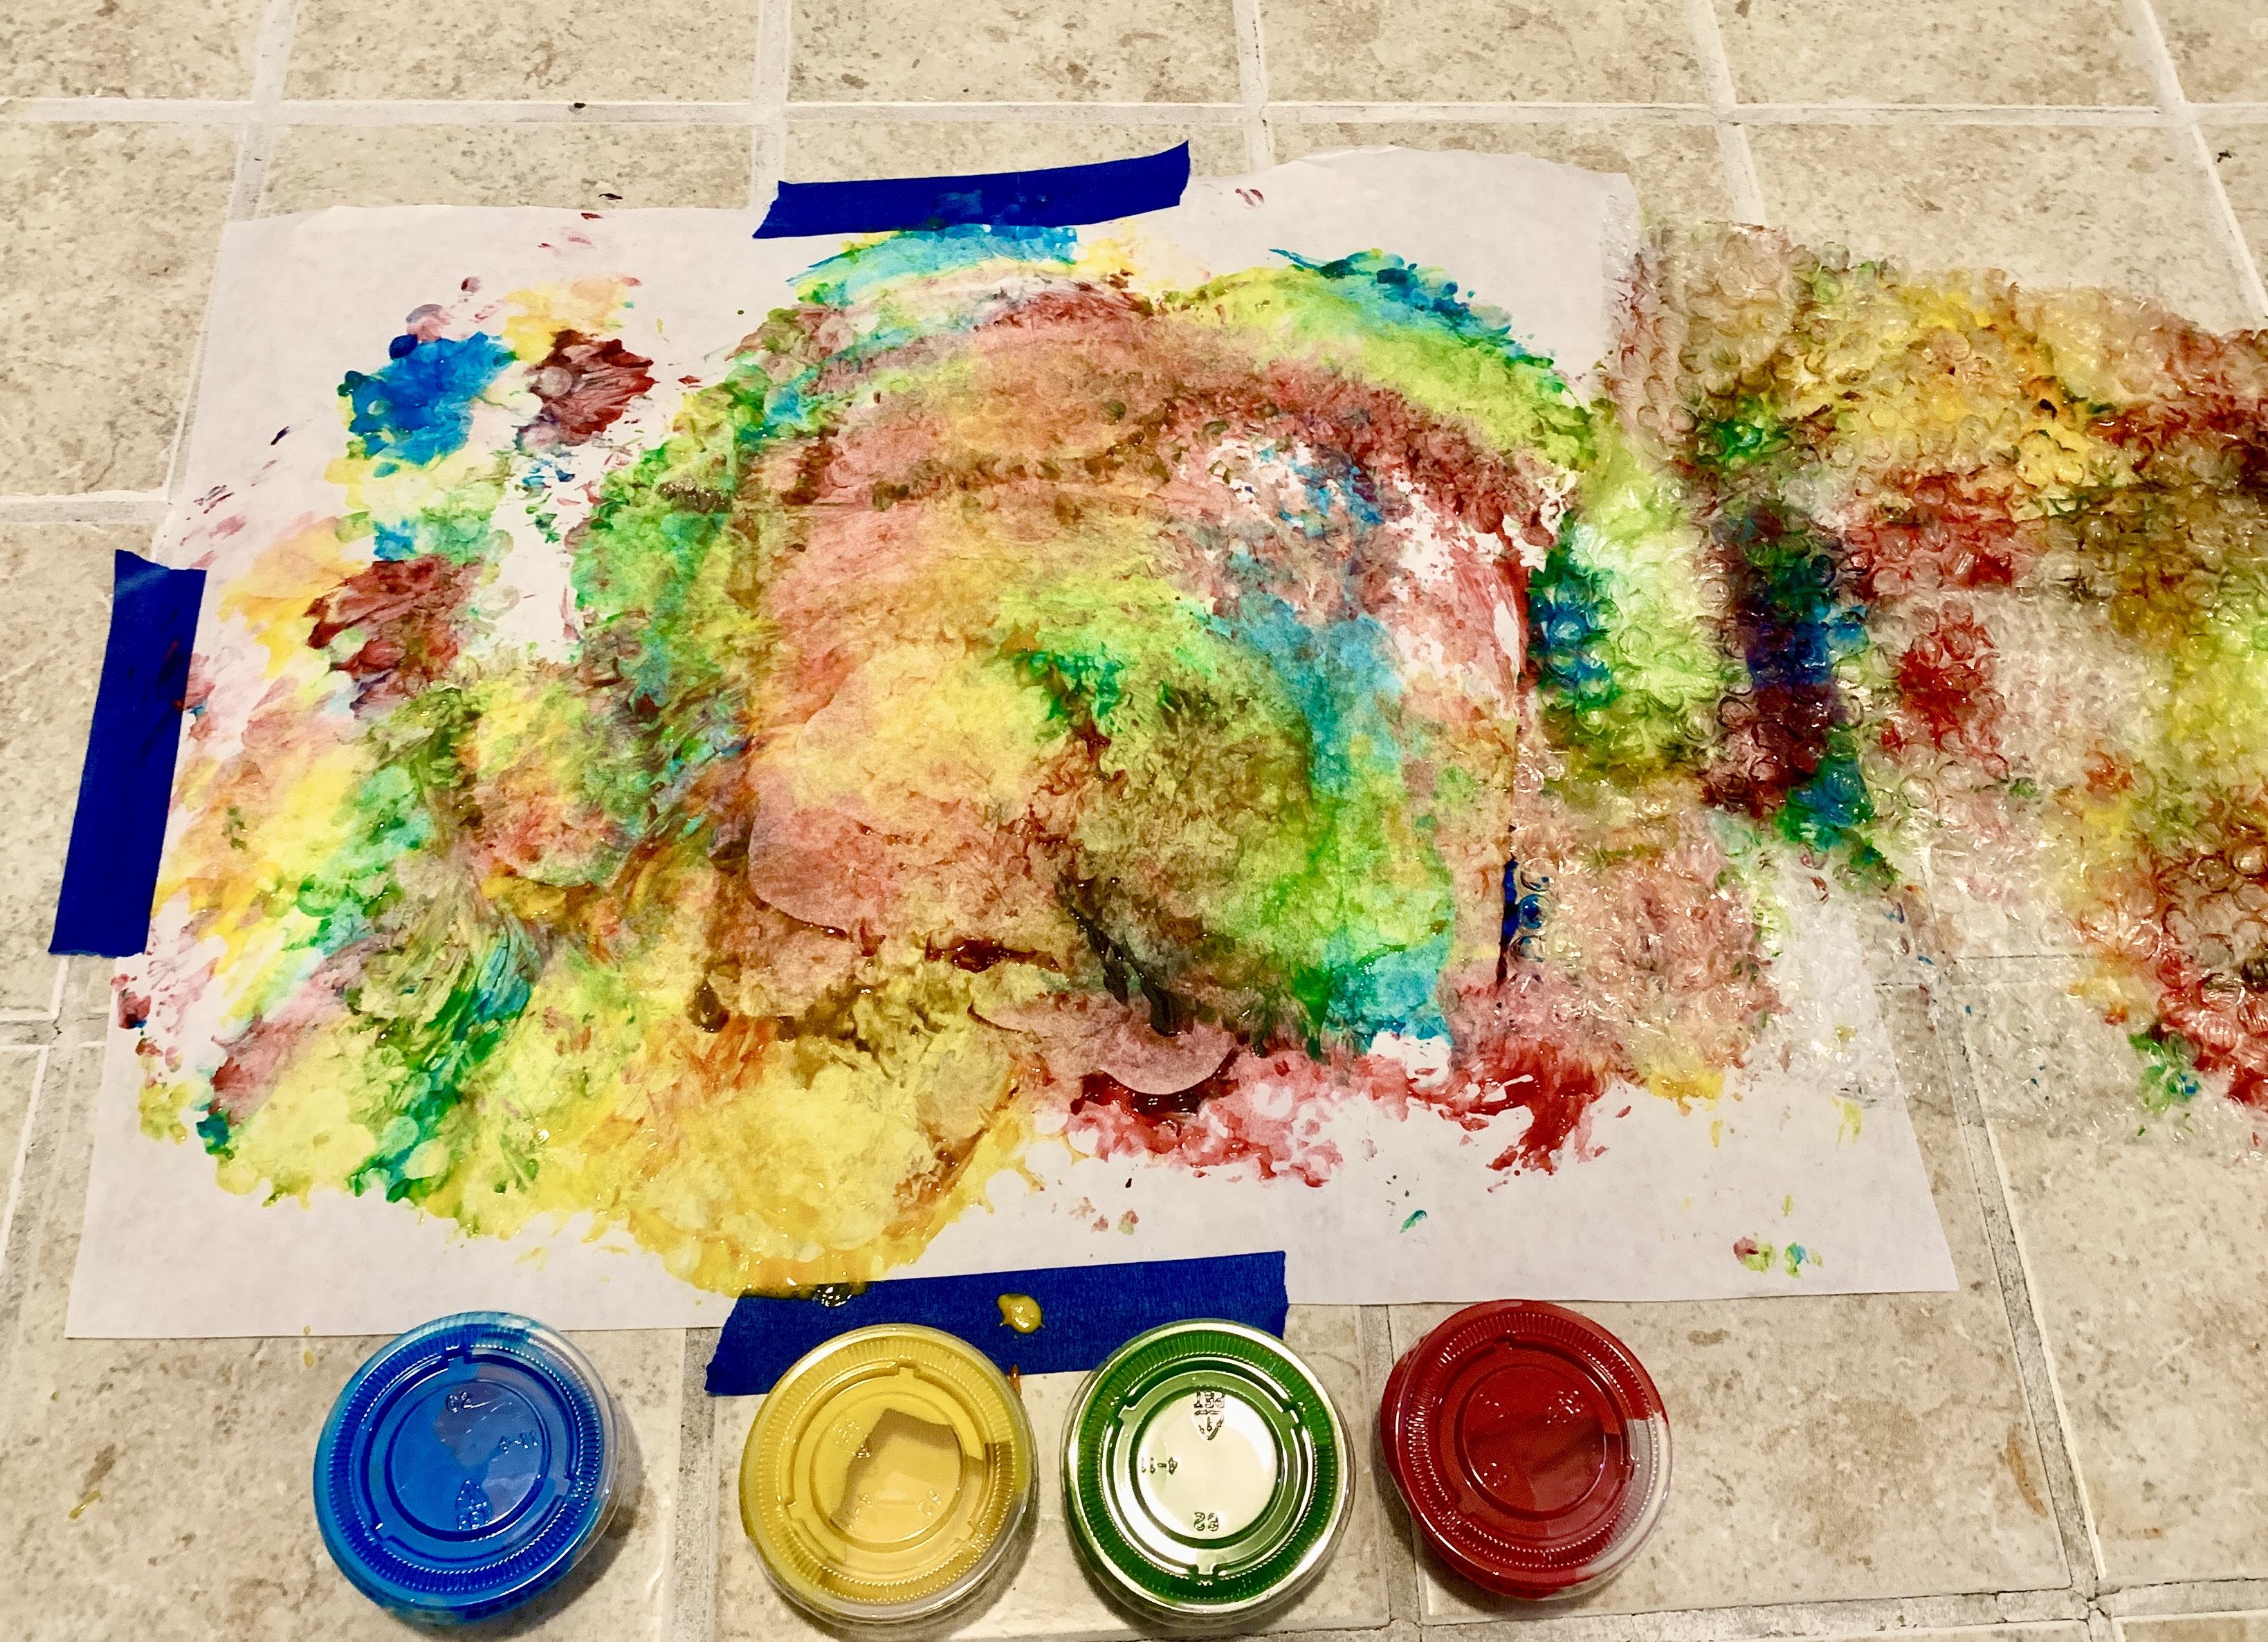
Stomp around to create your art! Remember to use caution when stomping on the paper because it can get slippery. Alternatively, you can use your hands to press the bubble wrap, instead of stomping.

Show us what you created! Send us pictures at youthservices@balibrary.org.
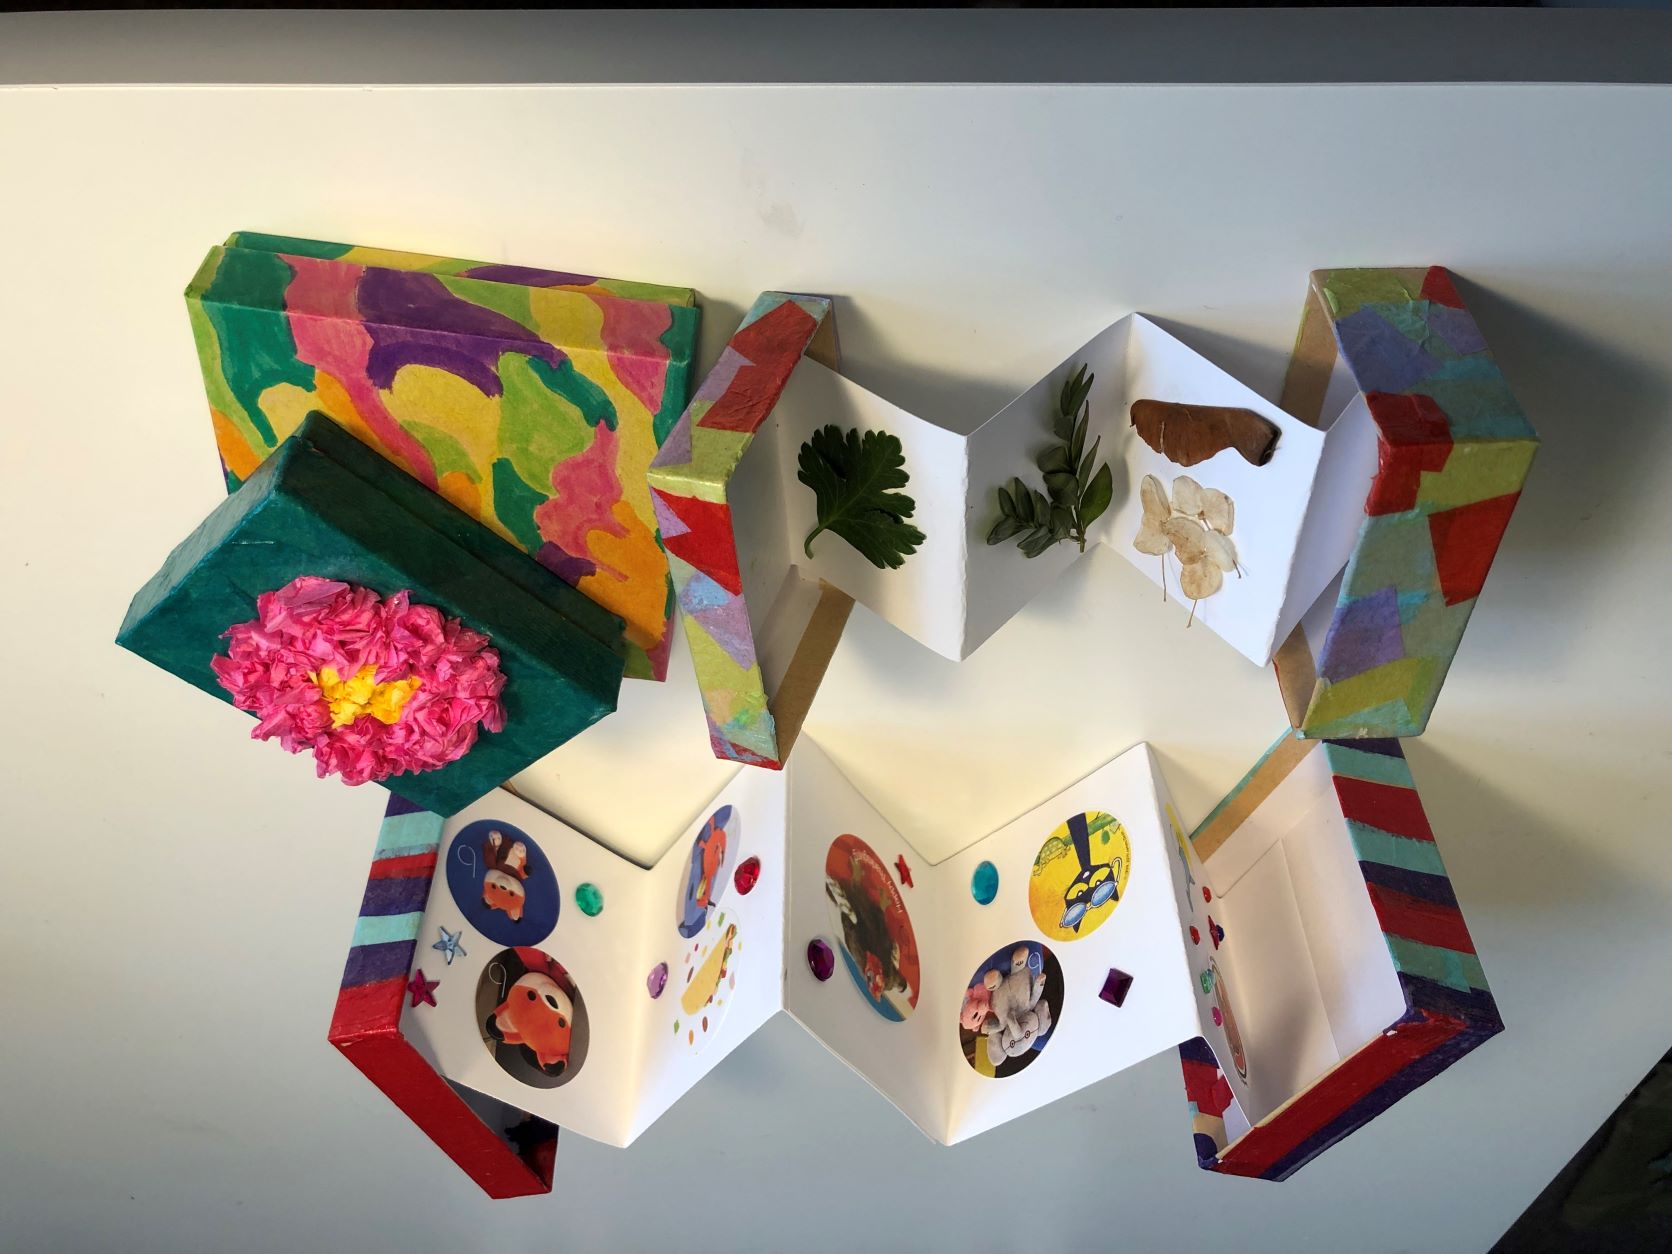
Grades K-2: Mini Collection Boxes
Decorate a box to hold your smallest treasures. Register for the April/May Grades K-2 Take-and-Make Kit here.
Kit contains:
- 2 small boxes
- 1 sponge brush
- 1 container of Mod Podge
- Several sheets of tissue paper
- 4 strips of cardstock
You may also need:
- Scissors
- Ruler
- Pencil
Instructions:
- Cut or tear the tissue paper into small squares or strips.
- Separate the two halves of one of the boxes. Coat one small area with Mod Podge, then place tissue paper bits on top. Keep applying Mod Podge as you go.
- You can overlap the pieces as much as you like. You can either trim the edges, or wrap them on the inside of the box.
- Let dry completely (about an hour). Make sure to wash out your sponge brush while you wait.
- Add a second coat of Mod Podge to seal the tissue paper, and let dry again. (Mod Podge will dry clear, and provides some durability for your design.) (Again, wash the brush!)
- If Mod Podge turns out to be challenging or too messy, you can also decorate the box with any other craft supplies – paint, crayons, markers, stickers, etc. Just make sure the box will still close!
- Fold one of the strips of cardstock paper into an accordion fold. The folds should be a little smaller than the width of the box. You can use a ruler and pencil to help with this.
- Lay the two box halves open and side-by-side.
- Use the sponge and Mod Podge to glue the first and last folds into the insides of the two box halves. Make them as even as you can so the box will close. You can also use double-sided tape.
- Let dry.
- Now your box is ready to store and display a small treasure collection! Stickers are a ready-to-go choice, but you can also glue buttons, class photos, leaves or flowers into your box.
Show us what you created! Send us pictures at youthservices@balibrary.org.
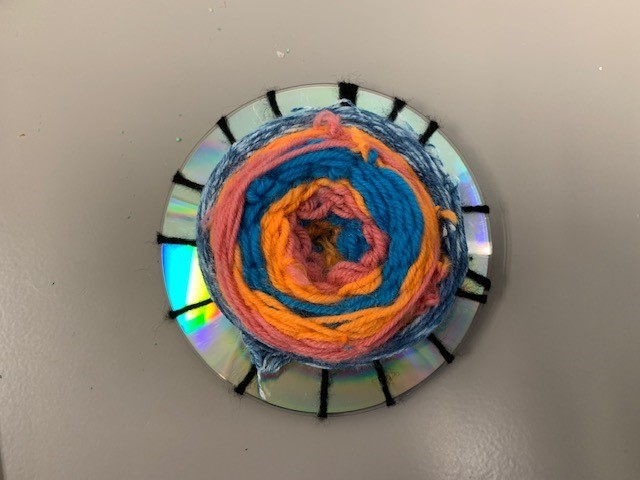
Grades 3-8: CD Weaving
Turn an old CD into a work of art with this simple weaving project. Register for the April/May Grades 3-8 Take-and-Make Kit here.
Your kit contains:
- 2 CDs
- 2 sewing needles
- Black yarn
- Rainbow ombre yarn (color will vary)
- Blue ombre yarn
- 3 small skeins of yarn
1. Pick out a yarn color for the spokes of your CD. You can use the black yarn or a different color.
2. Pull the yarn through the hole of the CD, leaving a small amount of yarn at the end. Secure the yarn by tying a knot to itself.
3. Pull the yarn tightly across the CD and back through the hole, creating a spoke that goes from the hole to the edge of the CD.
4. Continue to make spokes until you have an uneven When you are done creating your spokes, tie a knot to the label side.
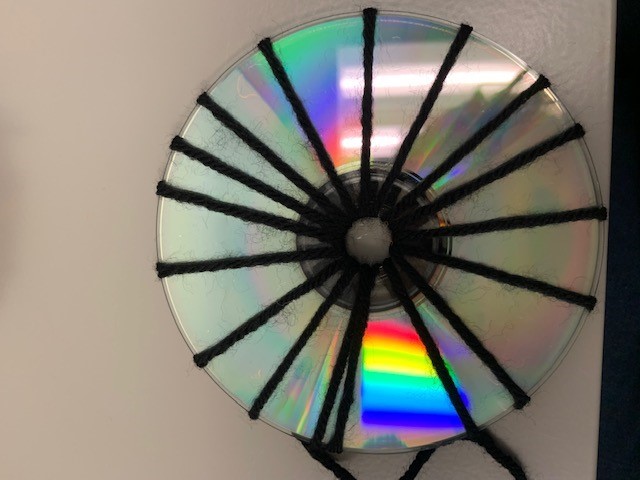
5. Pick out your first color of yarn, cut a piece, and thread it through your needle. Attach the end of the yarn to one of the spokes on the printed side. Weave the needle and thread over and under through the spokes, pulling it taut as you go along.
6. Continue to add different colors of yarn to your CD, until you are done.
Show us what you created! Send us pictures at youthservices@balibrary.org.
Youth Services Assistant Librarian Alyssa -
February/March Take-and-Make Kits
Bring home a fun new project! Sign up from our Library Calendar and pick up a kit at the Youth Services desk or through our Parking Lot Pickup service between February 14-March 11.
Toddler & PreK: Coffee Filter Butterflies
Liquid watercolor and coffee filters transform into beautiful butterflies. Register for the February/March Toddler & PreK Take-and-Make Kit here.
Kit contains:
- 5 coffee filters
- 5 pipe cleaners
- 3 containers of watercolor paint
- 1 pipette
Instructions:
- Dress for a mess, and cover your work area—the paint will soak through the coffee filters.
- Smooth one of the coffee filters flat.
- Use the pipette to drop the watercolor paint onto the filter. You can clean the pipette by squeezing fresh water in and out of the pipette a few times.
- Let dry completely. This might take several hours, depending on how much paint you use.
- Pinch two sides of the filter together, creating wings.
- Fold one pipe cleaner in half. Twist the pipe cleaner around the center of the coffee filter, leaving the ends pointing up for the antennae.
- Repeat with the remaining supplies.
Explore more:
- Using a pipette is a great exercise for fine motor control! Kids can experiment with squeezing the liquid out hard and gently to get different amounts of paint.
- You can dilute the paints with water to get lighter shades. Talk about how colors change when we add water, or they mix and bleed together. You might end up with more than 3 colors on your butterflies!
- Try painting with a brush, sponge, or even paper towel. How does that change the way the paint moves and looks?
- Making butterflies is a great opportunity to learn about symmetry. You can try to paint just one half of the coffee filter, and fold it over to achieve a mirrored effect. What other animals or objects look the same on both sides?
- Add tape, magnets, or clothespins to create some cheery decorations with your butterflies.
Show us what you created! Send us pictures at youthservices@balibrary.org.
Grades K-2: Simple Embroidery
Try out a new skill with this introduction to embroidery techniques. Register for the February/March Grades K-2 Take-and-Make Kit here.
Show us what you created! Send us pictures at youthservices@balibrary.org.
Grades 3-8: Gratitude Jar
Decorate a jar to fill with origami stars – use the stars to write down everything for which you are grateful. Register for the February/March Grades 3-8 Take-and-Make Kit here.
Show us what you created! Send us pictures at youthservices@balibrary.org.
Youth Services Assistant Librarian Alyssa -
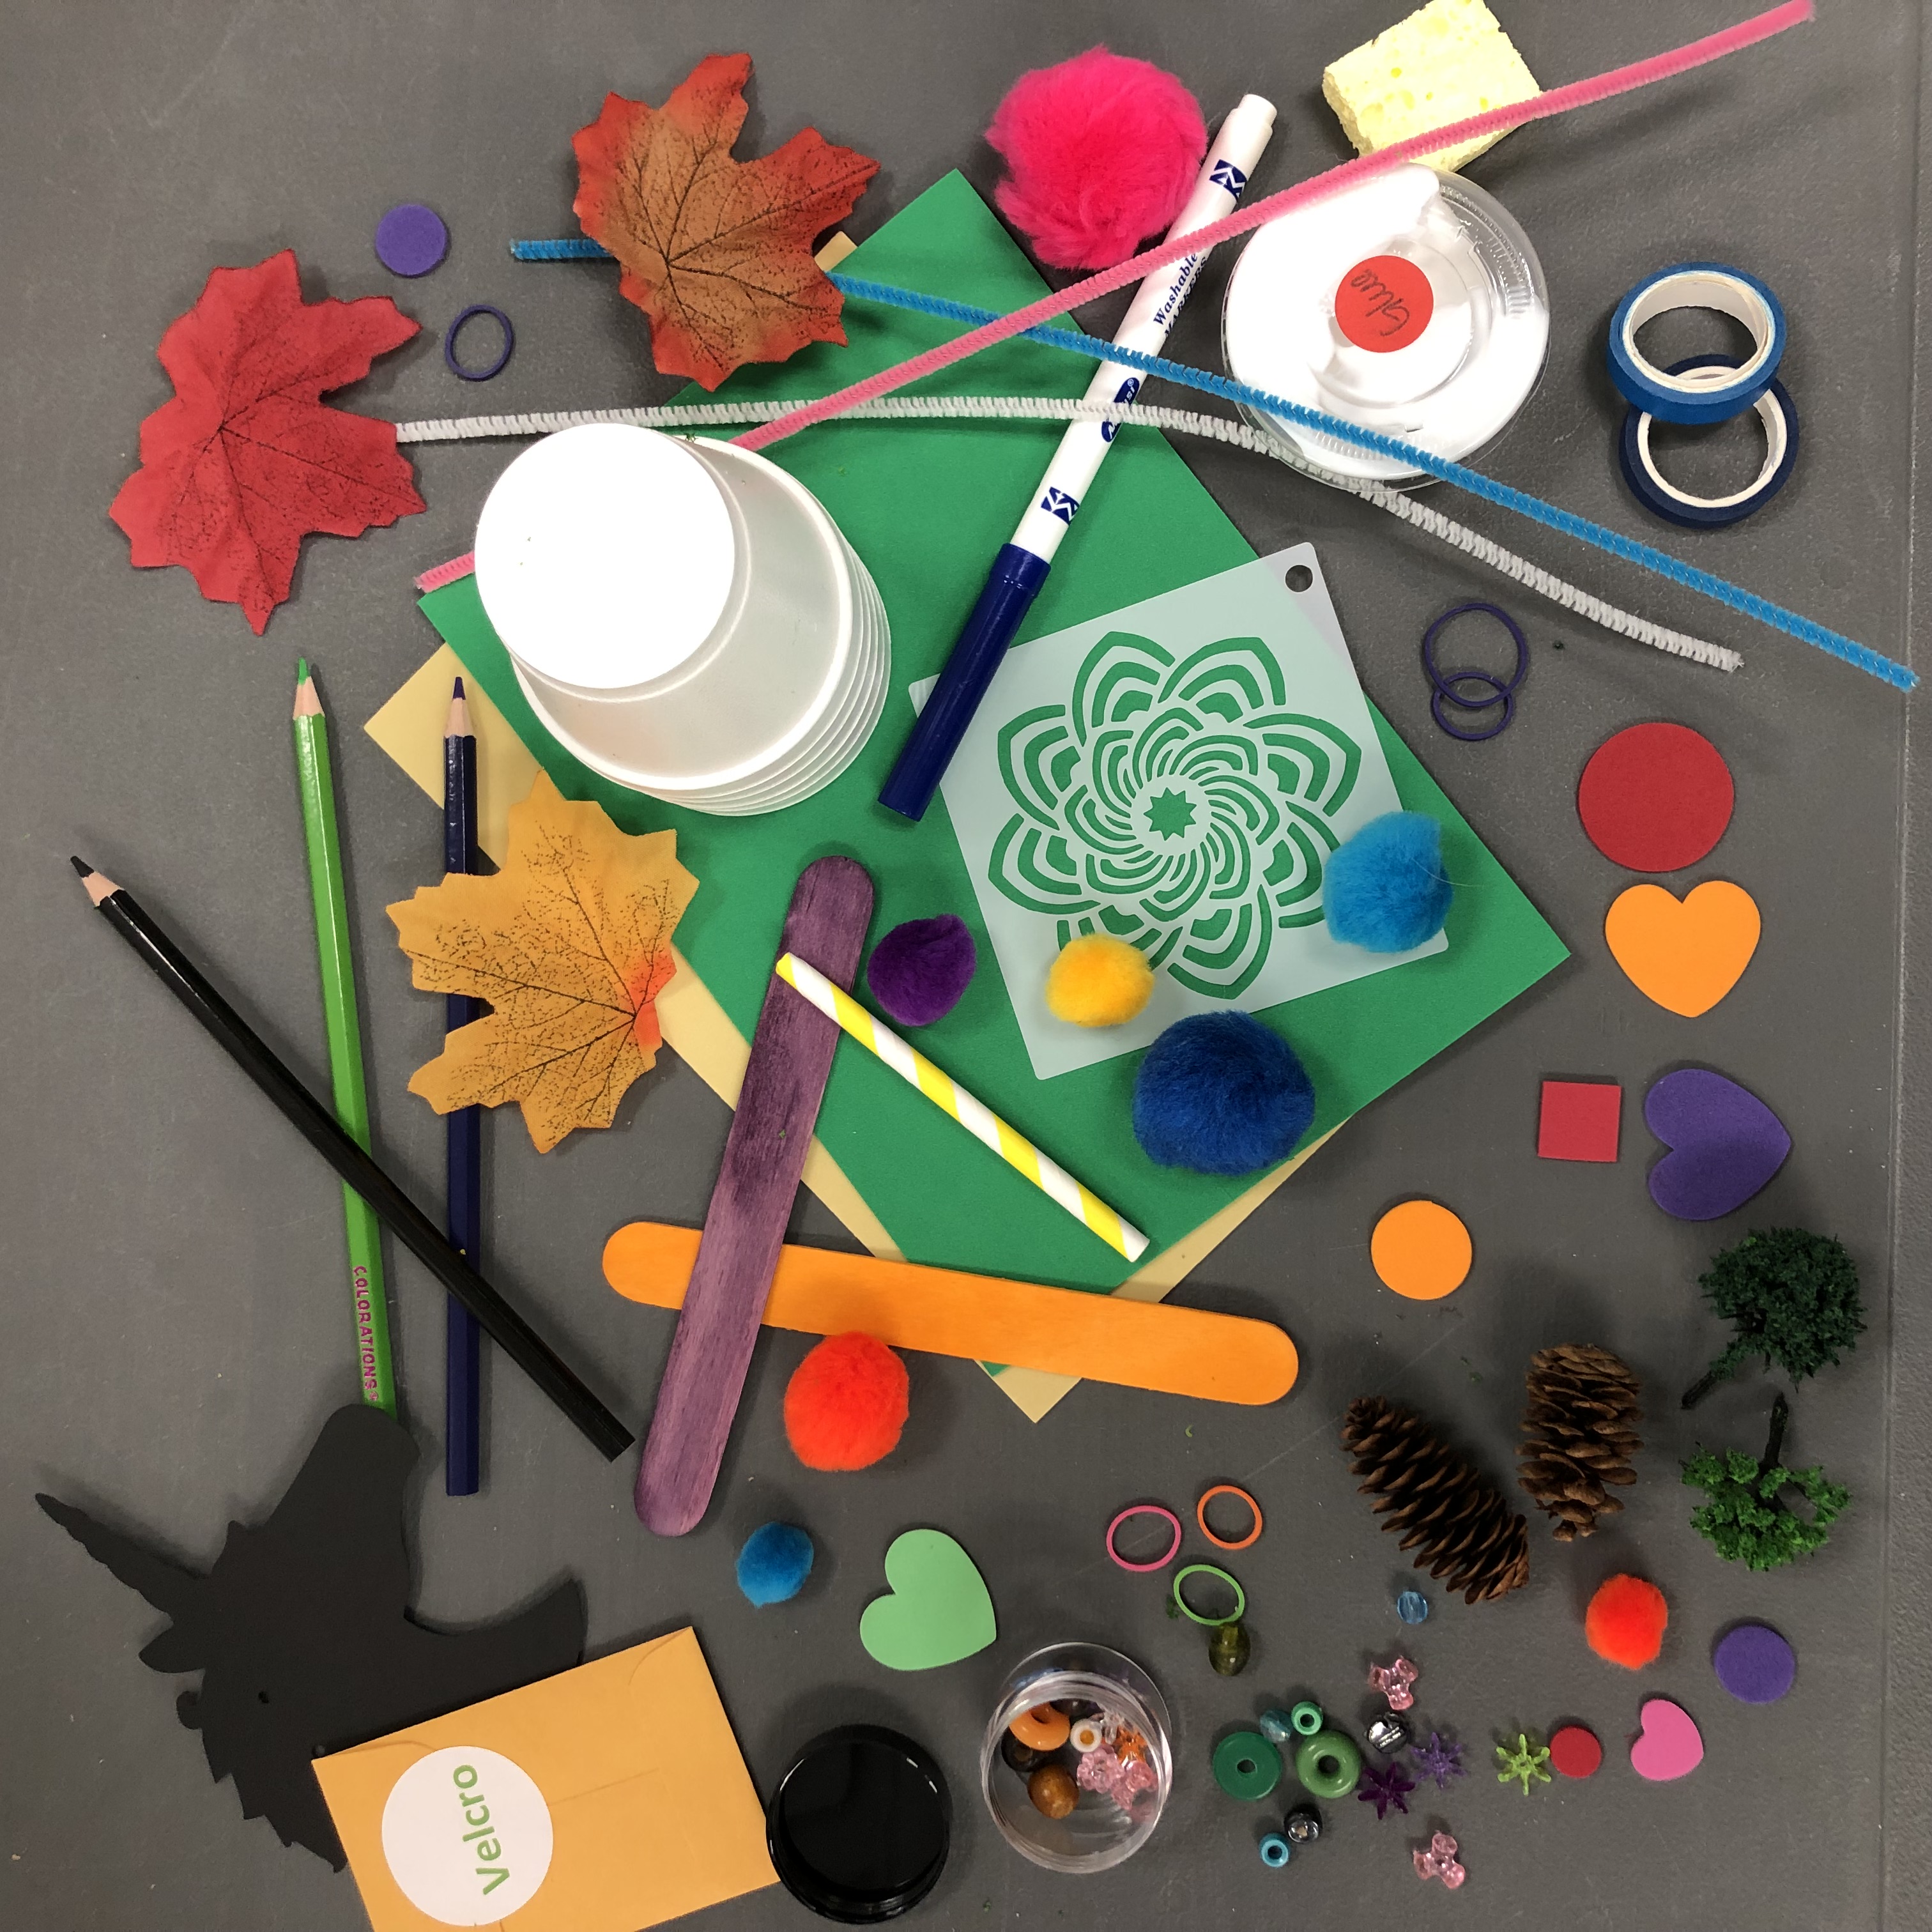
Special Take-and-Make Kit: Maker Challenge!
This month, pick up a special Take-and-Make Kit with all sorts of art supplies to inspire you. The challenge? Create something awesome! Come up with your own design and creation using this kit. You can use other materials or tools you might have in your house if you’d like.
Once you’ve created your masterpiece, email us a photo atyouthservices@balibrary.org and we’ll feature your art on the YS Blog.
Take-and-Make Maker Challenge Kits are available for pickup starting Monday, Dec. 20, while supplies last. Recommended for kids in Kindergarten through 8th grade. No registration required.
Discover more programs and events on the Library Calendar.
 Youth Services Librarian Allison
 -
December/January Take-and-Make Kits
Bring home a fun new project! Sign up from our Library Calendar and pick up a kit at the Youth Services desk or through our Parking Lot Pickup service between December 20-January 14.
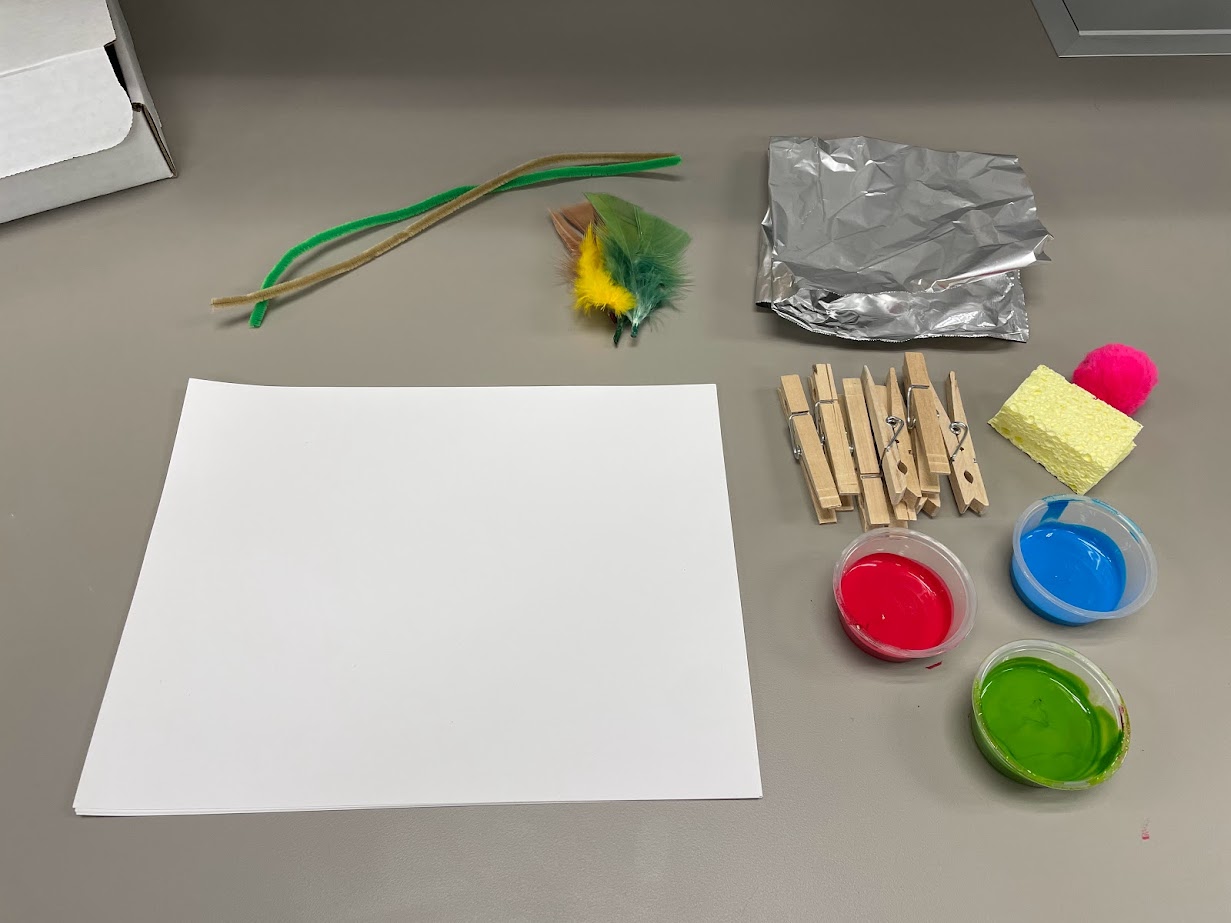
Toddler & PreK: DIY Paint Brushes
Turn some common items and clothespins into paint brushes to see what you can create. Register for the December/January Toddler & PreK Take-and-Make Kit here.
Your Kit Contains:
- 5 sheets of cardstock
- 8 clothes pins
- 2 pipe cleaners
- 2 pieces of sponge
- 4 feathers
- 1 pom pom
- 1 sheet of aluminum foil
- 3 cups of different colored paint
Instructions:
1. Take all of your items out of the box.
2. Assemble paintbrushes by attaching one clothes pin to each of the 5 different materials in the box. For example: secure just 1 or all 4 feathers to a clothespin to create a feather brush.
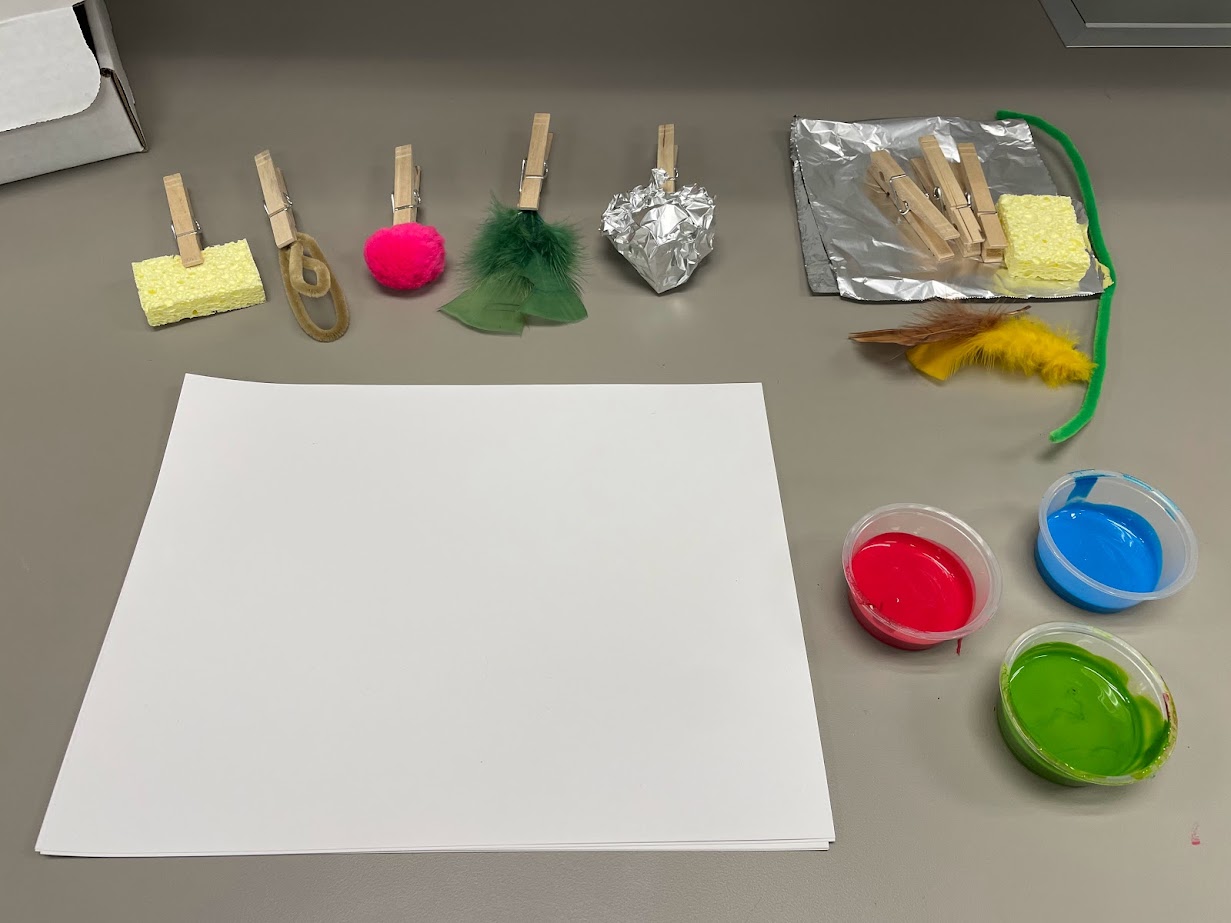
3. Optional—find 3 more materials from around the house to create your own paintbrushes with the extra clothespins.
4. Use assembled brushes to apply paint to a sheet of cardstock.
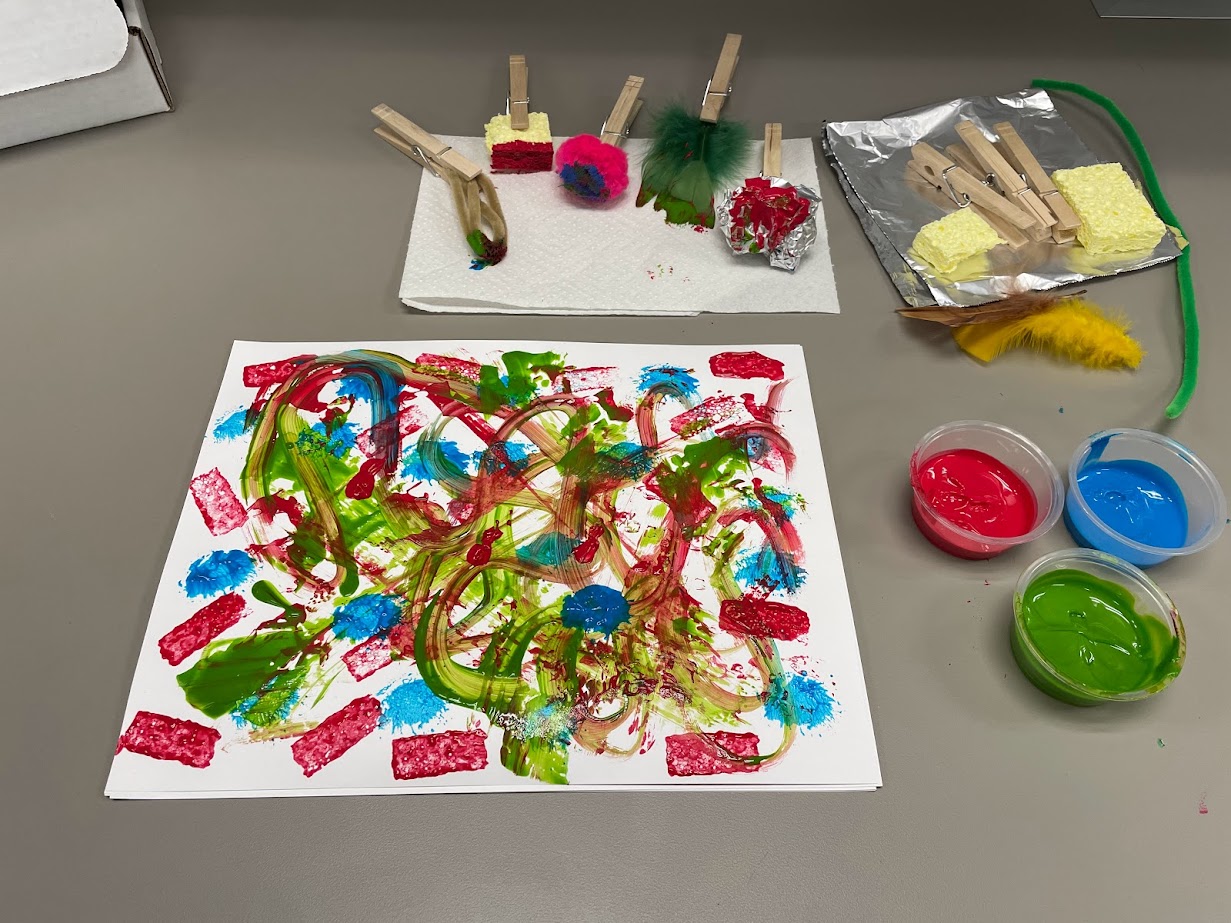
5. Let dry.
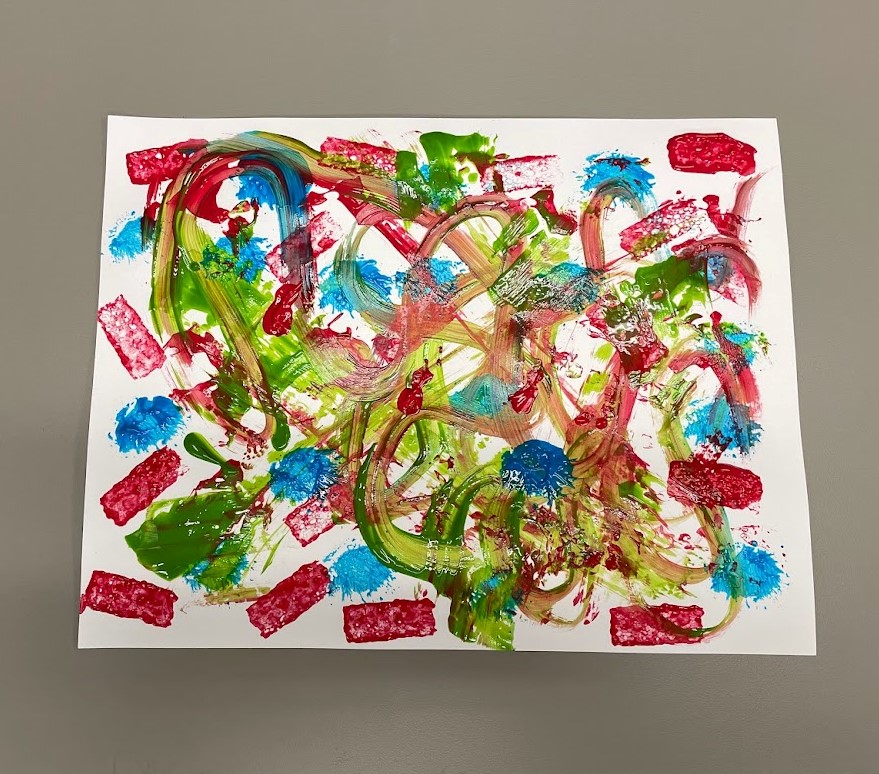
6. Enjoy your artwork!
Extension Questions/Discussion:
- Identify each color paint by name.
- Can you mix the paint colors together to create new colors?
- What other types of things do you think would make good paintbrushes? Why?
- How do each of the different paintbrushes feel as you put paint on the paper? Which one is hardest to use? Which one is easiest?
- How does the paint look on the paper with each of the different paintbrushes? Describe it.
- Which brush is your favorite? Why?
Show us what you created! Send us pictures at youthservices@balibrary.org.
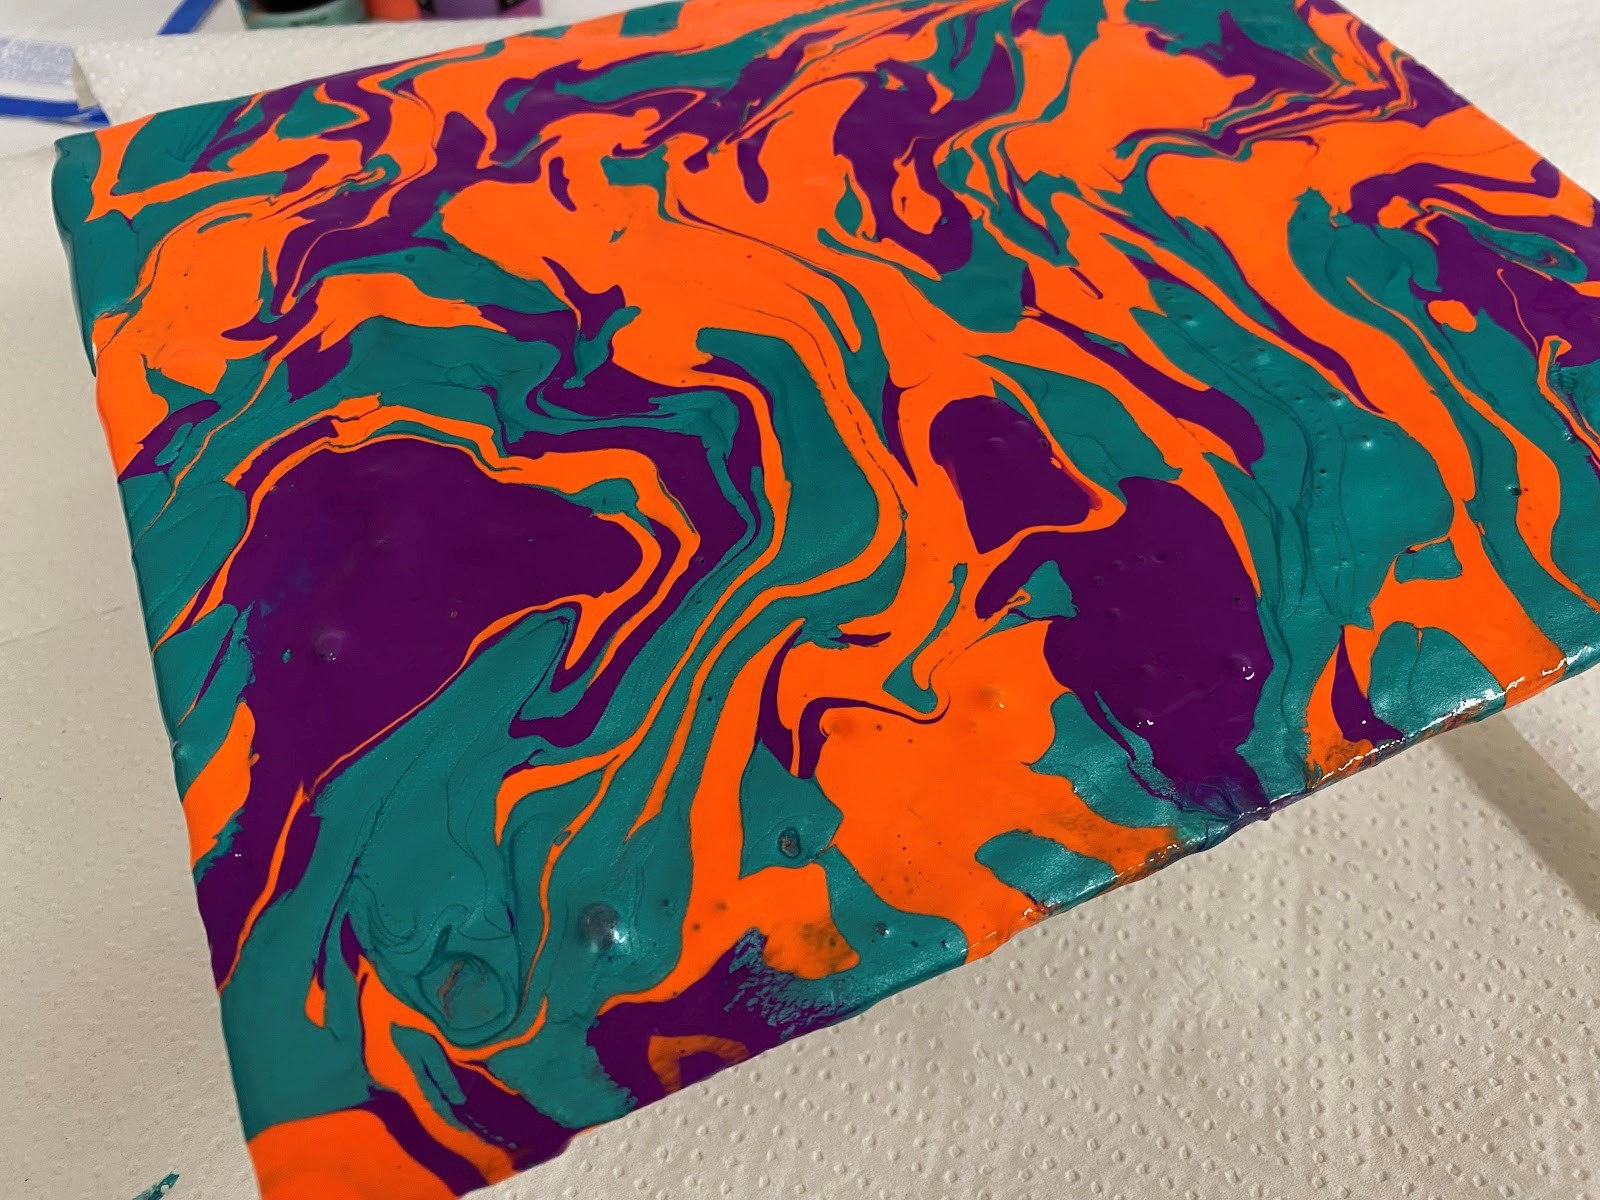
Grades K-2: Pour Painting
Drip, drop, pour, and spread paint to create a unique work of art. Register for the December/January Grades K-2 Take-and-Make Kit here.
Supplies in your kit:
- Canvas
- 3 bottles of tempera paint
You’ll also need:
- Disposable cups (or something to hold up your canvas while you paint)
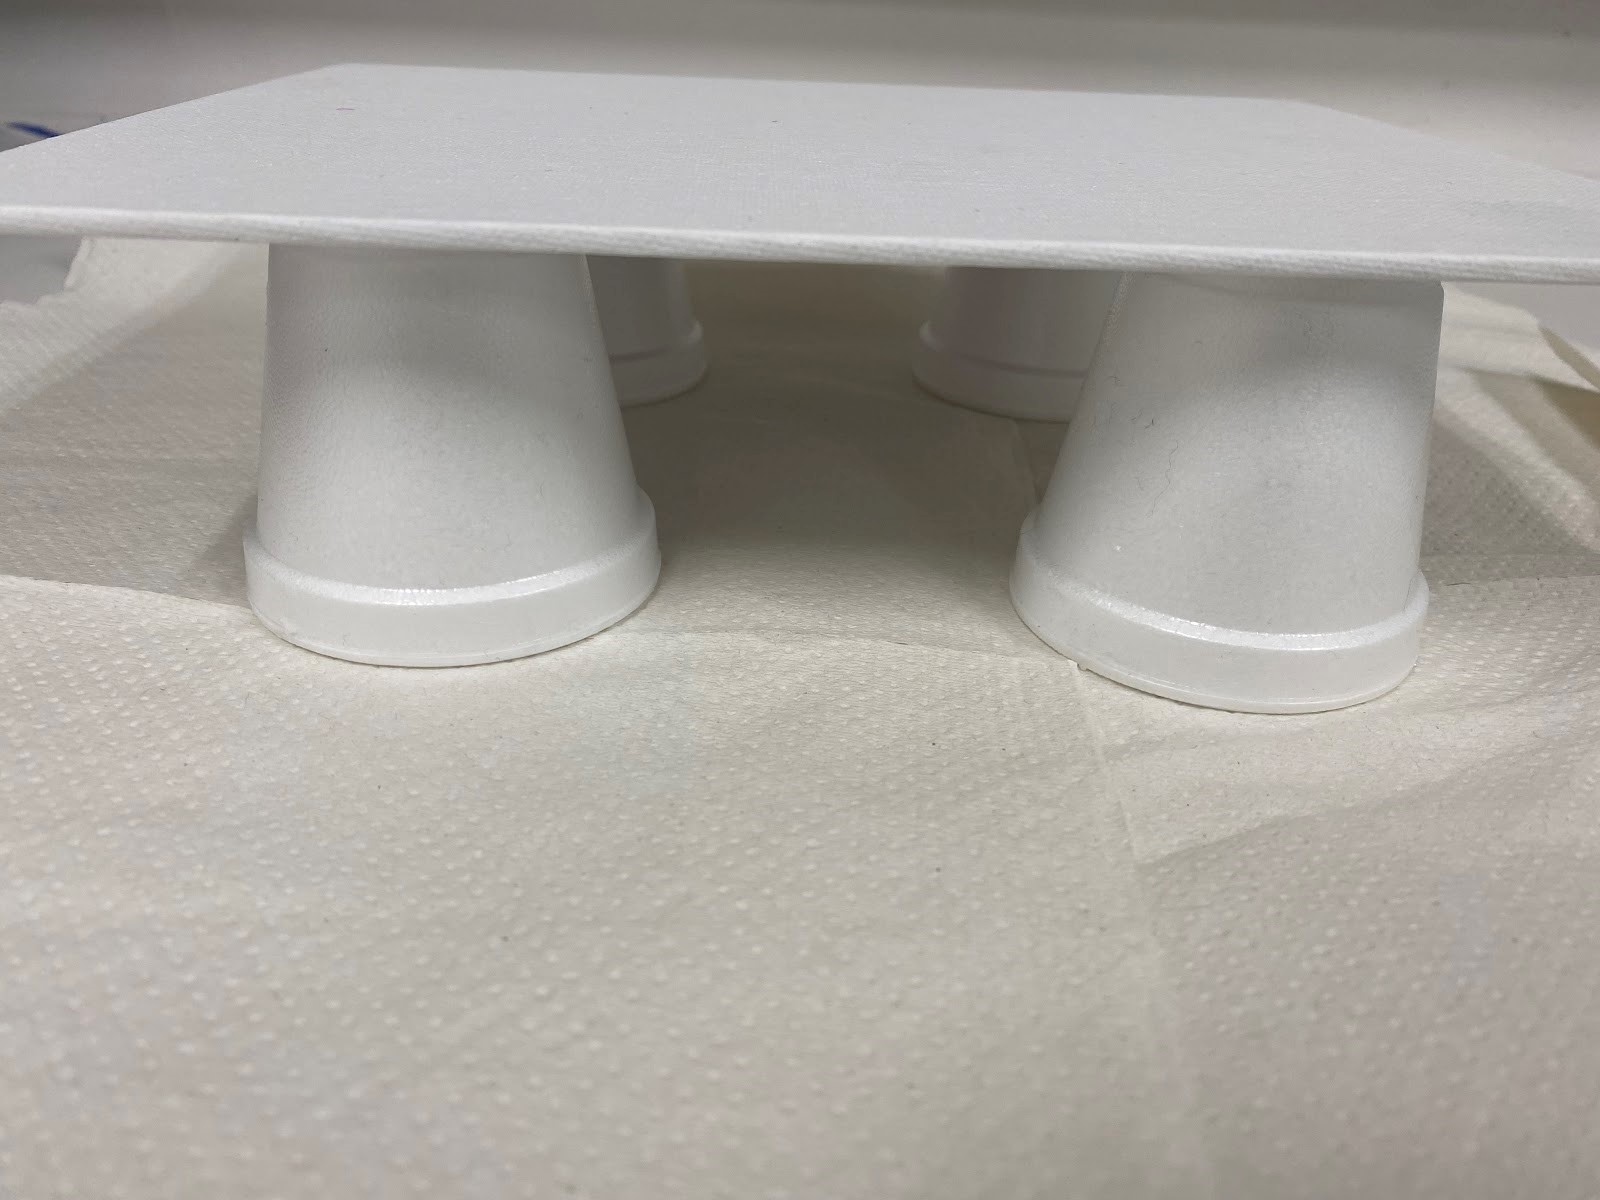
1. Find a surface where you can get a little messy. You can lay out a tablecloth, some paper towels, or whatever you have on hand.
2. Arrange four disposable cups so that you can rest your canvas on top.
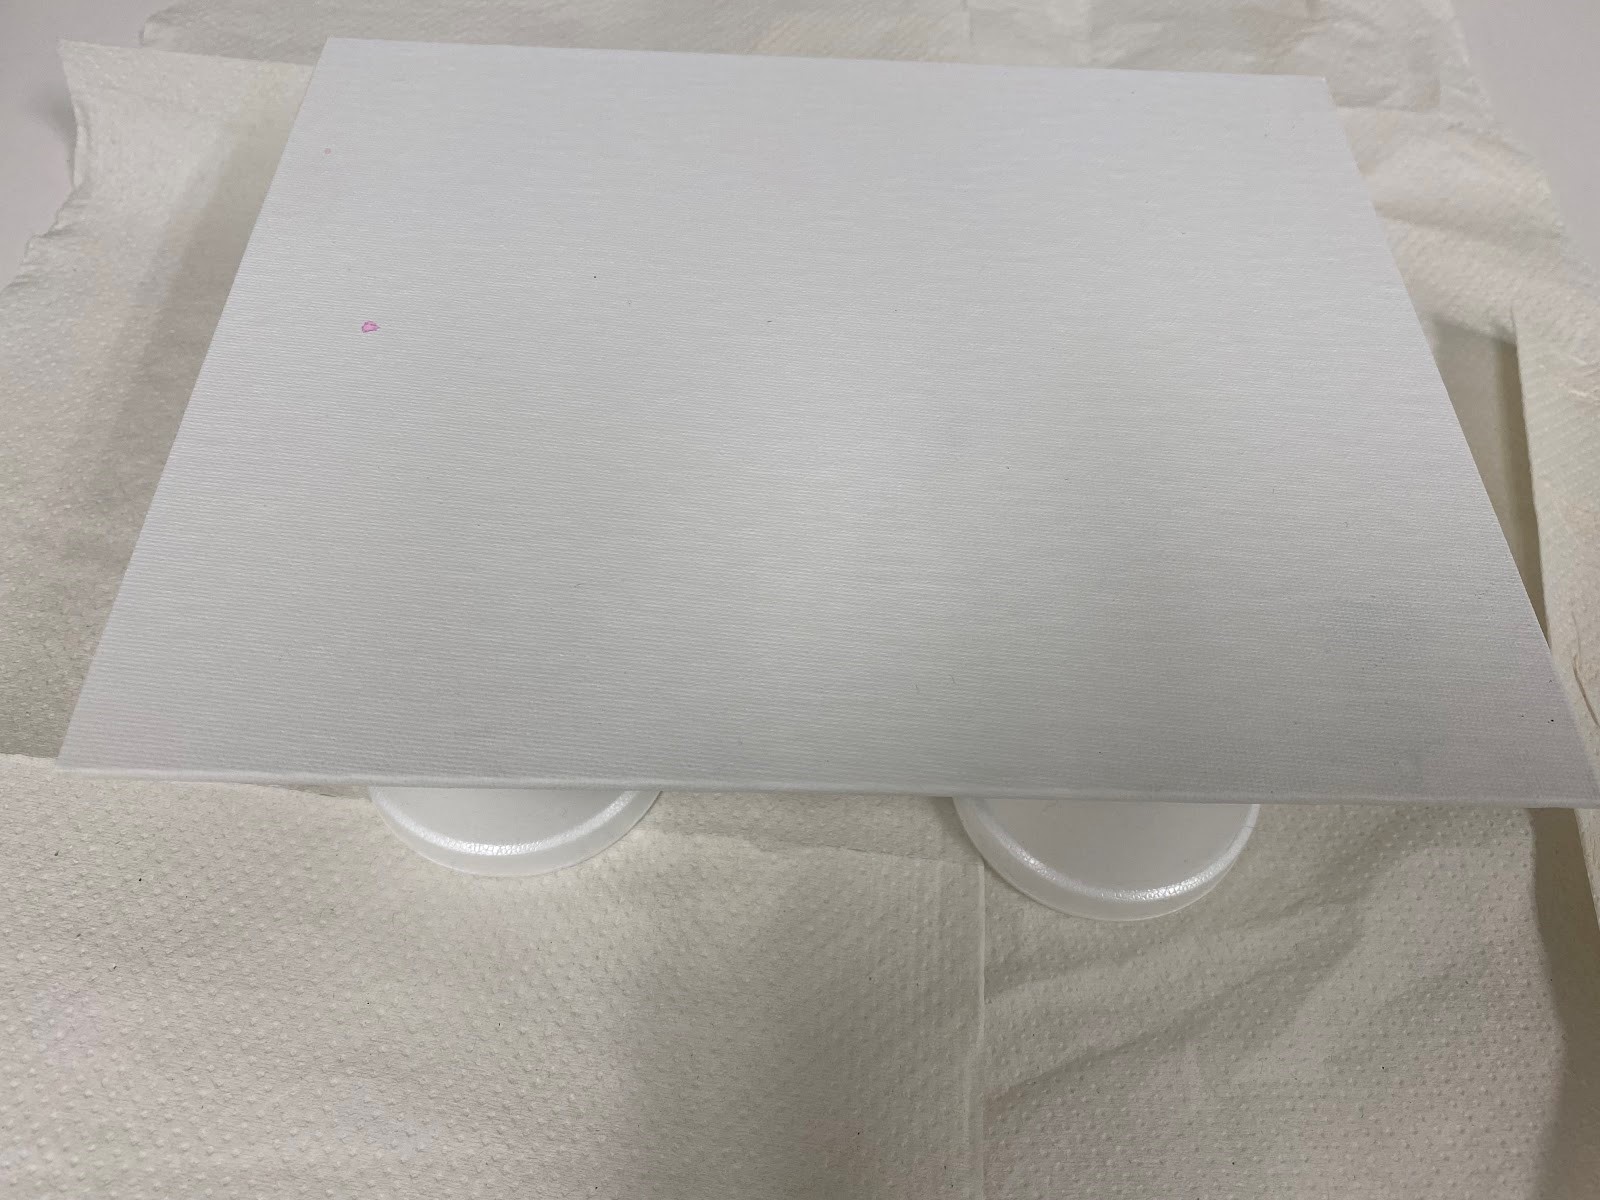
3. Open your bottles of paint and begin to pour the paint directly onto the canvas from the bottle. I made squiggly lines, but feel free to experiment.
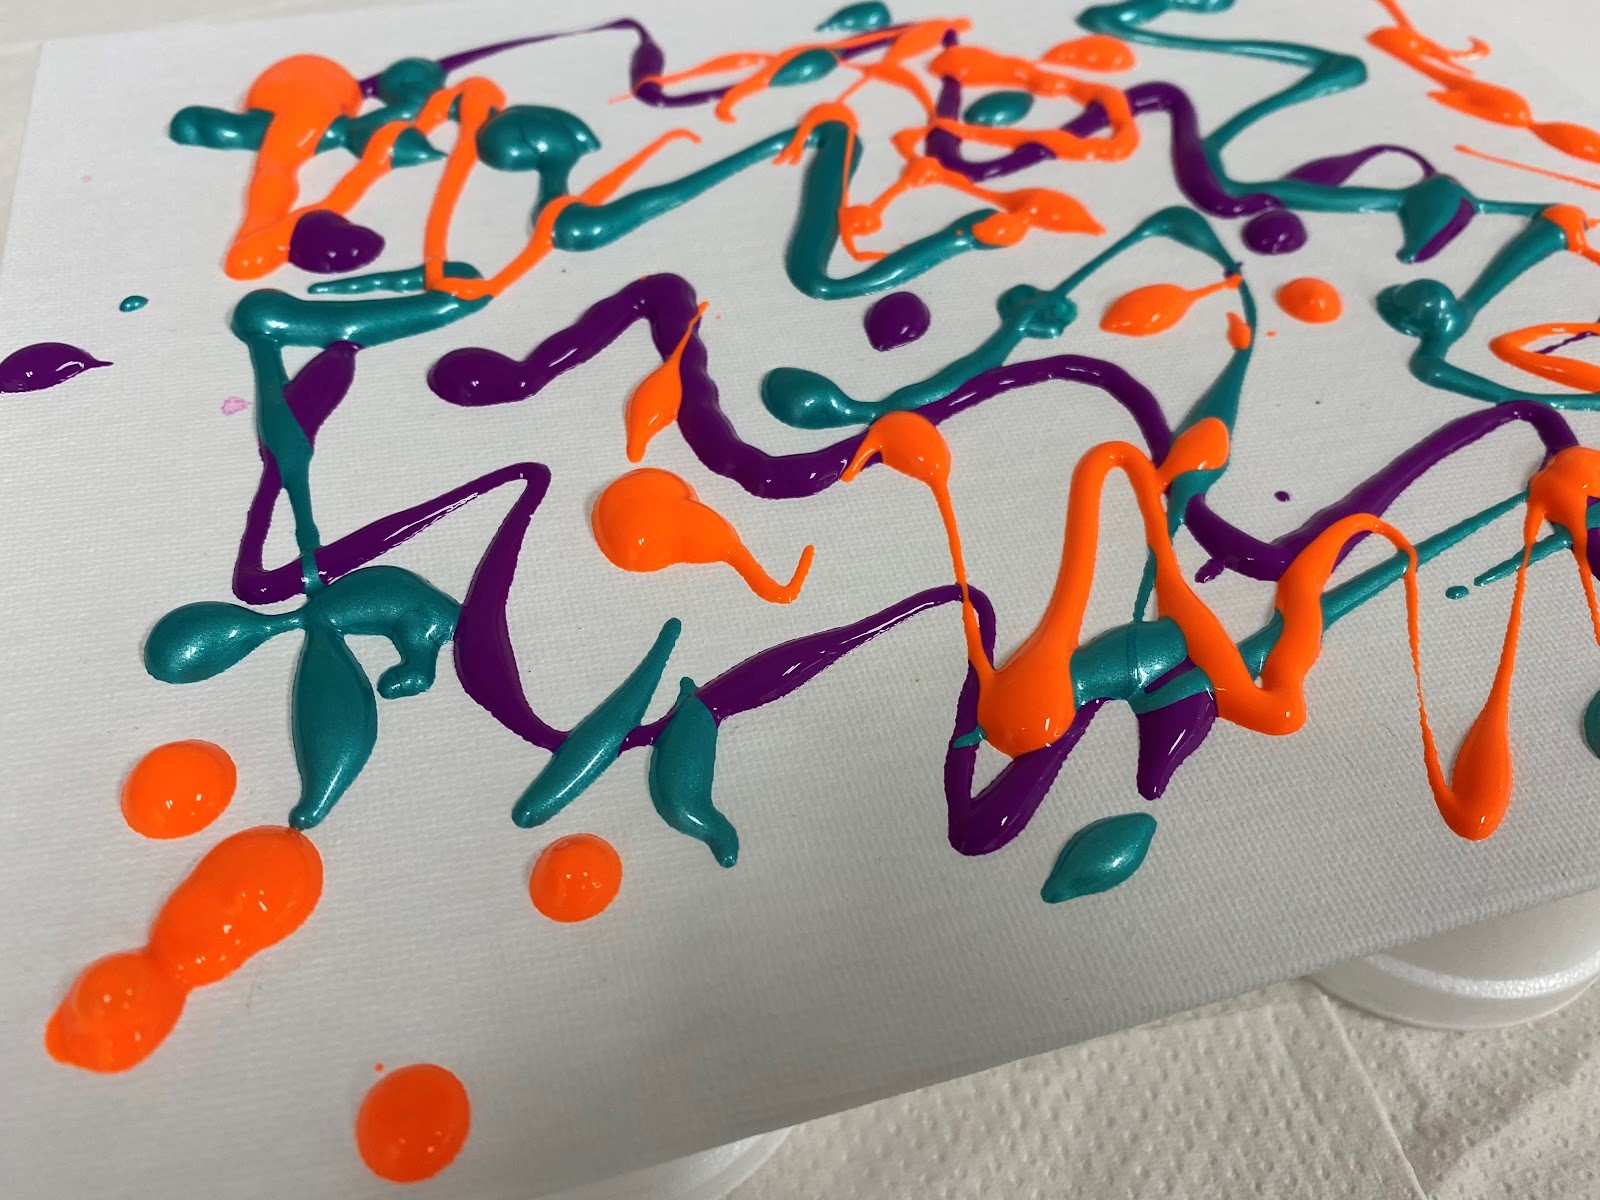
4. Continue pouring the paint onto the canvas, until a majority of your canvas is covered in paint.
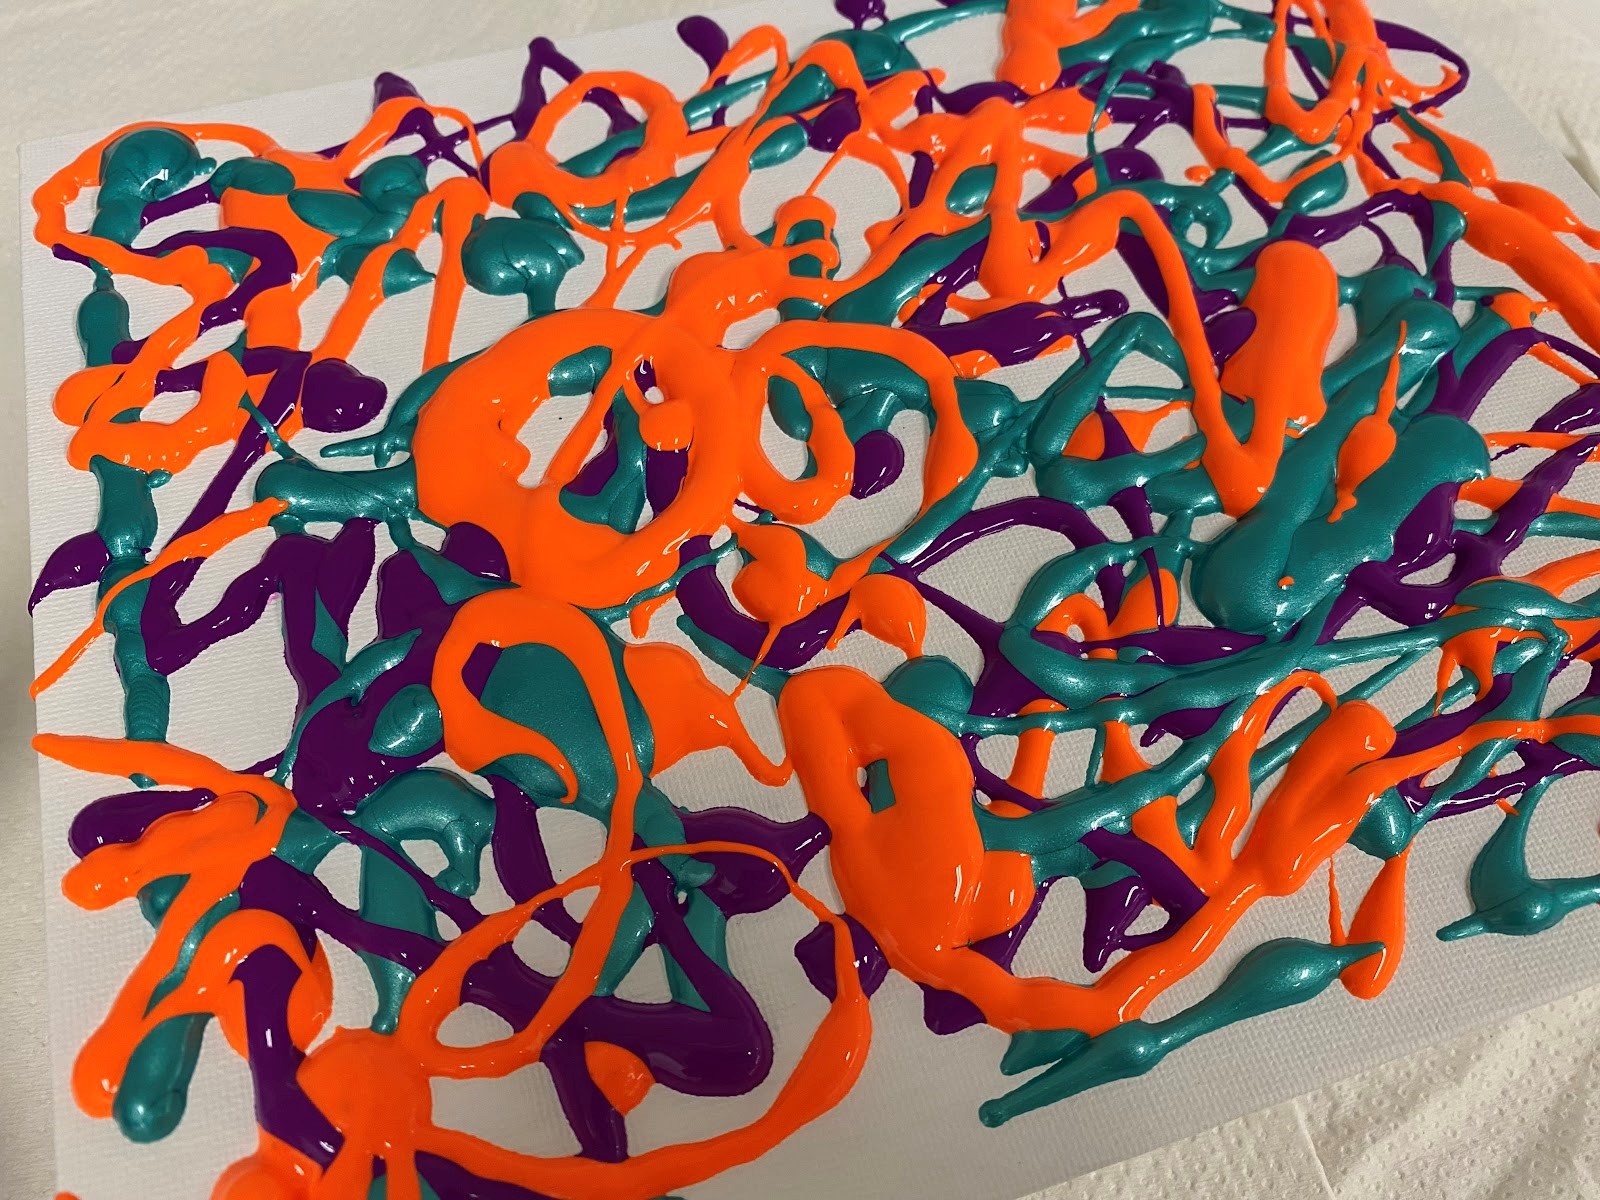
5. Once you have enough paint on the canvas, pick up your canvas and begin to move it around in different directions, so that the paint will drip into the empty spaces and cover the whole canvas.
6. Let your canvas dry overnight.
Show us what you created! Send us pictures at youthservices@balibrary.org.
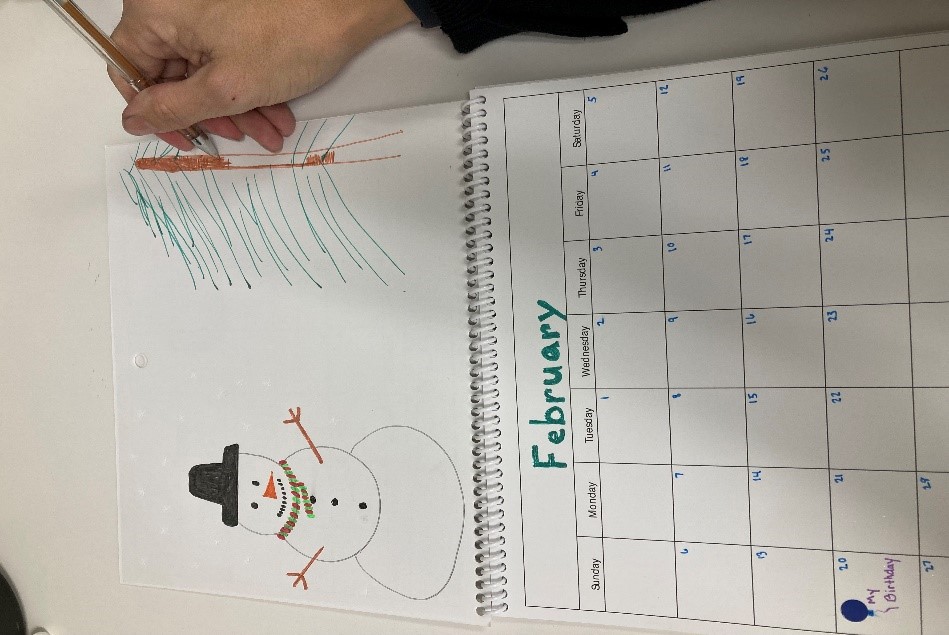
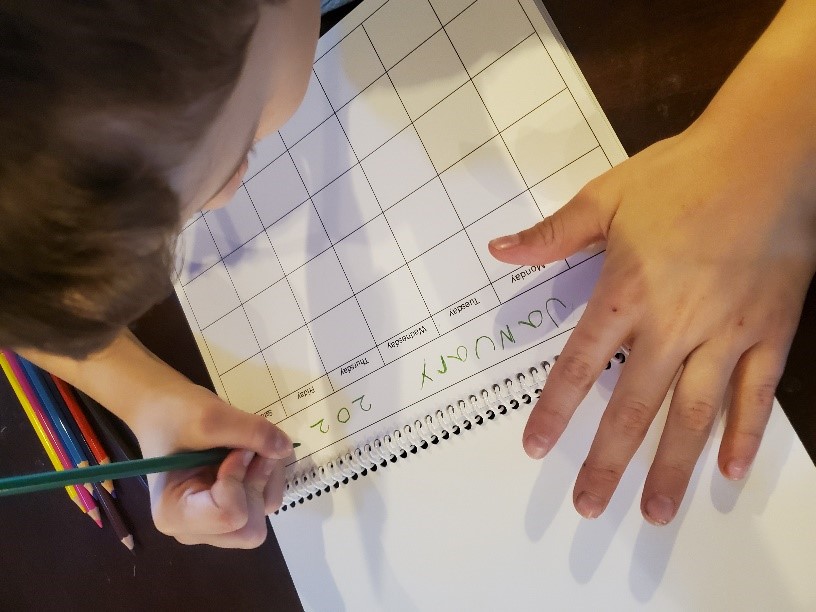
Grades 3-8: DIY Calendar
Put your personal touch on this monthly calendar and use it to keep track of important events throughout the year. Register for the December/January Grades 3-8 Take-and-Make Kit here.
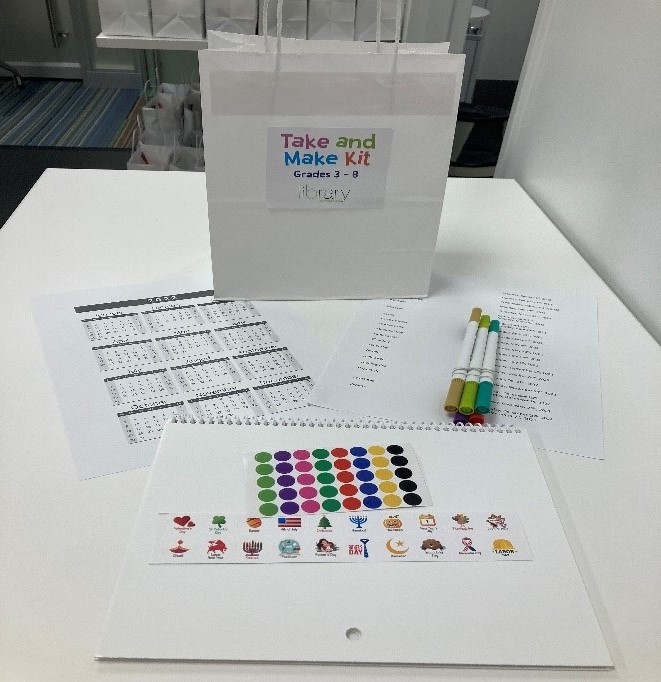
Your Kit contains:
- Blank calendar
- 5 markers or pens
- 1 set of holiday stickers
- 1 set of colored stickers
- 2022 Calendar print out
- Holiday date print out
1. Flip open the calendar, in the long rectangle on the top of each calendar page label the correct month.
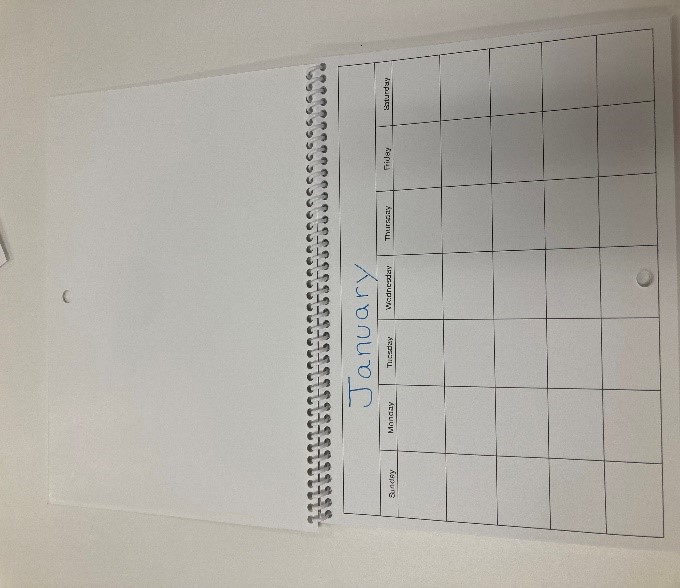
2. Use the provided sheet to number the days of the month in the corresponding boxes.

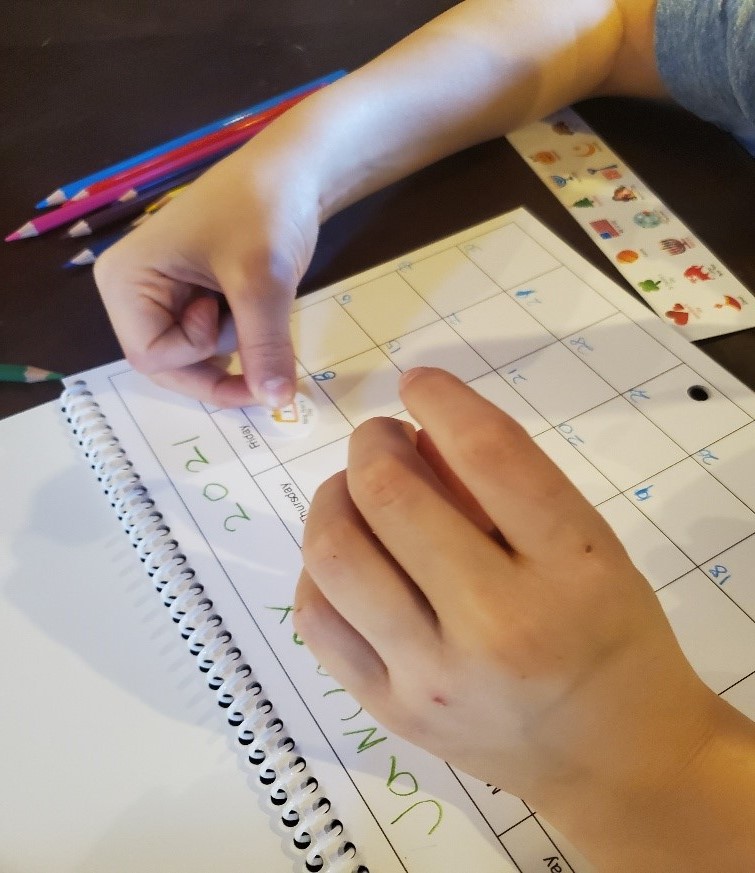
3. The holiday stickers correspond with the listed Holidays and their dates on the sheet of paper. Locate the dates on your calendar and add the correct sticker.
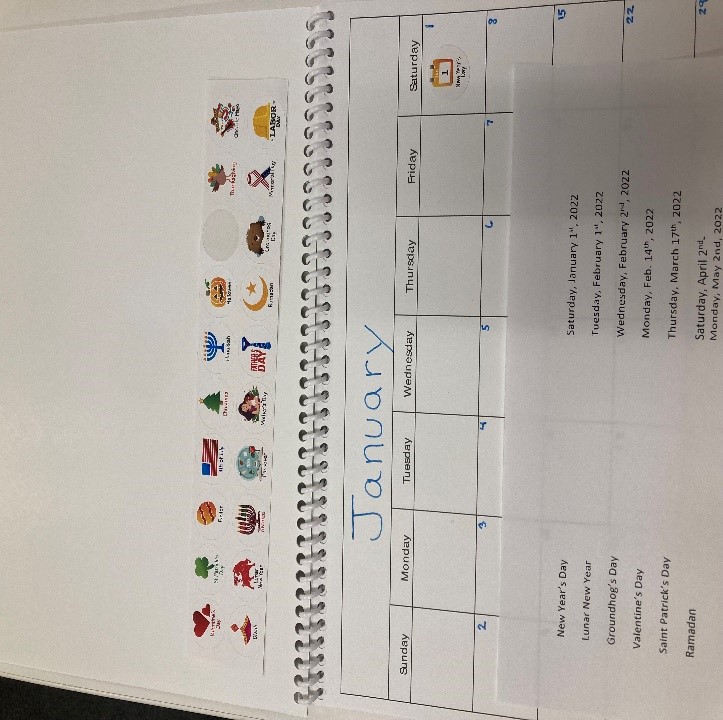
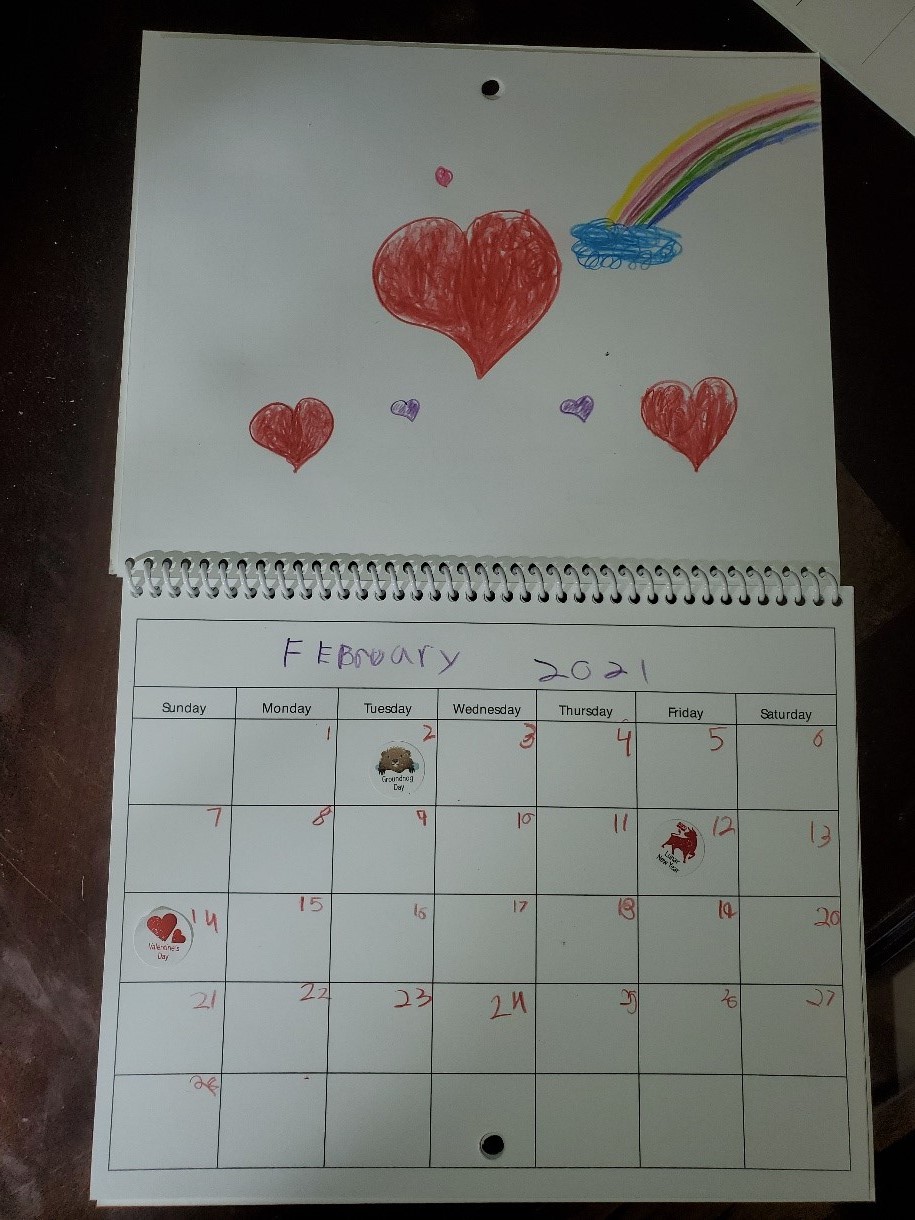
4. Add dates that are important to you and your family: birthdays, sporting events, lessons, beginning of a new season, appointments, special plans, etc…
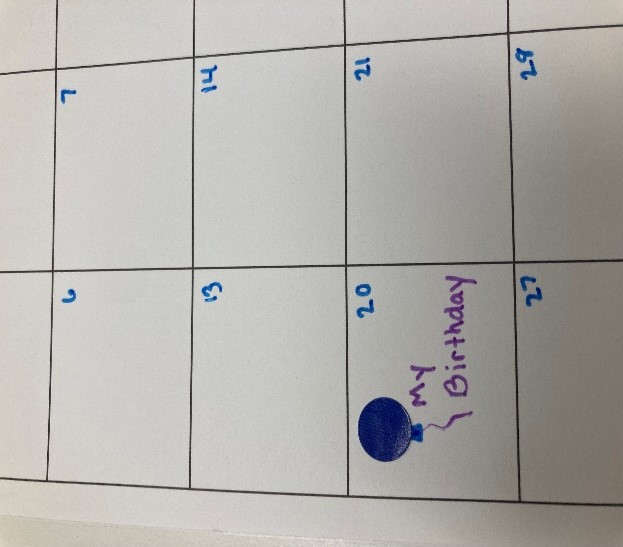
5. Use the provided pens and decorate the calendar however you choose. Feel free to use any materials that you have at home to add to the calendar design. Magazines, glitter glue, colored pencils, anything!
Show us what you created! Send us pictures at youthservices@balibrary.org.
Youth Services Assistant Librarian Alyssa -
October/November Take-and-Make Kits
Bring home a fun new project! Sign up from our Library Calendar and pick up a kit at the Youth Services desk or through our Parking Lot Pickup service between October 18-November 12.
Toddler & PreK: Fall Suncatcher
Catch the fall sun with this easy process art project. Register for the October/November Toddler & PreK Take-and-Make Kit here.
Show us what you created! Send us pictures at youthservices@balibrary.org.
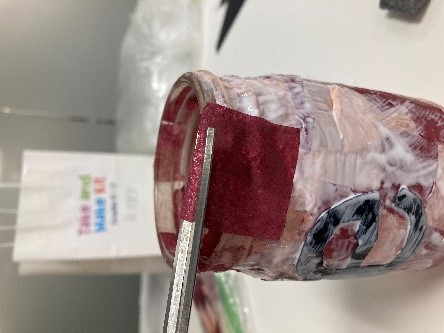
Grades K-2: Fall Lantern
Turn a jar and tissue paper into a seasonal lantern. Register for the October/November Grades K-2 Take-and-Make Kit here.
Your kit contains:
- Mason jar
- Foam brush
- Container of mod podge
- Bag of precut tissue paper
- Black card stock
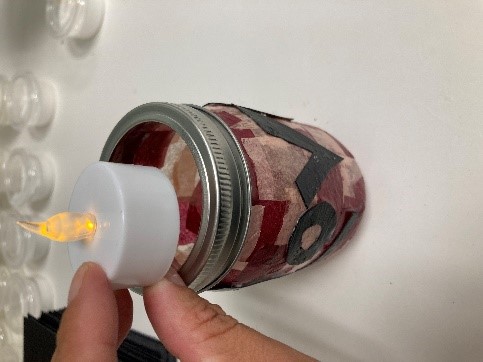
- Flameless tea light candle
- Instructions
Instructions:
1. Use the foam brush to apply a very thin layer of mod podge over your jar (move on to step 2 immediately).
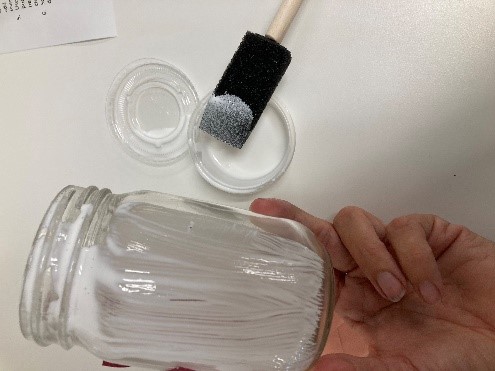
2. Working quickly, wrap your tissue paper around the jar.
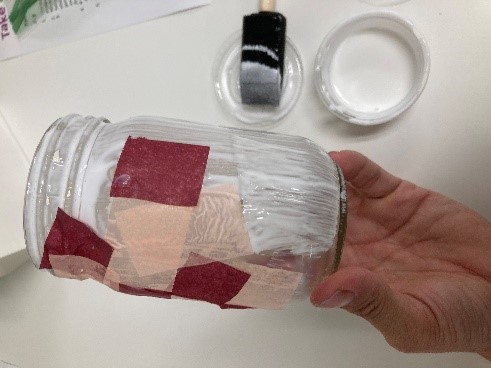
3. Smooth the tissue paper out as much as you can with your hands (don’t expect it to be perfectly smooth). If you get a tear; just dab a little mod podge and patch it with a small piece of tissue paper then smooth it over with your fingers.
4. If needed, use scissors (not provided) to snip away any excess tissue around the rim. Continue to press the tissue down with your fingers.
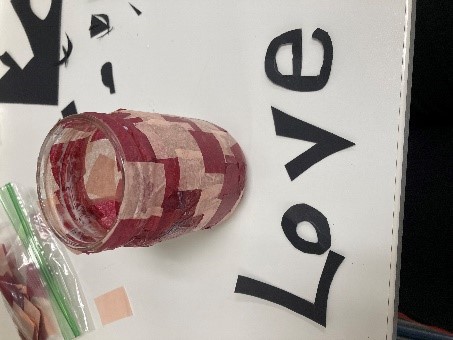
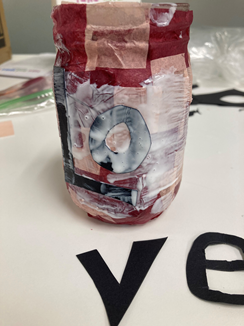
5. If desired, while your mod podge is drying (about 15 mins), cut cardstock to make a design. Use the foam brush and dab some mod podge on the area where you want to add your cardstock design. (Mod Podge acts as a glue and a sealer, so it will be our adhesive and our topcoat for this.)
6. Use your foam brush to paint another thin layer of mod podge all over your jar, this time on top of the tissue paper/ cardstock. Allow it to dry (about 15 mins). It will dry clear.
7. Screw on the ring part of the lid and add the tea light candle.
Show us what you created! Send us pictures at youthservices@balibrary.org.
Grades 3-8: Button Canvas Art
Use a variety of buttons to create silhouette art. Register for the October Grades 3-8 Take-and-Make Kit here.
Instructions:
1. Pick out one of the cardstock templates for your design, or make your own. Your design can be anything that strikes your fancy!
2. Tape the template to the canvas.
3. Lightly draw the outline of the template with the pencil.
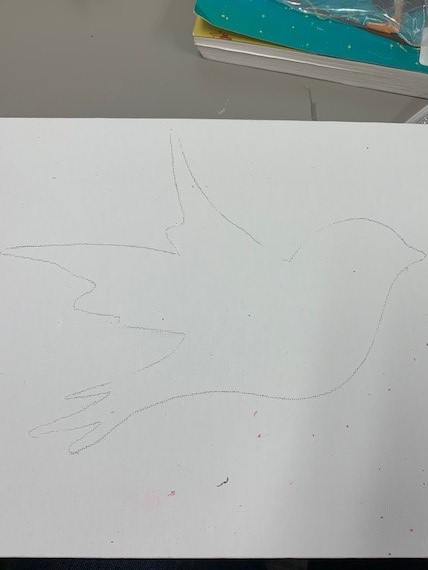
4. Remove template.
5. Optional: lay out the buttons you plan on using on the design. Include a variety of button sizes.
6. Using the cotton swab, glue buttons to canvas.
7. Optional: outline design with a marker.
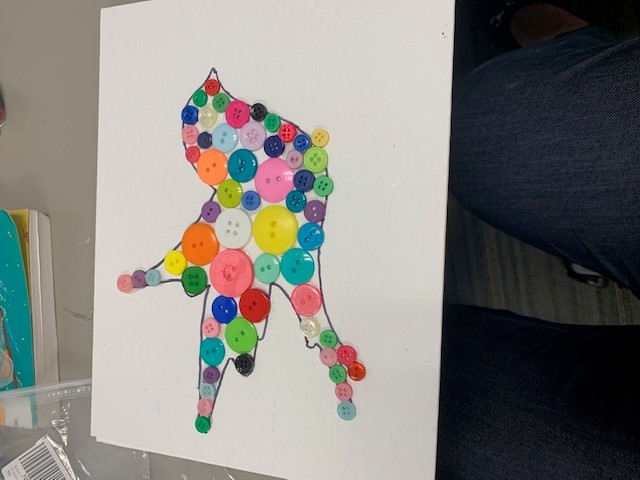
Show us what you created! Send us pictures at youthservices@balibrary.org.
Youth Services Assistant Librarian Alyssa -
September Take-and-Make Kits
Bring home a fun new project! Sign up from our Library Calendar and pick up a kit at the Youth Services desk or through our Parking Lot Pickup service between September 13-24.
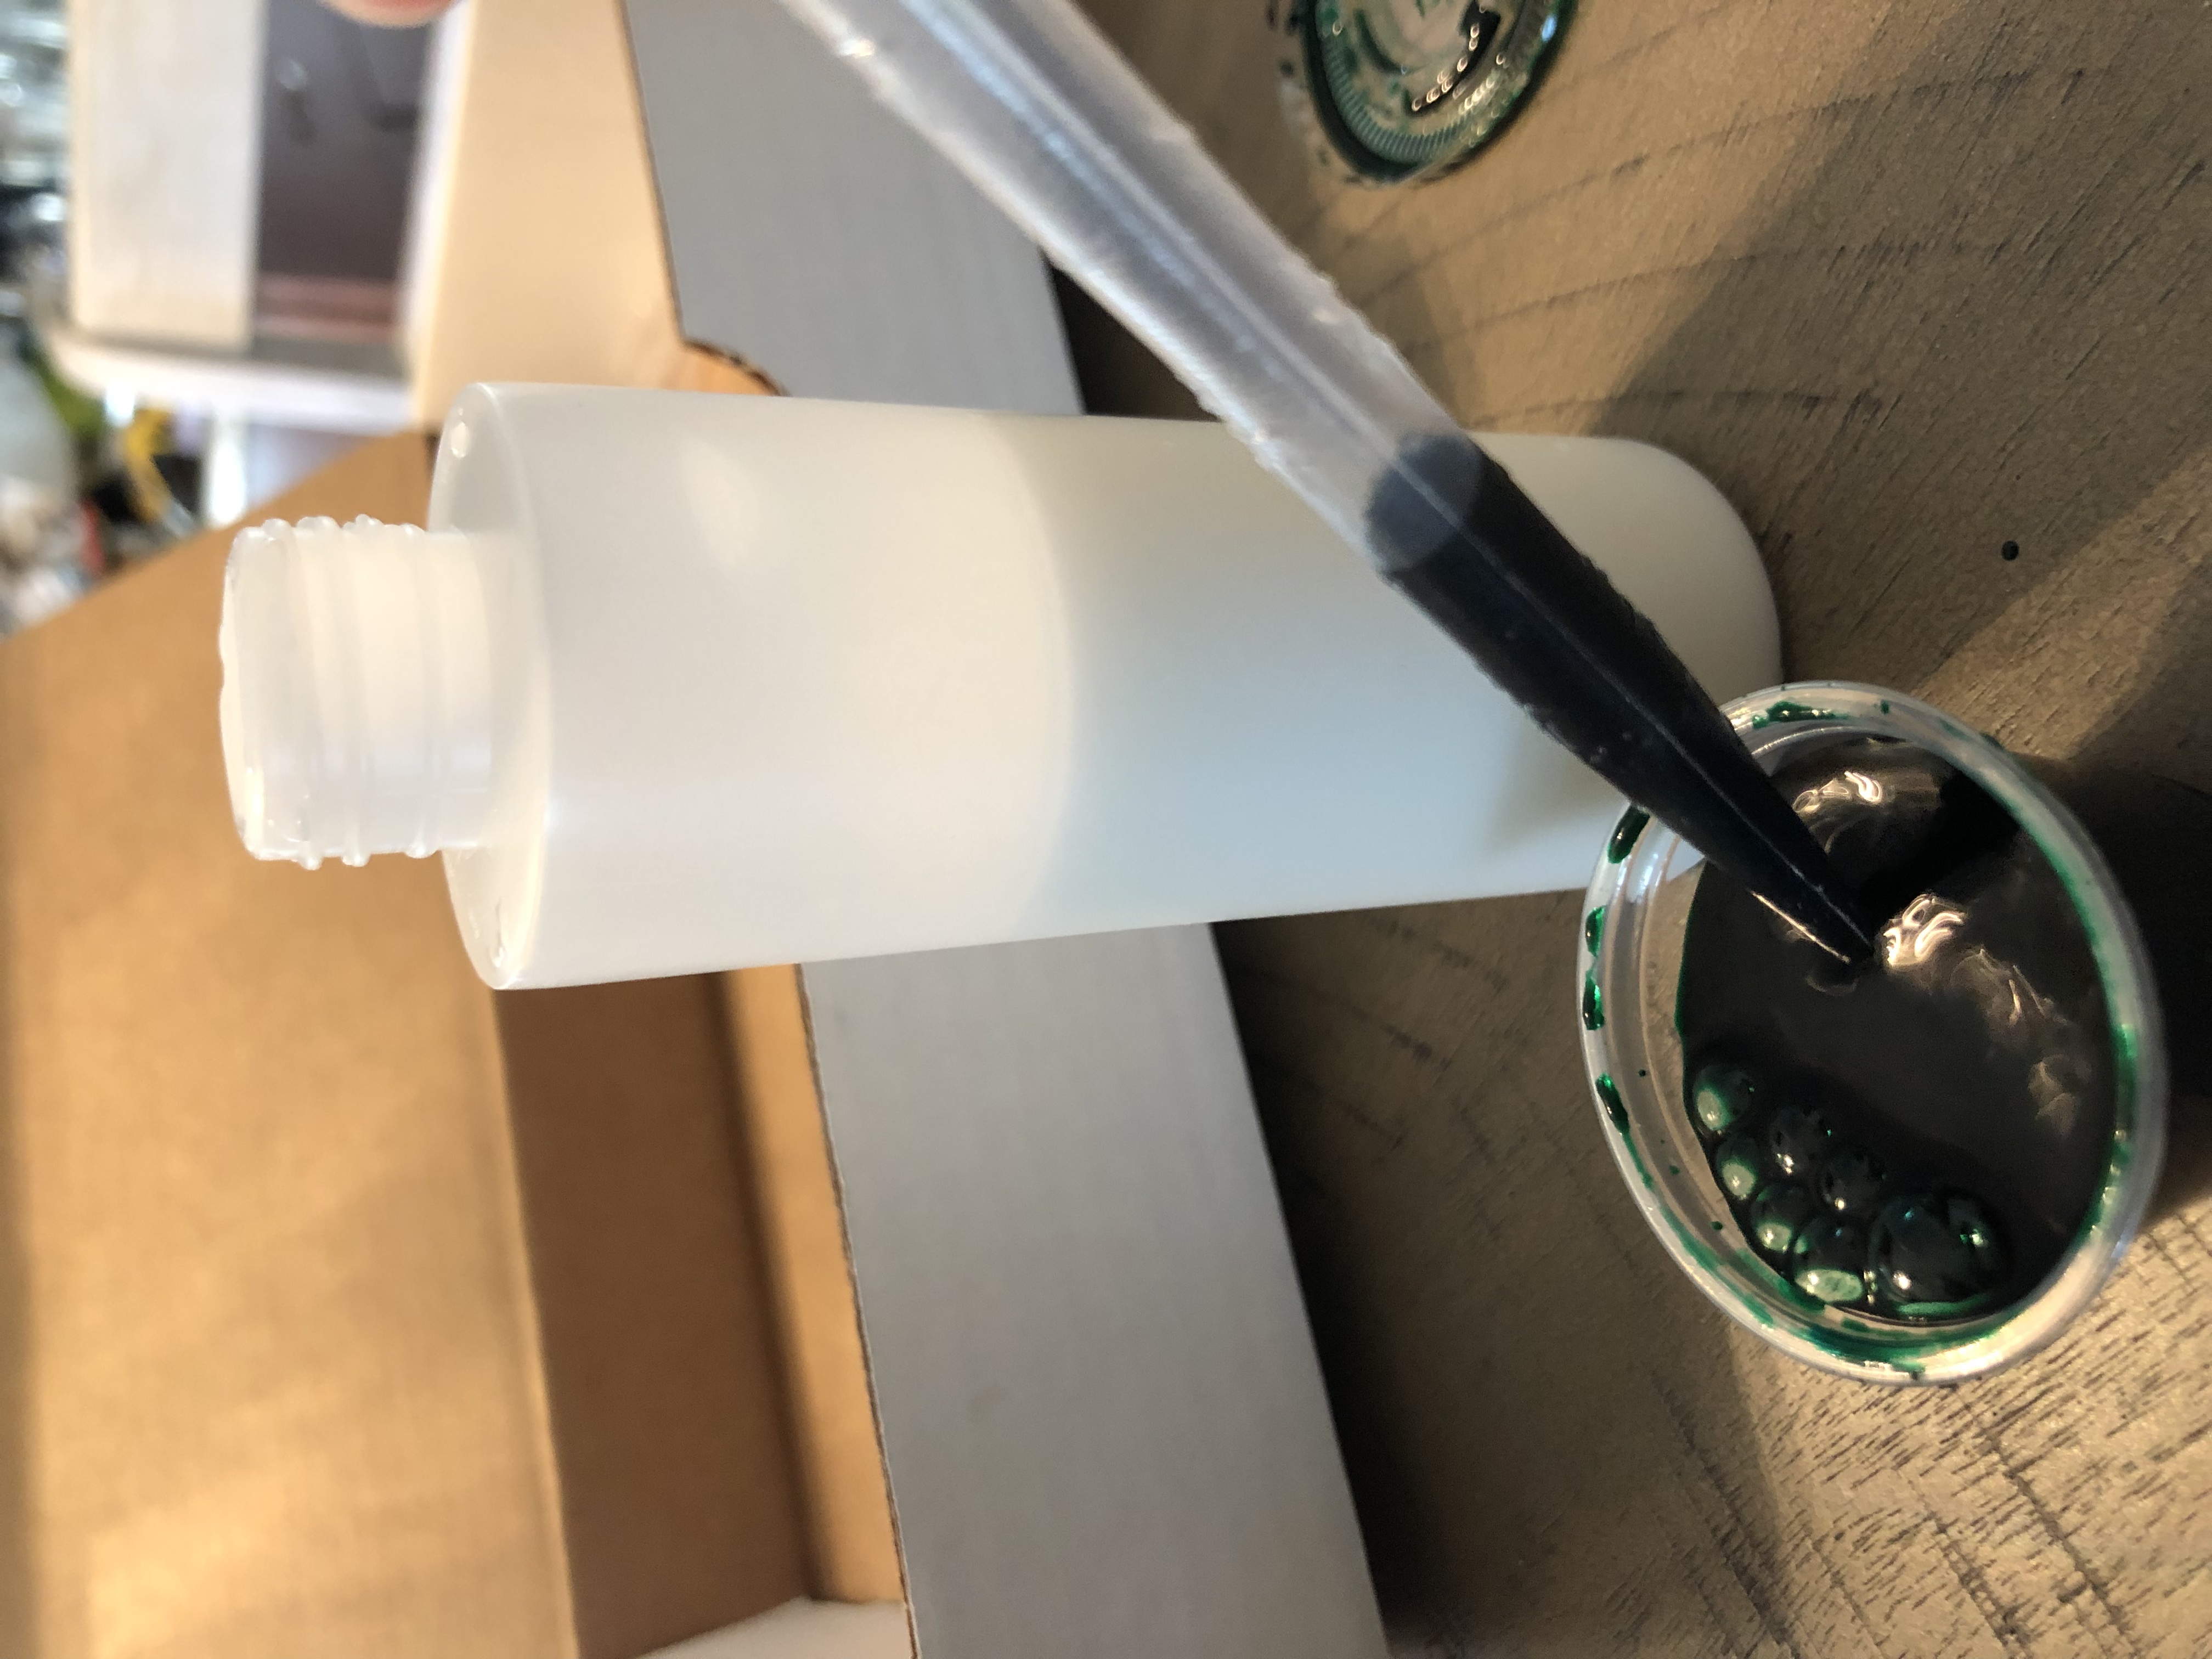
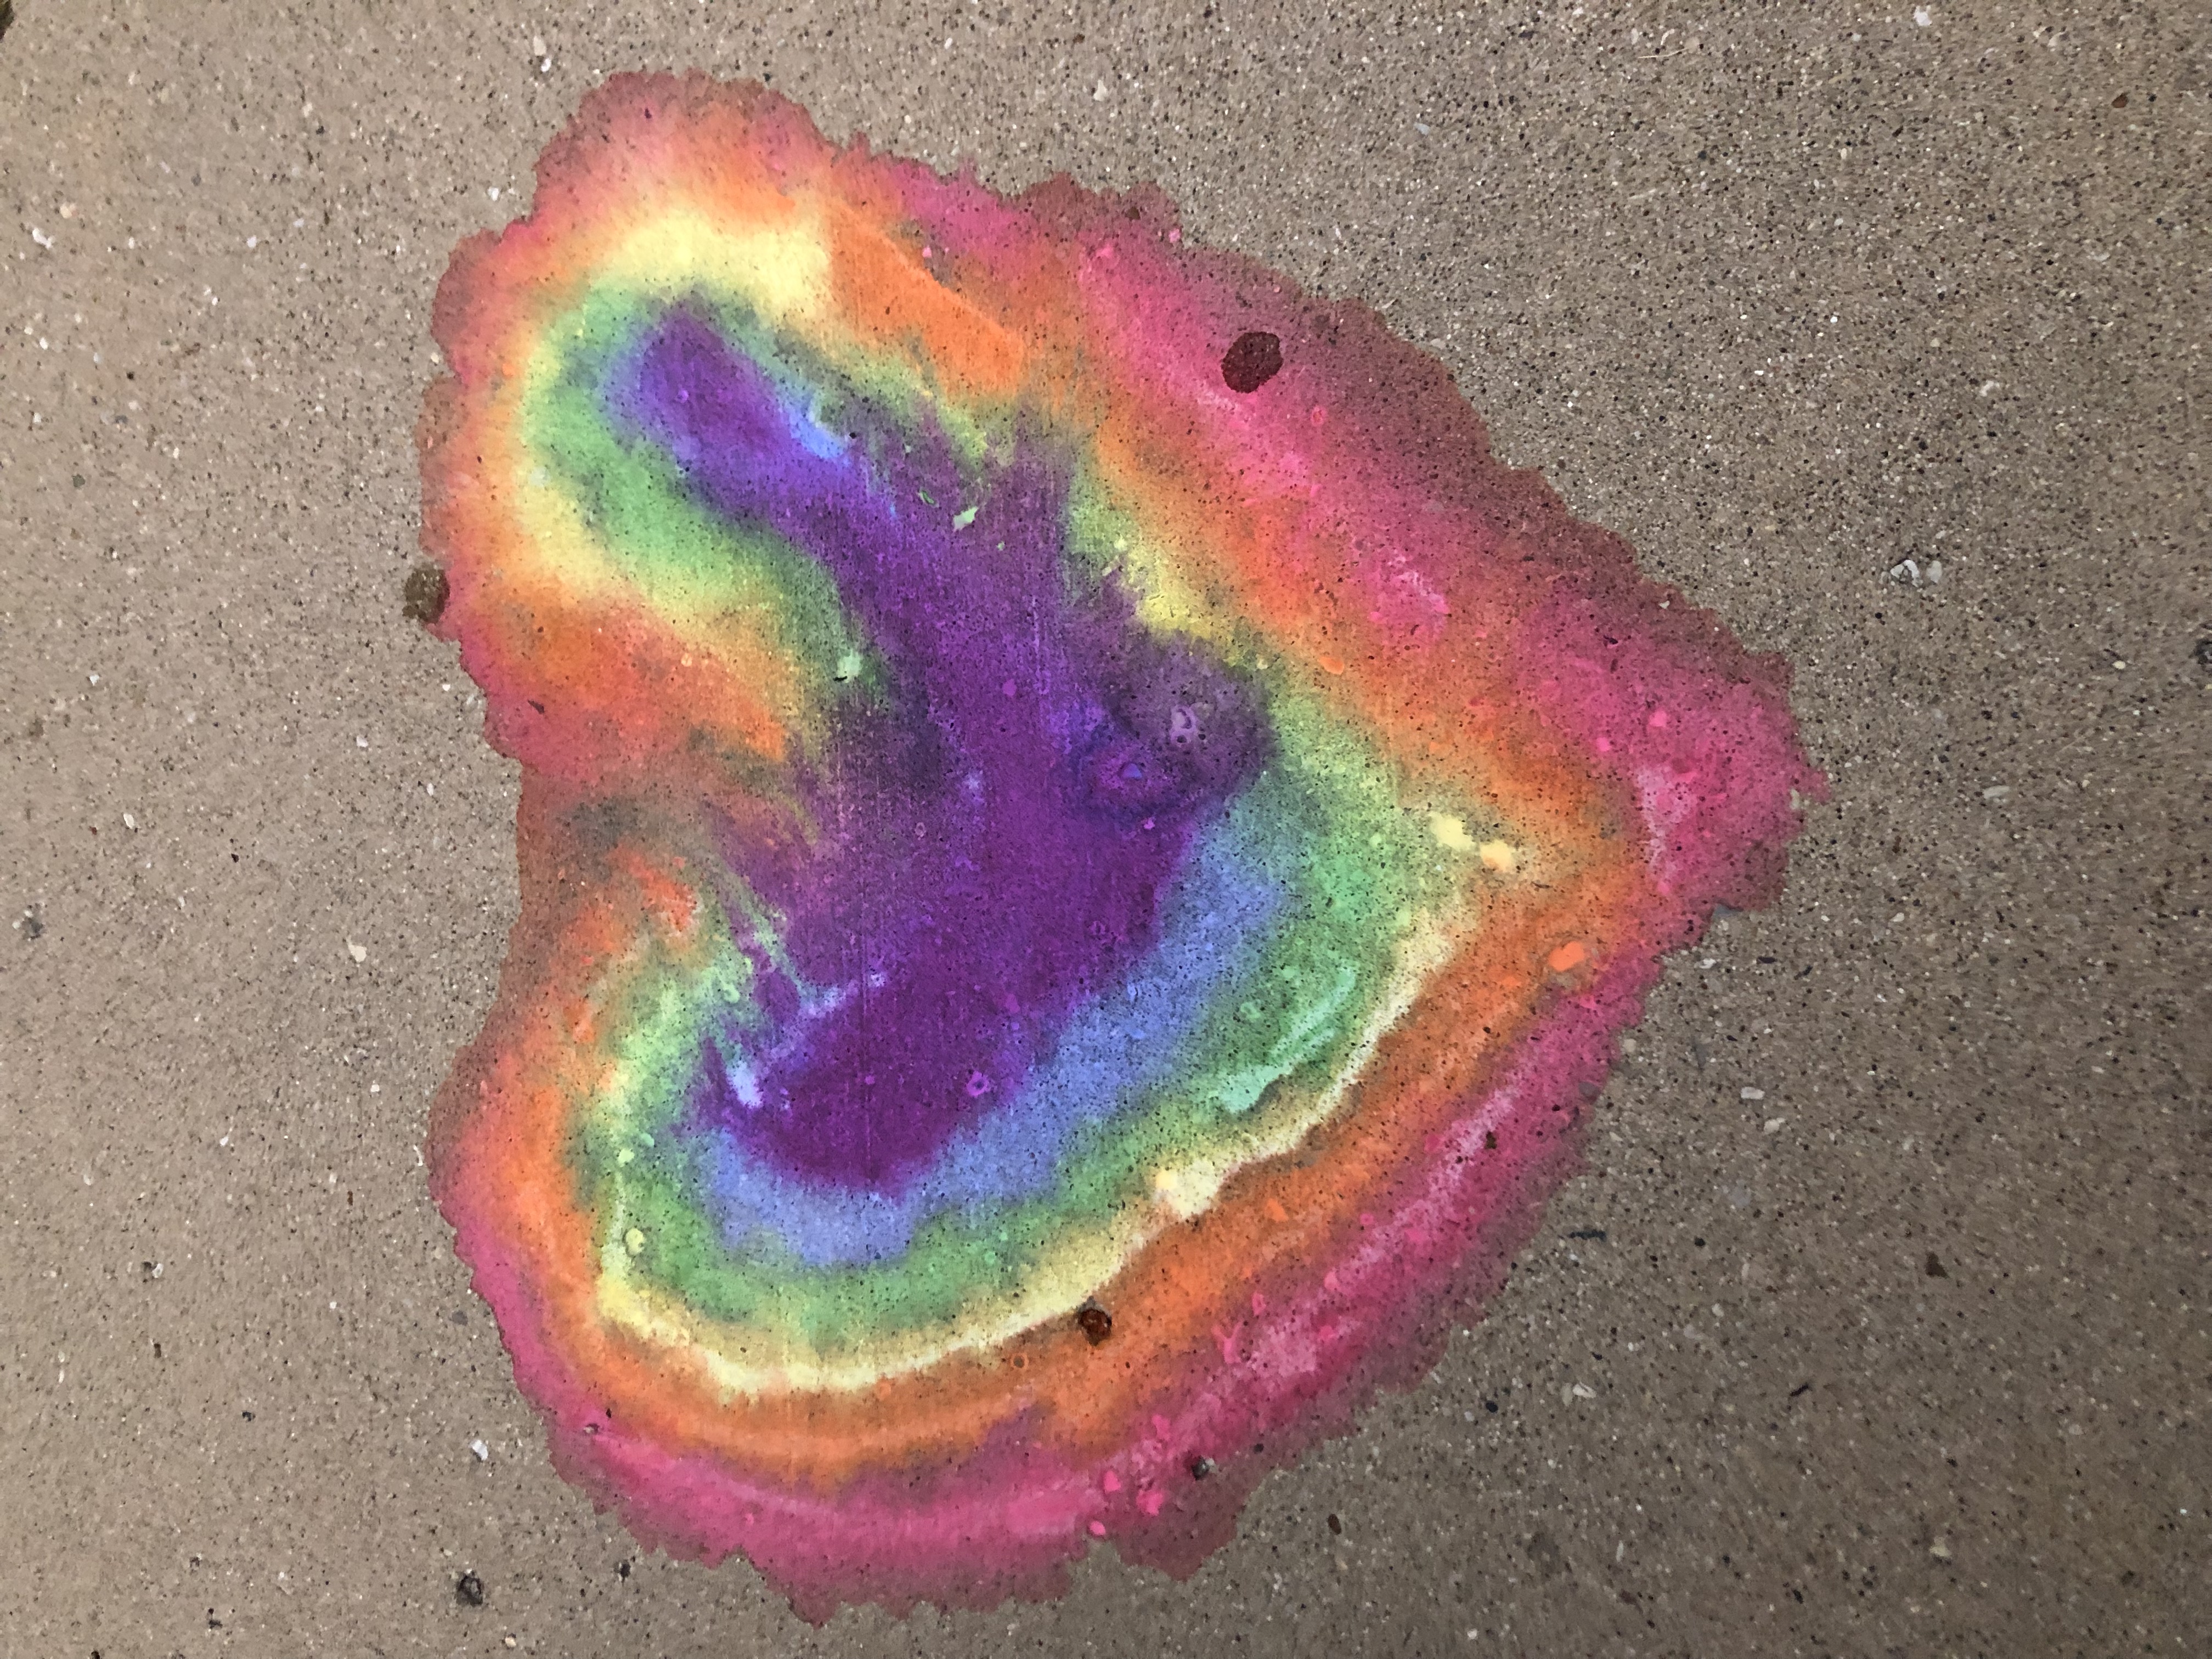
Toddler & PreK: DIY Liquid Chalk
Mix simple ingredients to make your own liquid color, then see what you can create on the sidewalk. Register for the September Toddler & PreK Take-and-Make Kit here.
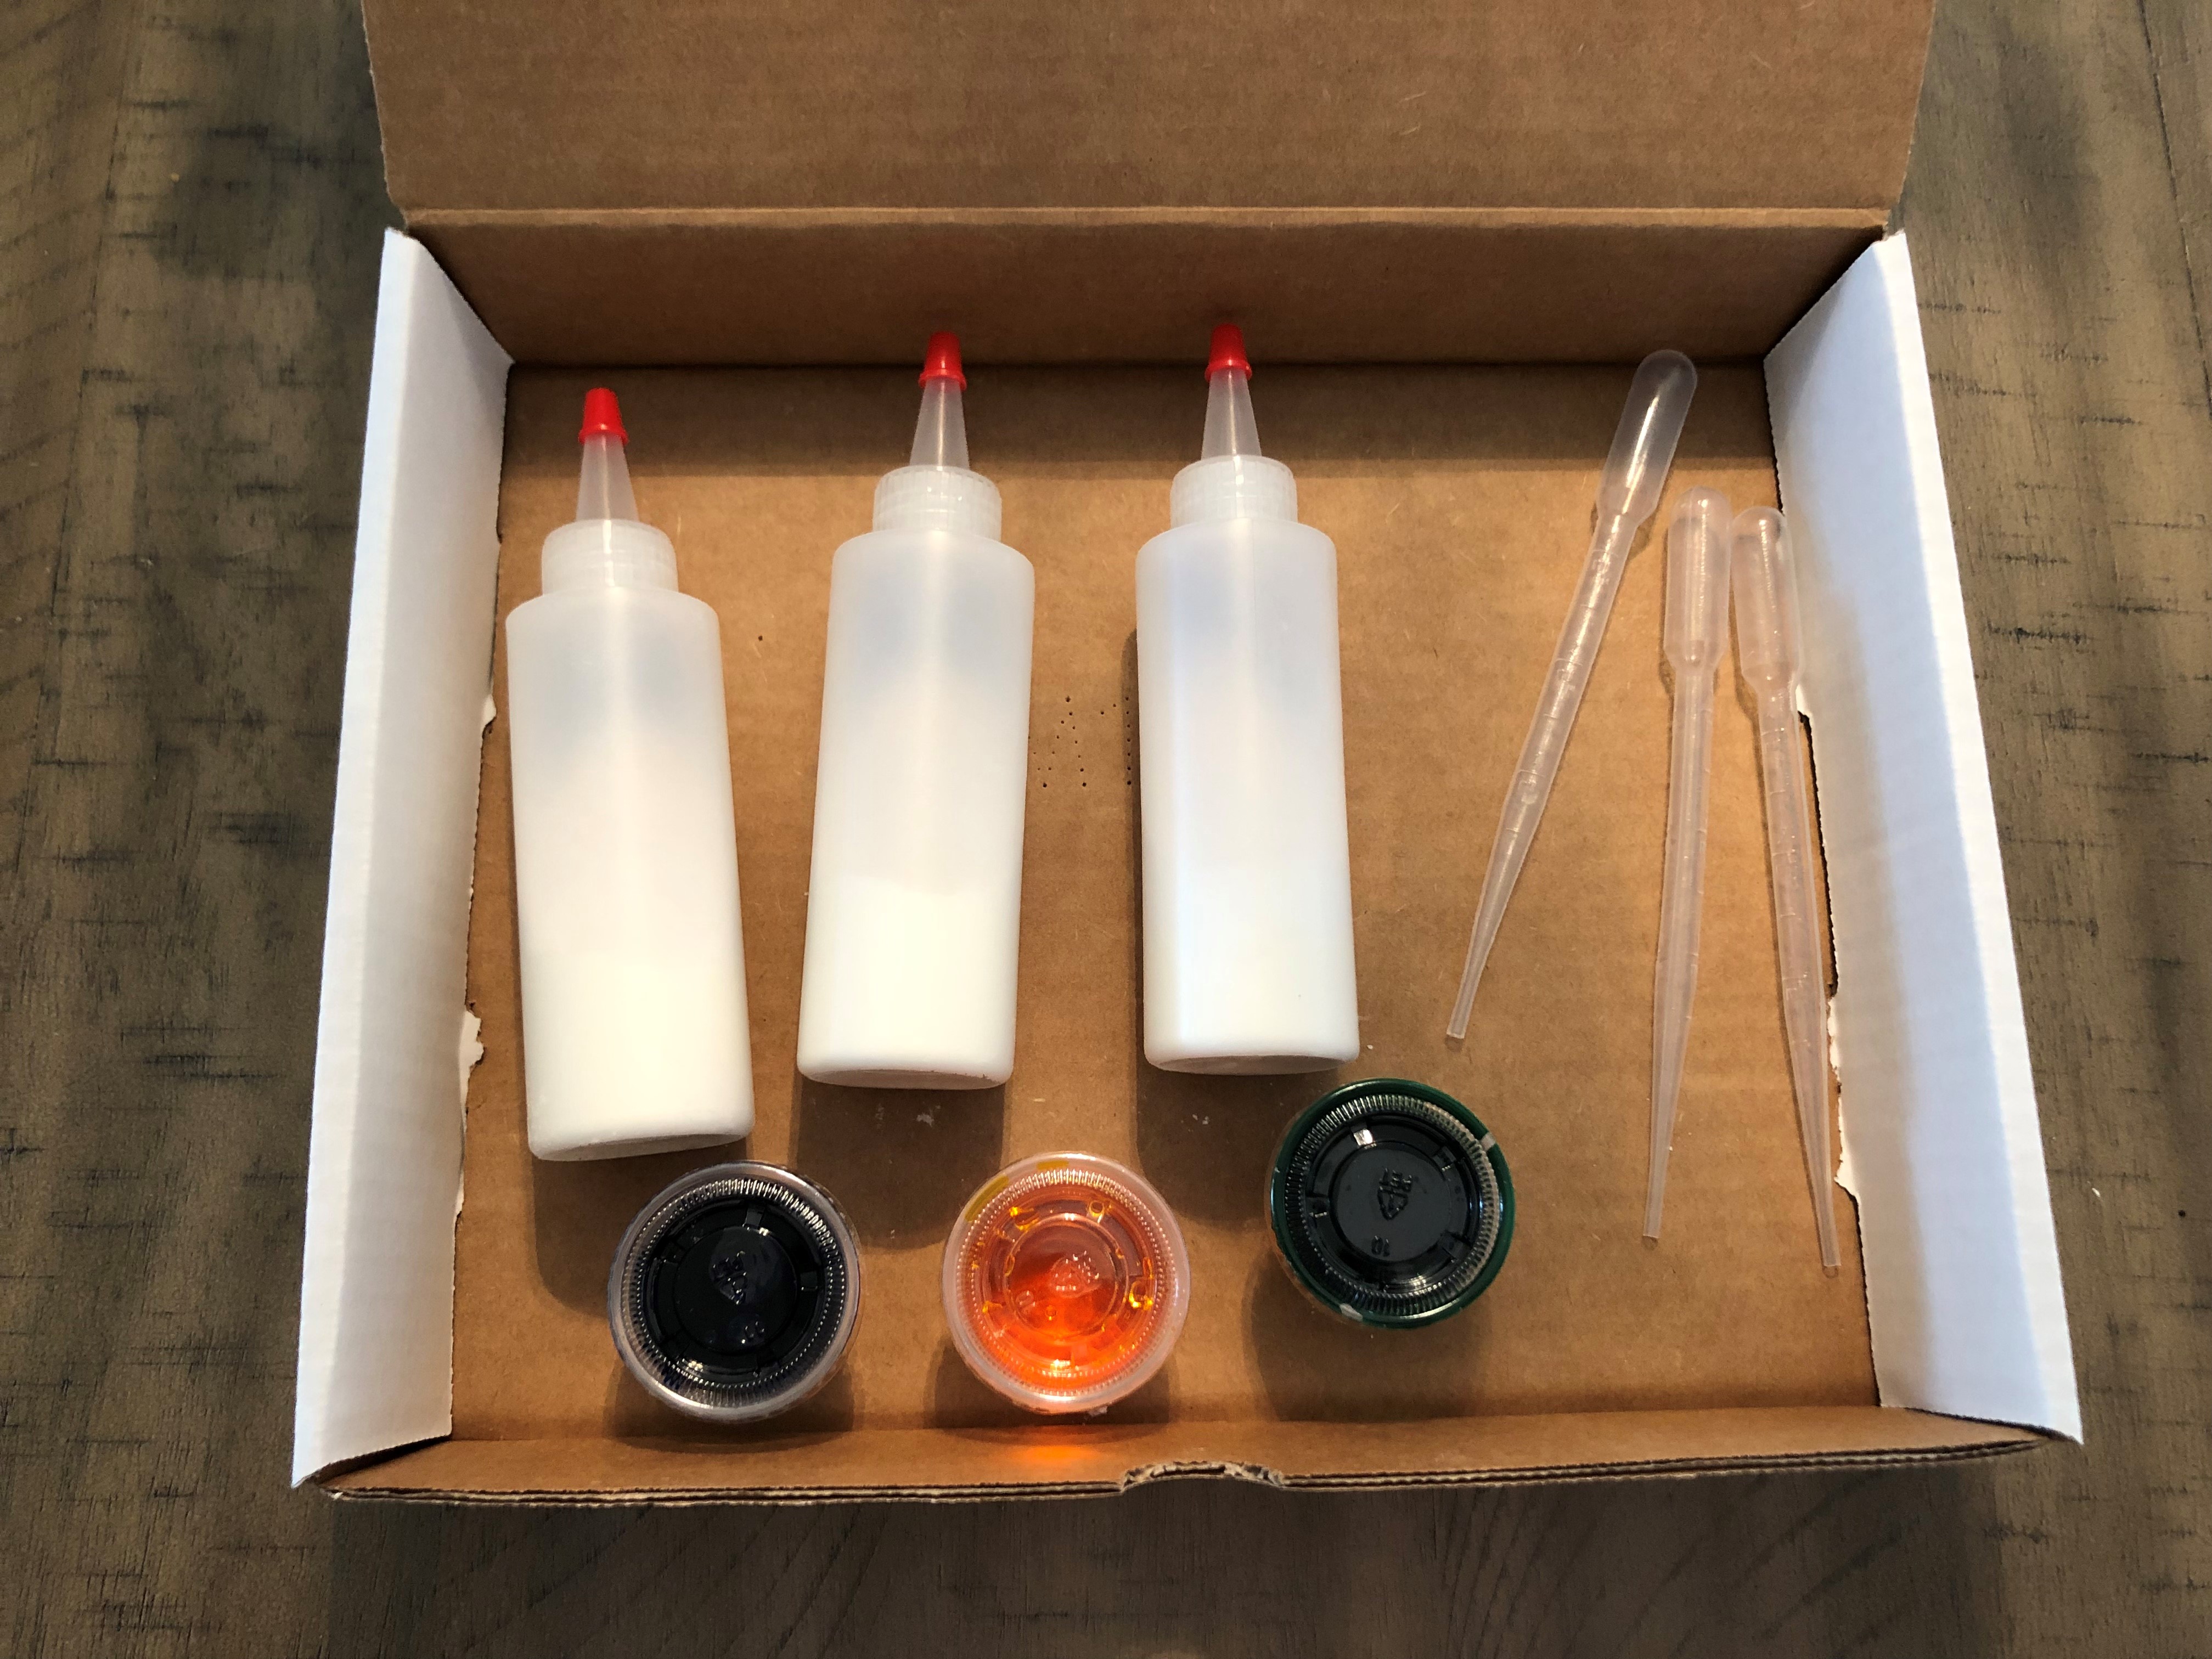
Your kit contains:
- Three squeeze bottles pre-filled with one ounce of baking soda and one ounce of corn starch
- Three one-ounce cups of liquid watercolor
- Three pipettes
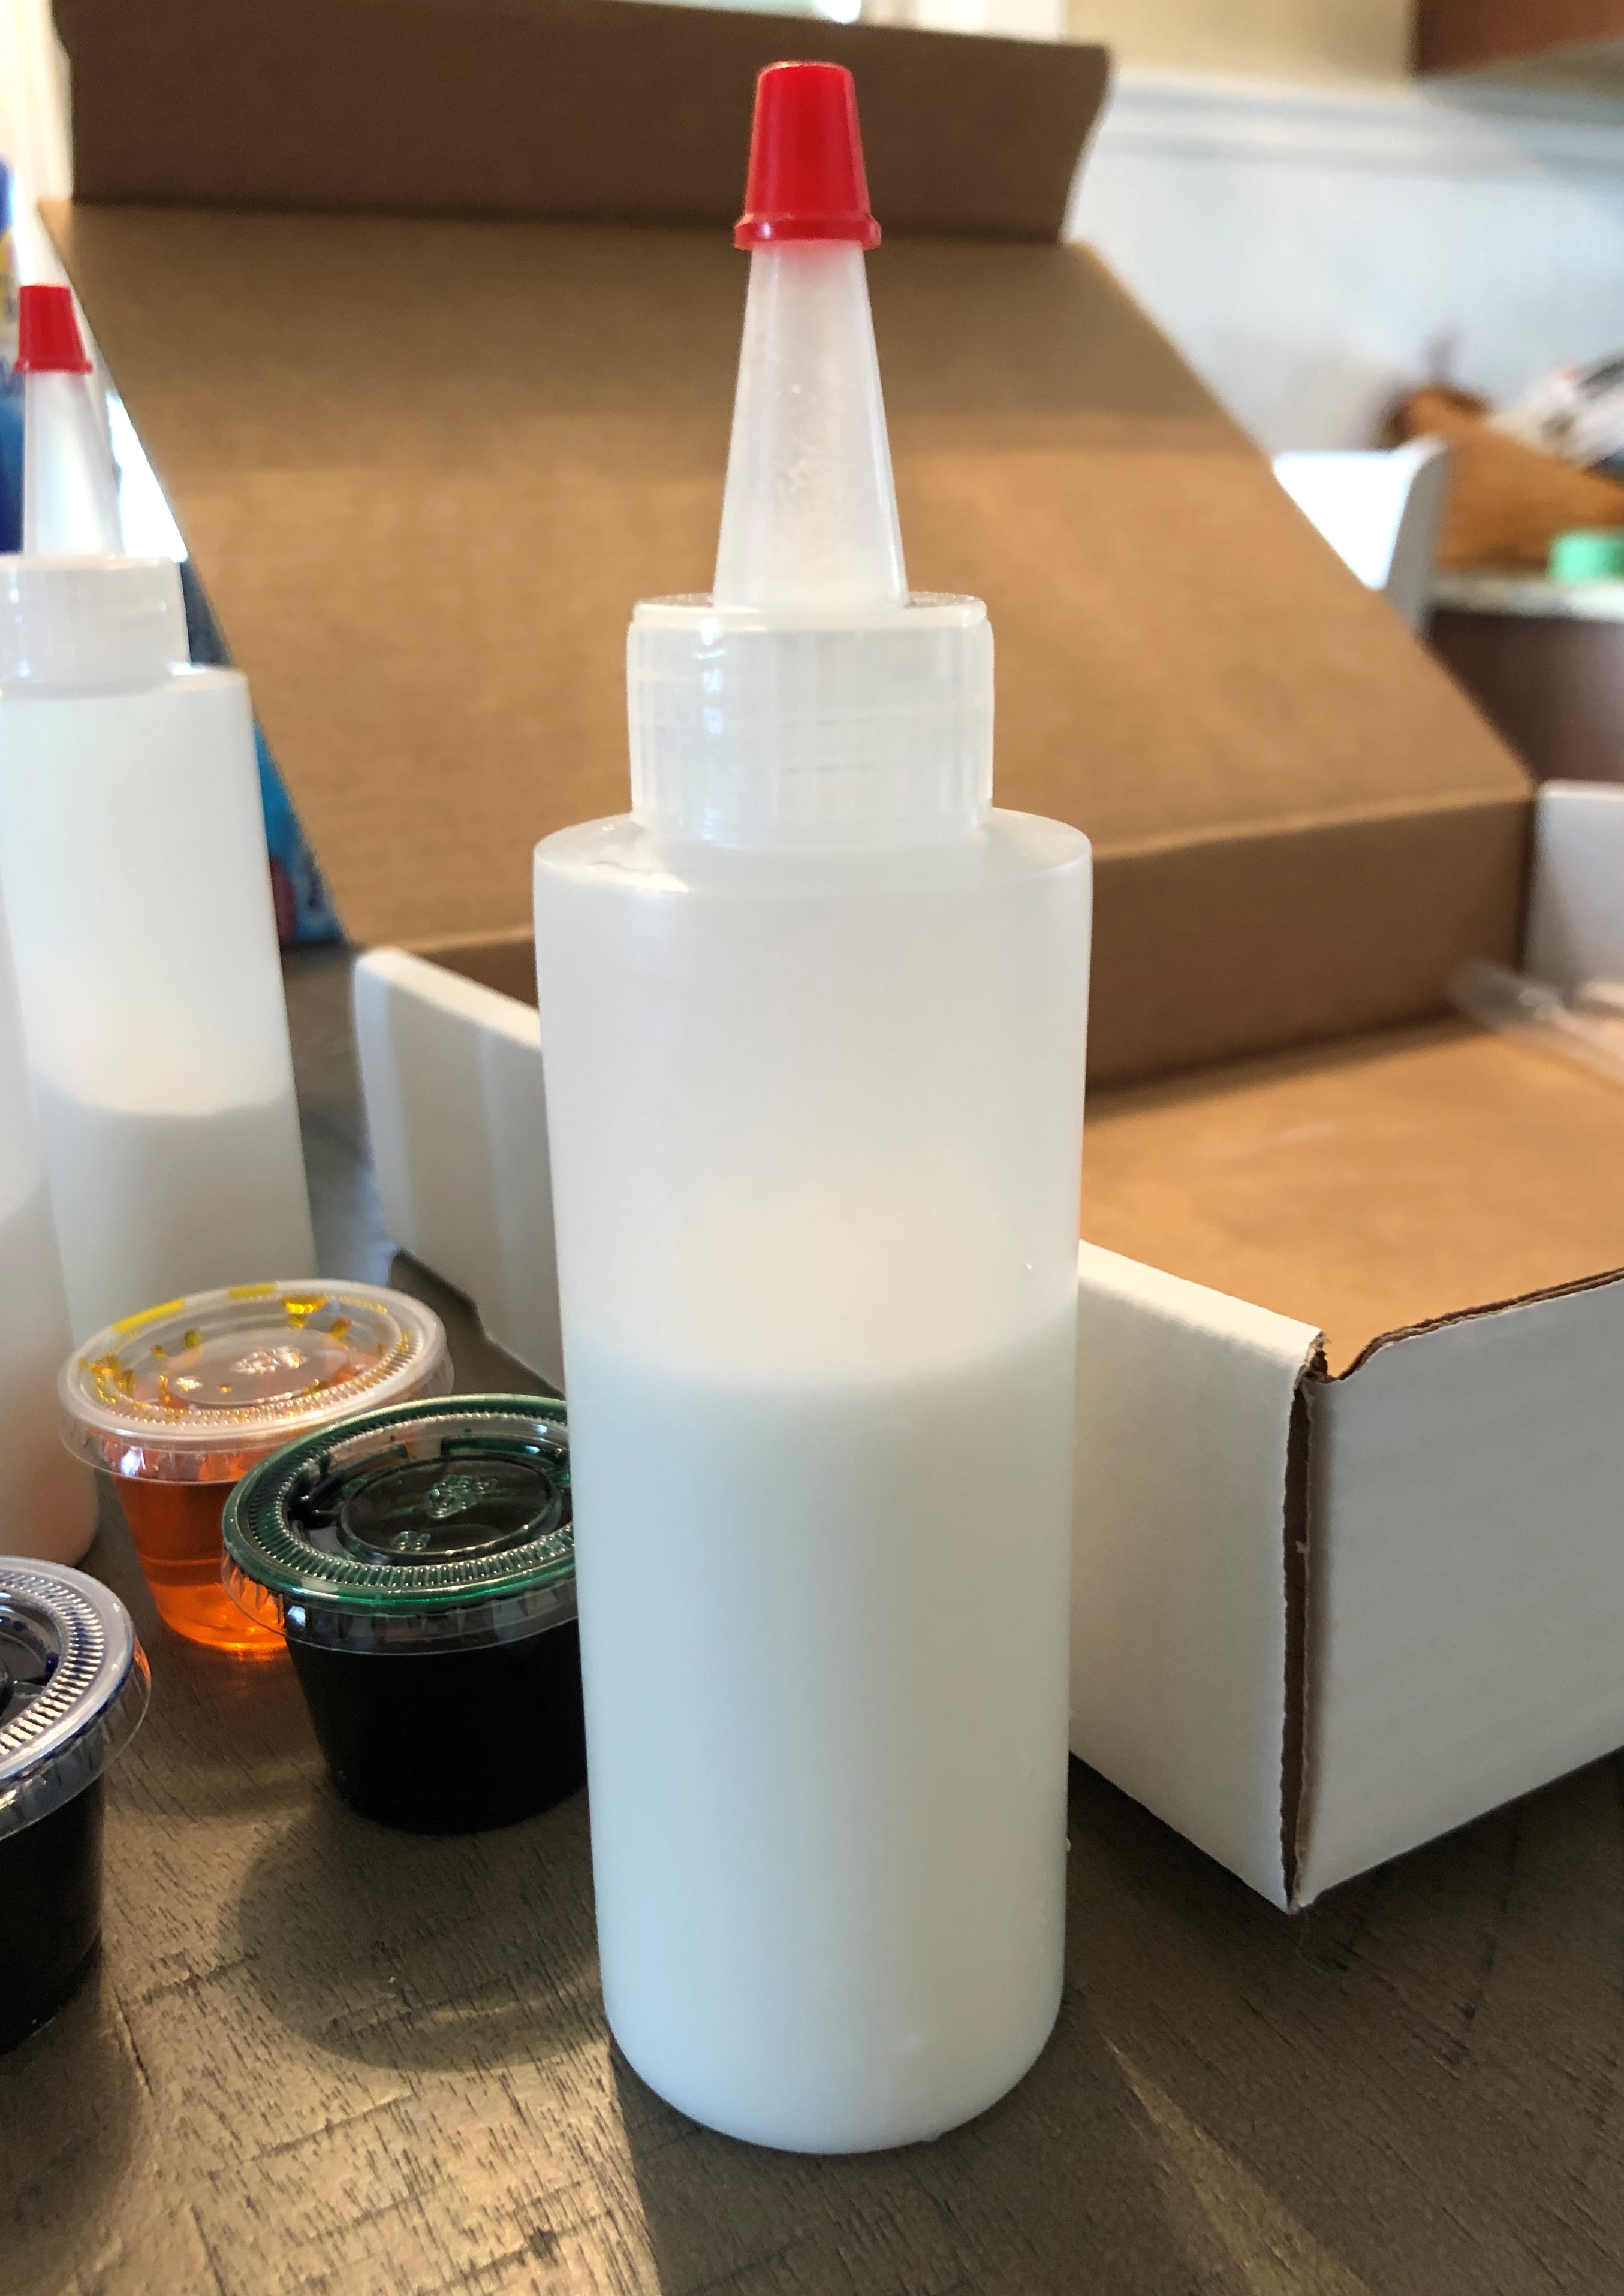
Instructions:
1. Untwist the top of the squeeze bottle and fill it about two-thirds full of water. Remember to save space for the liquid watercolor!
2. Put the cap back on the bottle and shake vigorously to mix the water with the baking soda and corn starch at the bottom. It should look a little milky when mixed.
3. Using a pipette, transfer the liquid watercolor into your squeeze bottle.
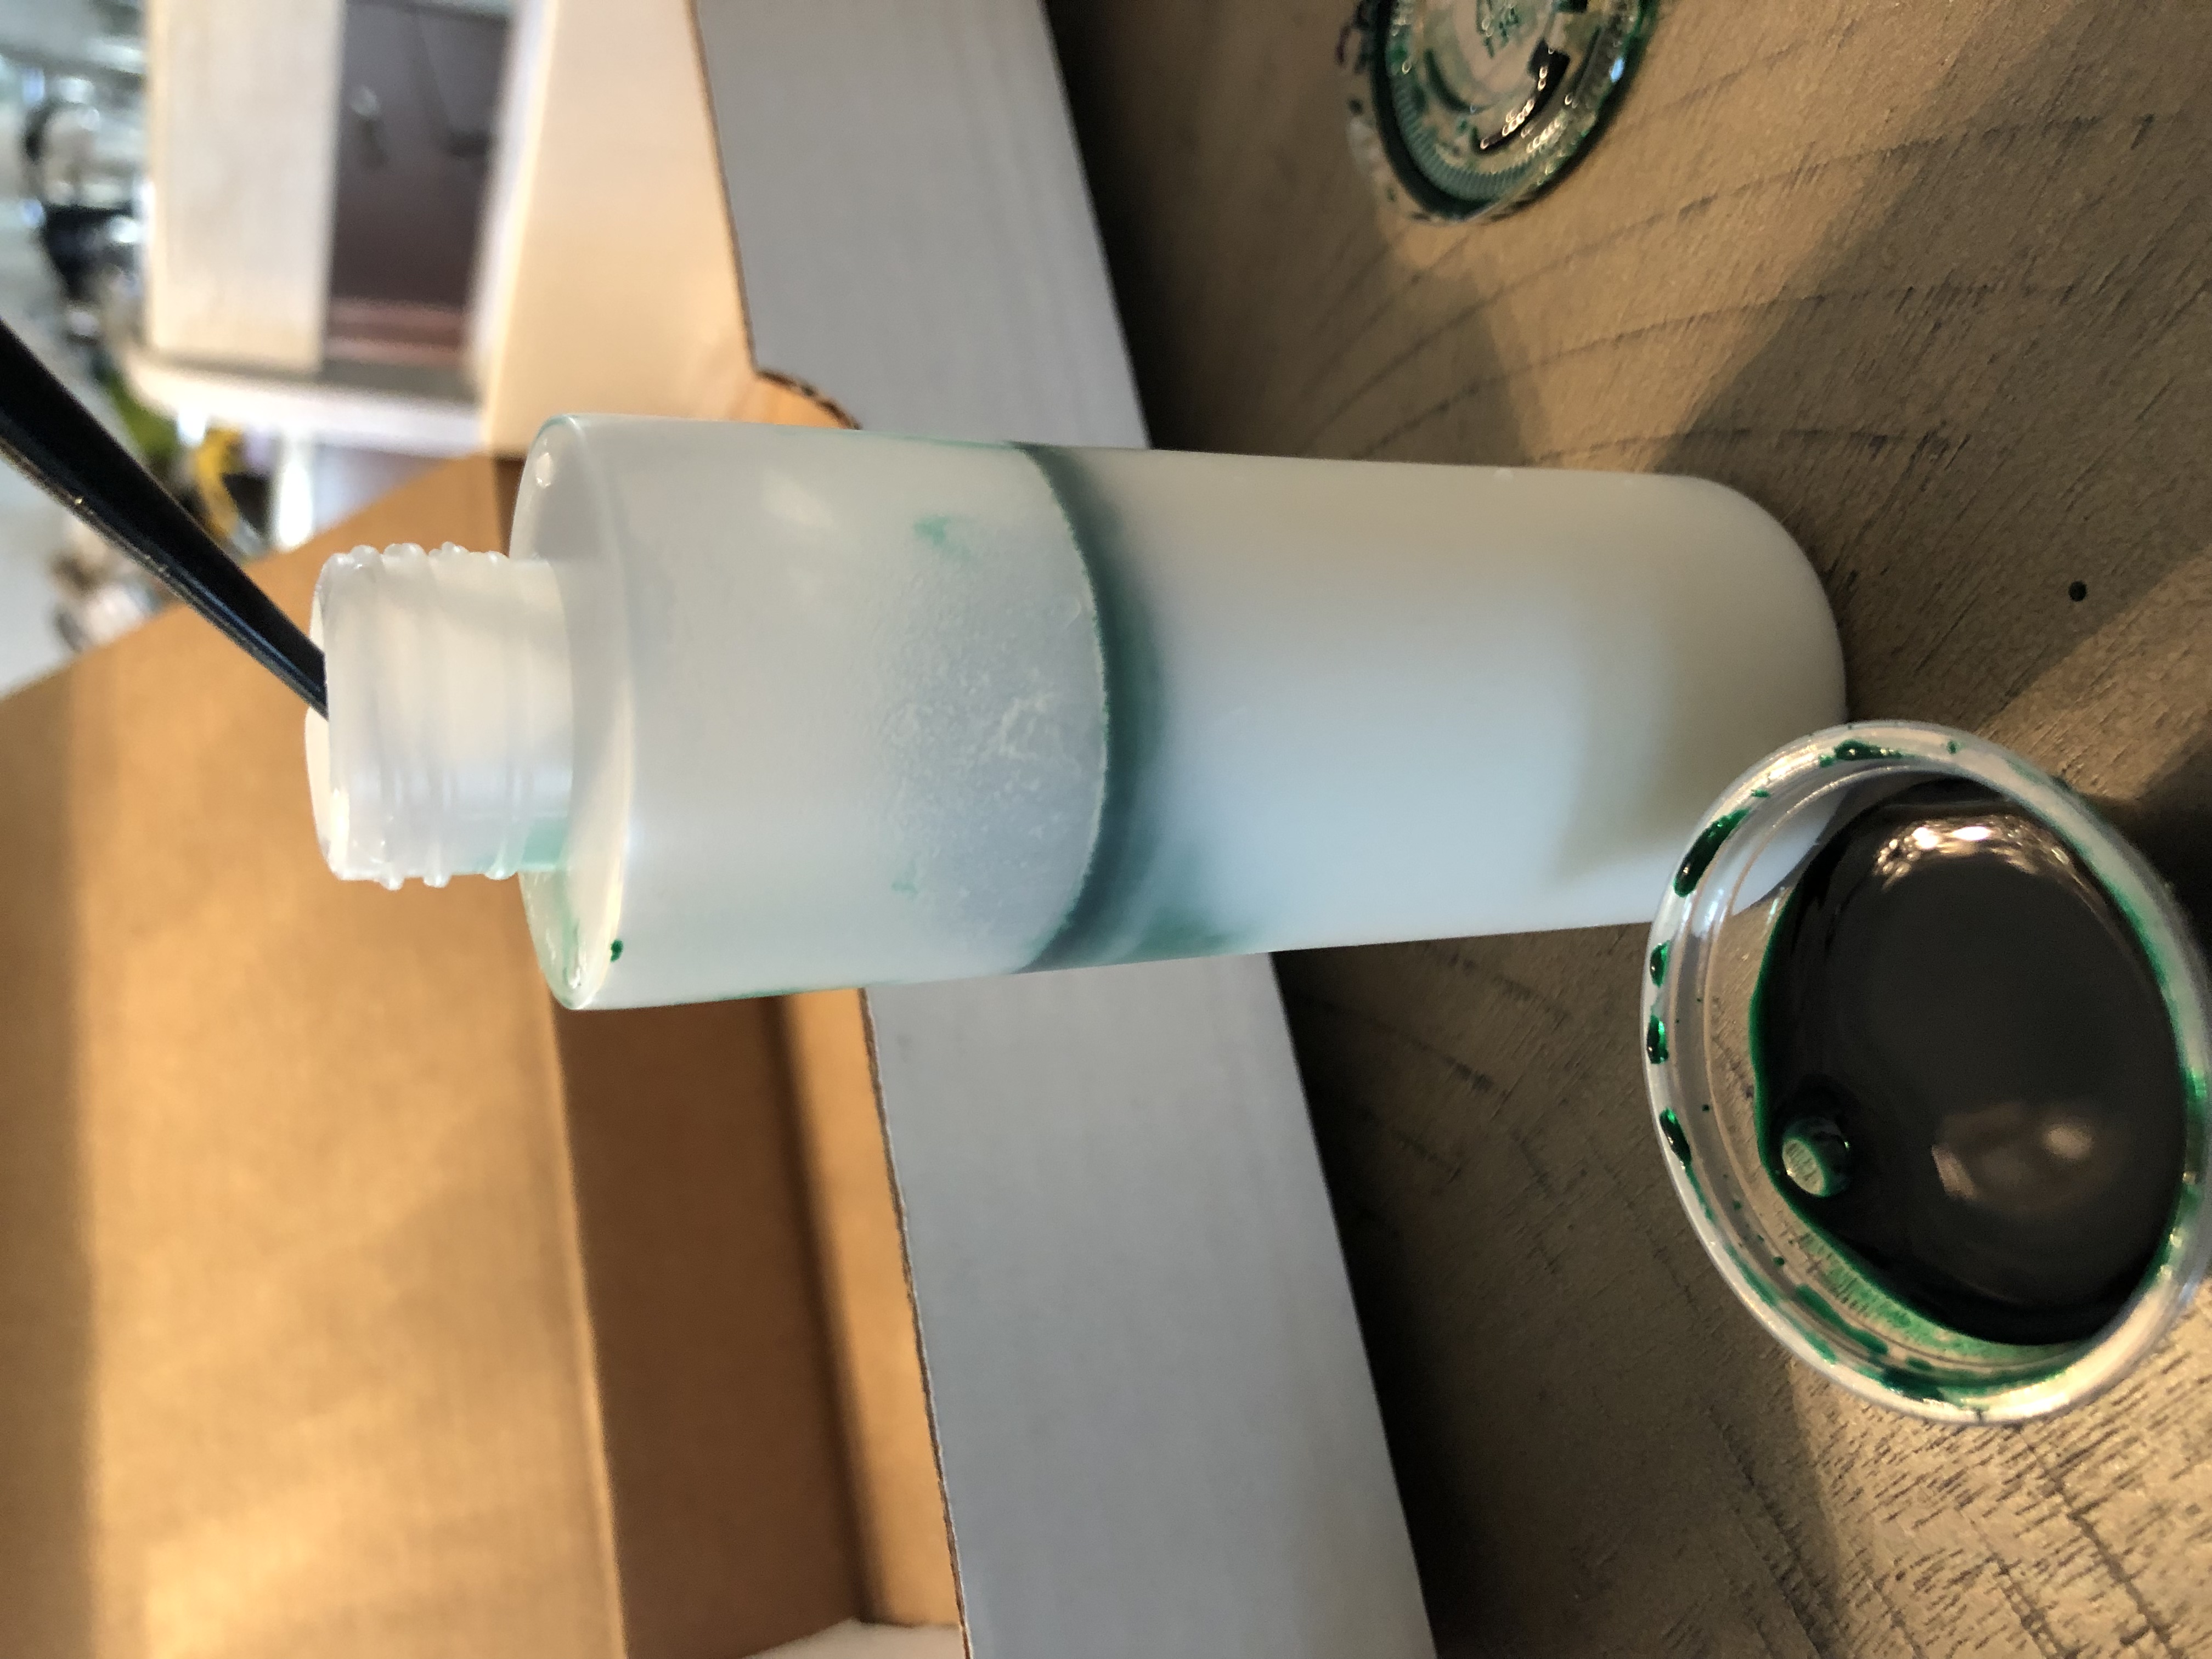
4. Put the cap back on the bottle and shake until the watercolor is distributed evenly.
5. Repeat steps 1-4 for each squeeze bottle using a different color of watercolor for each.
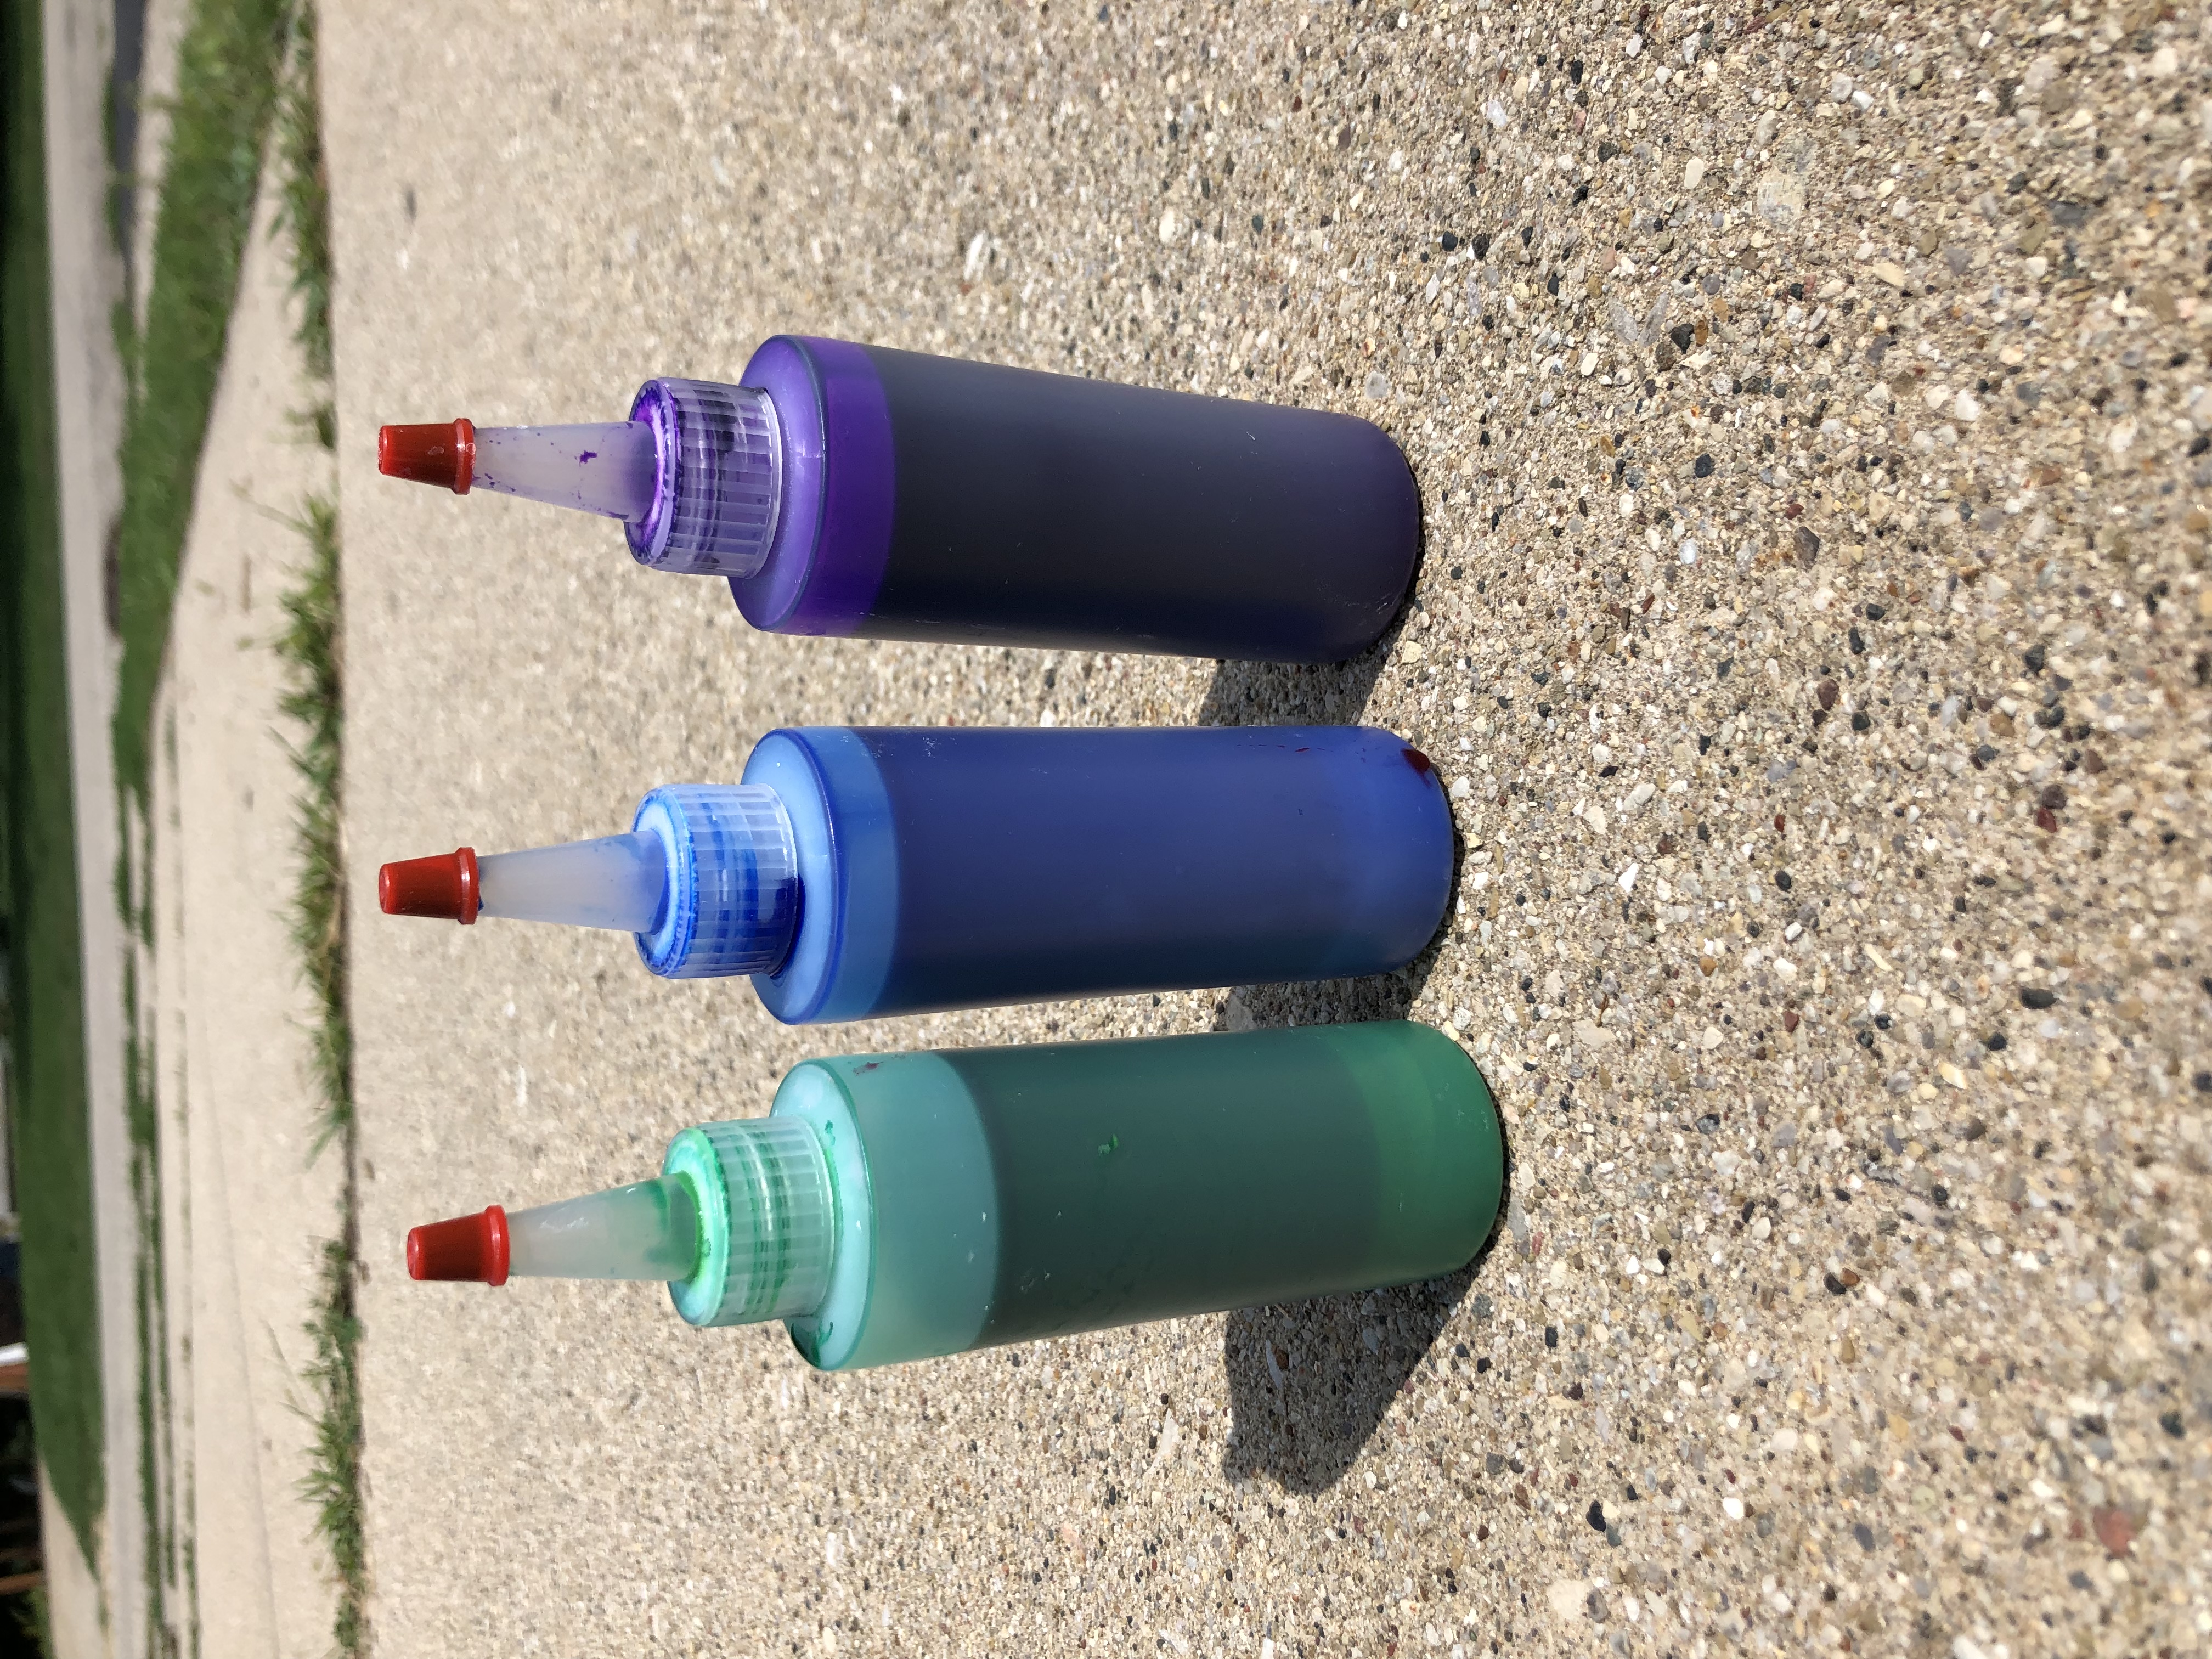
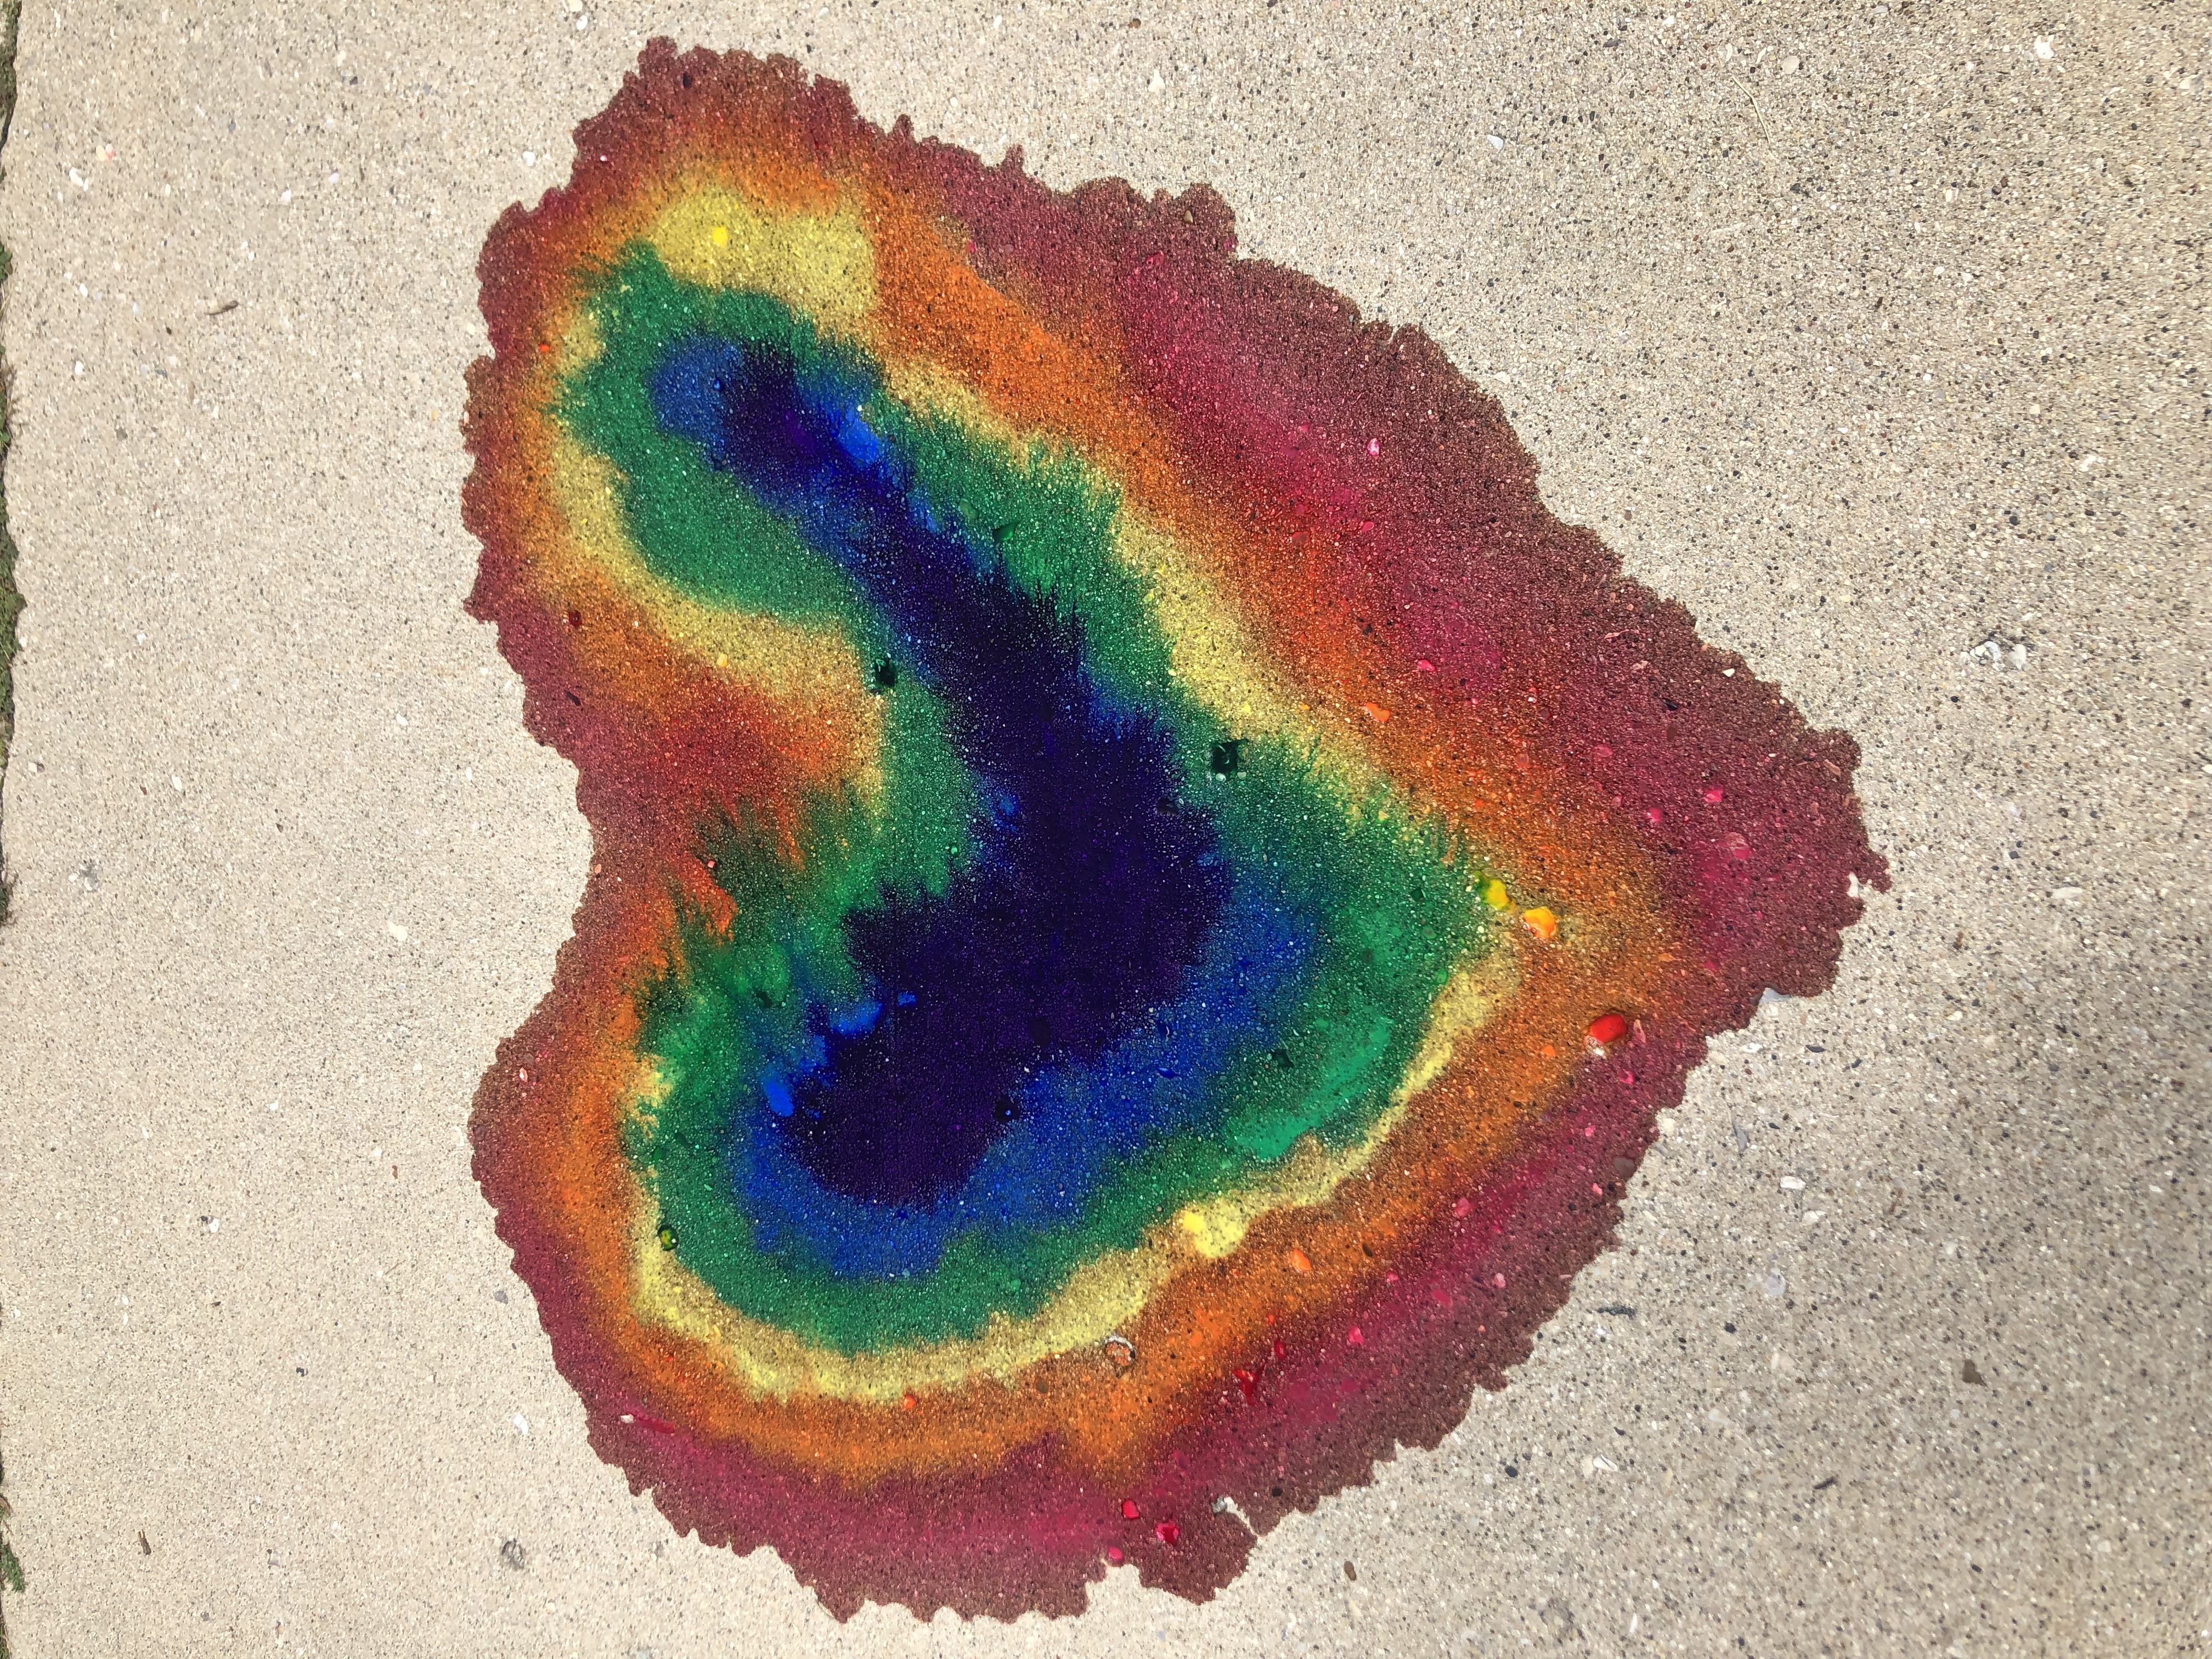
6. Take your liquid chalk outside and paint on the sidewalk. Tip: The liquid chalk may be hard to control and come out looking splatter-y. Embrace the messiness of it! For lighter colors, you may need to wait for the chalk to dry before the color fully comes through.
7. Step back and enjoy your creations!
Bonus tip:
To reuse your squeeze bottles and make more liquid chalk, rinse bottle thoroughly and then fill it with one ounce (two tablespoons) of baking soda and one ounce of corn starch. To add color, use liquid watercolor or substitute with food coloring. This recipe is based on the four ounce squeeze bottles provided in the kits, but if you use another squeeze bottle that you own, just make sure to use an equal amount of baking soda and corn starch, adjusting the amount for the size of the bottle.
Show us what you created! Send us pictures at youthservices@balibrary.org.
Grades K-2: Animal Mobile
Create a floating menagerie for your bedroom with these supplies. Register for the September Grades K-2 Take-and-Make Kit here.
Kit contains:
- Two dowel rods
- Eight foam sheets
- Six animal stencils
- One plastic needle
- Two sets of embroidery thread
- Four jingle bells
- Twelve pony beads
You will also need:
- Scissors
- Pen
Instructions:
- Trace animal stencils onto foam sheets and cut out. Use as many colors and animals as you wish. You will need at least 4 animals, though you can use more. Feel free to design your own shapes, too!
- Cut a length of thread about 1 foot long. Place the two dowels in an X-shape, and then tie them tightly together with the thread. Leave extra thread so you can hang the mobile. You can use more thread to wrap the two rods tightly together in different directions, to make sure it is secure. Test out the balance, and adjust the rods so they hang pretty straight.
- Cut another strand of thread about 1 foot long. Thread the needle with the cut piece, then use the threaded needle to punch a hole through the top of one of the foam animals. Tie a knot to secure.
- You can connect multiple animals in the same string if you would like.
- Cut another piece of thread. Tie a jingle bell and, if you’d like, some pony beads on one end. Thread the other side through the needle and punch it through your bottom-most animal on the string. This will help weigh the mobile down.
- When you’re done with your string of animals, tie them to one end of the dowels. (Optional: secure with glue)
- Repeat three more times, one string for each dowel end.
- Hang your mobile up, and watch your animals float and fly!
Show us what you created! Send us pictures at youthservices@balibrary.org.
Grades 3-8: Yarn Wall Hanging
Create a unique piece of art to add color and texture to your space. Register for the September Grades 3-8 Take-and-Make Kit here.
Show us what you created! Send us pictures at youthservices@balibrary.org.
Youth Services Assistant Librarian Alyssa -
August Take-and-Make Kits
Bring home a fun new project! Sign up from our Library Calendar and pick up a kit at the Youth Services desk or through our Parking Lot Pickup service between August 9-20.
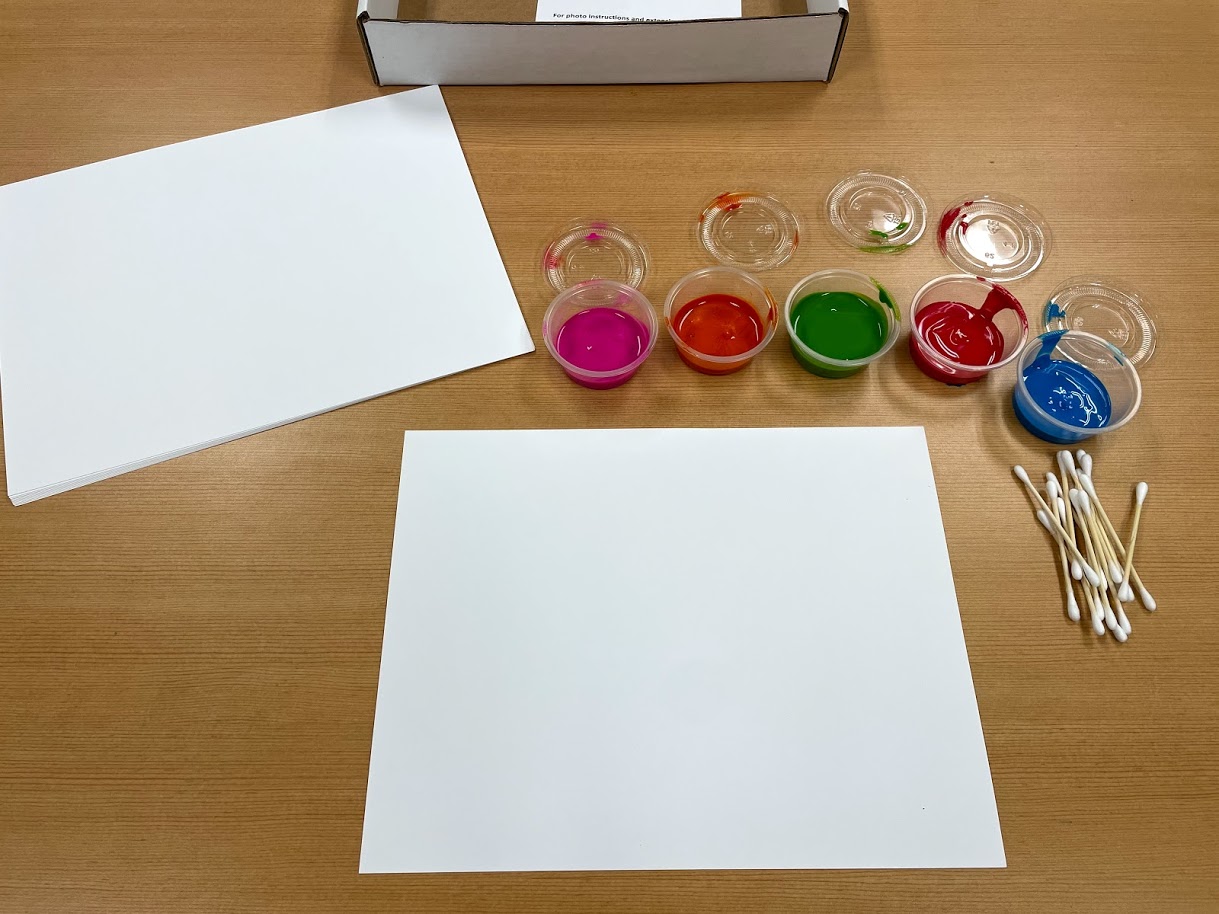
Toddler & PreK: Cotton Swab Painting
Use a cotton swab to dip, dot, and dash paint until your work of art is complete. Register for the August Toddler & PreK Take-and-Make Kit here.
Your kit contains:
- Cardstock
- Cotton swabs
- Five containers of paint
Directions:
1. Take all of your items out of the box.
2. Use a cotton swab to apply paint to a sheet of cardstock.
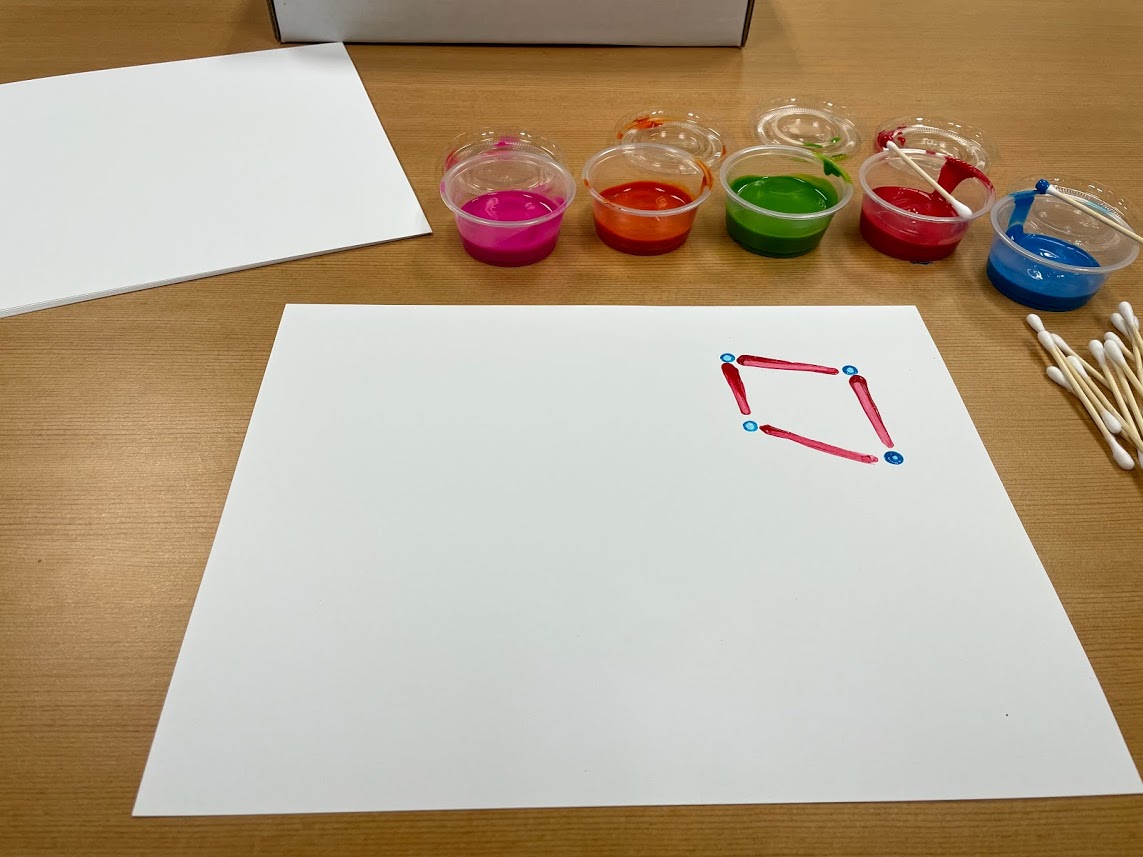
3. Let dry.
4. Enjoy your beautiful masterpiece!
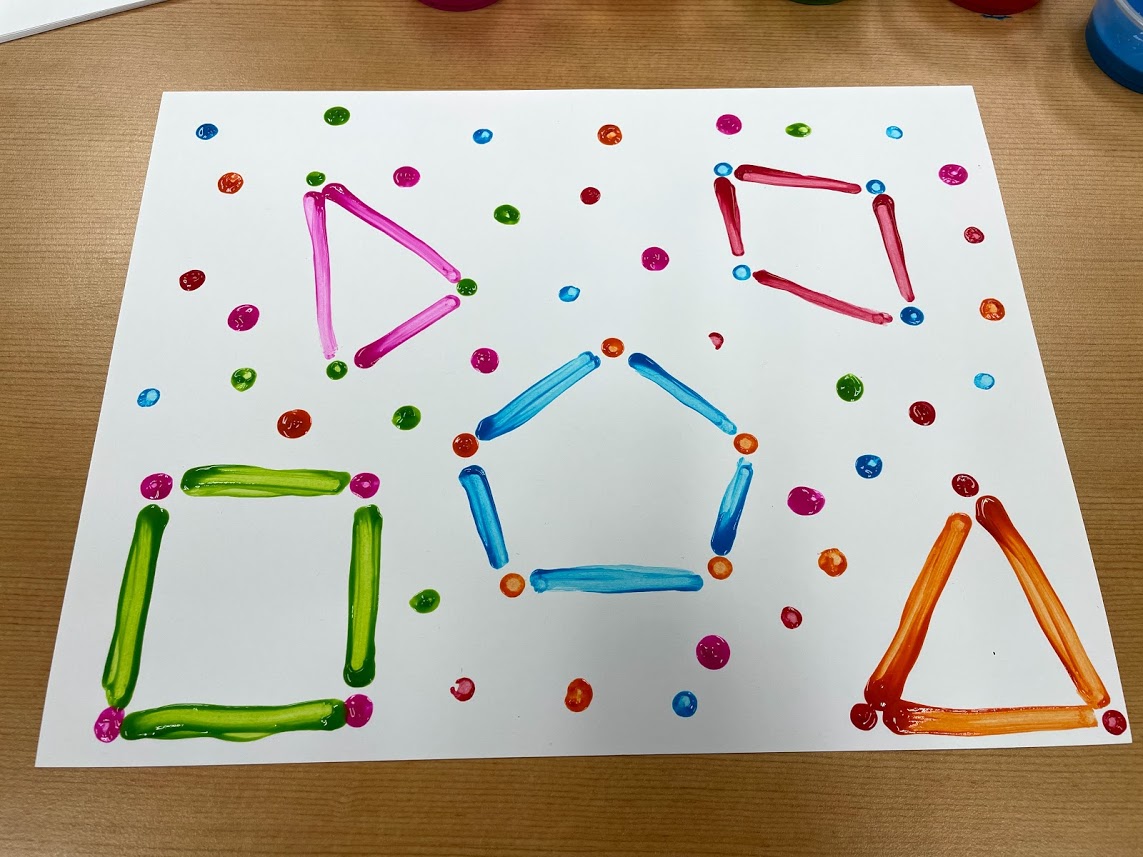
Extension Questions/Discussion
- Talk to your child about the different colors of paint. What are they? Can they be mixed to create new colors? Do you see anything else in the room that is the same color?
- Experiment with different application techniques. Try dotting the paint, or dragging the swab across the paper. Does it feel different? Can you make the same shape, once using dots and once using dashes?
Show us what you created! Send us pictures at youthservices@balibrary.org.
Grades K-2: Shaving Cream Marble Painting
Use shaving cream and paint for a sensory art experience. Register for the August Grades K-2 Take-and-Make Kit here.
Directions:
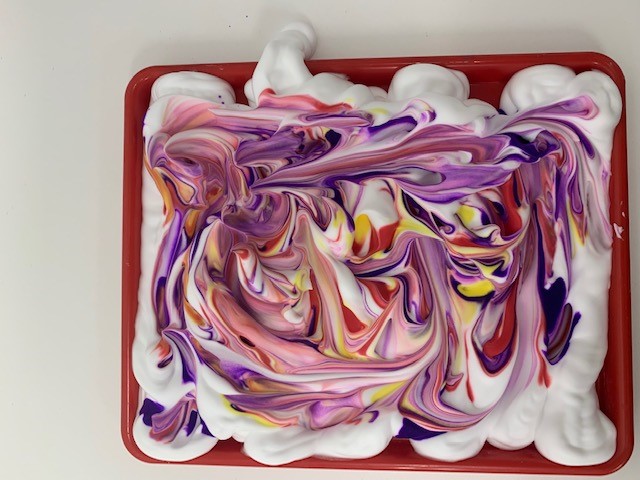
1. Spray a layer of shaving cream into a shallow container or tray.
2. Using the pipettes, drip paint onto the shaving cream.
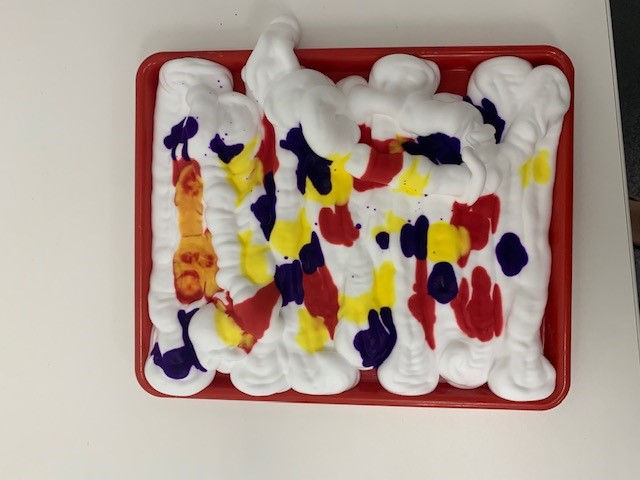
3. Swirl the colors together with a small popsicle stick.
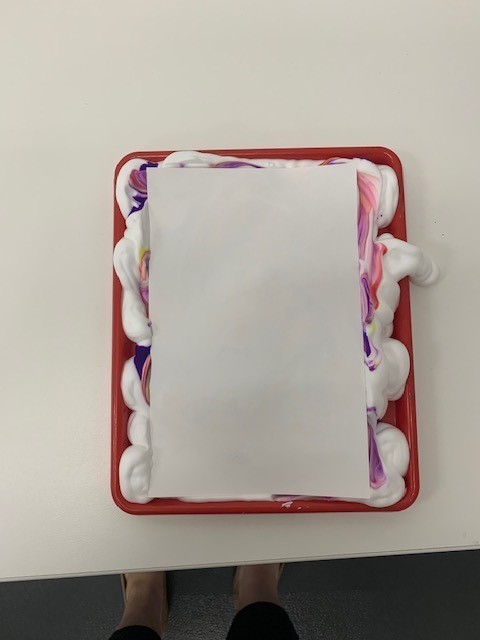
4. Press a piece of paper down onto the top of the shaving cream.
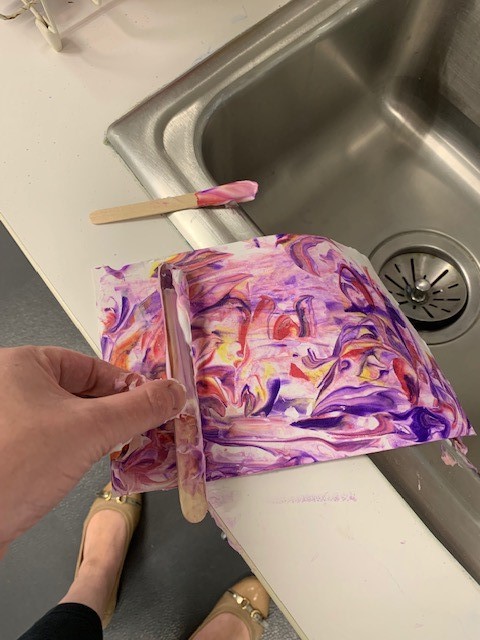
5. Lift paper up and scrape all of the shaving cream off with a large popsicle stick.
6. Repeat! You may not need to add a new layer of shaving cream every time.
Show us what you created! Send us pictures at youthservices@balibrary.org.
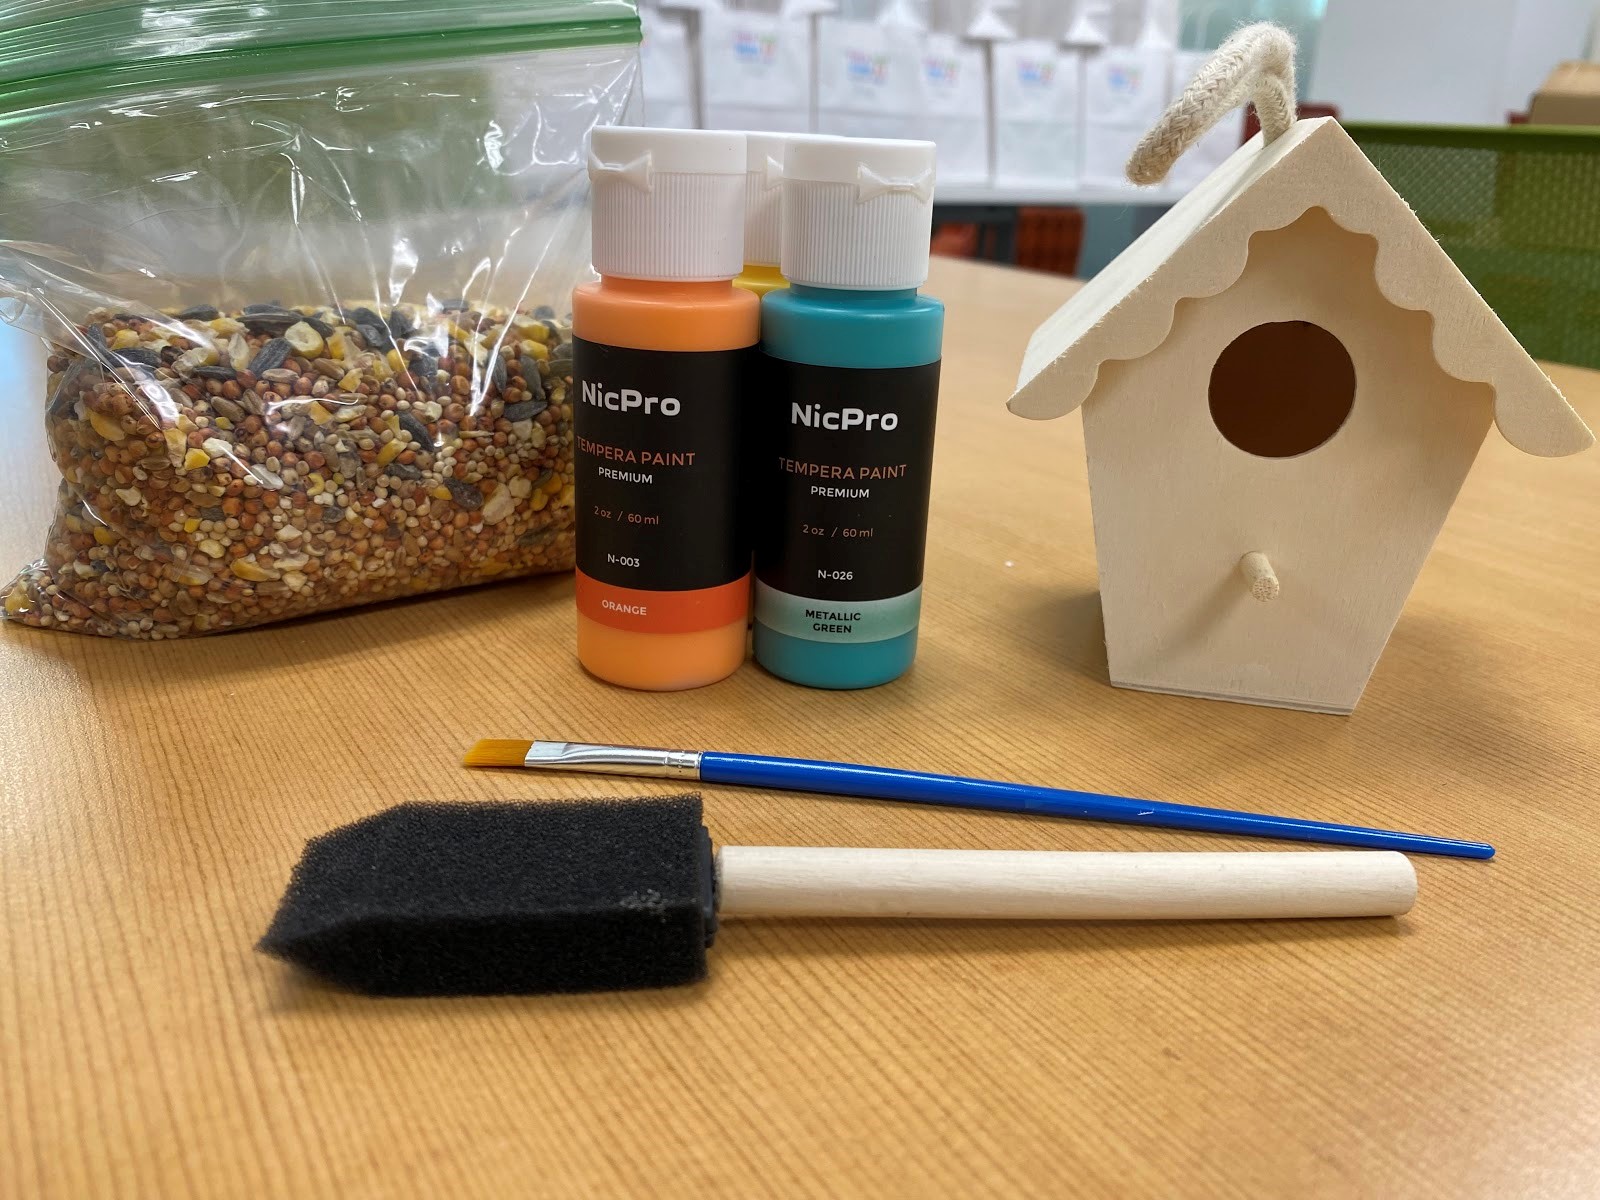
Grades 3-8: Birdhouse Painting
Paint a house for our tiny feathered friends, then fill it with birdseed and display it in your yard. Register for the August Grades 3-8 Take-and-Make Kit here.
Allergy Warning: The Birdseed in this kit is manufactured in a facility that handles major allergens including peanuts, tree nuts, wheat, fish, and soy products. Therefore this product may contain such allergens.
Your kit contains:
- 1 wooden birdhouse
- 3 bottles of acrylic paint
- 1 foam paintbrush
- 1 nylon hair paintbrush
- 1 bag of birdseed
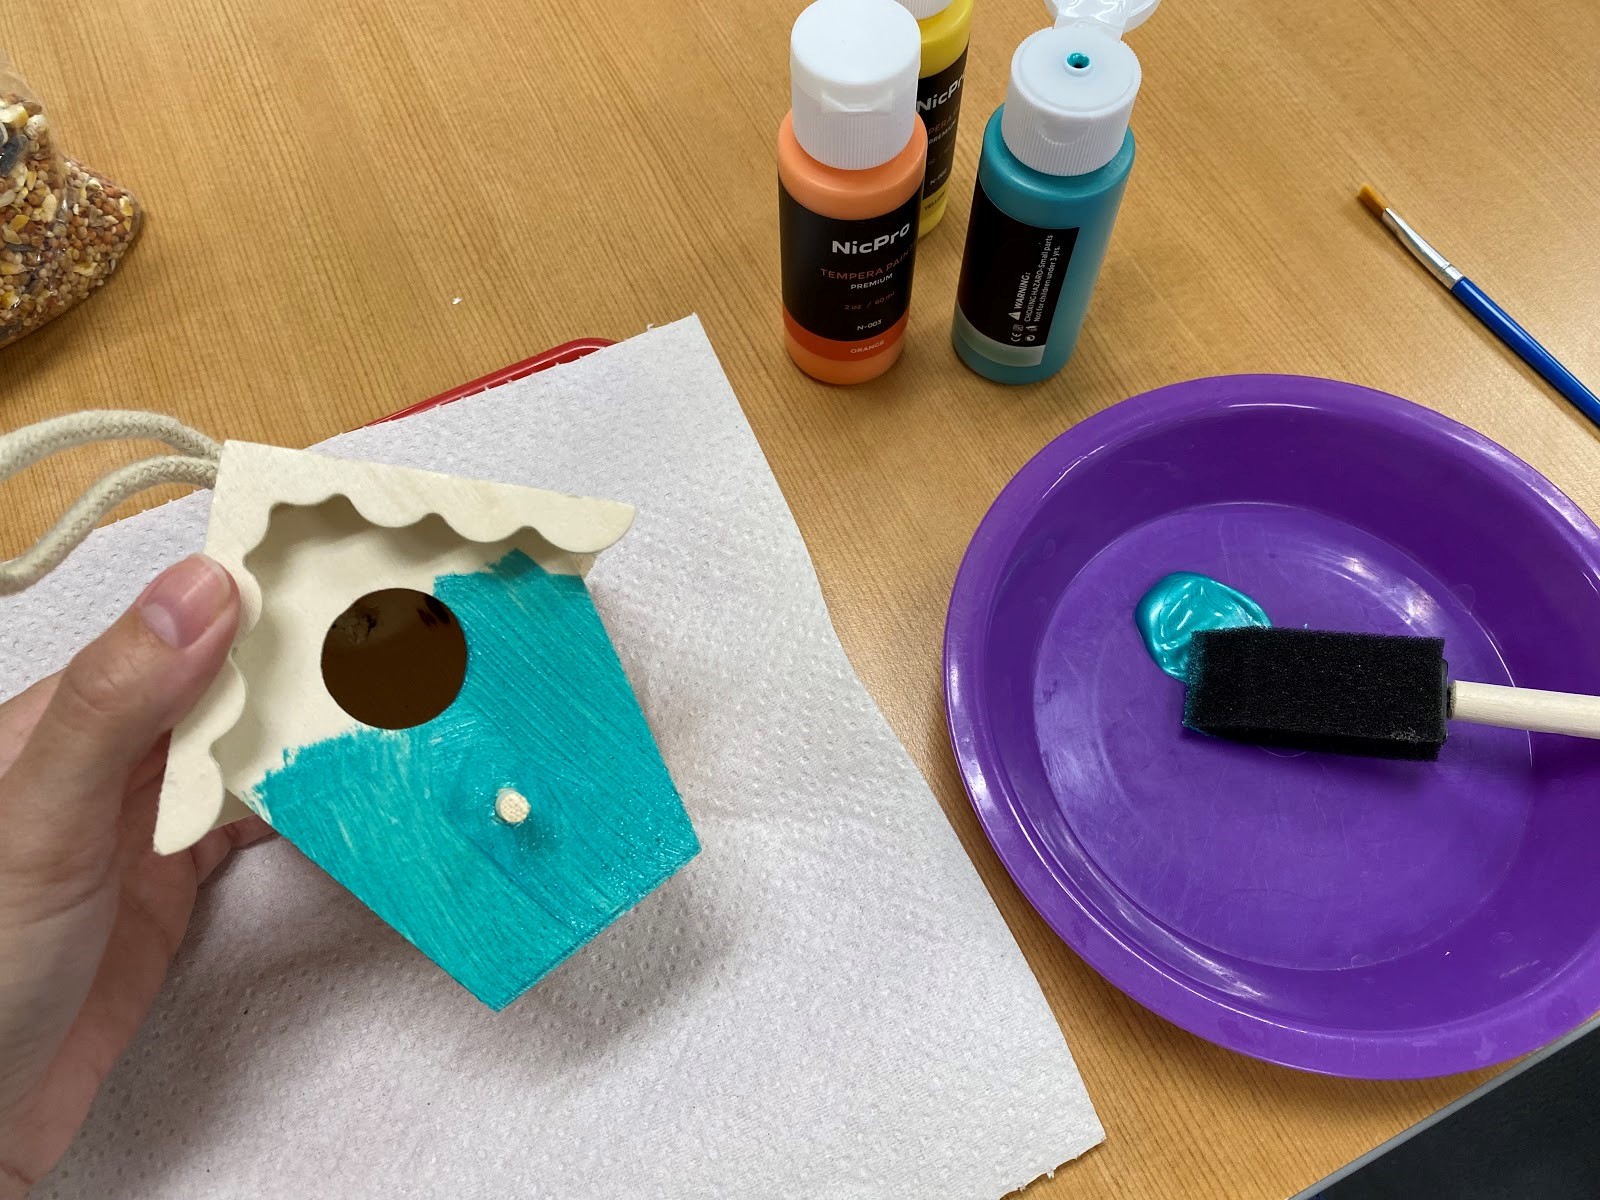
Directions:
1. Find a good spot where you can get a little messy while painting your birdhouse.
2. Spend some time thinking about how you’d like to design your birdhouse.
3. Start painting! There’s no wrong or right way to paint your birdhouse. The foam brush will work well painting a larger surface, while the nylon hair brush will help you to paint smaller details, like a flower or sun.
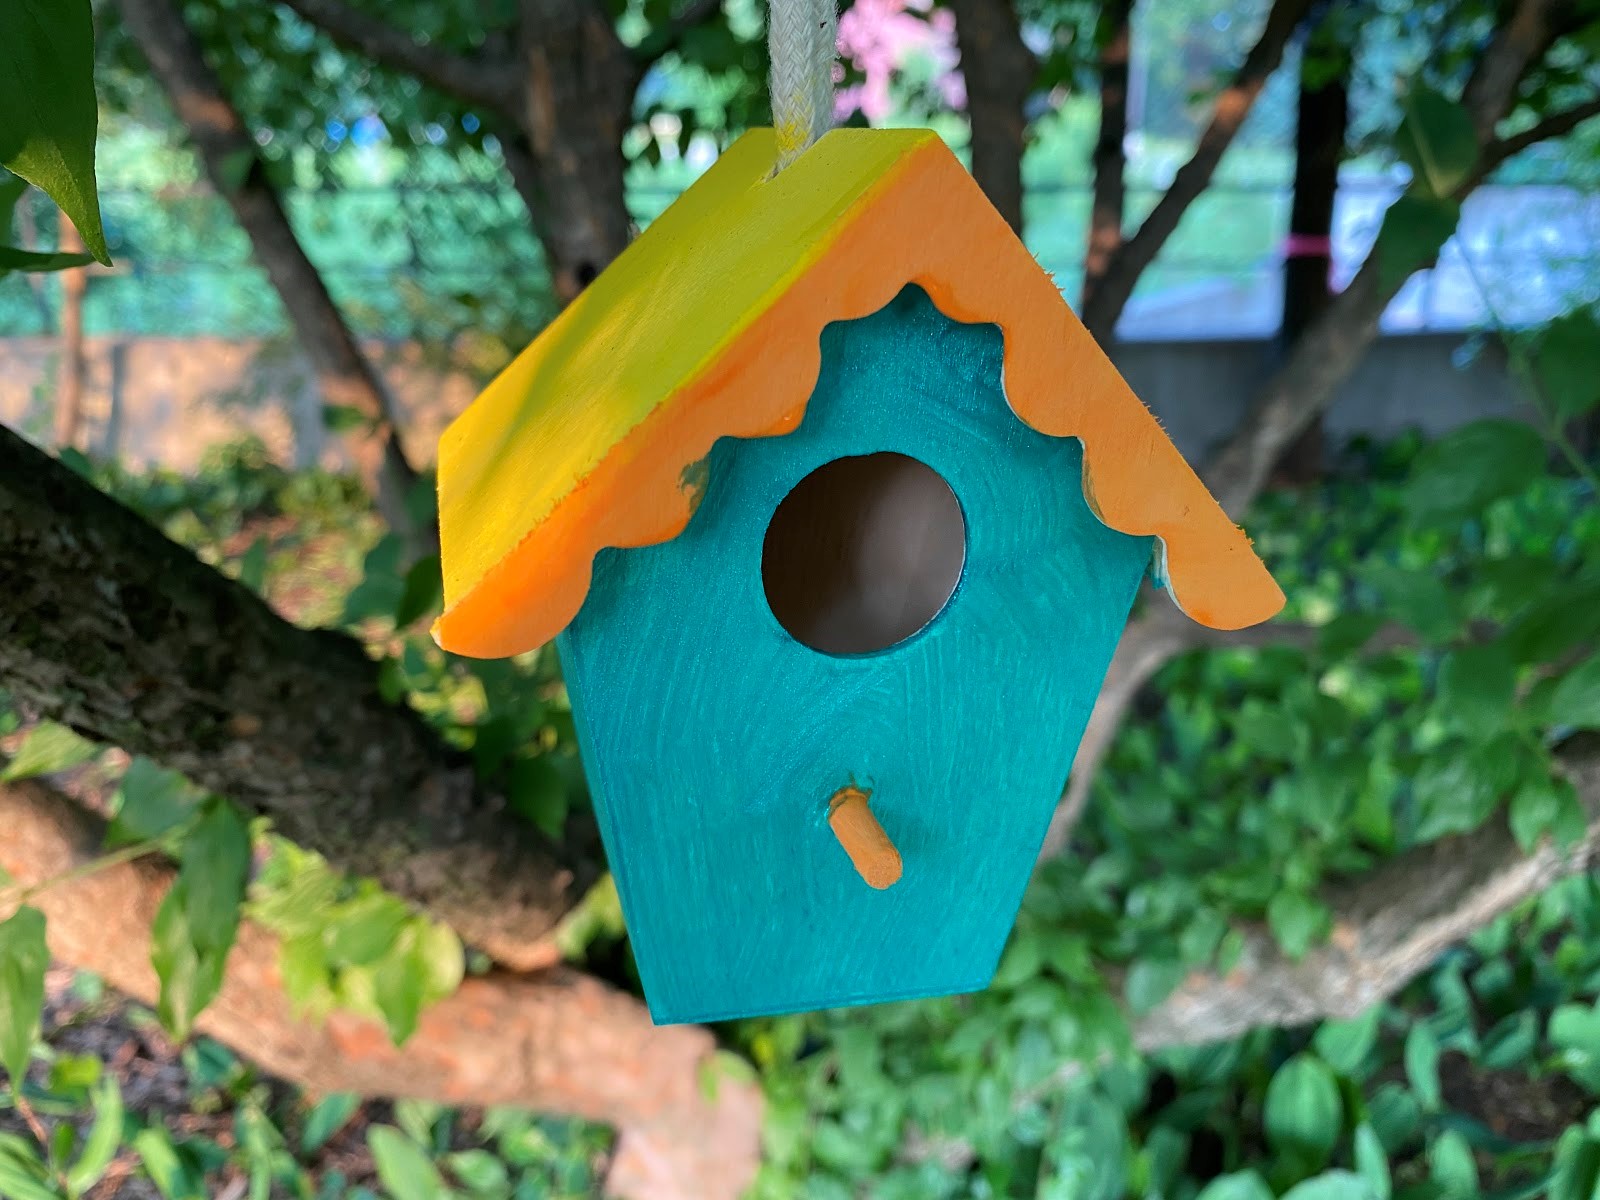
4. Once you’ve finished painting, let your birdhouse dry overnight.
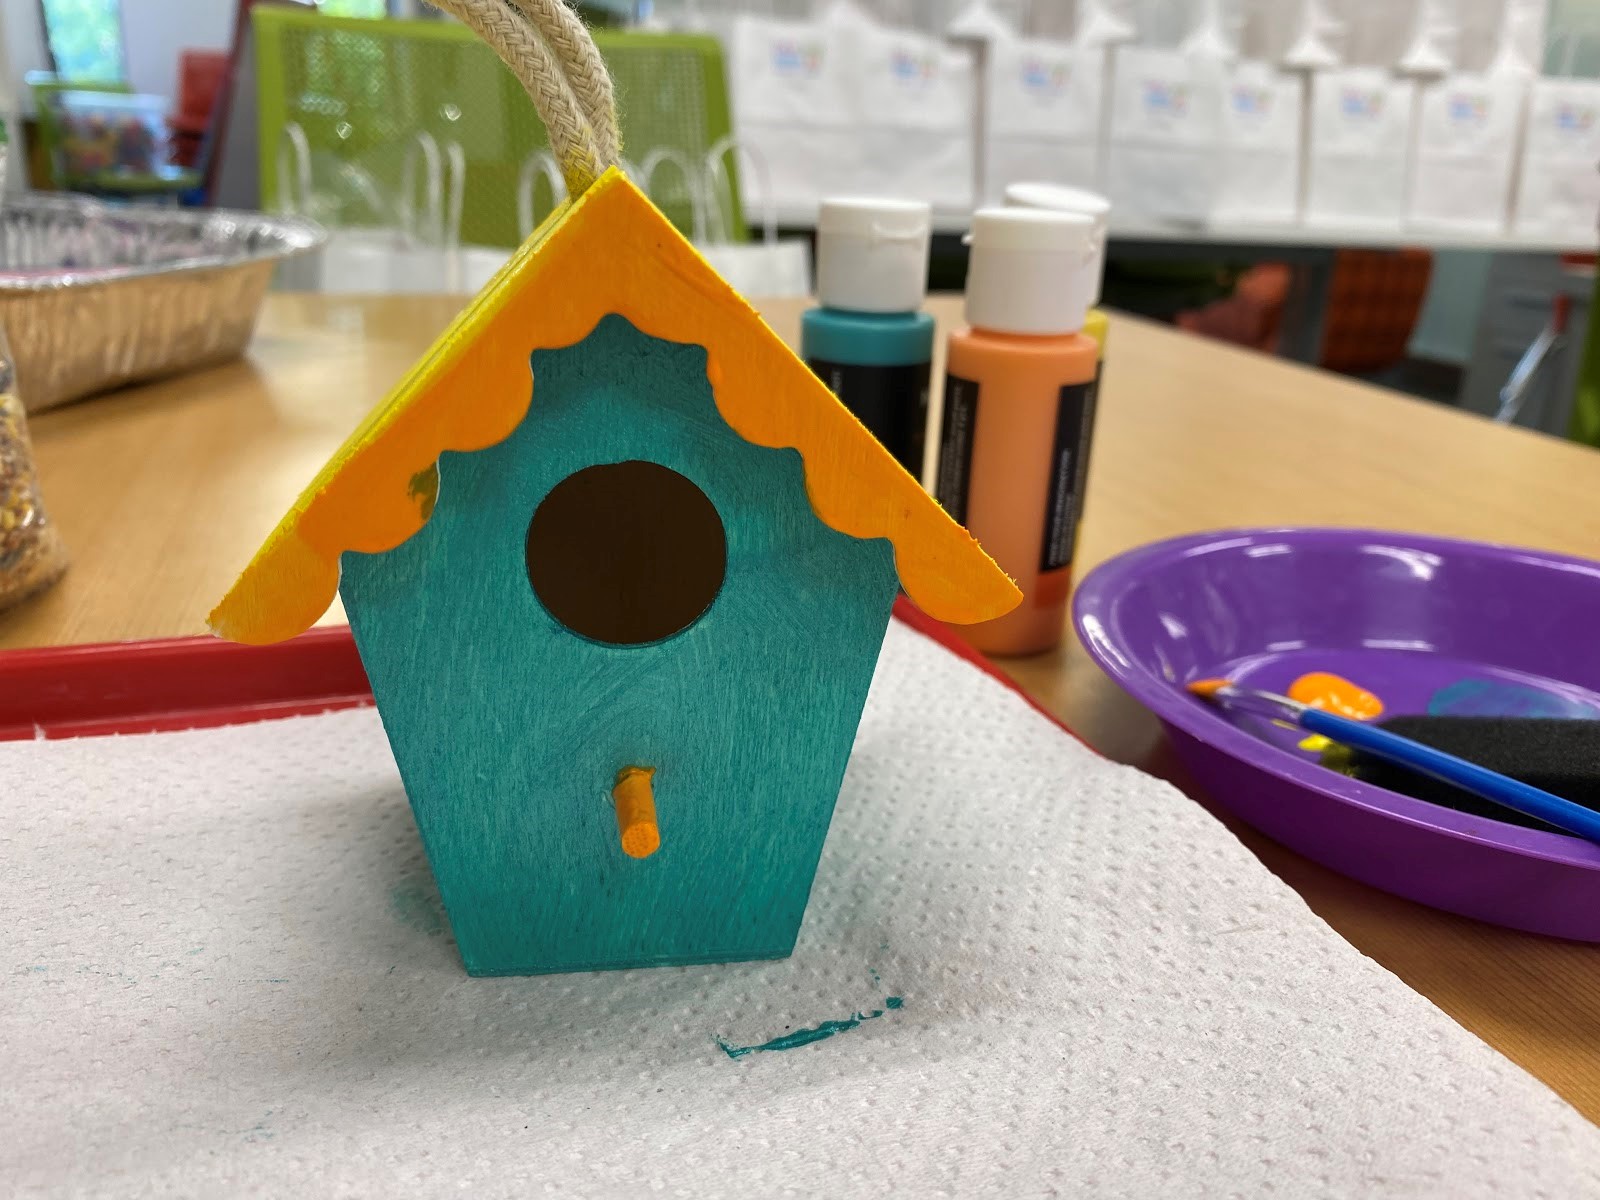
5. Scoop some bird seed into your birdhouse, and find a good place to hang it outside.
6. Now you can admire the beauty of your birdhouse, while also doing some backyard birdwatching!
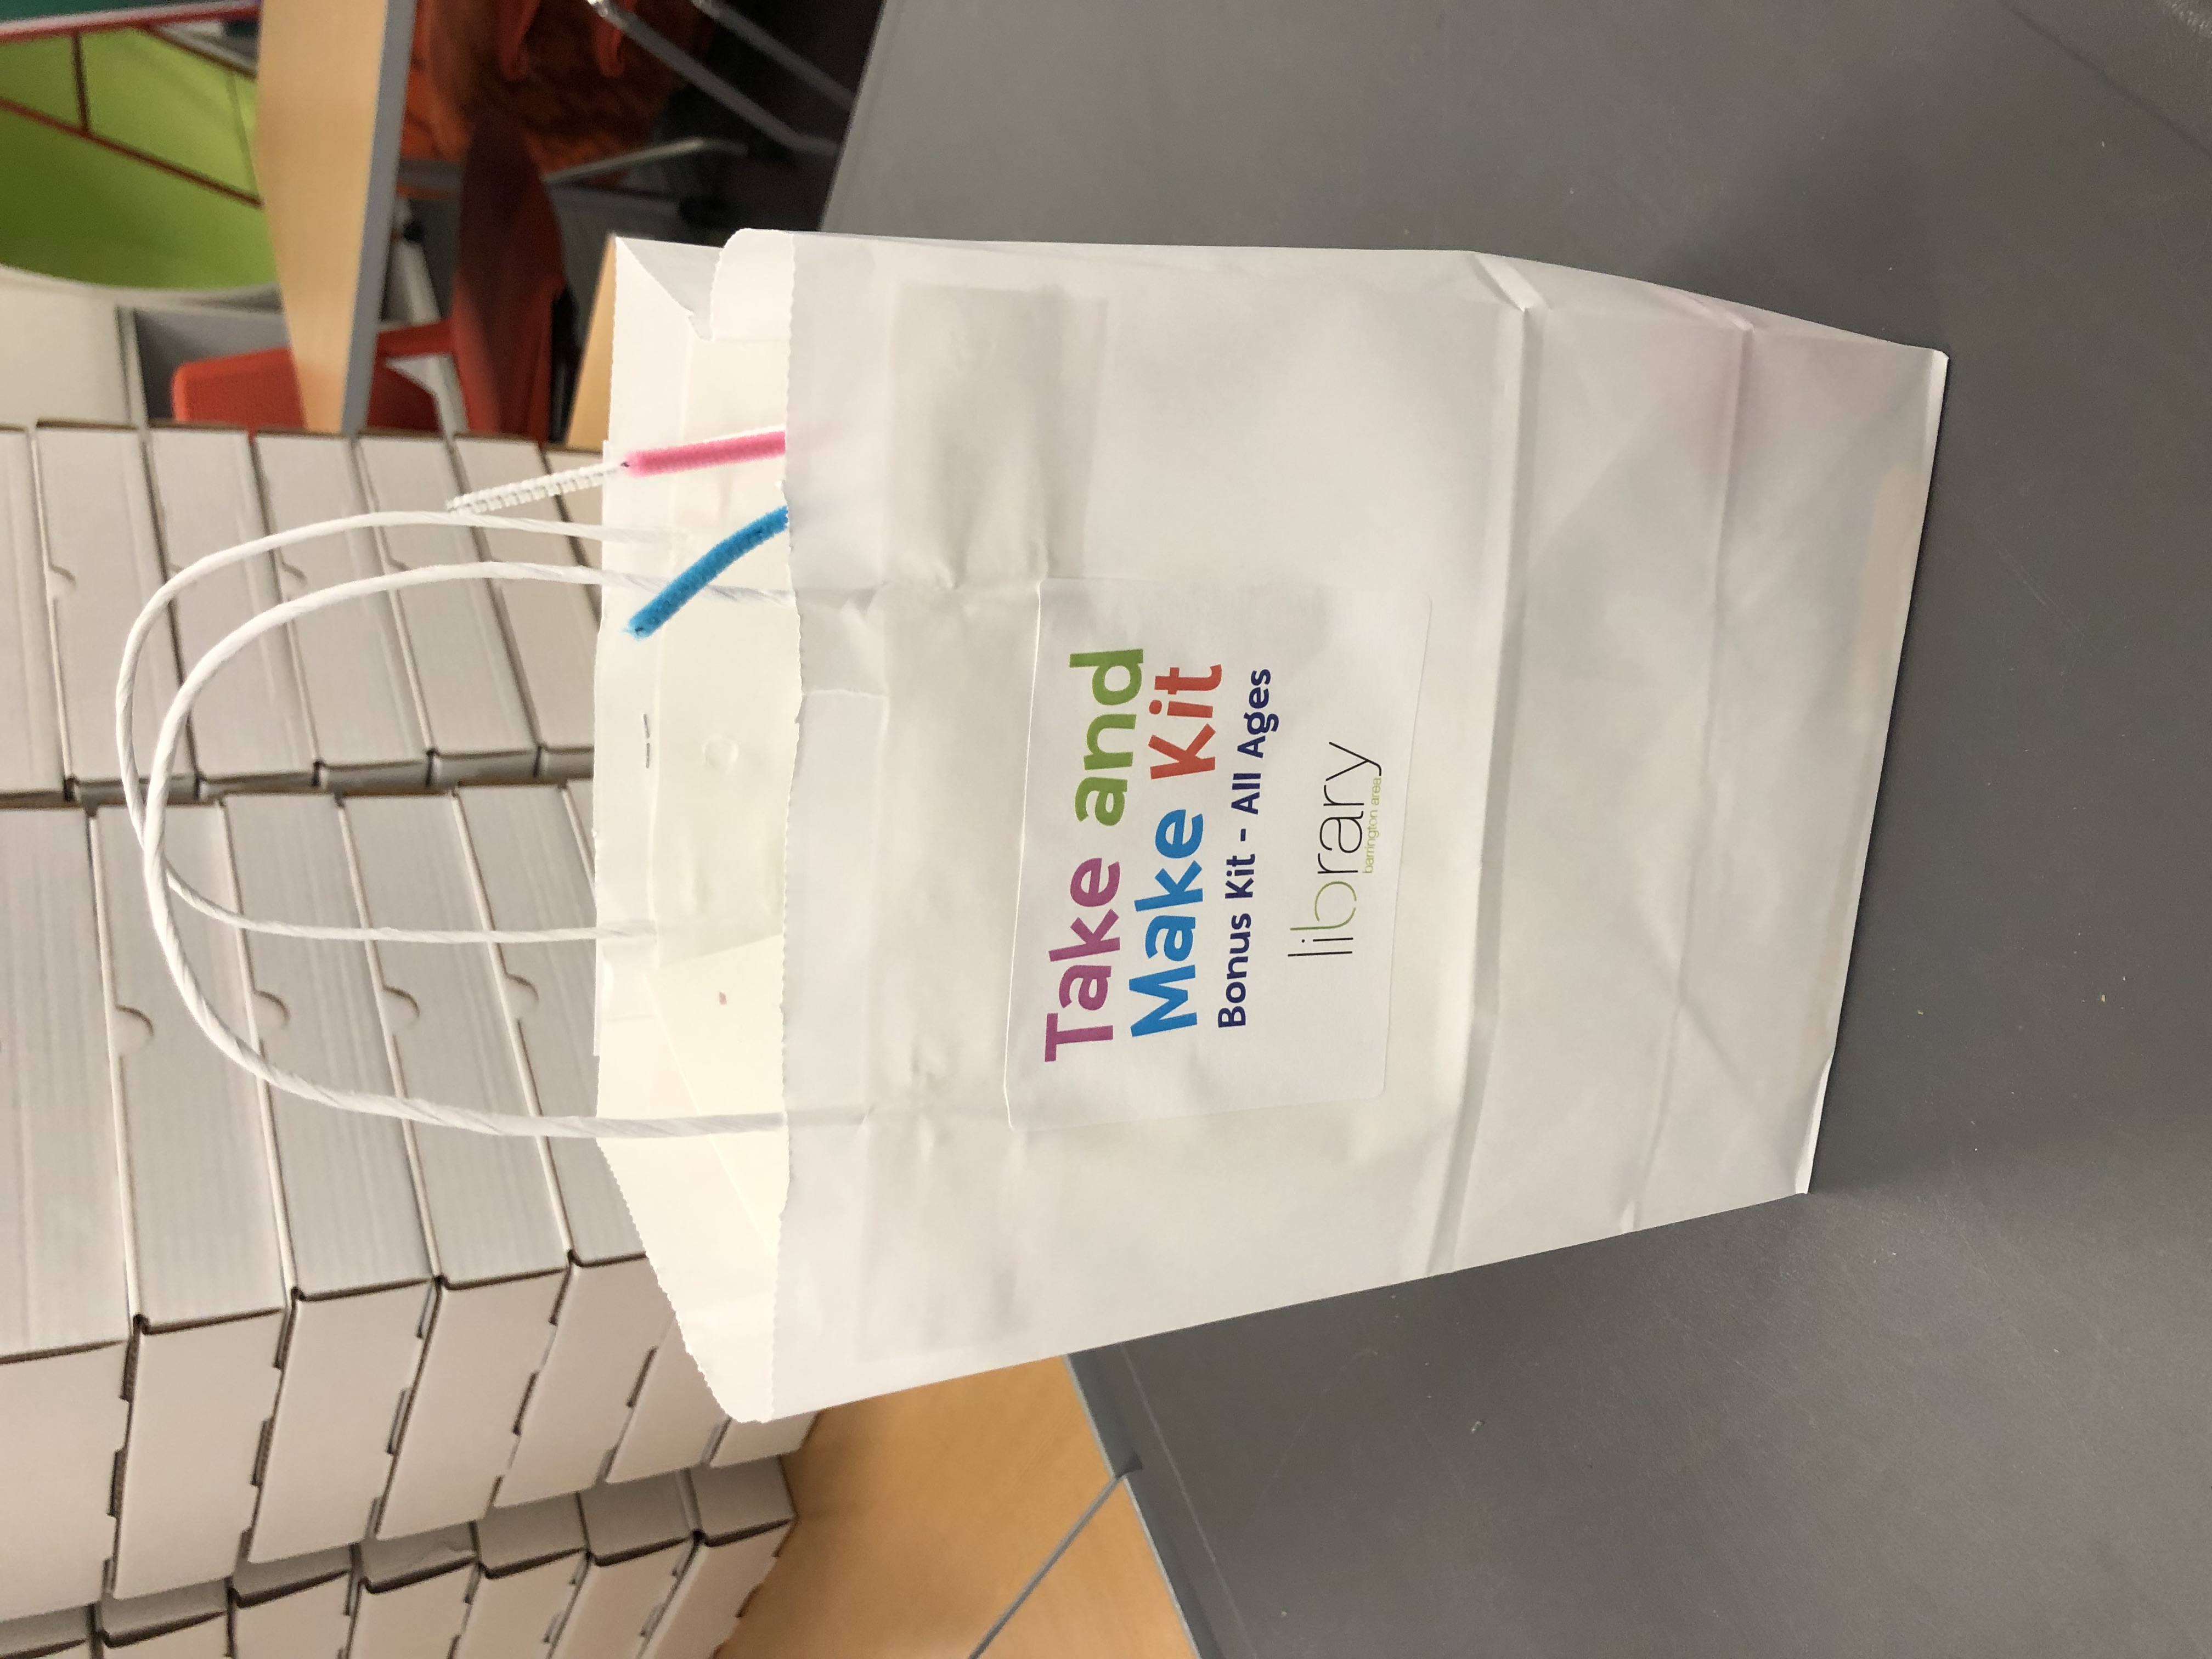
Bonus! All Ages Kit: Summer Reading Badge Display
Create a place to display and admire all of the badges you worked so hard to earn during Summer Reading. Register for the Bonus! All Ages Take-and-Make Kit here.
Show us what you created! Send us pictures at youthservices@balibrary.org.
Youth Services Assistant Librarian Alyssa -
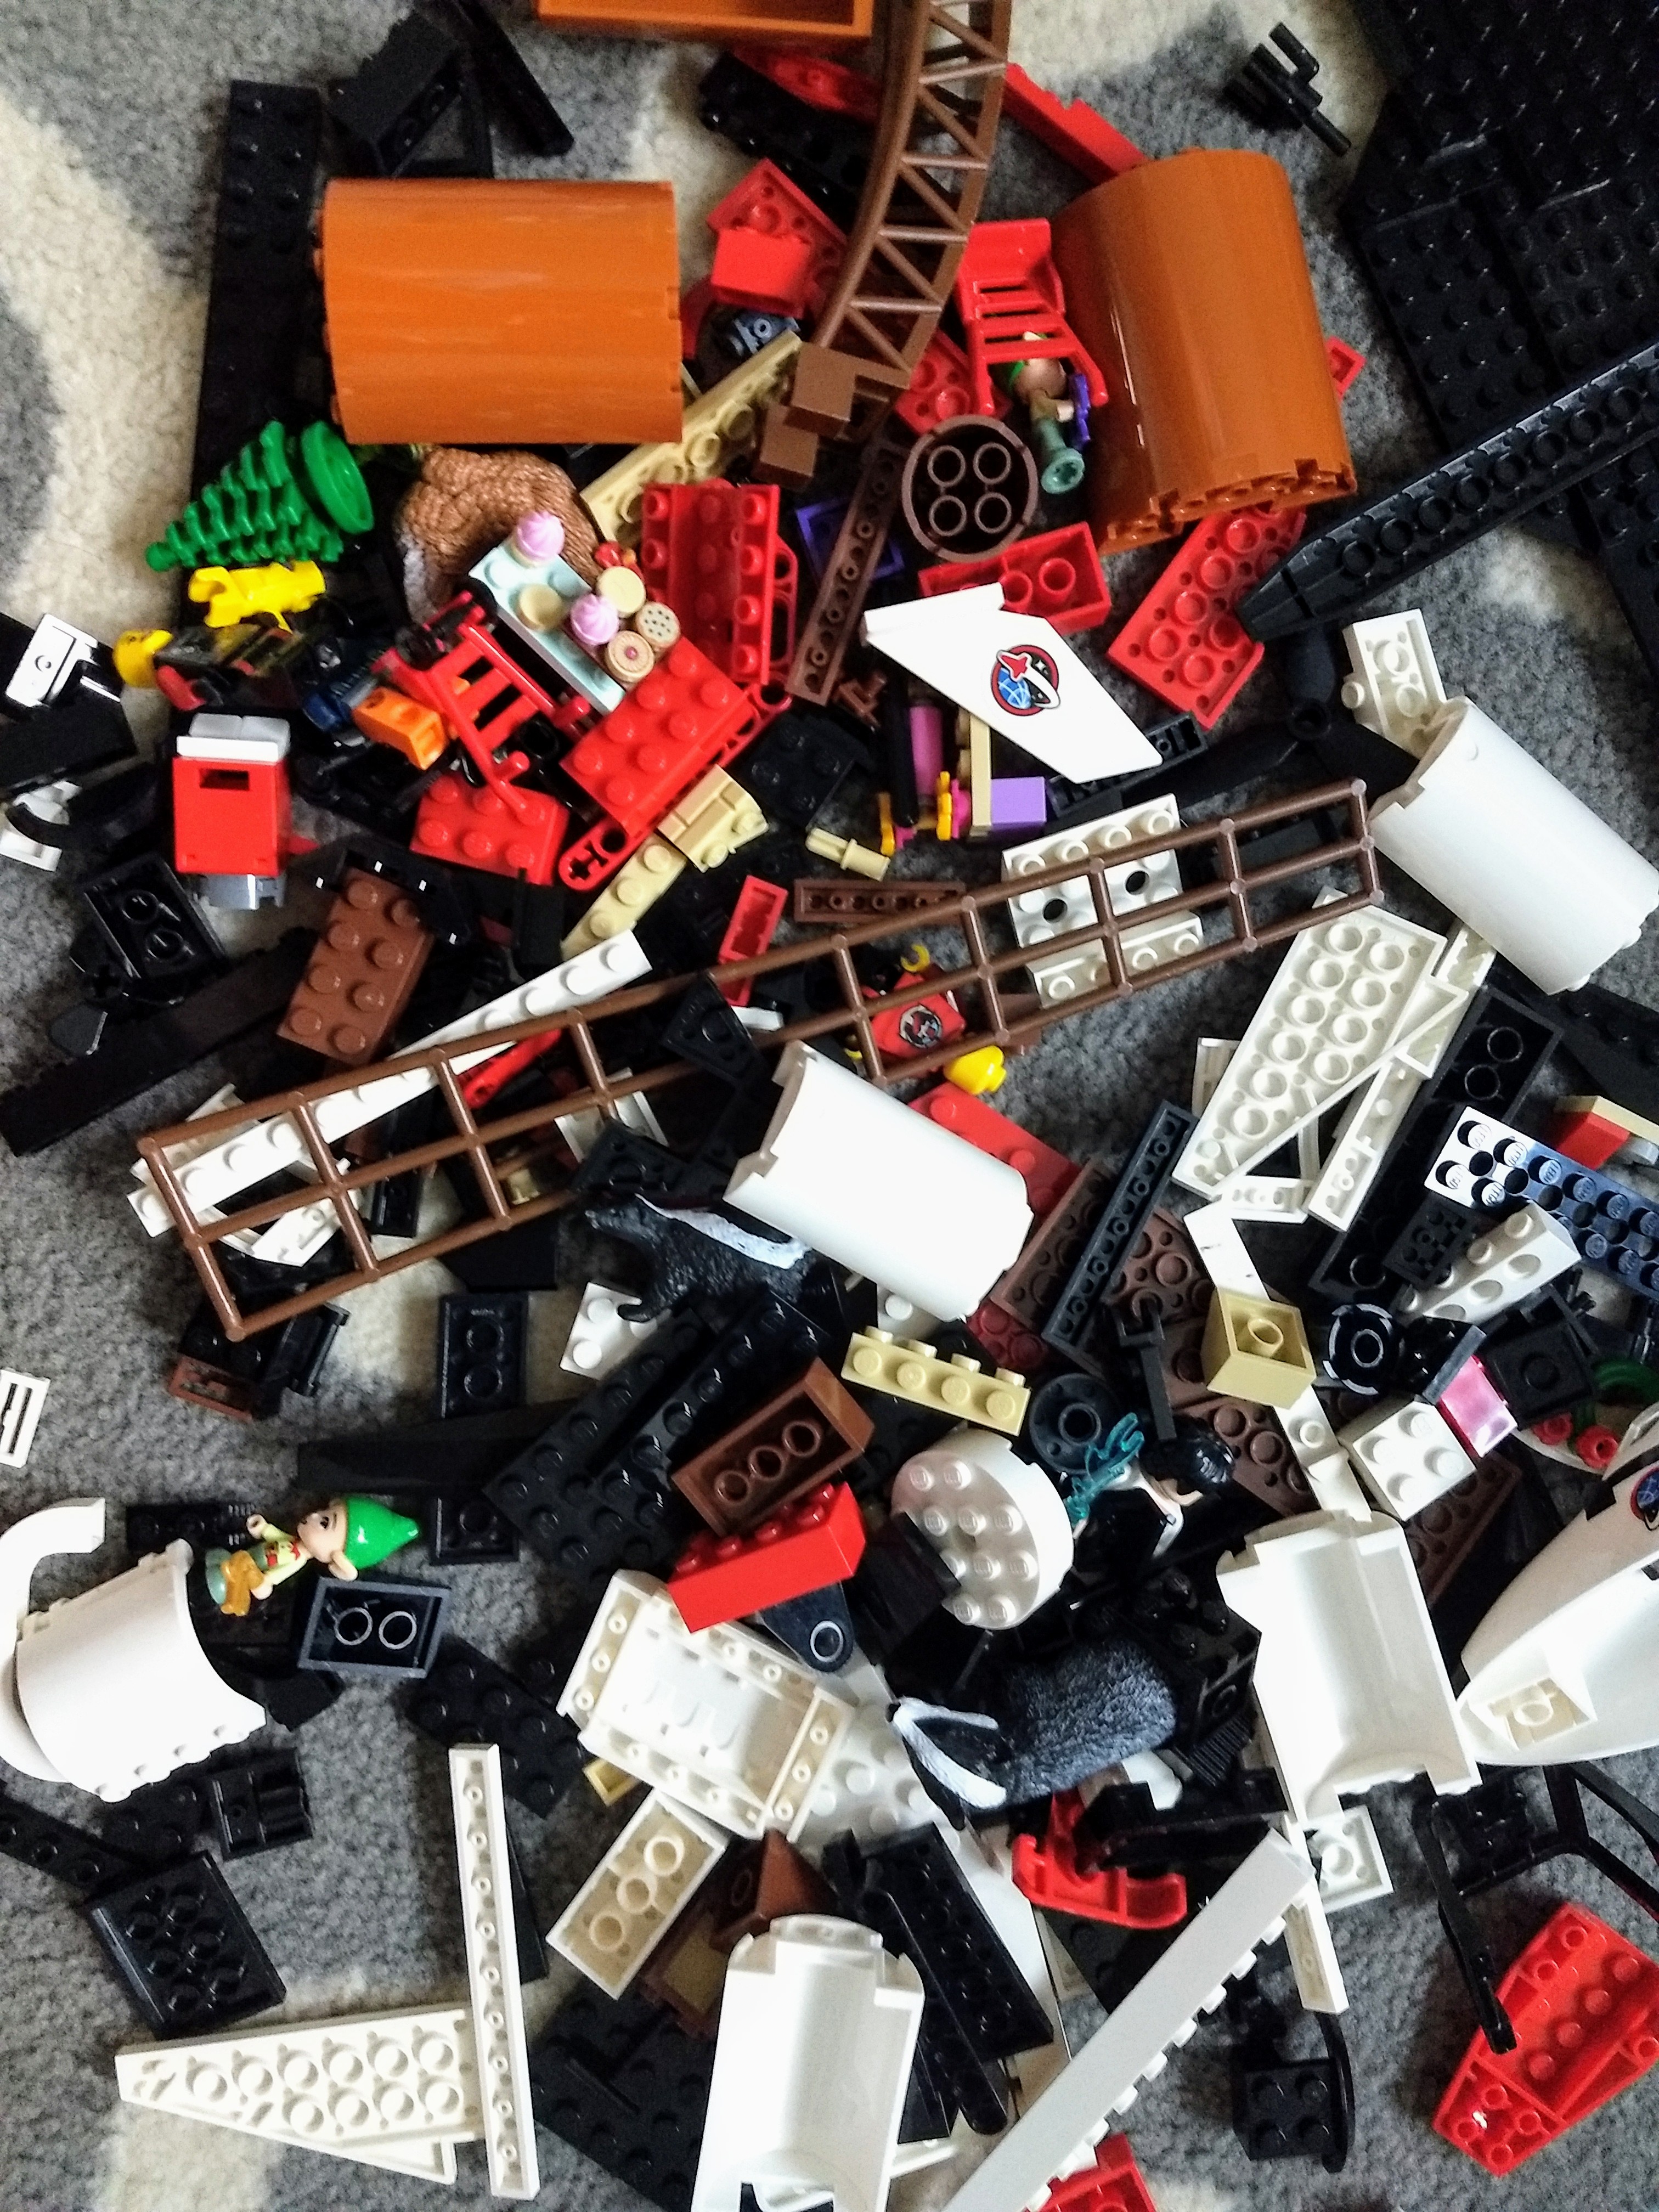
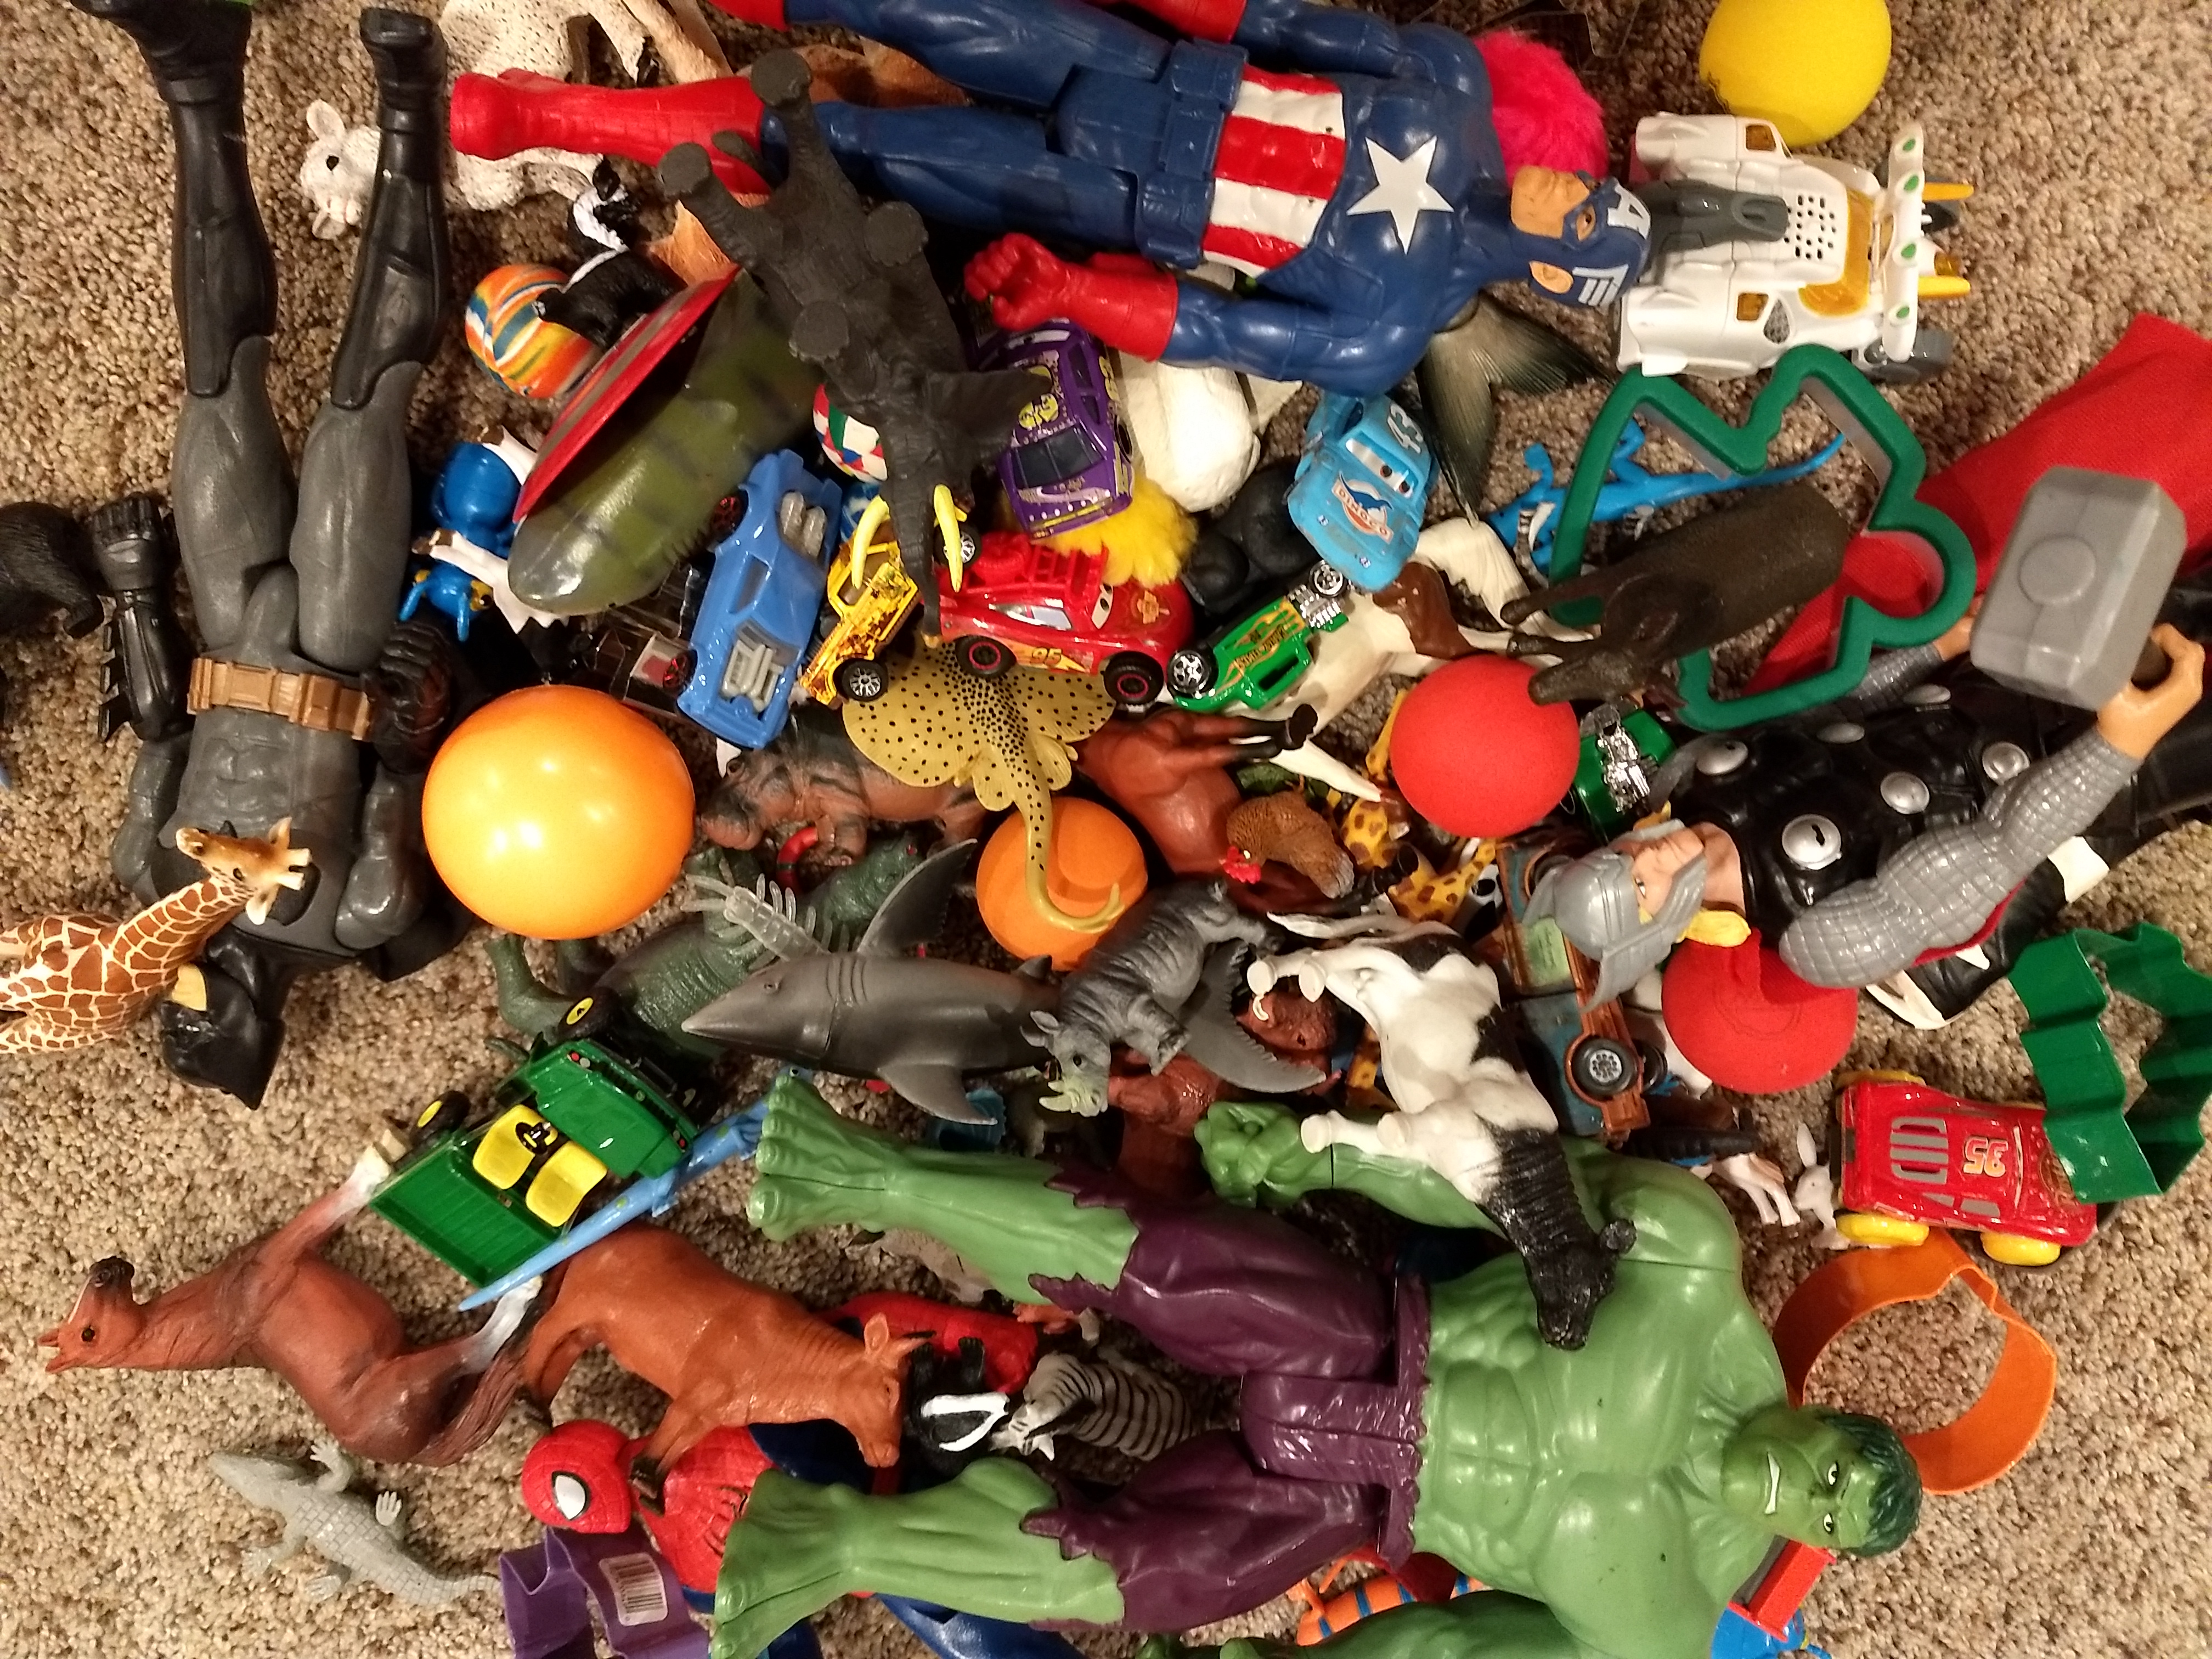
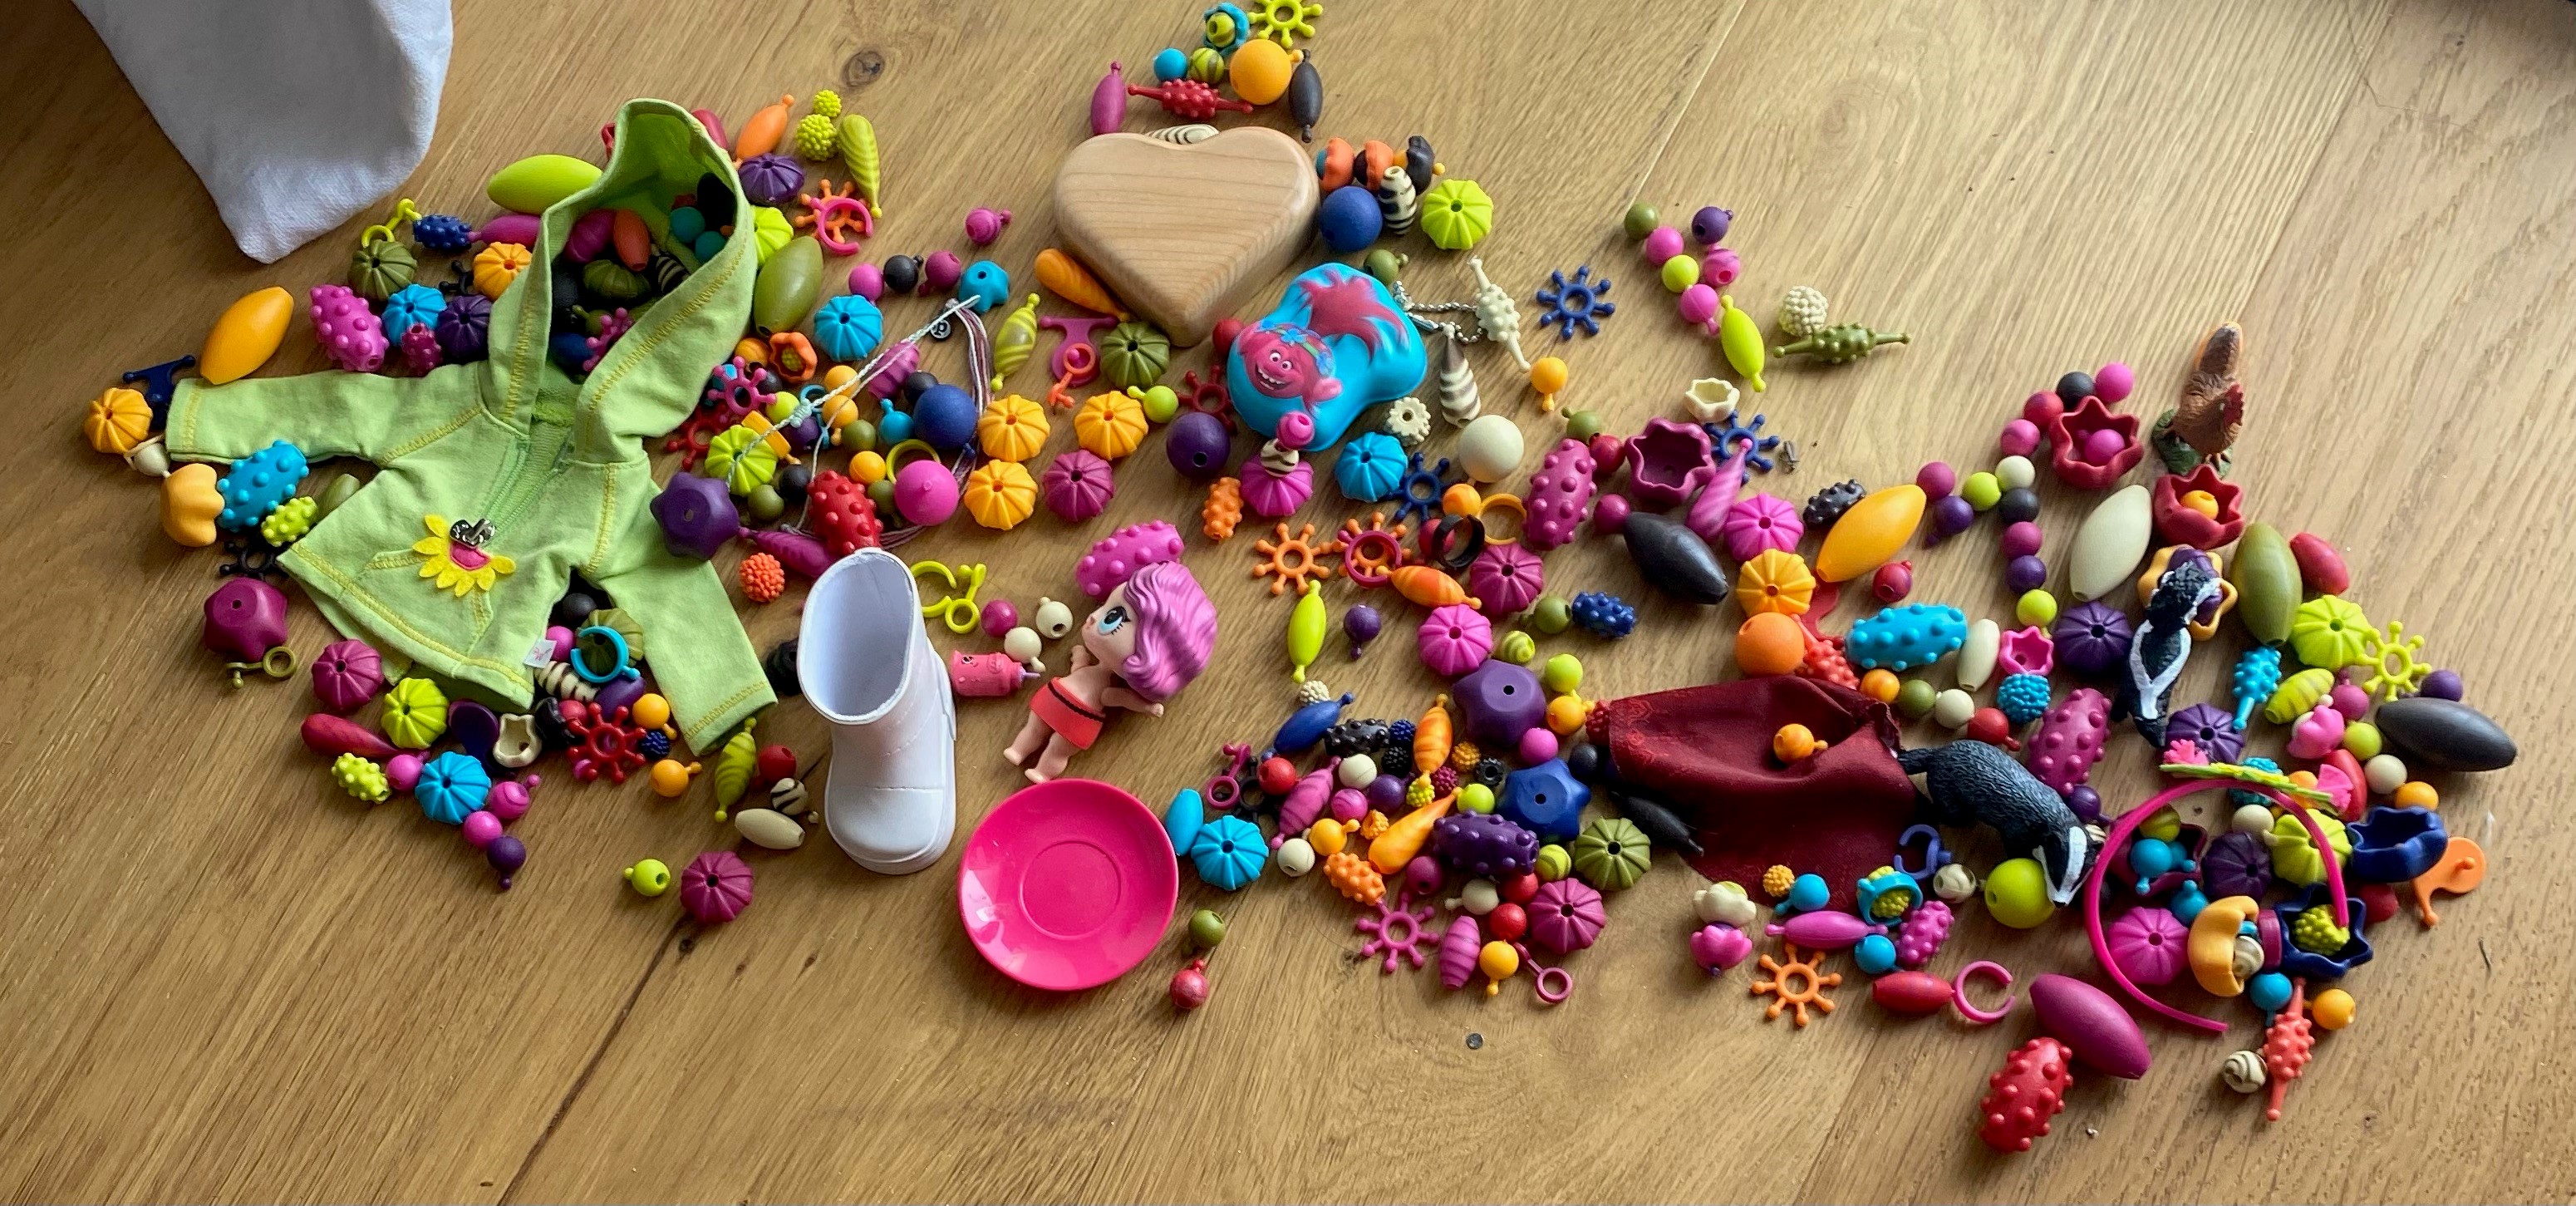
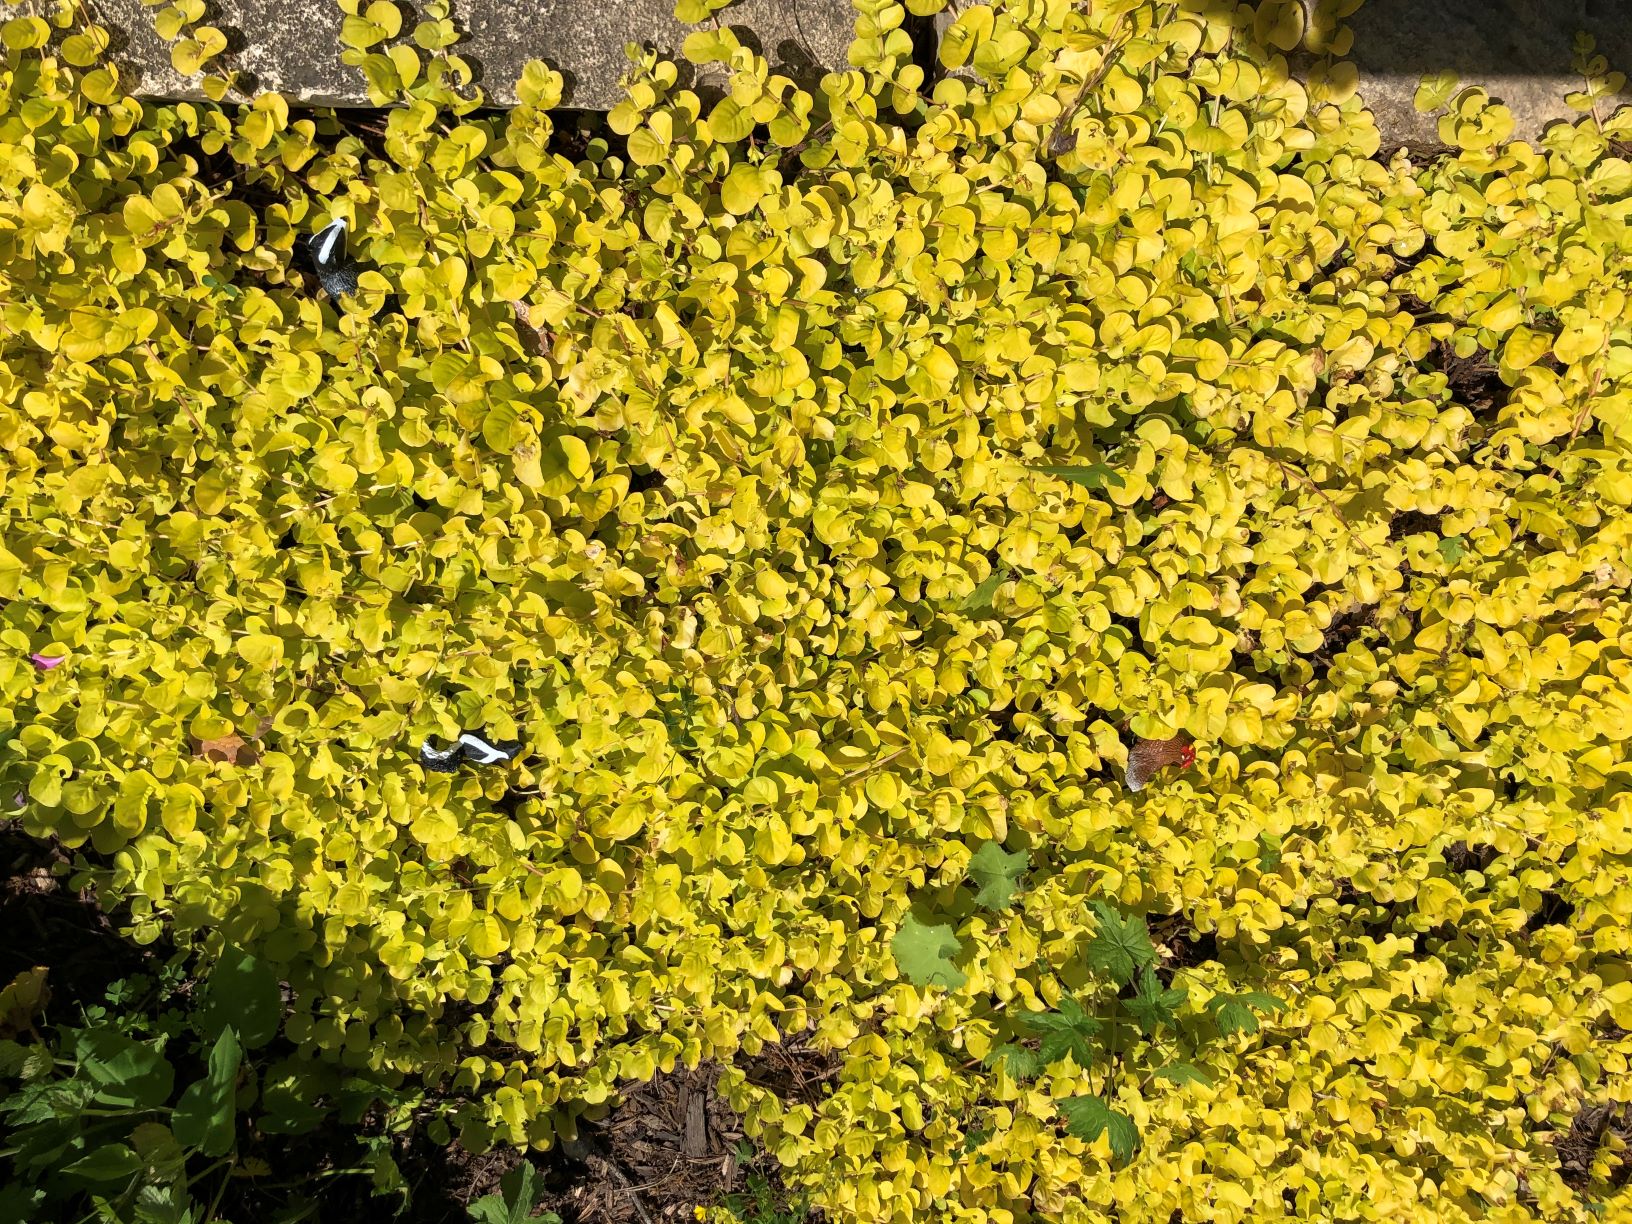
Seek-and-Find Photos from Kids
Thank you to everyone who has checked out a DIY Seek-and-Find Photography Kit, inspired by our Book of the Summer, Skunk and Badgerby Amy Timberlake. Here are some photos you all captured and shared. See if you can find Skunk, Badger, and one little chicken in each of these kid-created tableaus!
From Cooper:
From Duncan:
From Lyla:
From Molly and Maddy:
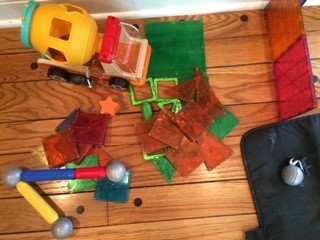
Find activity ideas, discussion questions, and booklists on ourwebpage all about Skunk and Badger. You can also earn the Book of the Summer badge in ourSummer Reading program!
Youth Services Librarian Allison -
Teaching Garden Opening
The Library's new Teaching Garden is now officially open. To celebrate, we created a special kit that was given away at the grand opening. We still have plenty left, and can be picked up at the Youth Services desk as a first come first served basis. The kit is a build your own bird feeder, that includes instructions on how to make them. Adult Services will also have a kit available in the Atrium of the library for adults.
Allergy Warning:The Birdseed in this kit is manufactured in a facility that handles major allergens including peanuts, tree nuts, wheat, fish, and soy products. Therefore this product may contain such allergens. Wash hands after handling birdseed.
Video Instructions for the Cookie Cutter Bird Feeder:
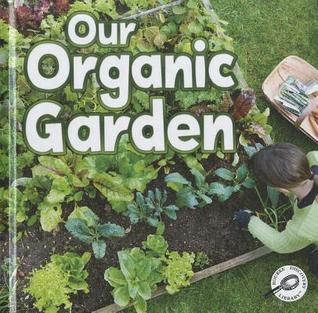
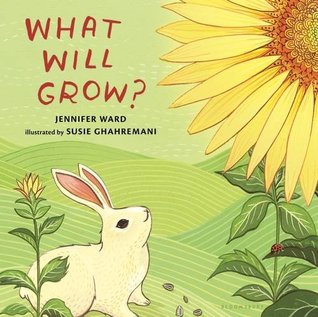
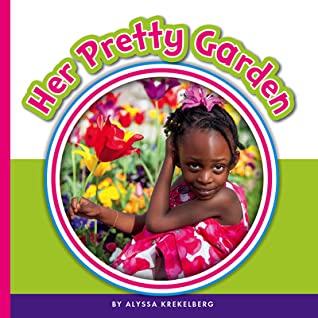
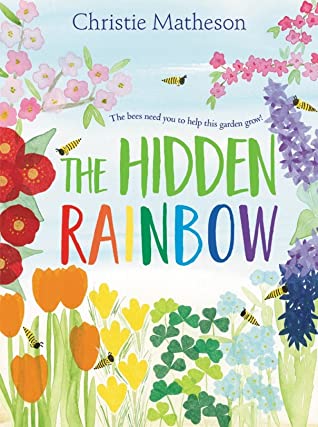
Inspired to learn more about gardening? Check out these gardening books available to check out from the library.
Looking for more recommendations? Fill out our form to get a custom list of reads or a Book Bundle for pickup.
 Youth Services Specialists MaryJo
 -
July Take-and-Make Kits
Bring home a fun new project! Sign up from our Library Calendar and pick up a kit at the Youth Services desk or through our Parking Lot Pickup service between July 12-23.
Toddler & PreK: Tape Resist Art
Use tape to create shapes on your canvas. Paint over it, then remove the tape to reveal your masterpiece. Register for the July Toddler & PreK Take-and-Make Kit here.
Your kit contains:
- one canvas
- one paint brush
- one roll of masking tape
- three containers of paint
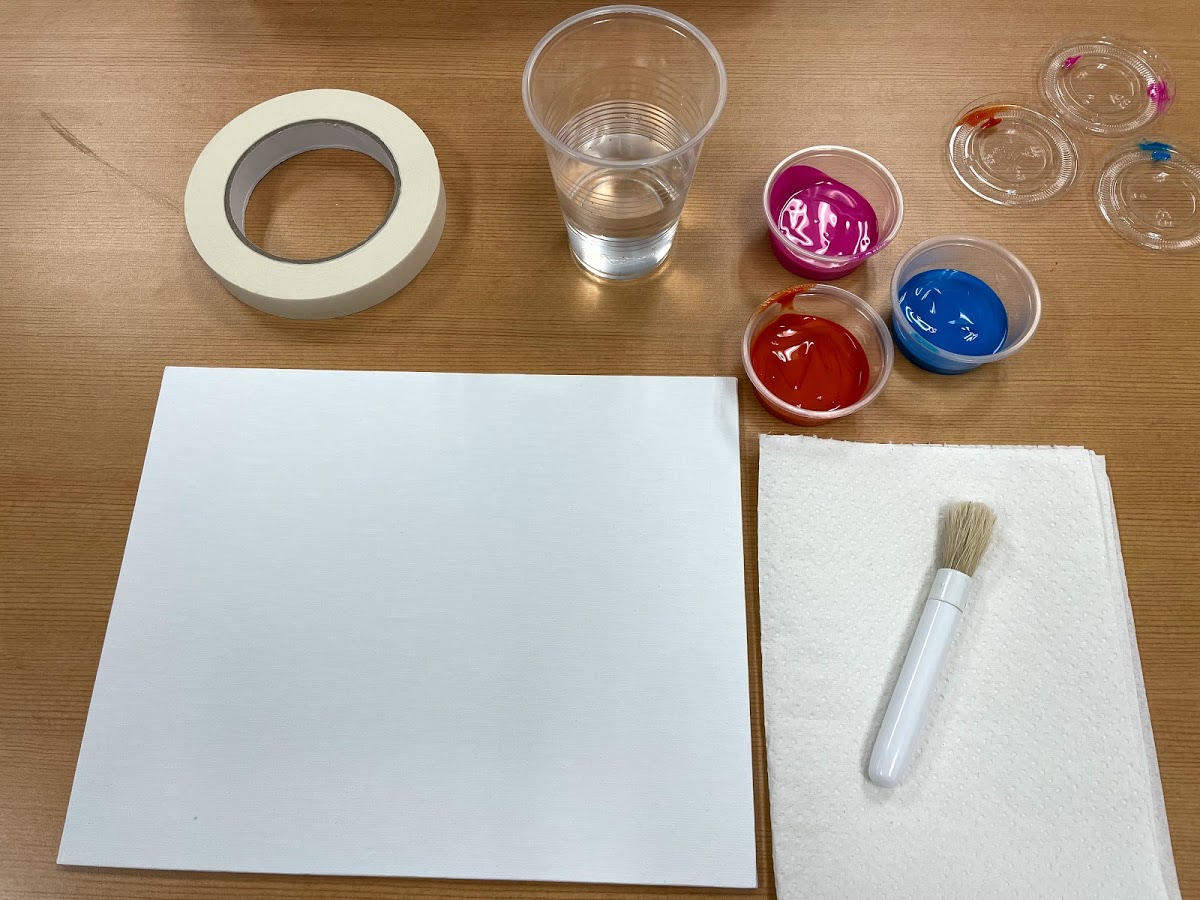
You may also need a cup of water to rinse your brush and paper towels to wipe the brush off between colors.
Directions:
1. Take all of your items out of the box.
2. Remove the plastic from the canvas.
3. Create a shape, letter, or design of your choice with the masking tape on the canvas.
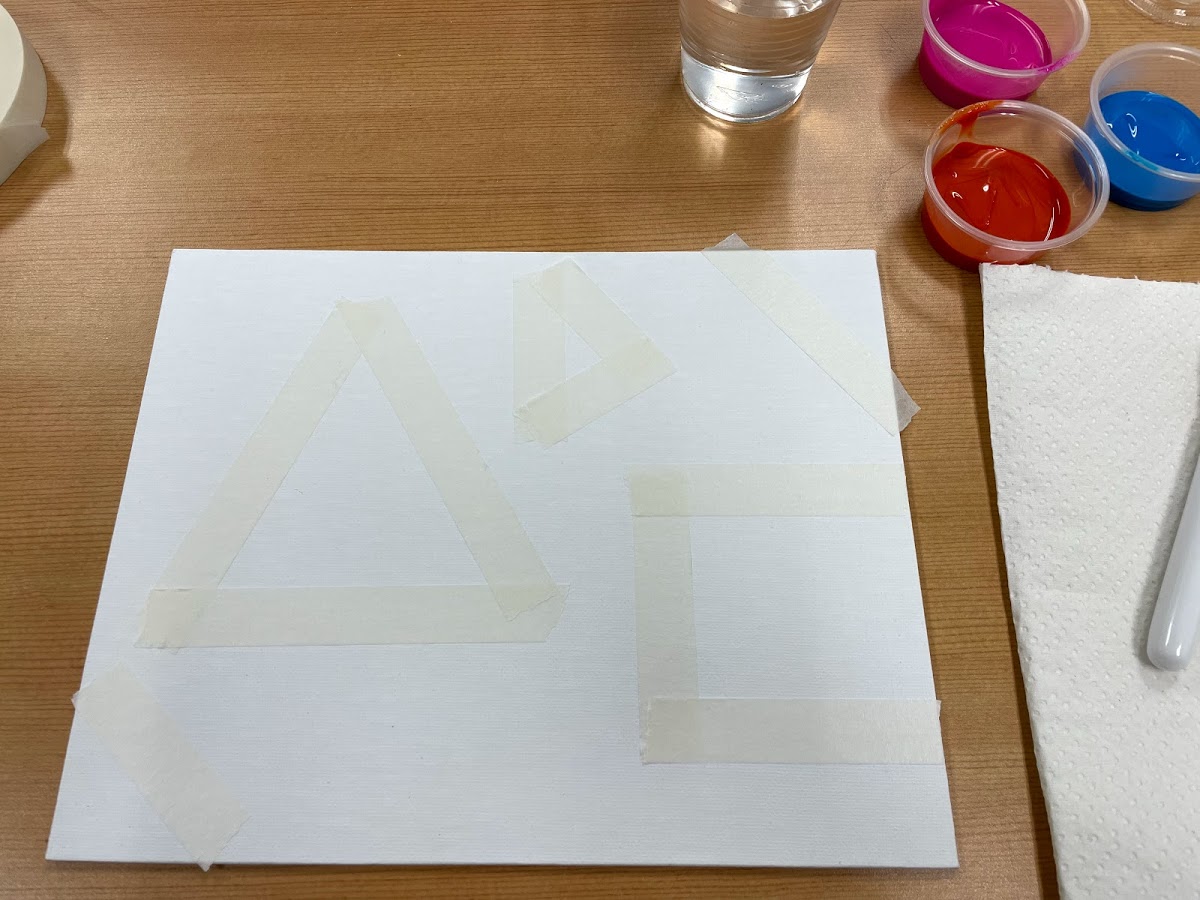
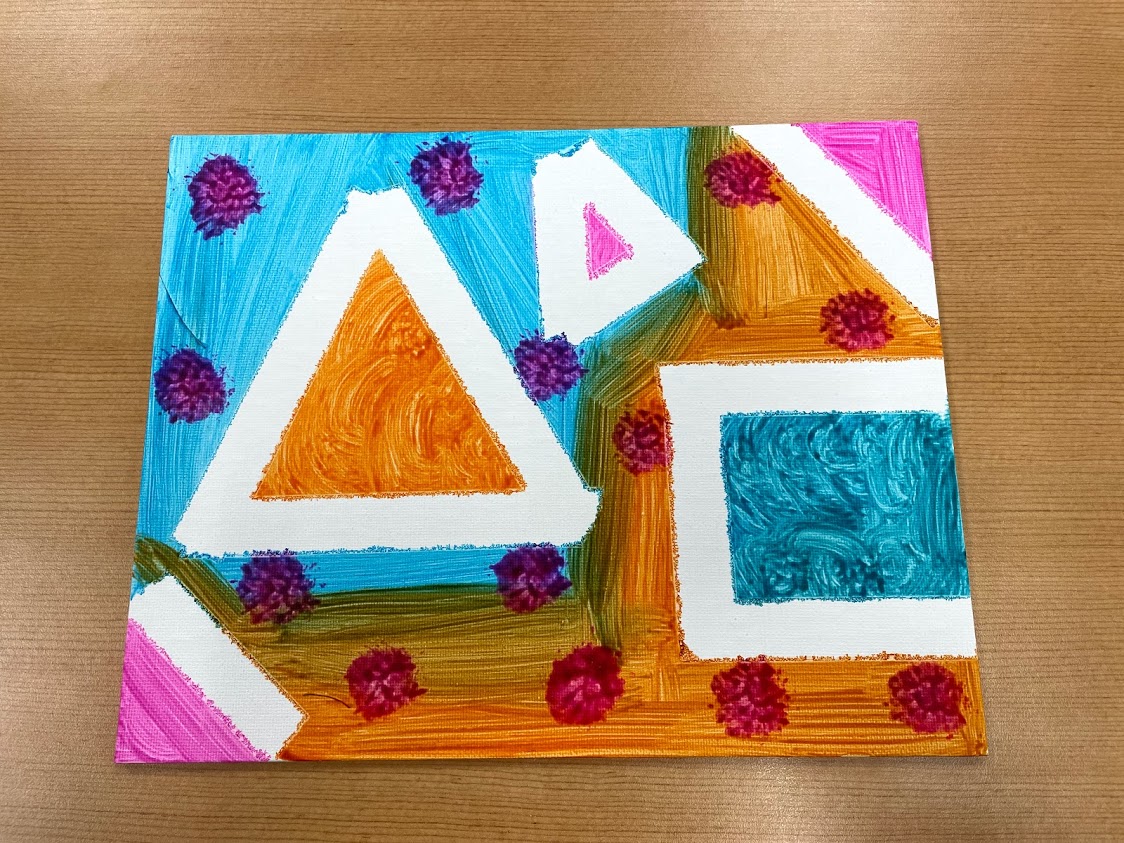
4. Use your brush to apply paint all over the canvas. Don’t worry about covering the masking tape.

5. Let dry.
6. Remove the masking tape from the dried canvas.
7. Enjoy your beautiful masterpiece!
Extension Questions/Discussion
- Talk to your child about the different shapes they can make with the tape. How many sides should the shape have? How many different shapes can you make?
- Ask your child if they can make the first letter of their name with the tape.
- Talk to your child about the different colors of paint. What are they? Can they be mixed to make new colors?
Show us what you created! Send us pictures at youthservices@balibrary.org.
Grades K-2: DIY Bubble Wand
Create your own bubble wand, then mix up some bubble solution for tons of fun. Register for the July Grades K-2 Take-and-Make Kit here.
Making your bubble solution:
- Pour 3 cups of water into a large container
- Pour the blue dish soap into the container. Slowly stir until the dish soap is mixed.
- Pour the corn syrup into the container and mix slowly. The bubble solution can be used immediately, but it will improve if it sits overnight.
Creating your bubble wands:
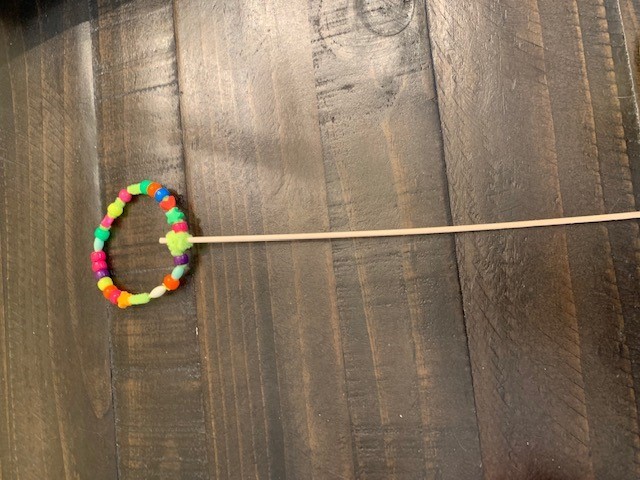
1. String beads on pipe cleaner.
2. Form pipe cleaner into a shape, and twist around dowel rod.
3. You may need to spread the beads around the pipe cleaner to distribute the weight.
4. Multiple pipe cleaners can be put on the dowel rods, if you desire.
5. Dip pipe cleaner into bubble solution and blow bubbles.
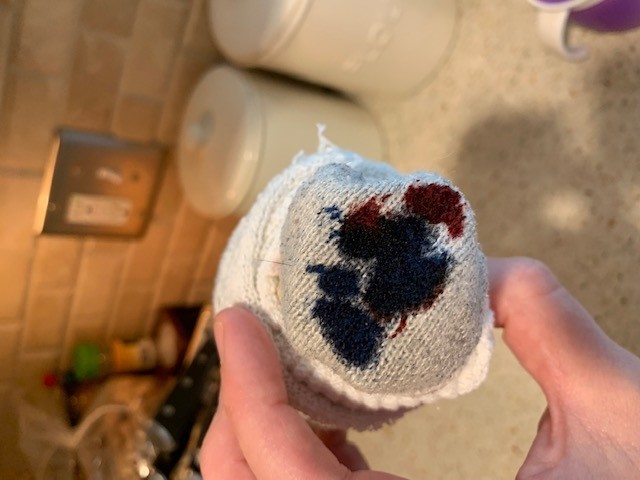
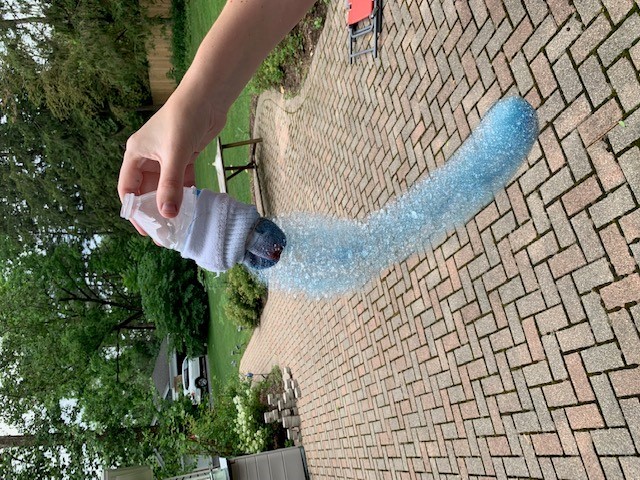
Bubble Snakes:
1. Place the sock over the bottom of the cut water bottle and wrap the rubber band around it. It’s okay if the bottle gets a little crunched.
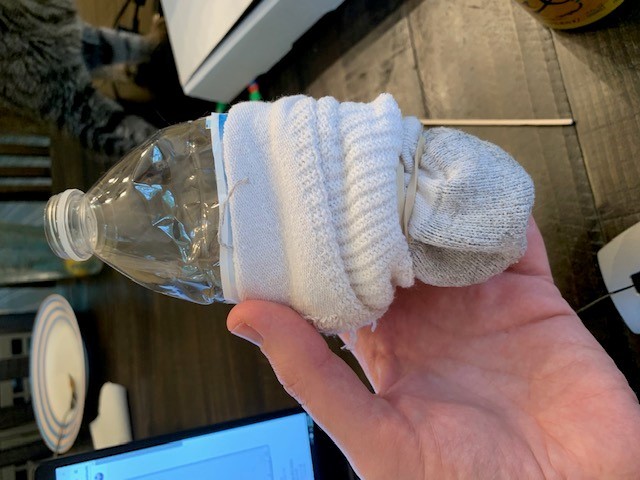
2. Squeeze food coloring onto the bottom of the sock. You can use multiple colors. The food coloring can stain clothing.
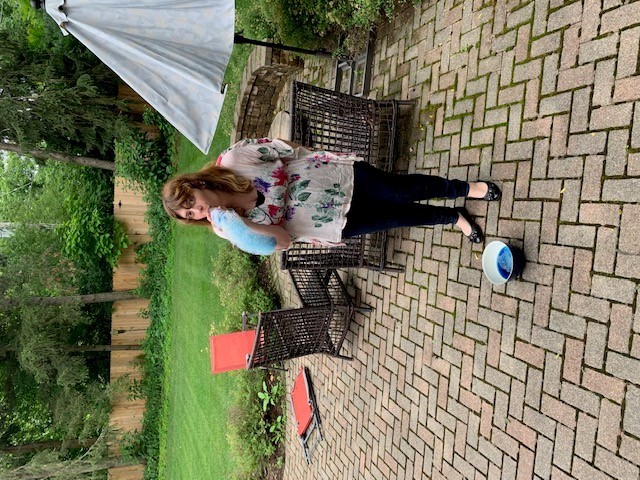
3. Dip the bottle with the sock into the bubble solution. Blow bubbles through the opening at the top of the bottle.
Show us what you created! Send us pictures at youthservices@balibrary.org.
Grades 3-8: Mini Zen Garden
Take a mindful moment as you design your mini Zen garden and enjoy the calm. Register for the July Grades 3-8 Take-and-Make Kit here.
Show us what you created! Send us pictures at youthservices@balibrary.org.
-
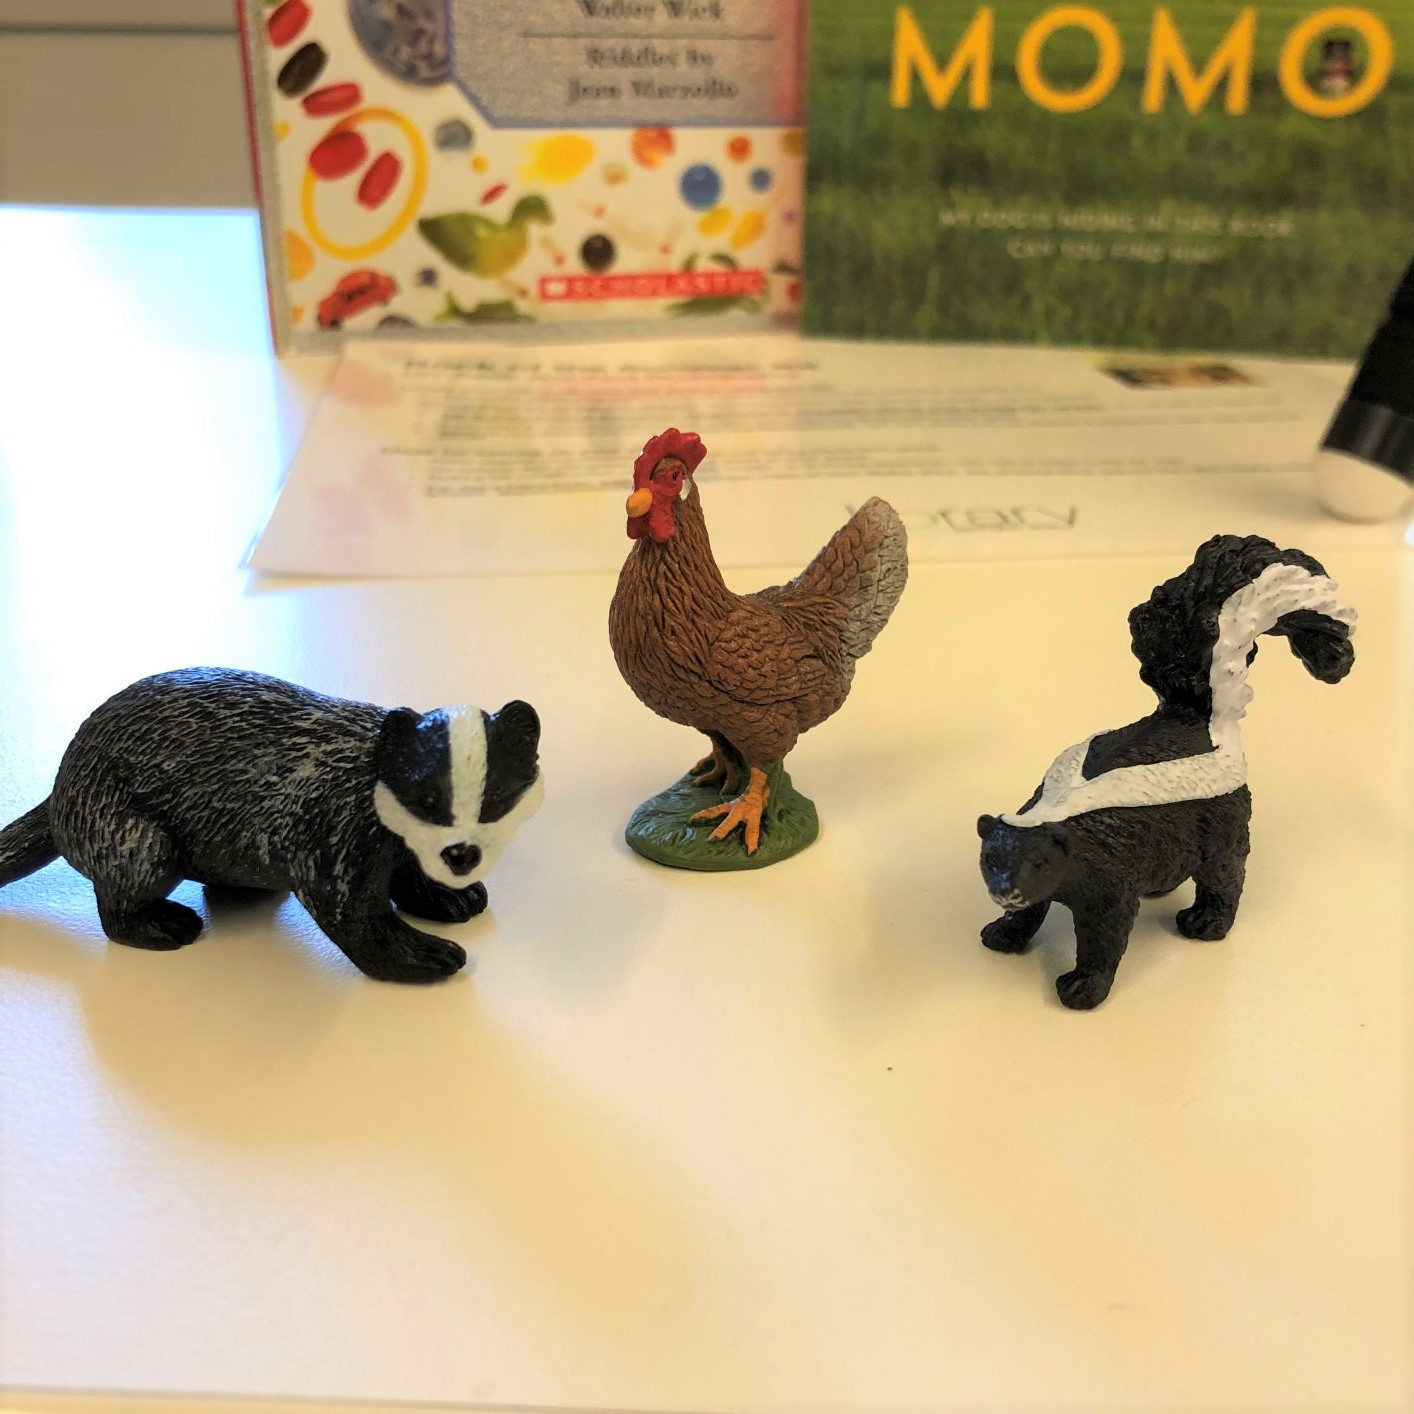
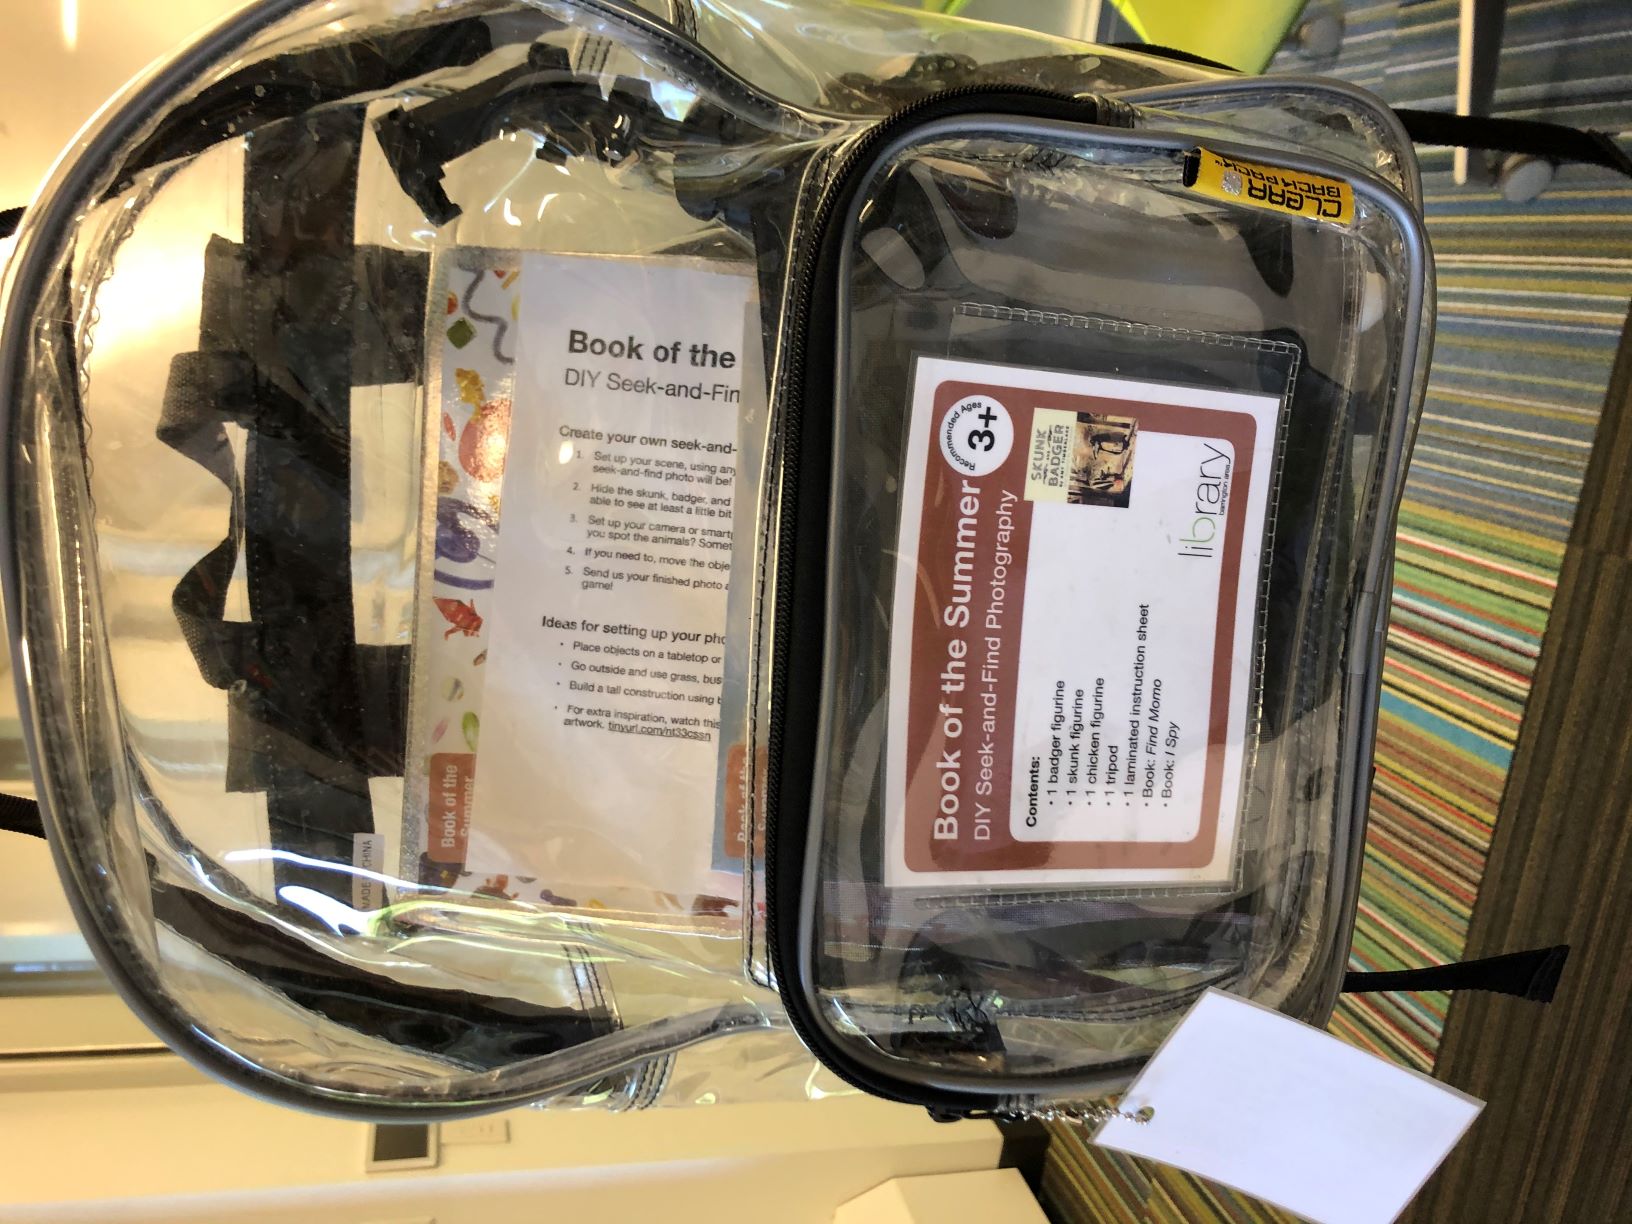
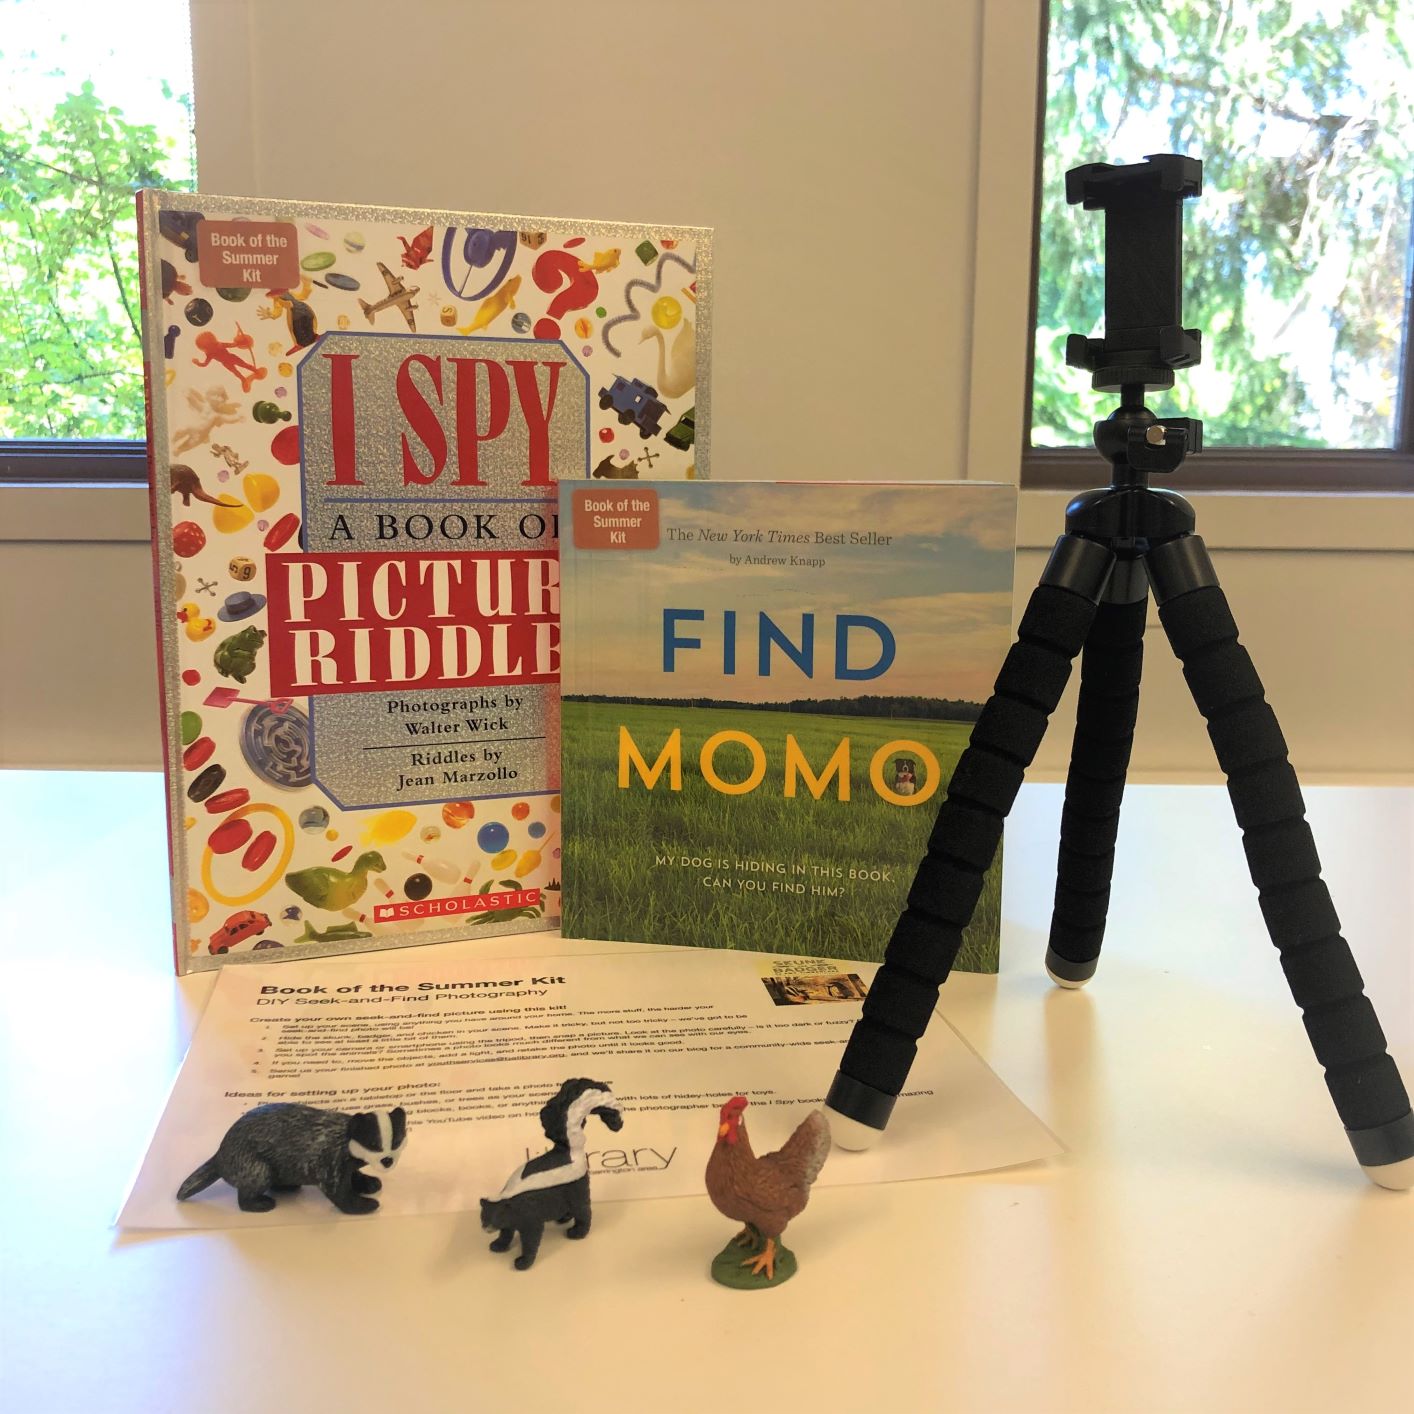
Book of the Summer Kit: DIY Seek-and-Find Photography
Inspired by ourBook of the Summer,Skunk and Badger, we’ve created some special edition backpacks: Book of the Summer Kits! This is our DIY Seek-and-Find Photography Kit. Inside, you’ll find the tools to create your own image inspired by the art in books likeI SpyandFind Momo.
Here’s a few I made around the Library. Can you find Skunk, Badger, and Chicken?
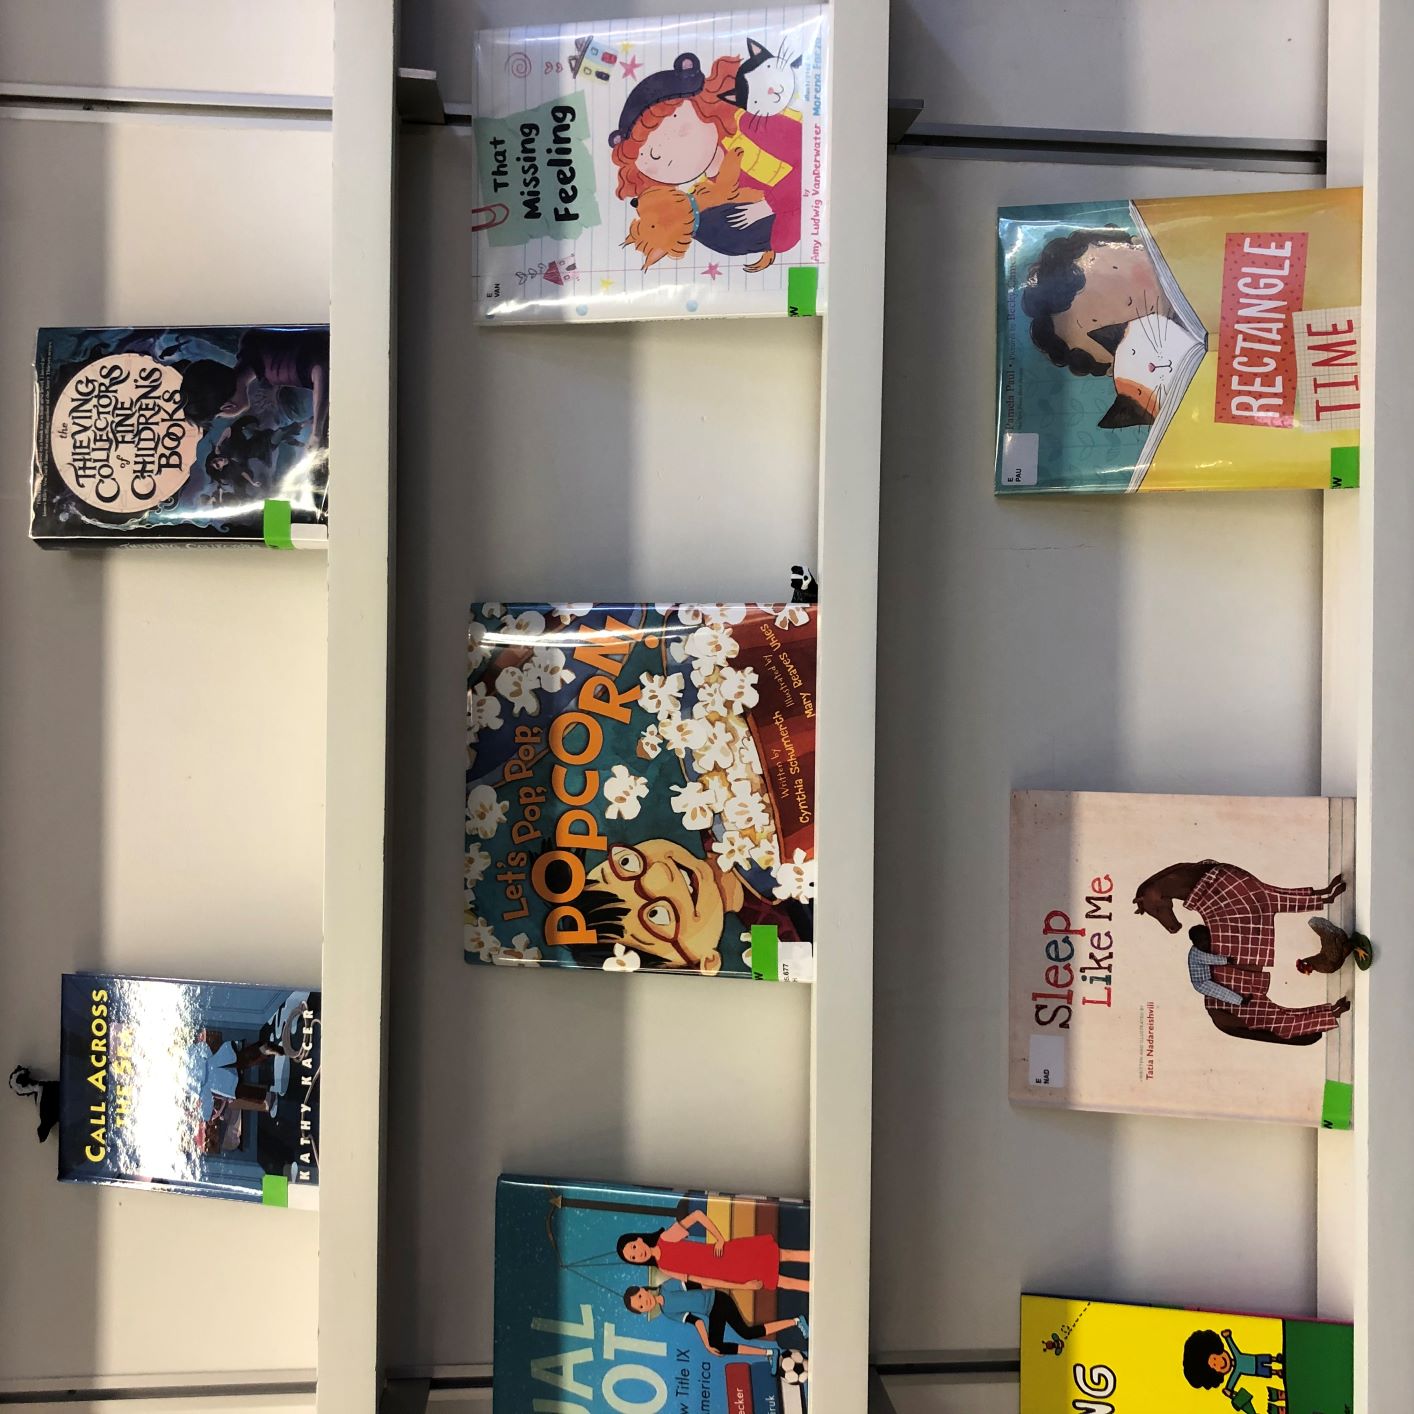
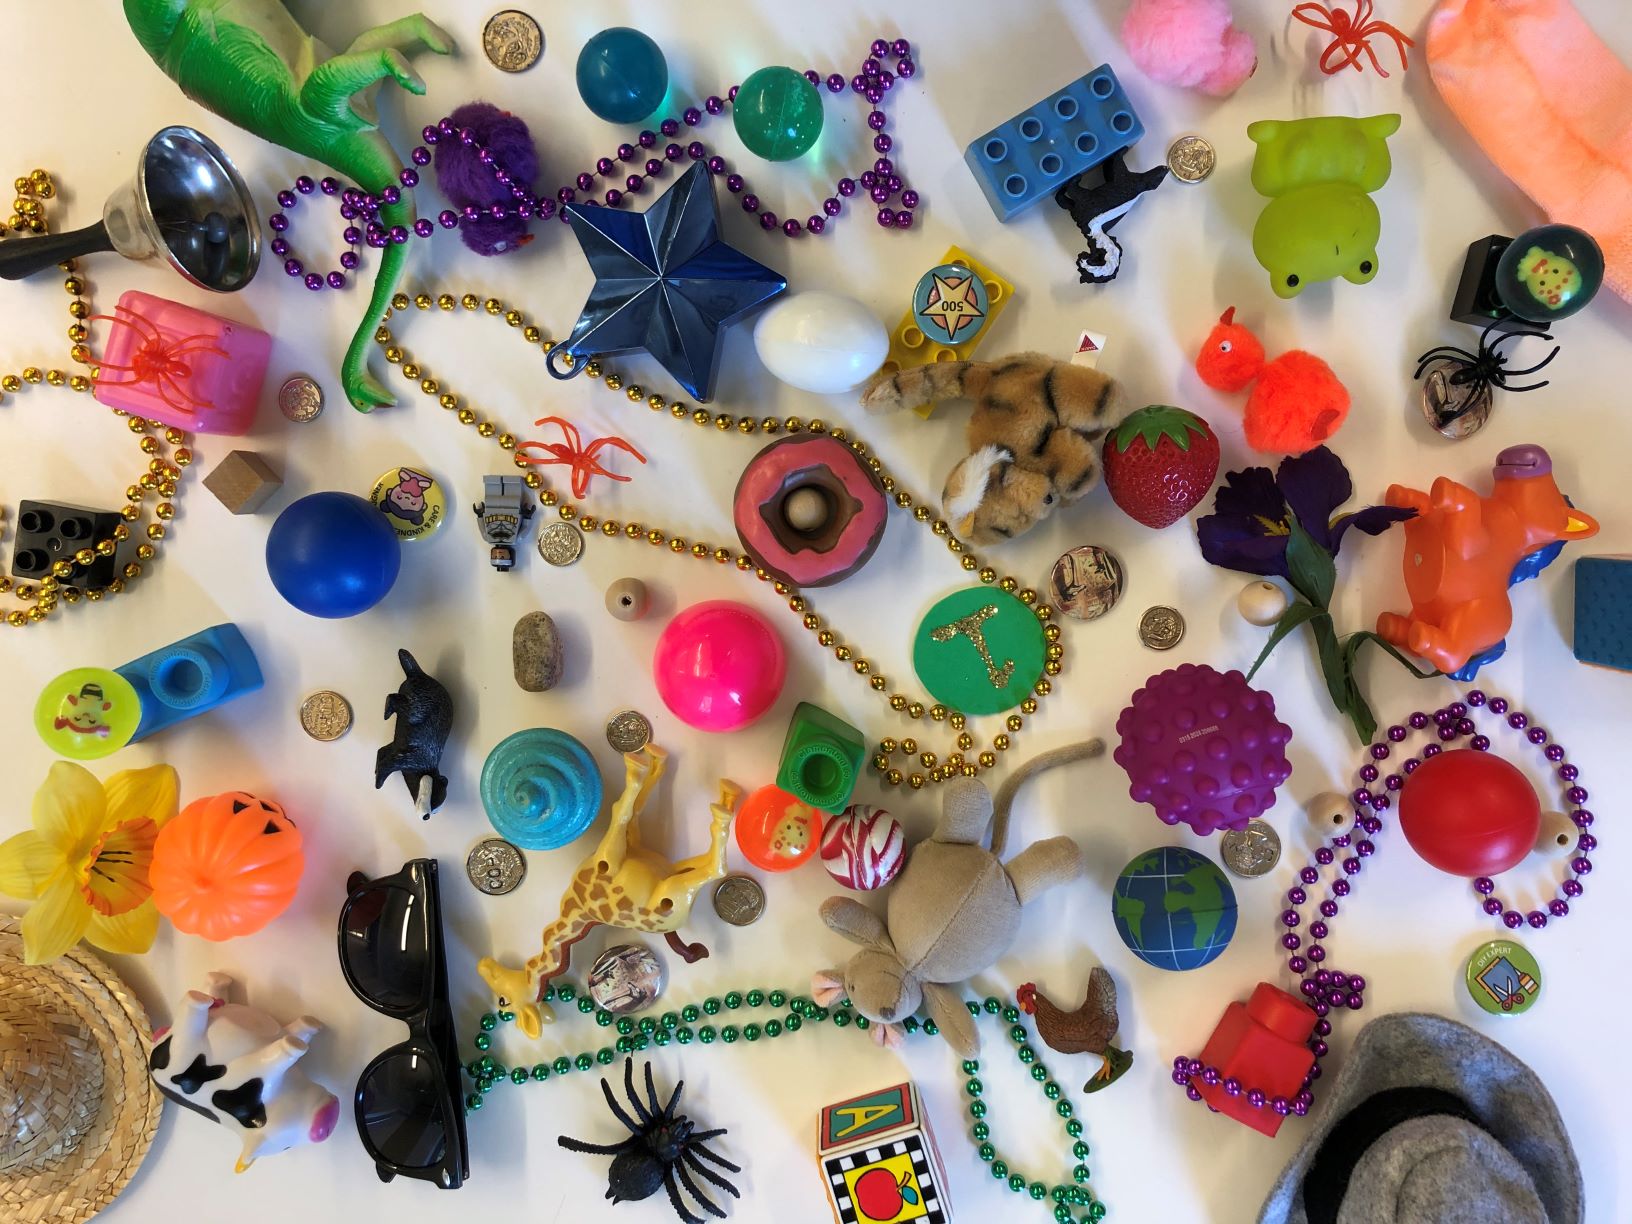
Try creating your own scene and hiding the skunk, badger, and chicken figurines. Send your photo toyouthservices@balibrary.org and we’ll share it here on the Blog!
Find activity ideas, discussion questions, and booklists on ourwebpage all about Skunk and Badger. You can also earn the Book of the Summer badge in ourSummer Reading program!
Youth Services Librarian Allison -
June Take-and-Make Kits
Bring home a fun new project! Sign up from our Library Calendar and pick up a kit at the Youth Services desk or through our Parking Lot Pickup service between June 14-25.
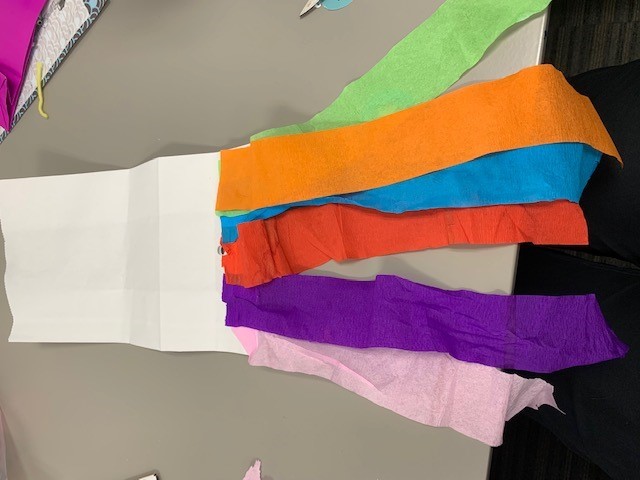
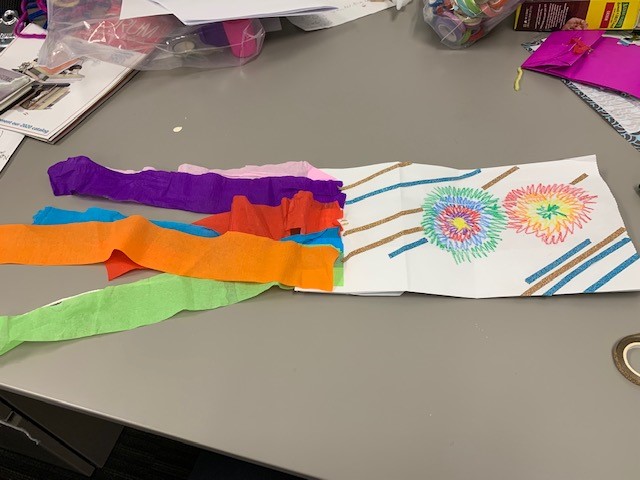
Toddler & PreK: Paper Bag Kites
Decorate a paper bag and watch it soar as a kite. Register for the June Toddler & PreK Take-and-Make Kit here.
Instructions:
1. Decorate your paper bag with crayons and washi tape.
2. Glue 6 streamers to the bottom of your paper bag. You will need to overlap them to fit all 6 on.
3. Tie a piece of twine to the middle of one of the popsicle sticks.
4. Open the paper bag. Put the popsicle stick with the twine on it inside the bag and thread the string through the hole at the bottom of the bag. Your bag has two holes punched in it, but you only need to thread the string through the hole at the bottom of the bag.
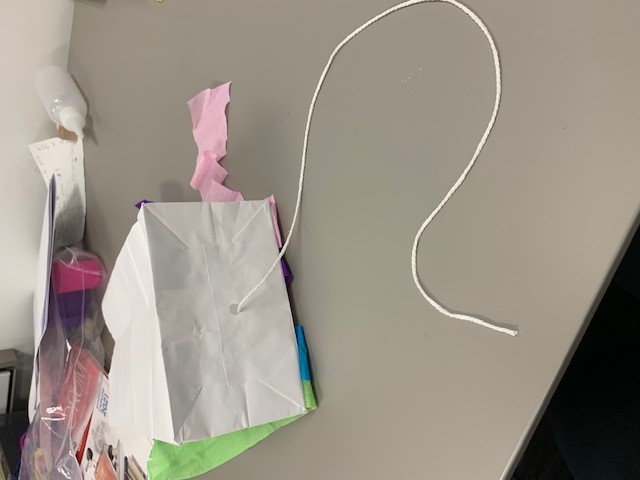
5. The string will be your kite string and the popsicle stick will keep it in place in the bag.
6. Fly your kite by holding on to the string and running. If the string is too long for your child, wrap it around their hand. Enjoy flying your kite!
Show us what you created! Send us pictures at youthservices@balibrary.org.
Grades K-2: Make Your Own Kinetic Sand
Mix together the ingredients to make moldable sand that won’t stick to your hands. Register for the June Grades K-2 Take-and-Make Kit here.
Show us what you created! Send us pictures at youthservices@balibrary.org.
Grades 3-8: No-Sew Pillows
Spruce up your space with a DIY pillow — no sewing skills required. Register for the June Grades 3-8 Take-and-Make Kit here.
Your kit contains:
- two squares of fleecy fabric
- one bag of stuffing
- one ring-shaped paper stencil
- one piece of chalk
- one roll of tape (optional)
You will also need one pair of very sharp scissors.
Instructions:
1. Lay out one square of fabric on a table or desk. Place the paper stencil on top of the fabric. Optionally, use the tape to hold the stencil in place.
2. Using the chalk, trace both the outside circle and the inside circle on the fabric. It's okay if your work isn't super neat.
3. Set the first square aside.
4. Lay out the second square of fabric, put the stencil on top, and trace the same two circles (outside and inside edges) on the fabric.
5. Using your sharp scissors, cut along just the outside (larger) chalk line on both of the fabric pieces. Leave the inside (smaller) chalk circle alone for now.
6. Layer the two fabric circles on top of each other, as exact as you can.
7. Cut slits from the outer edge of the fabric circle to the inside chalk line. Cut through both layers of fabric at once. You're making fringe strips, about 1/2-1 inch wide. Keep your scissors pointing towards the middle of the circle as you cut slits all the way around.
8. Don't separate the two layers!
9. Take the top and bottom layers of one set of fringe, and tie a double knot, connecting the front and back of the pillow.
10. Continue to tie knots around the circular pillow.
11. Leave a few inches untied, enough space you can put your hand in the pillow.
12. Stuff the pillow with stuffing, as much or as little as you'd like.
13. Finish tying the fringe strips all the way around the pillow.
14. Trim any fringe if it looks too long or uneven.
Show us what you created! Send us pictures at youthservices@balibrary.org.
-
May Take-and-Make Kits
Bring home a fun new project! Sign up from our Library Calendar and pick up a kit at the Youth Services desk or through our Parking Lot Pickup service between April 12-23.
Toddler & PreK: Flower Pot Painting
Paint a flower pot, plant some seeds, then watch as they grow! Register for the May Toddler & PreK Take-and-Make Kit here.
Show us what you created! Send us pictures at youthservices@balibrary.org.
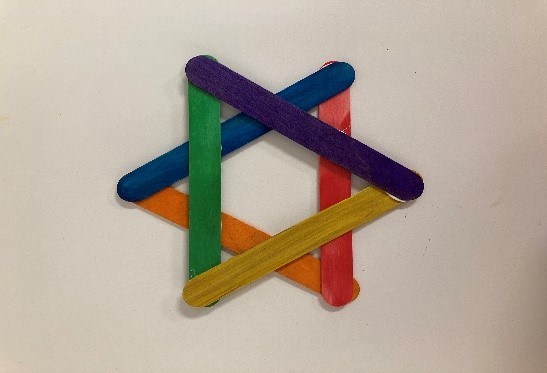
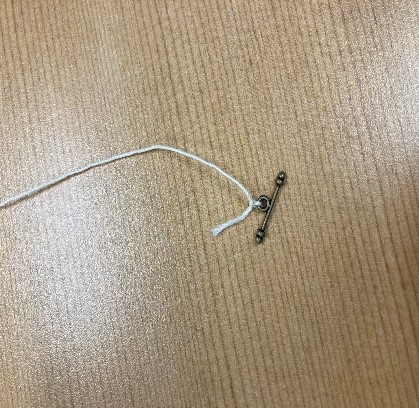
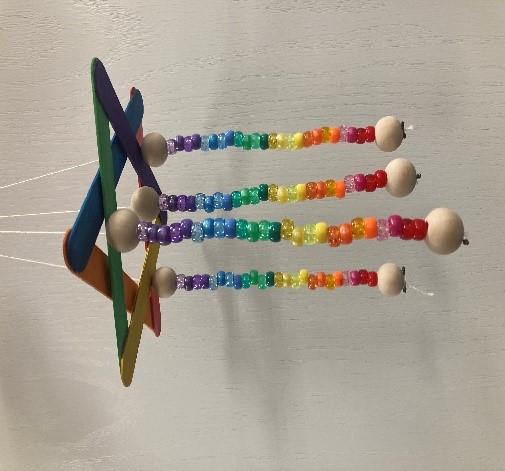
Grades K-2: Beaded Wind Chime
String colored beads and then enjoy watching your chime blow in the breeze. Register for the May Grades K-2 Take-and-Make Kit here.
Your Kit Contains:
- 96 beads 24 colors, 4 of each color
- 6 colorful jumbo craft sticks
- 1 Tacky glue stick
- 4 twenty inch pieces of string
- 1 plastic container with 5 jewelry clasp
1. Glue the craft sticks into two triangles. Place and glue the two triangles on top of each other to form a star.

2. Tie a string around one of the jewelry clasps.
3. Start and end with a large bead on each string. Start stringing smaller beads in desired pattern, (repeat four times).
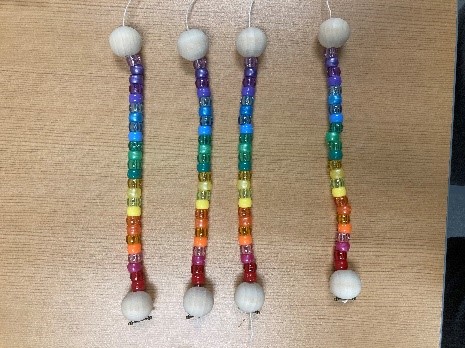
4. Thread three strands, one through each hole on the star. Put the fourth strand up through the middle and gather all four strand ends together. The star will sit on the big beads, adjust the strands until it is hanging evenly.
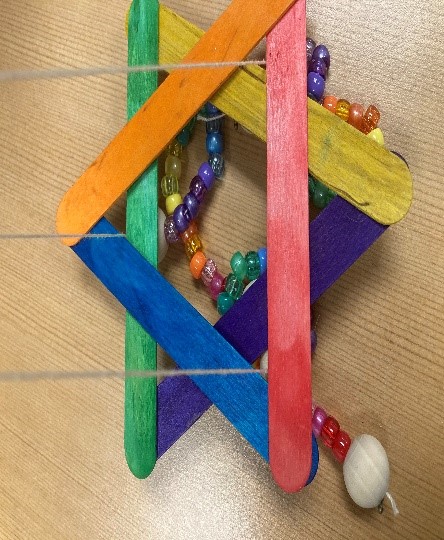
5. Tie all four strands on the circular jewelry clasp.
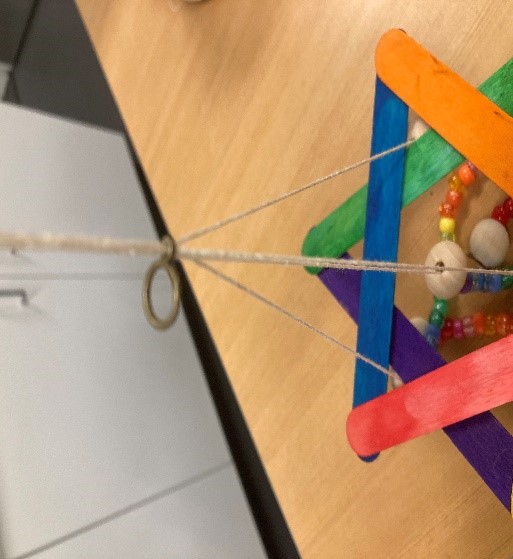
6. Hang and enjoy!
Show us what you created! Send us pictures at youthservices@balibrary.org.
Grades 3-8: Sharpie Art Coasters
Use permanent markers and rubbing alcohol to create a blended-ink masterpiece where you can set your drink. Register for the May Grades 3-8 Take-and-Make Kit here.
Your kit contains:
- 2 ceramic tiles
- 3 Sharpie pens
- 1 pipette
- 1 strip of black felt
- 1 container of rubbing alcohol
- 1 empty cup
1. Color a coaster with the Sharpies. Don’t stress about getting this perfect—the end result will look very different!
2. Place the coaster in a shallow plastic or foil container, resting on the empty plastic cup.
3. Carefully use the pipette to drip a small amount of rubbing alcohol over the coaster. You can gently tip the coaster so the liquid moves and the colors start to bleed and blend.
4. Let dry completely (about 1-2 hours).
5. Cut the felt into small squares, remove the backing, and stick on the underside of your coaster.
Show us what you created! Send us pictures at youthservices@balibrary.org.
-
April Take-and-Make Kits
Bring home a fun new project! Sign up from our Library Calendar and pick up a kit at the Youth Services desk or through our Parking Lot Pickup service between April 12-23.
Toddler & PreK: Make a Puppet
Create a unique puppet of your own. Register for the April Toddler & PreK Take-and-Make Kit here.
Your kit contains:
1 glue stick
1 bag of feathers
1 brown bag filled with 4 googly eyes
2 foam sheets
2 colored goody bags
3 or 4 crayons
Not included: Scissors
Instructions:
1. Lay a colored goody bag on its smooth side. Keep the bottom flap facing up. (Point the opening toward you).
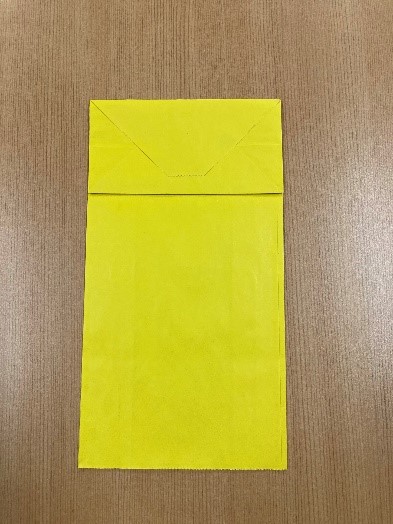
2. The flap will be the mouth of the puppet. Have your child draw or decorate the puppet as they please.
Scissors are not provided in your kit. However, please feel free to utilize your own scissors. If appropriate, have your child cut out shapes or different designs. You may also choose to cut out different shapes and designs for your child if they are unable to do so themselves.

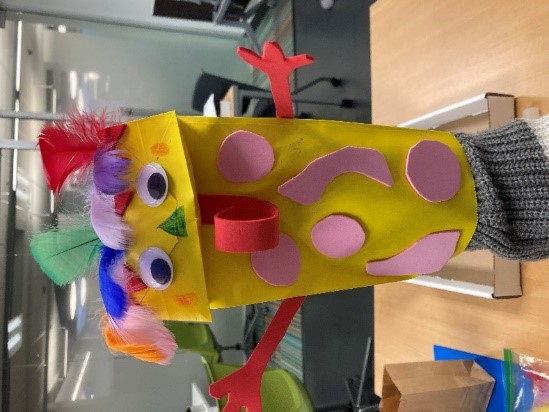
3. Have your child use the glue stick to glue the googly eyes, feathers and foam shapes to their puppet.
4. Once the puppet has dried, your child may use their puppet! Have them slide their hand into the opening and curl their fingers up and under the flap. They can extend and curl their fingers to make the puppet “talk.”
Optional talking points to consider: Use this activity as an opportunity to practice color recognition; ask your child to find the “blue feather”. Cut out different shapes from the foam paper and have your child identify the shapes. Have your child create patterns with the shapes you have cut out. Talk about different body parts and have your child locate theirs as well as their puppets.
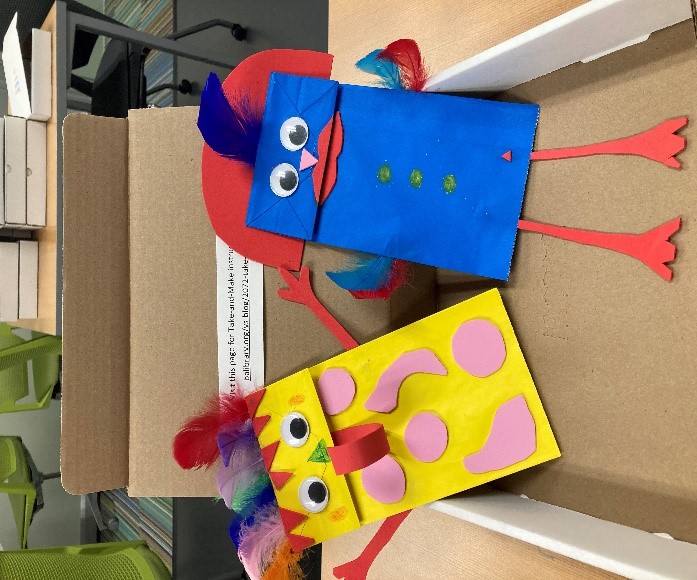
There are enough materials to make two puppets! (You may also use the brown bag that the googly eyes came in to create a third puppet!)
Show us what you created! Send us pictures at youthservices@balibrary.org.
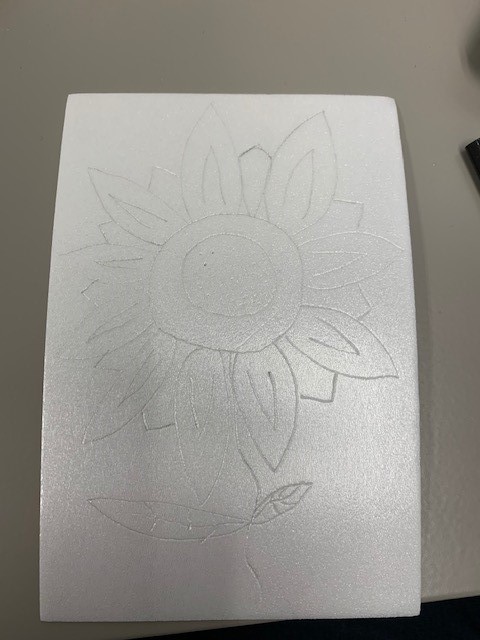
Grades K-2: Glue and Chalk Art
Experiment with glue and chalk pastels to create a colorful work of art. Register for the April Grades K-2 Take-and-Make Kit here.
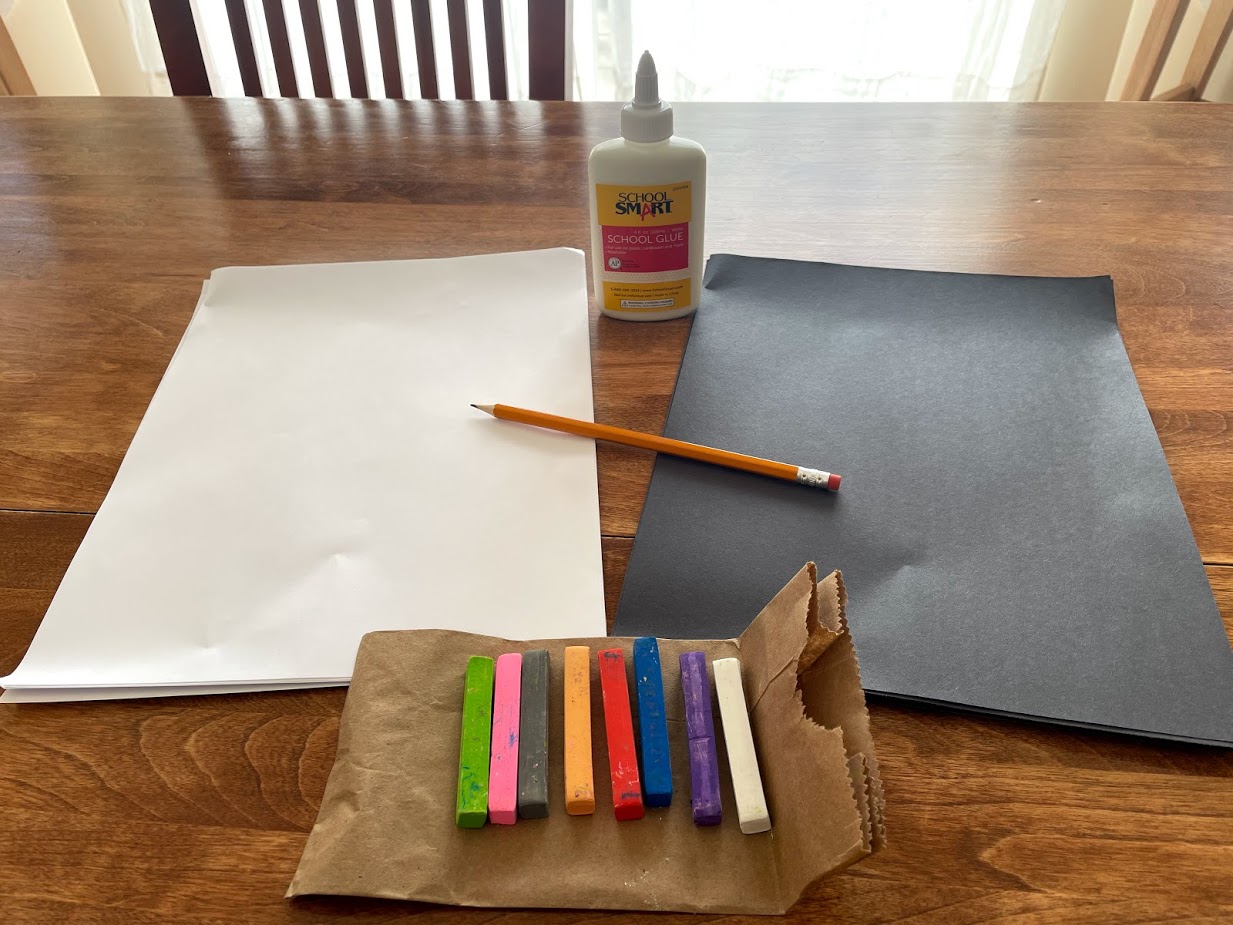
Your Kit Contains:
5 sheets of white construction paper
5 sheets of black construction paper
1 pencil
1 bottle of school glue
1 bag of chalk pastels
Instructions:
1. Open the box and empty out your supplies.
2. Select either a white or black piece of paper for your first creation.
3. Trace out your design with pencil – bold designs like flowers and leaves lend themselves nicely to this technique.
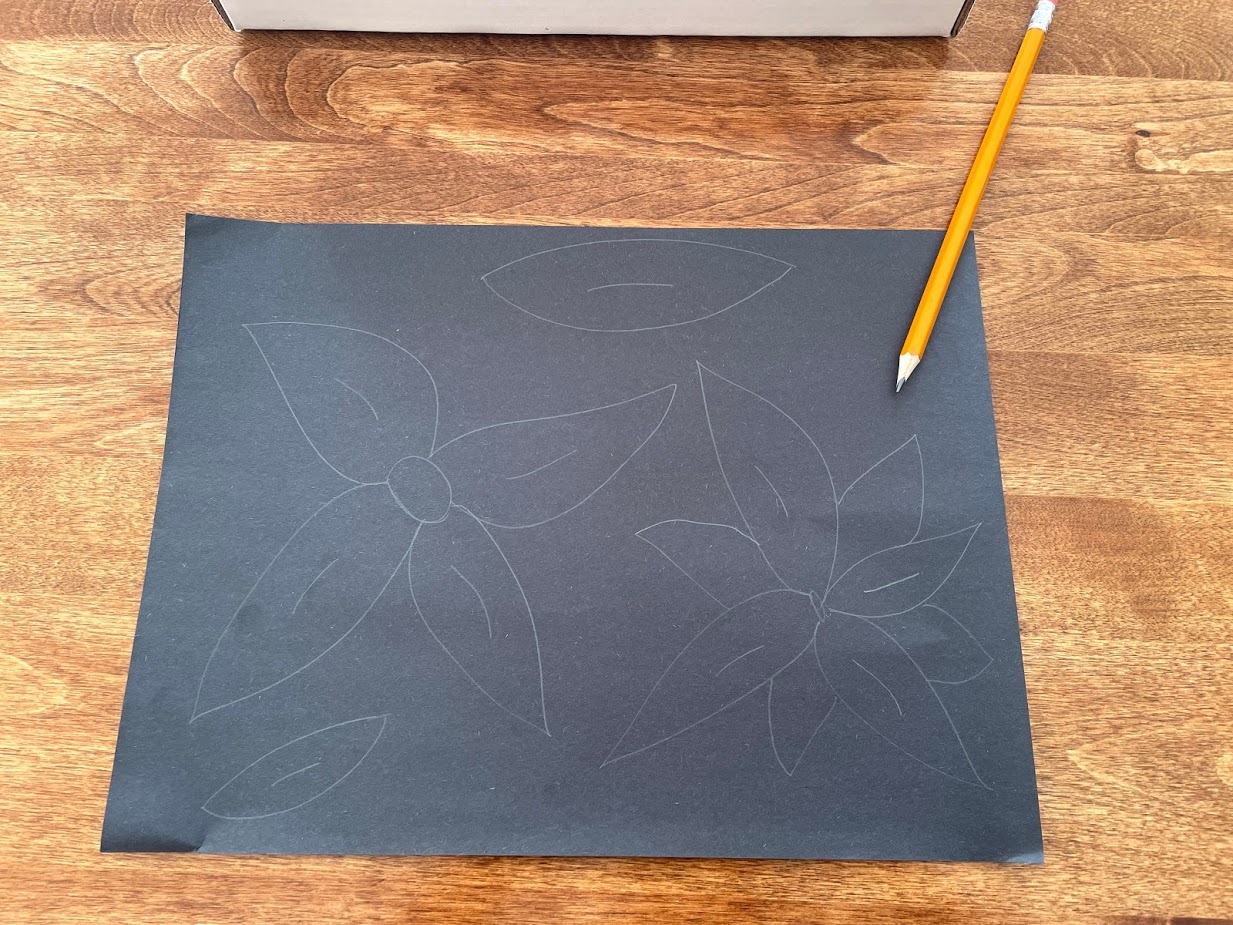
4. Trace your pencil lines in glue. Try not to touch the tip of the glue bottle directly to the paper. Instead just lay a continuous line of glue.

5. Wait for glue to completely dry. This will take time – be patient!
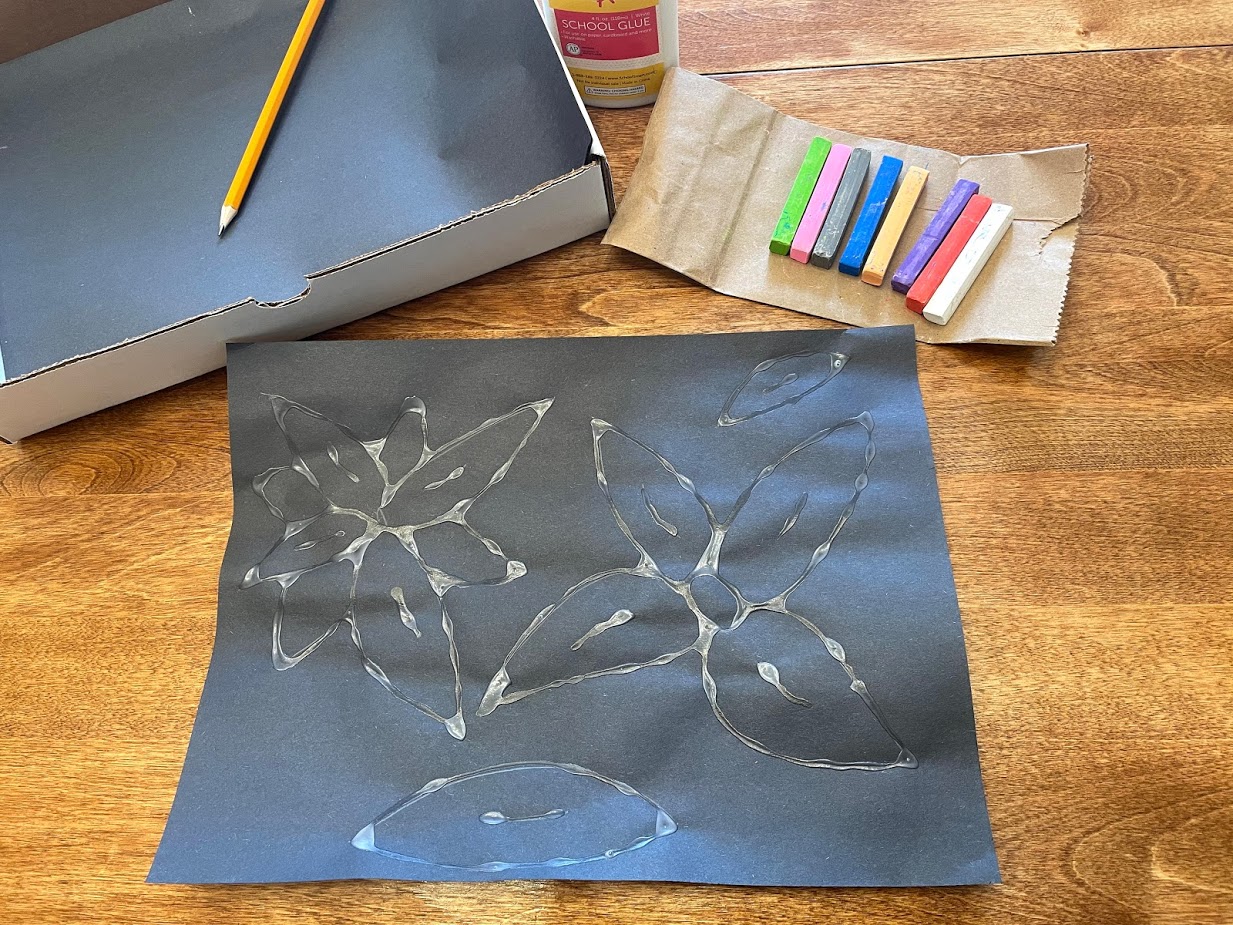
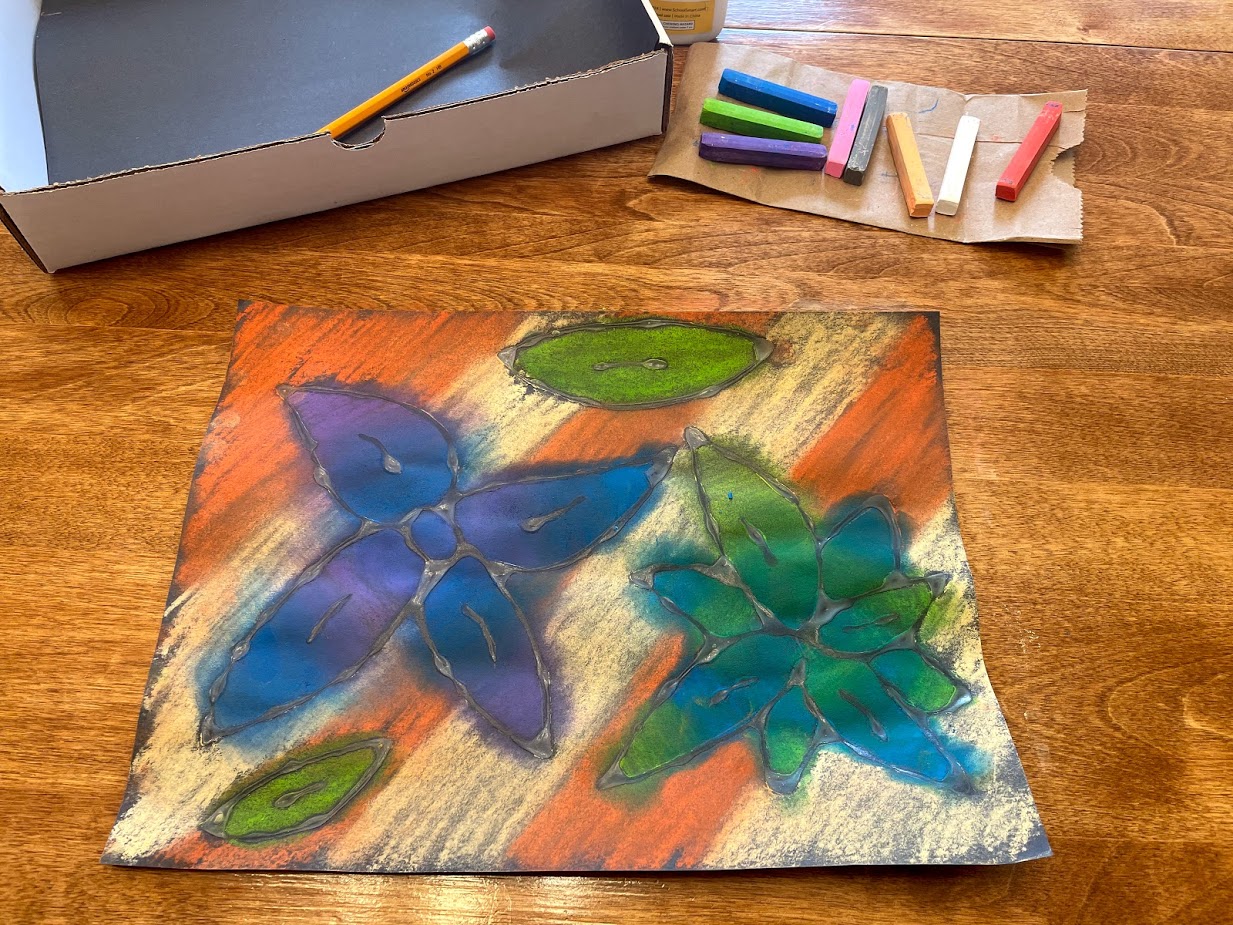
6. Time to add color! Use your chalk pastels to color both the inside and outside of your design. Use your fingertip to blend some of the colors together.

7. Enjoy your finished art piece!
Concepts to explore:
Positive and negative space – the inside of your design is the positive space and rest of the paper is negative space. How can you choose colors to show the differences between those two elements?
Warm and cool colors – colors like reds, oranges and yellows are warm, while blues, purples and greens are cool. How can you blend your pastels to create more warm or more cool shades?
Show us what you created! Send us pictures at youthservices@balibrary.org.
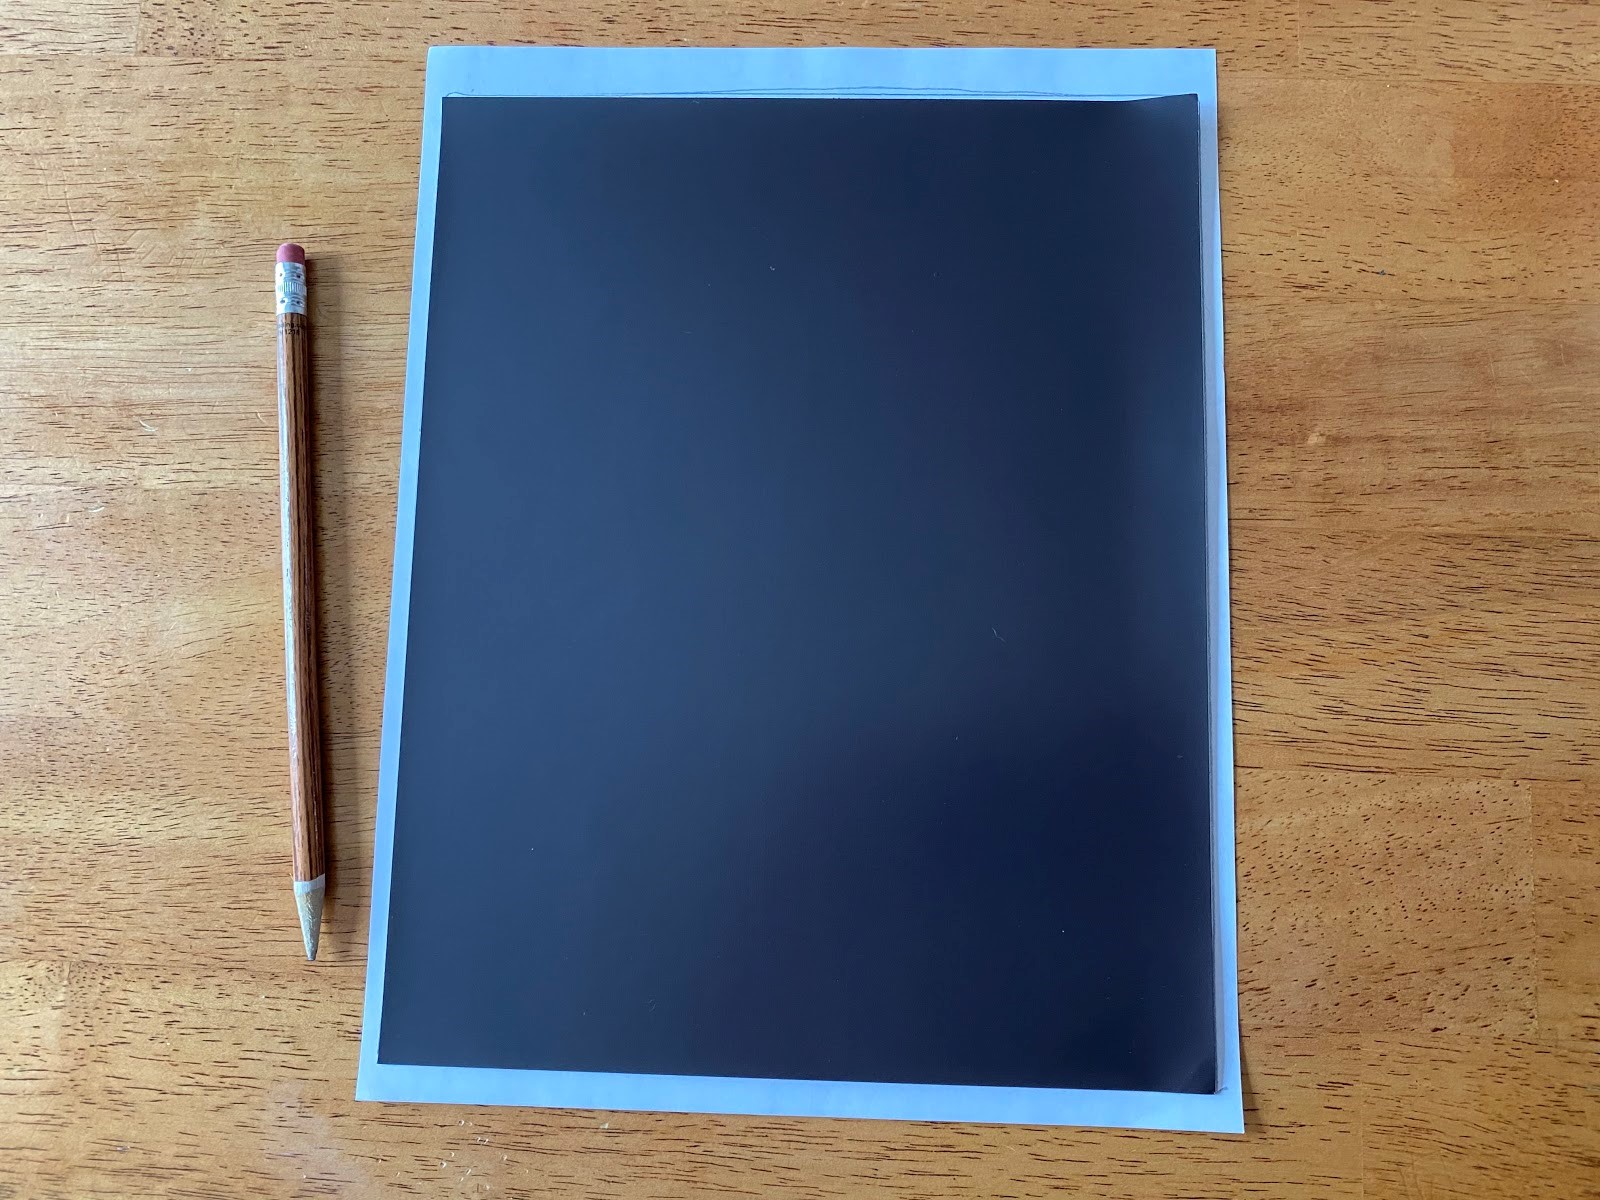
Grades 3-8: DIY Magnetic Poetry Kit
Create your own magnetic words set and use it to write poetry. Register for the April Grades 3-8 Take-and-Make Kit here.
Your kit contains:
- 1 8x10 magnetic adhesive sheet
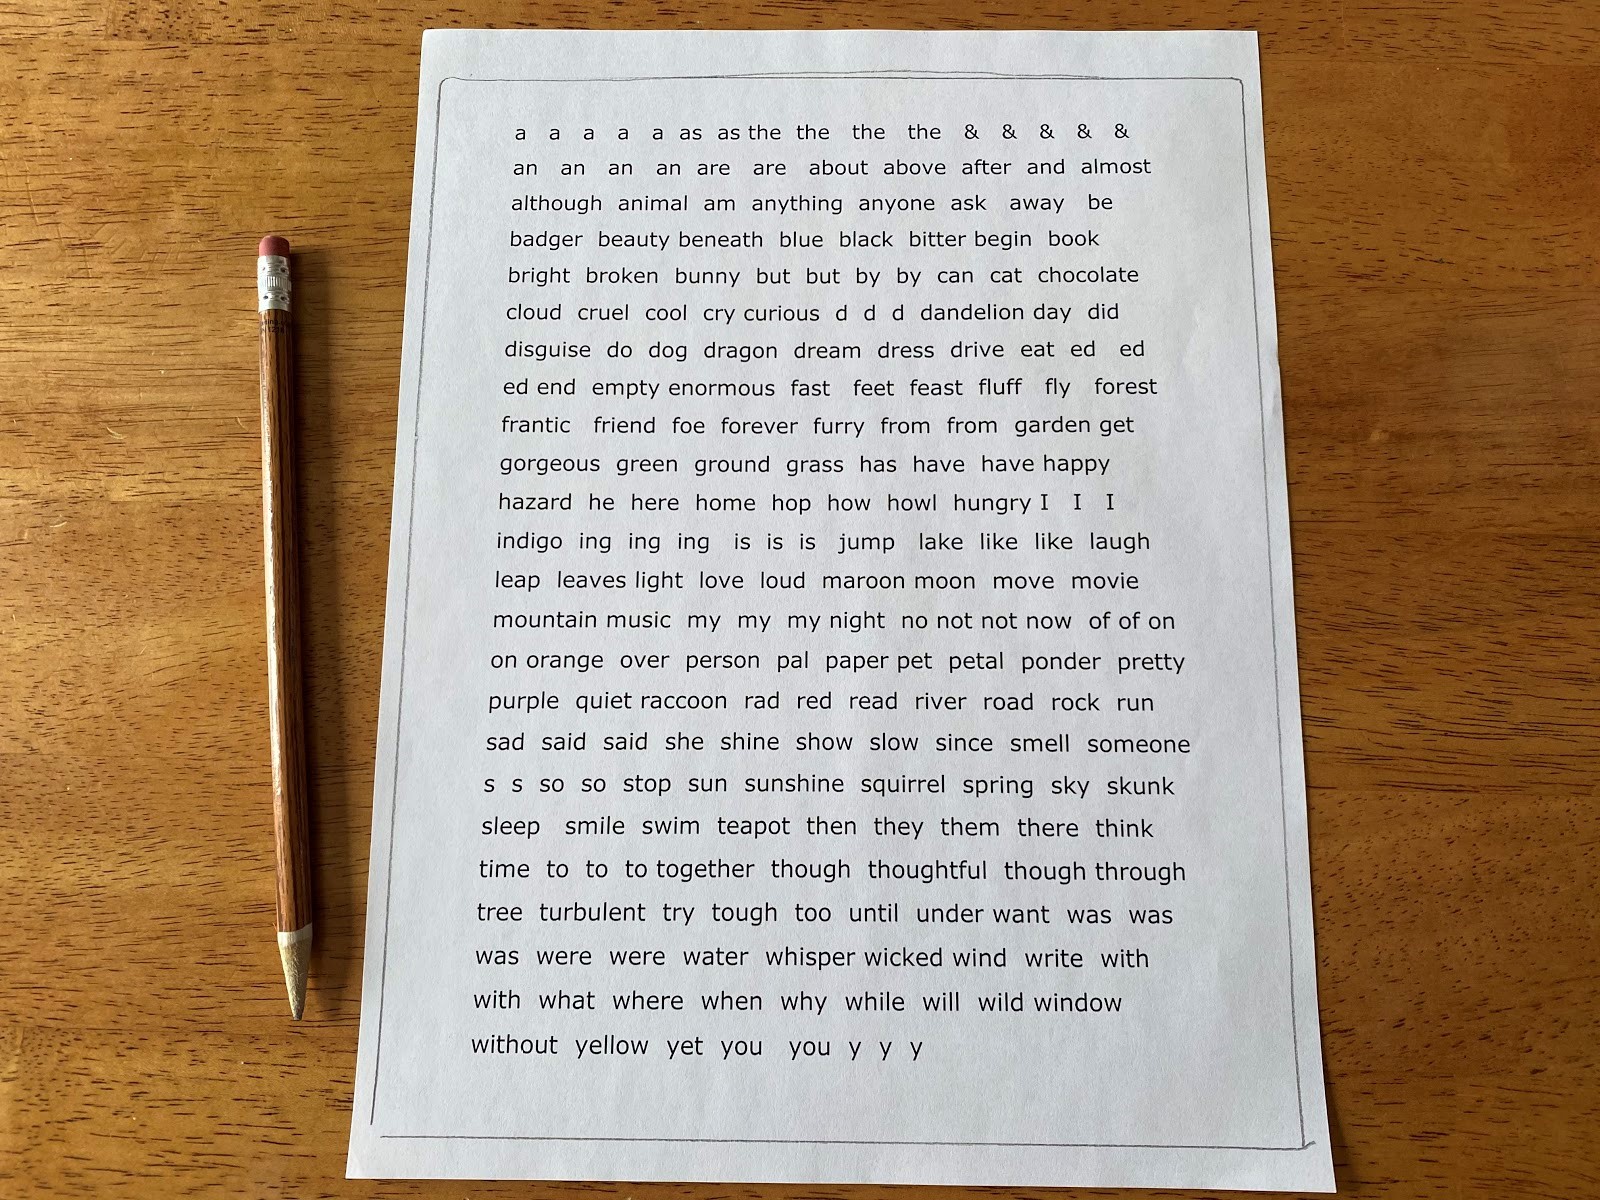
- 1 printed sheet of words
- 1 tin box
- Extra magnetic sheet/blank paper
You will also need:
- Scissors
- Pencil (for tracing)
- Pen
Instructions:
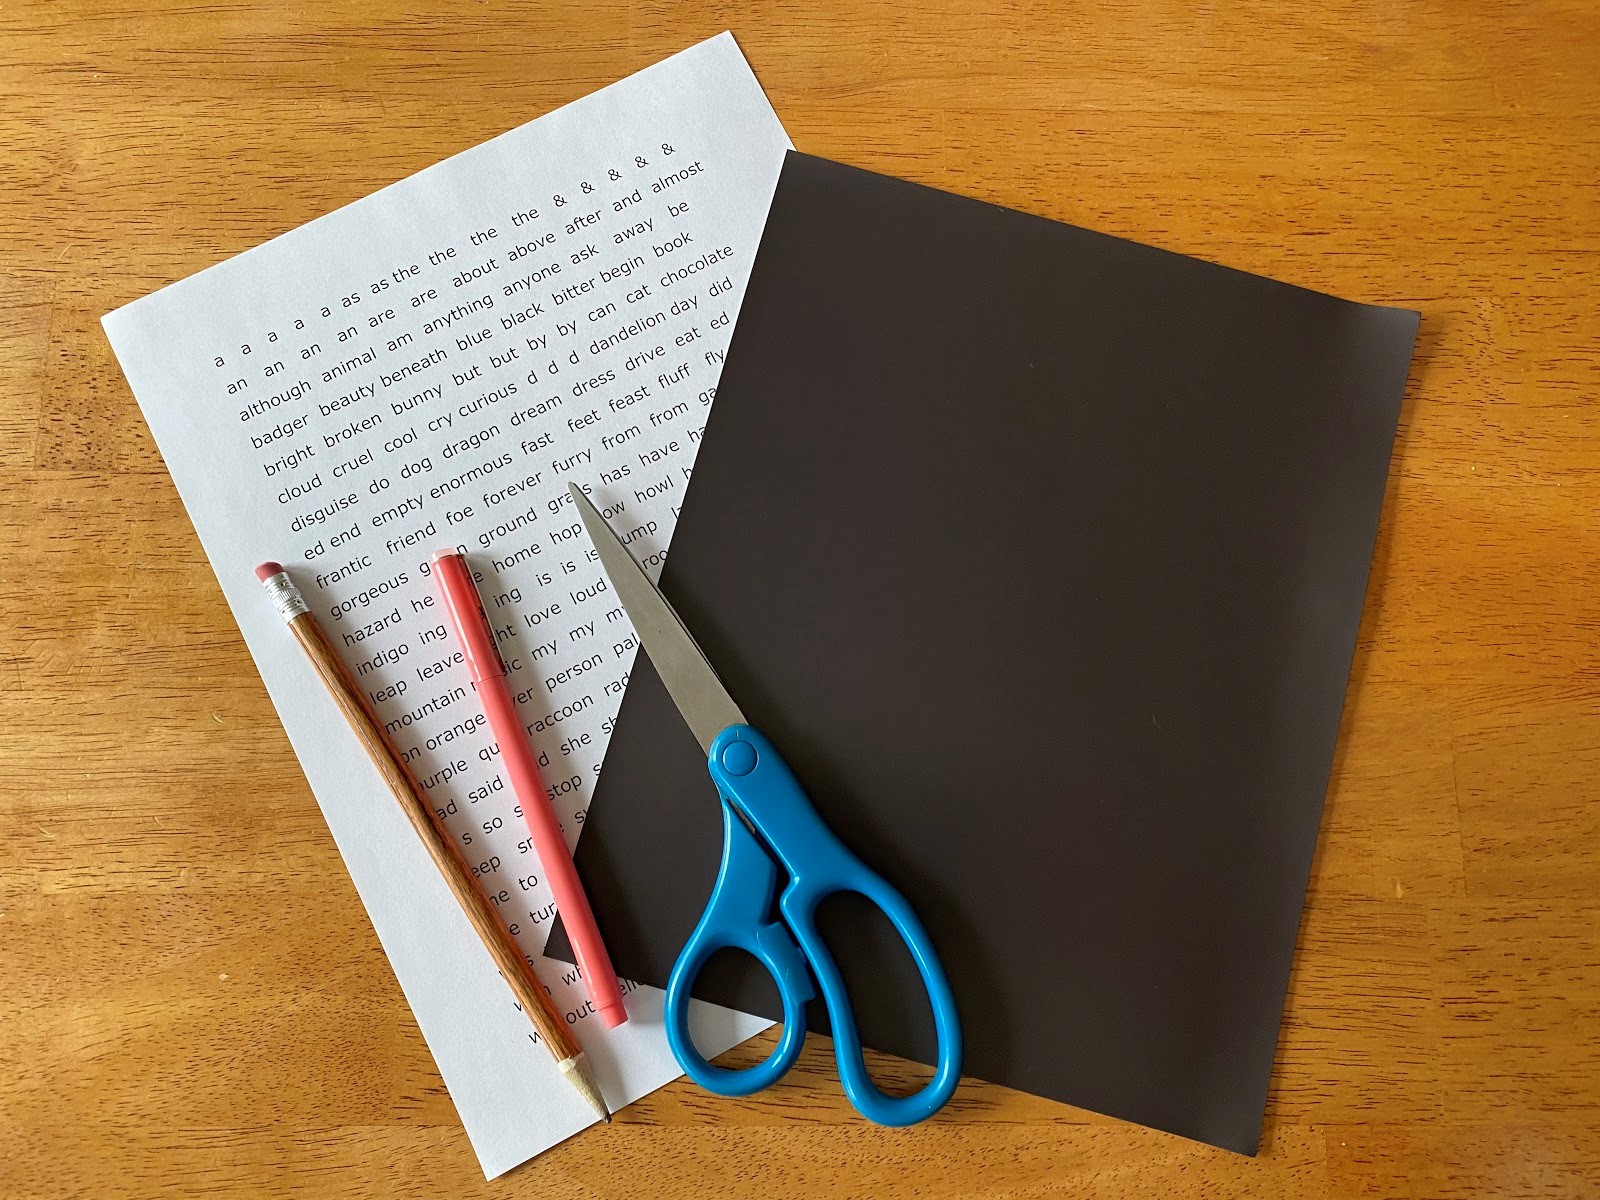
1. Lay the full sheet of paper with the words on it face up and lay your magnetic sheet on top. Trace the shape of the magnetic sheet onto the piece of paper, making sure that all of the words will fit onto the magnetic sheet. Cut the paper where you traced, just trimming the excess.
2. Once you’ve trimmed the sheet of words, carefully peel the cover off of the magnetic sheet, so that the adhesive is facing up.
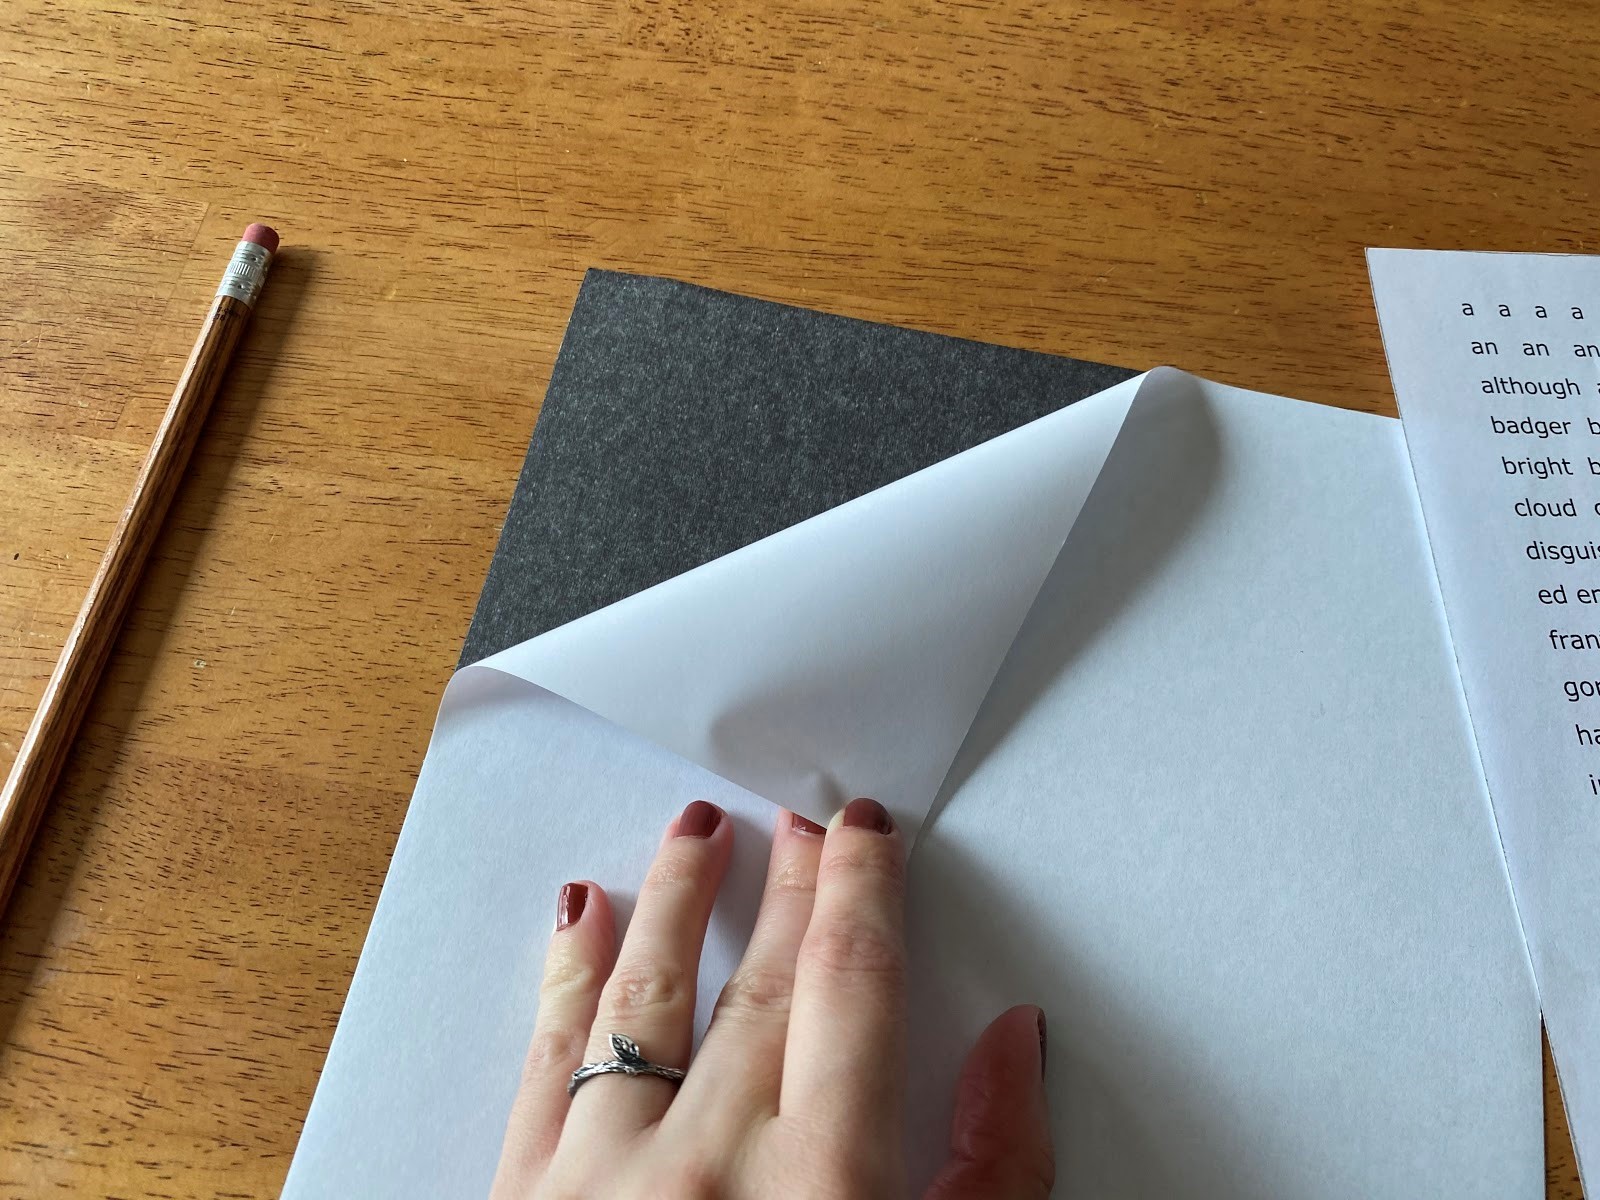
3. Place your sheet of words onto the adhesive very slowly, starting from the top, and working your way down, making the paper fit as smoothly as possible onto the magnetic sheet. Be careful not to stick it on all at once. This part is a little tricky, so feel free to ask a grown up for help!
4. Once your words are fully stuck to the adhesive, smooth it over with your fingers a few times to make sure it’s sticking really well.
5. Do you notice any blank spaces? Feel free to write your own words in those spaces, or trace some rectangular shapes to fill in words later. I recommend doing this part before you start cutting, to make the process a little easier.

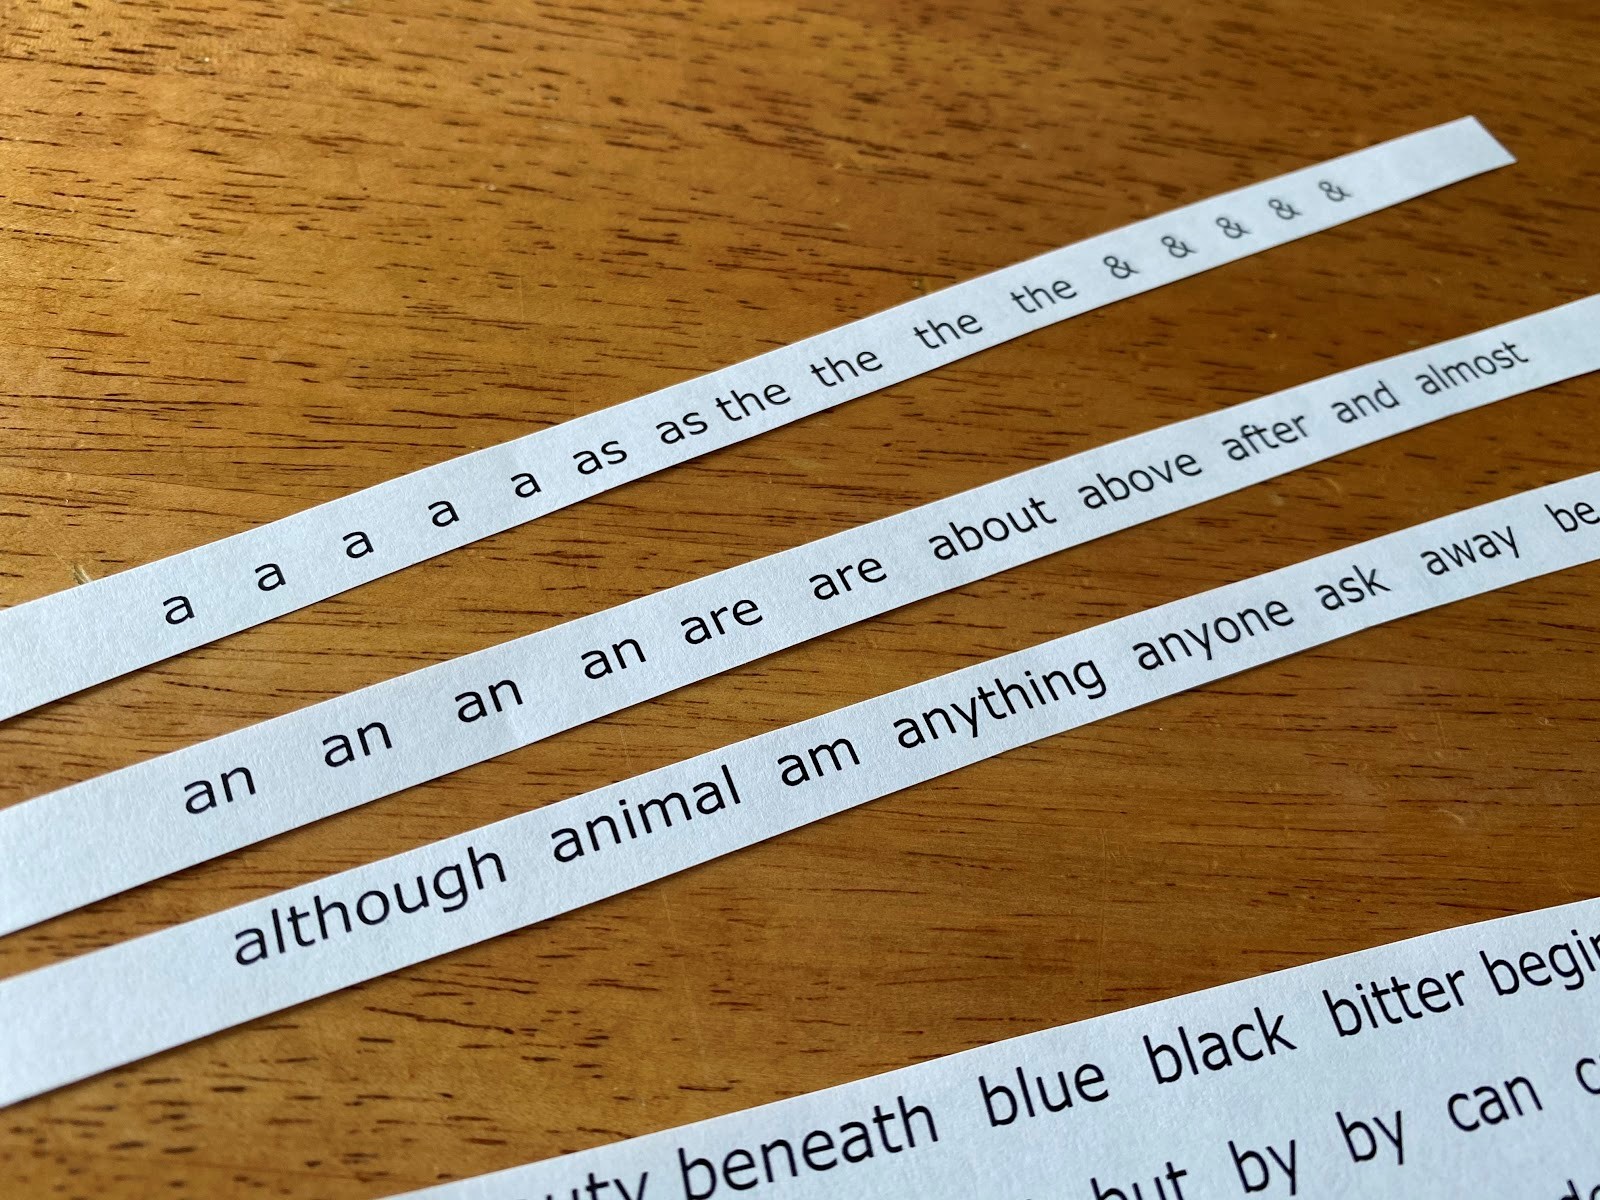
6. Now you’re ready to cut! Begin cutting your words out. I recommend cutting the page into strips, and then trimming the individual words from there. Place your words into your tin box as you cut them out.
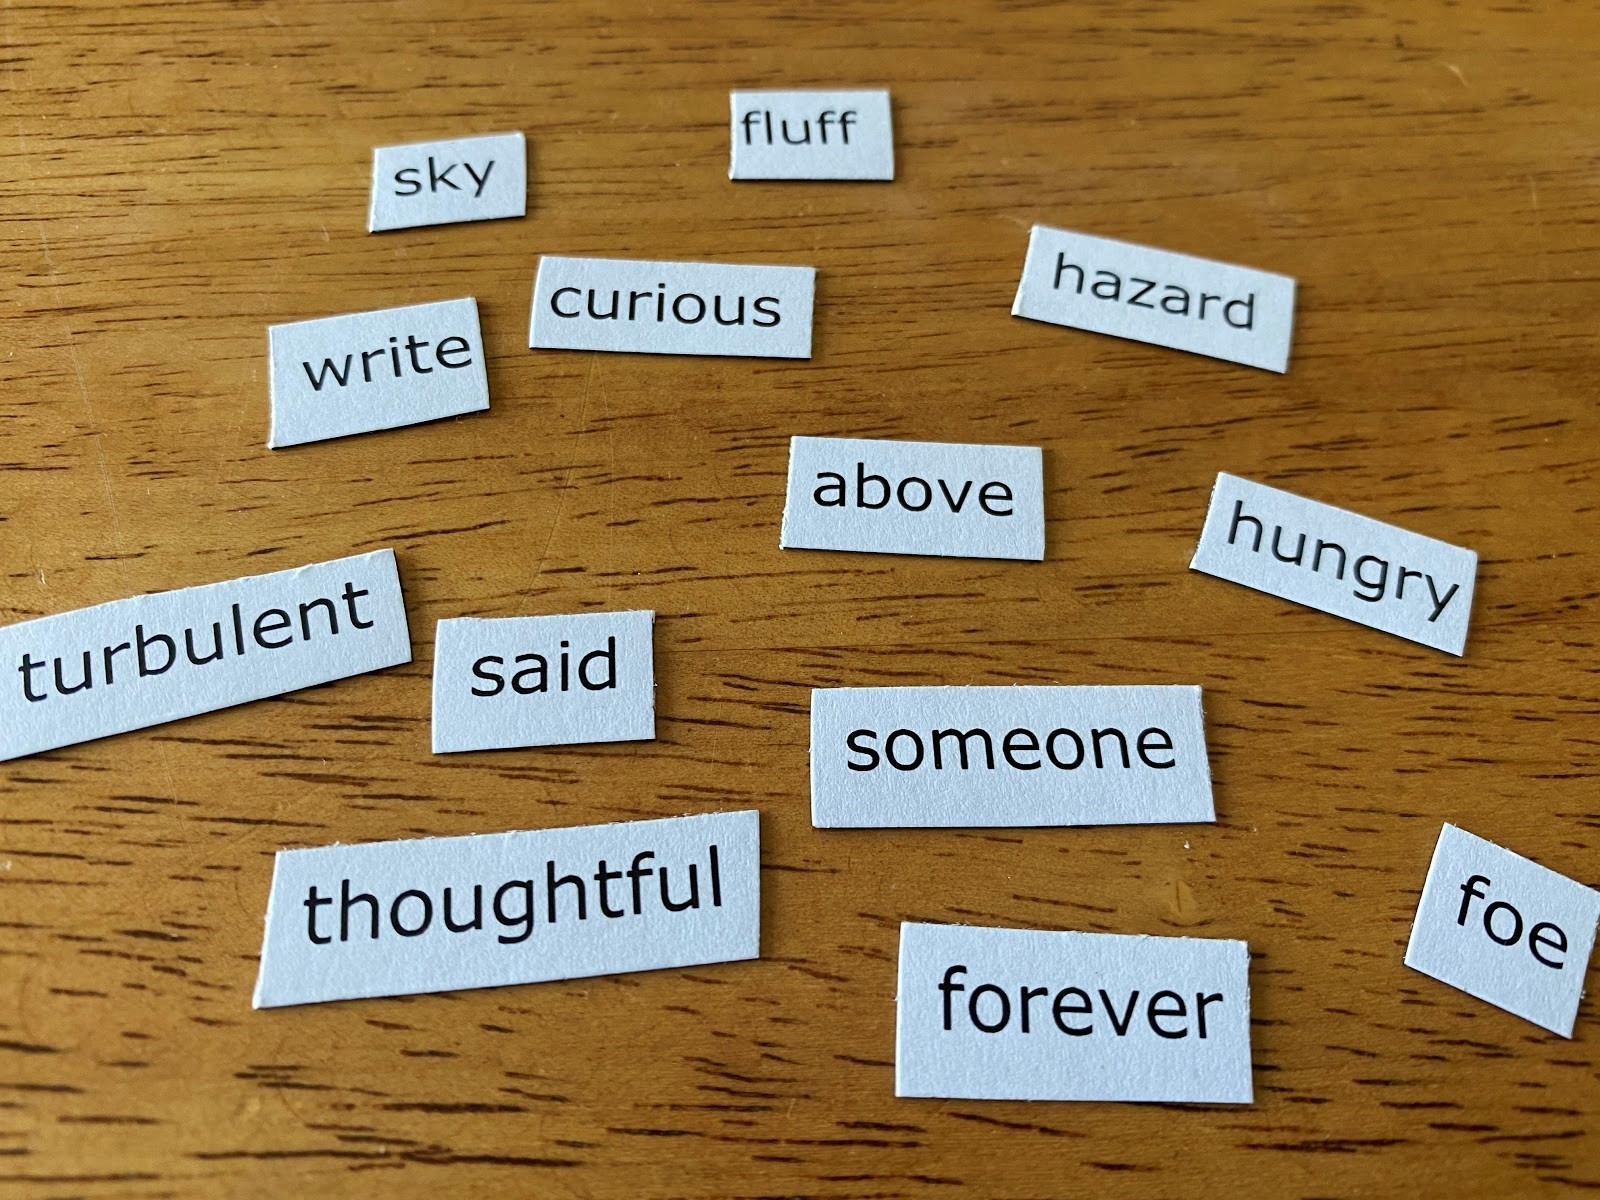
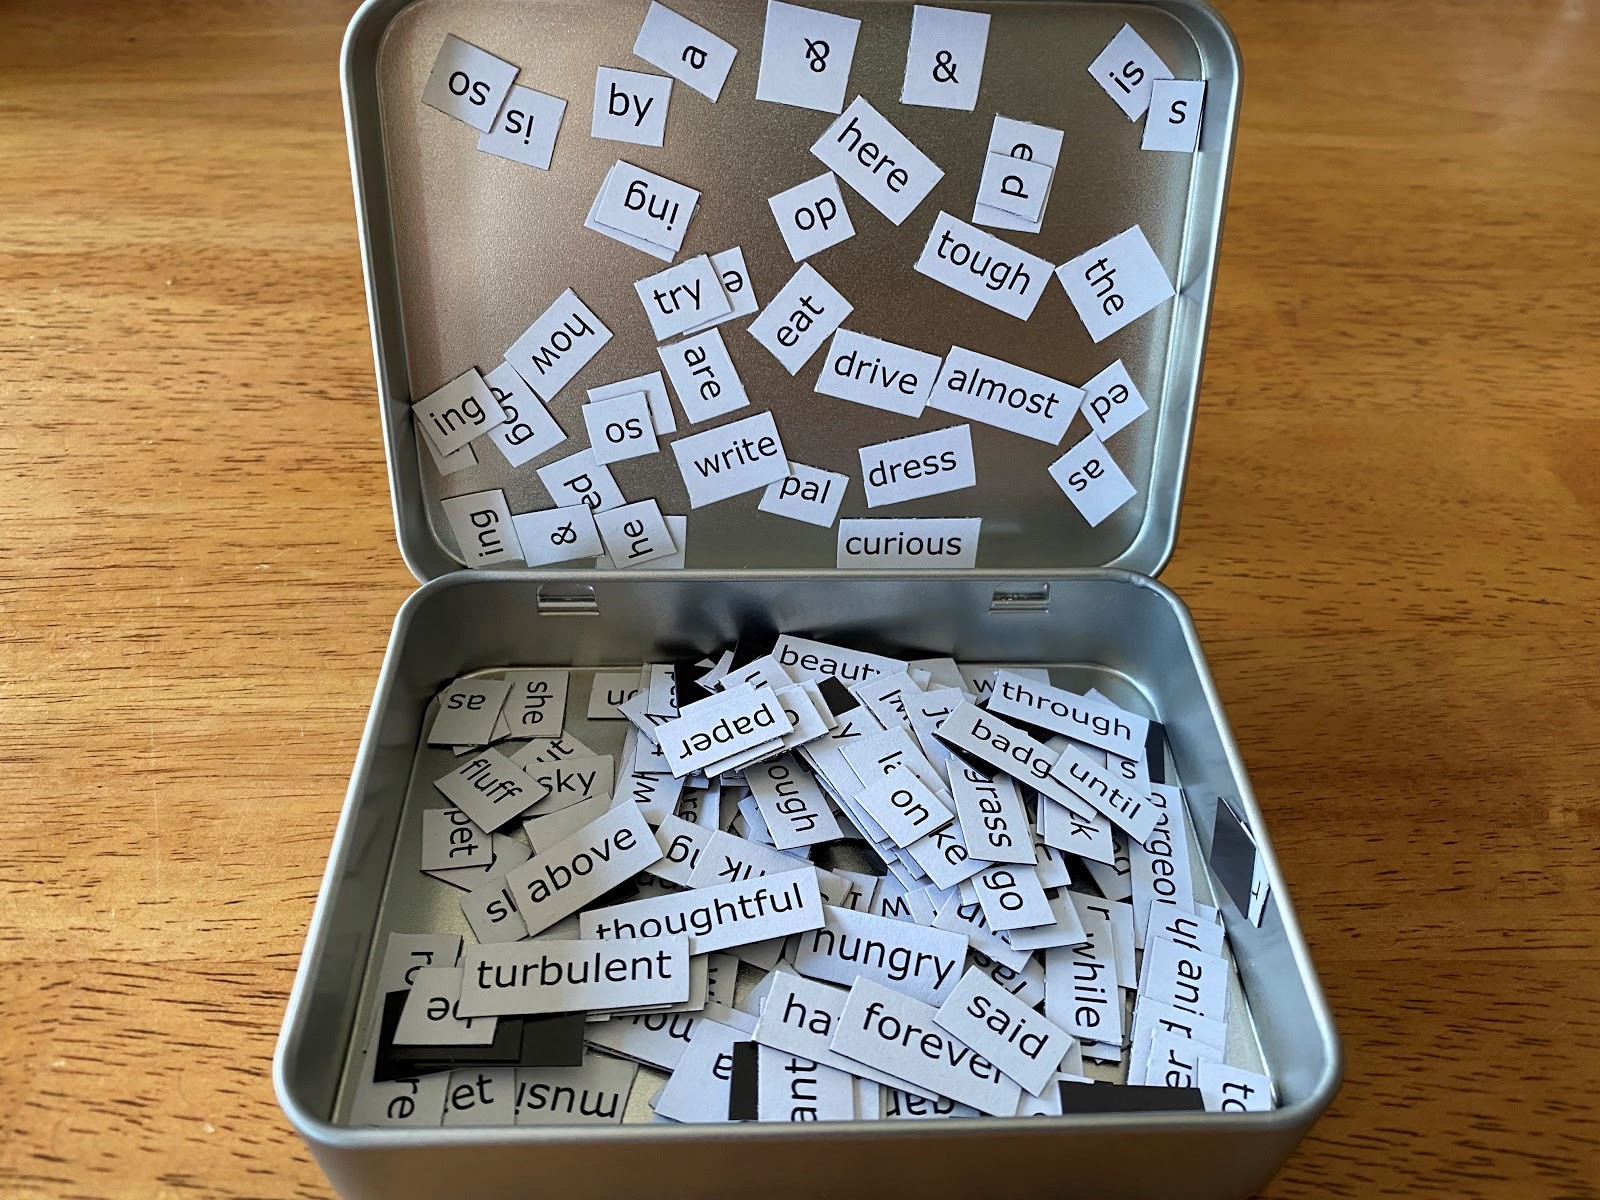
7. It’s time to get creative! Now you can use your words to write some poetry. Place them on your fridge, a magnetic board, a cookie sheet, or anything else you can find that is magnetic. Think of some more words you could add? You have been given an extra piece of magnet and blank paper to personalize your kits.
Some ideas for how to use your DIY Magnetic Poetry Kit:
- Check out a book on poetry to go along with your Take and Make Kit for inspiration!
- Write a poem with your family and/or friends. Take turns adding a word each until you’re satisfied.
- Make it into a game! Give each person participating a specific number of words (like 10 or 15). See what you all can come up with!
Show us what you created! Send us pictures at youthservices@balibrary.org.
Youth Services Librarian Allison -
March Take-and-Make Kits
Bring home a fun new project! Sign up from our Library Calendar and pick up a kit at the Youth Services desk or through our Parking Lot Pickup service between March 8-19.
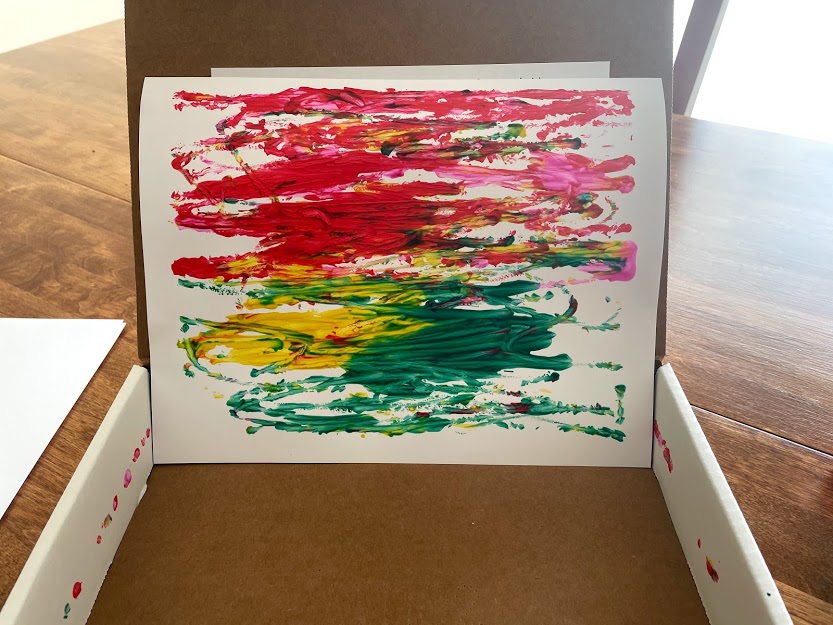
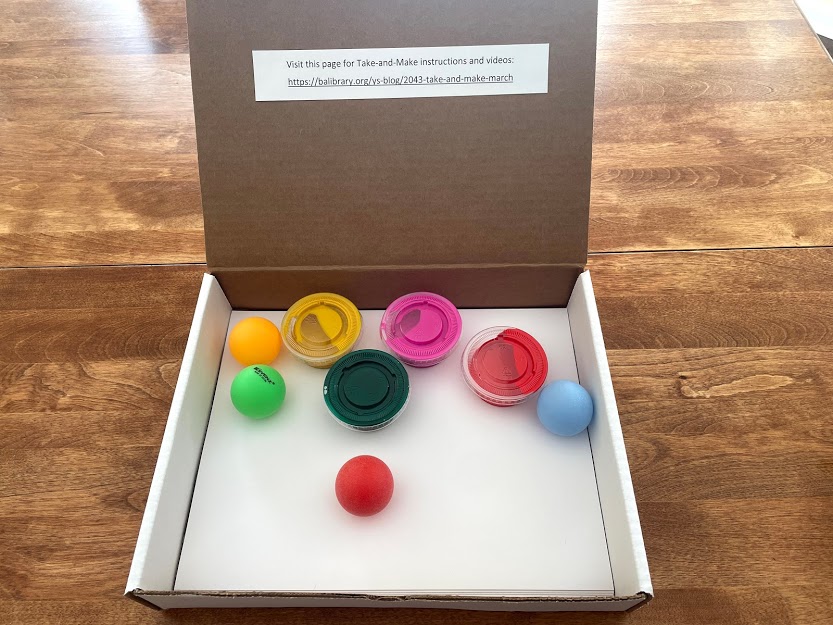
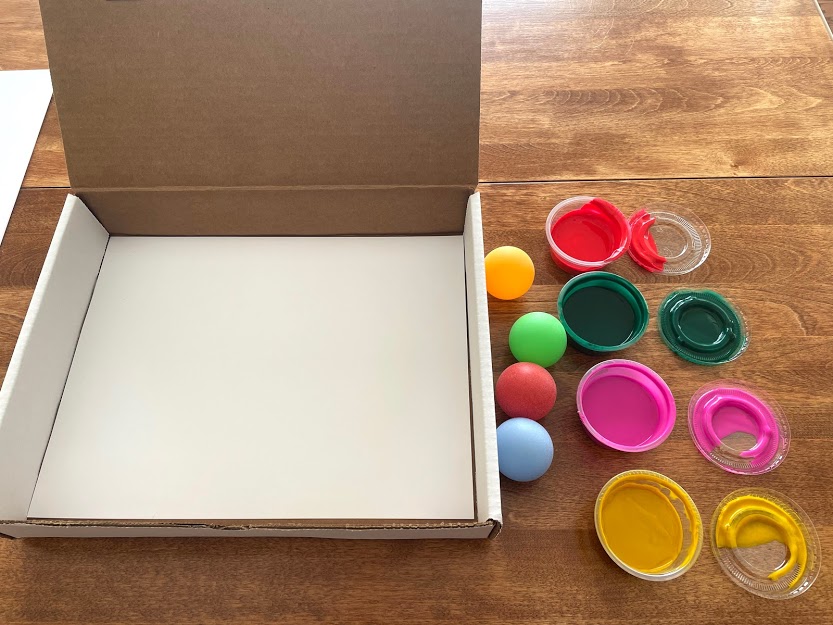
Toddler & PreK: Ping Pong Ball Painting
Use ping pong balls to create a unique work of art. Register for the March Toddler & PreK Take-and-Make Kit here.
Your kit contains:
· 4 containers of different colored paint
· 4 ping pong balls
· 10 sheets of cardstock
Instructions:
1. Remove all the items from the box.
2. Place one sheet of cardstock into the bottom of the box.
3. Open the paint containers.
4. Dip each of the ping pong balls into a different color of paint.
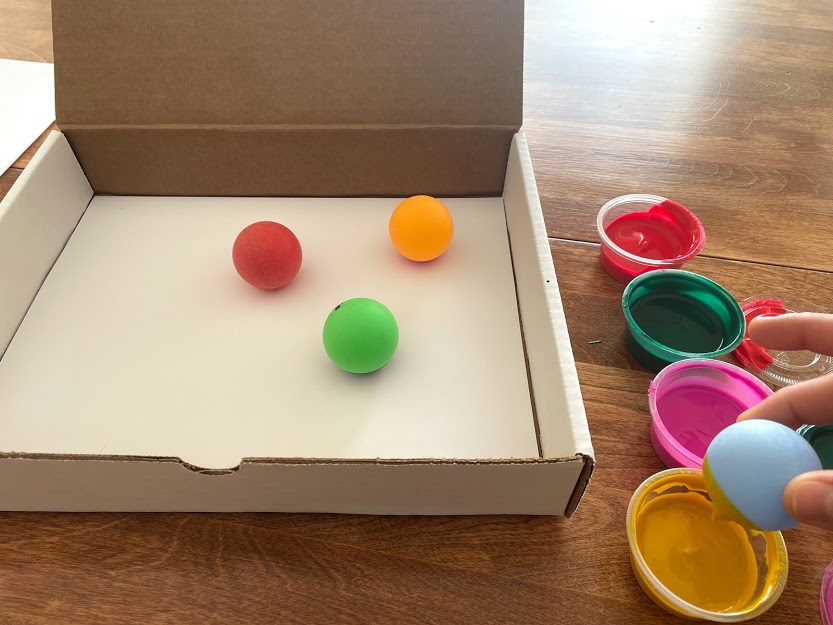
5. Place them on top of the cardstock in the box.
6. Leave the box open and move the box back and forth to roll the ping pong balls across the cardstock. Watch the paint as it streaks across your cardstock.
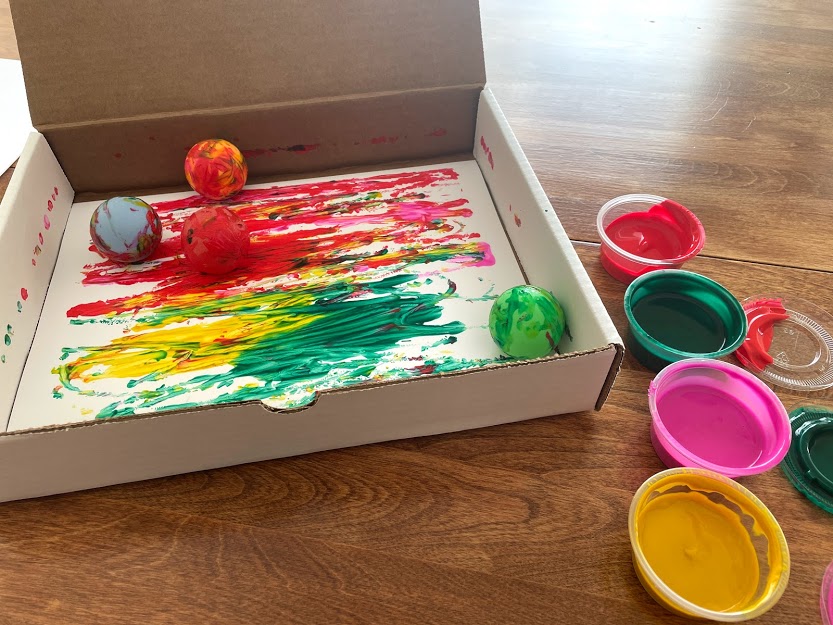
7. Remove the ping pong balls.
8. Take the piece of cardstock out of the box and admire your art work!
9. Rinse and dry the ping pong balls to make another work of art!
Talking points to consider and alternate ways to create art:
· Talk to your child about the different colors of paint. Have them identify each one individually.
· Talk about the new colors created as the original colors mix together.
· Use only one, two, or three of the ping pong balls with different colors and talk about how the art looks different with less or more colors.
· Instead of leaving the box open, close the box with the ping pong balls and paint inside and give it a good shake! Compare the art you make with the rolling technique vs. the shaking technique.
Show us what you created! Send us pictures at youthservices@balibrary.org.
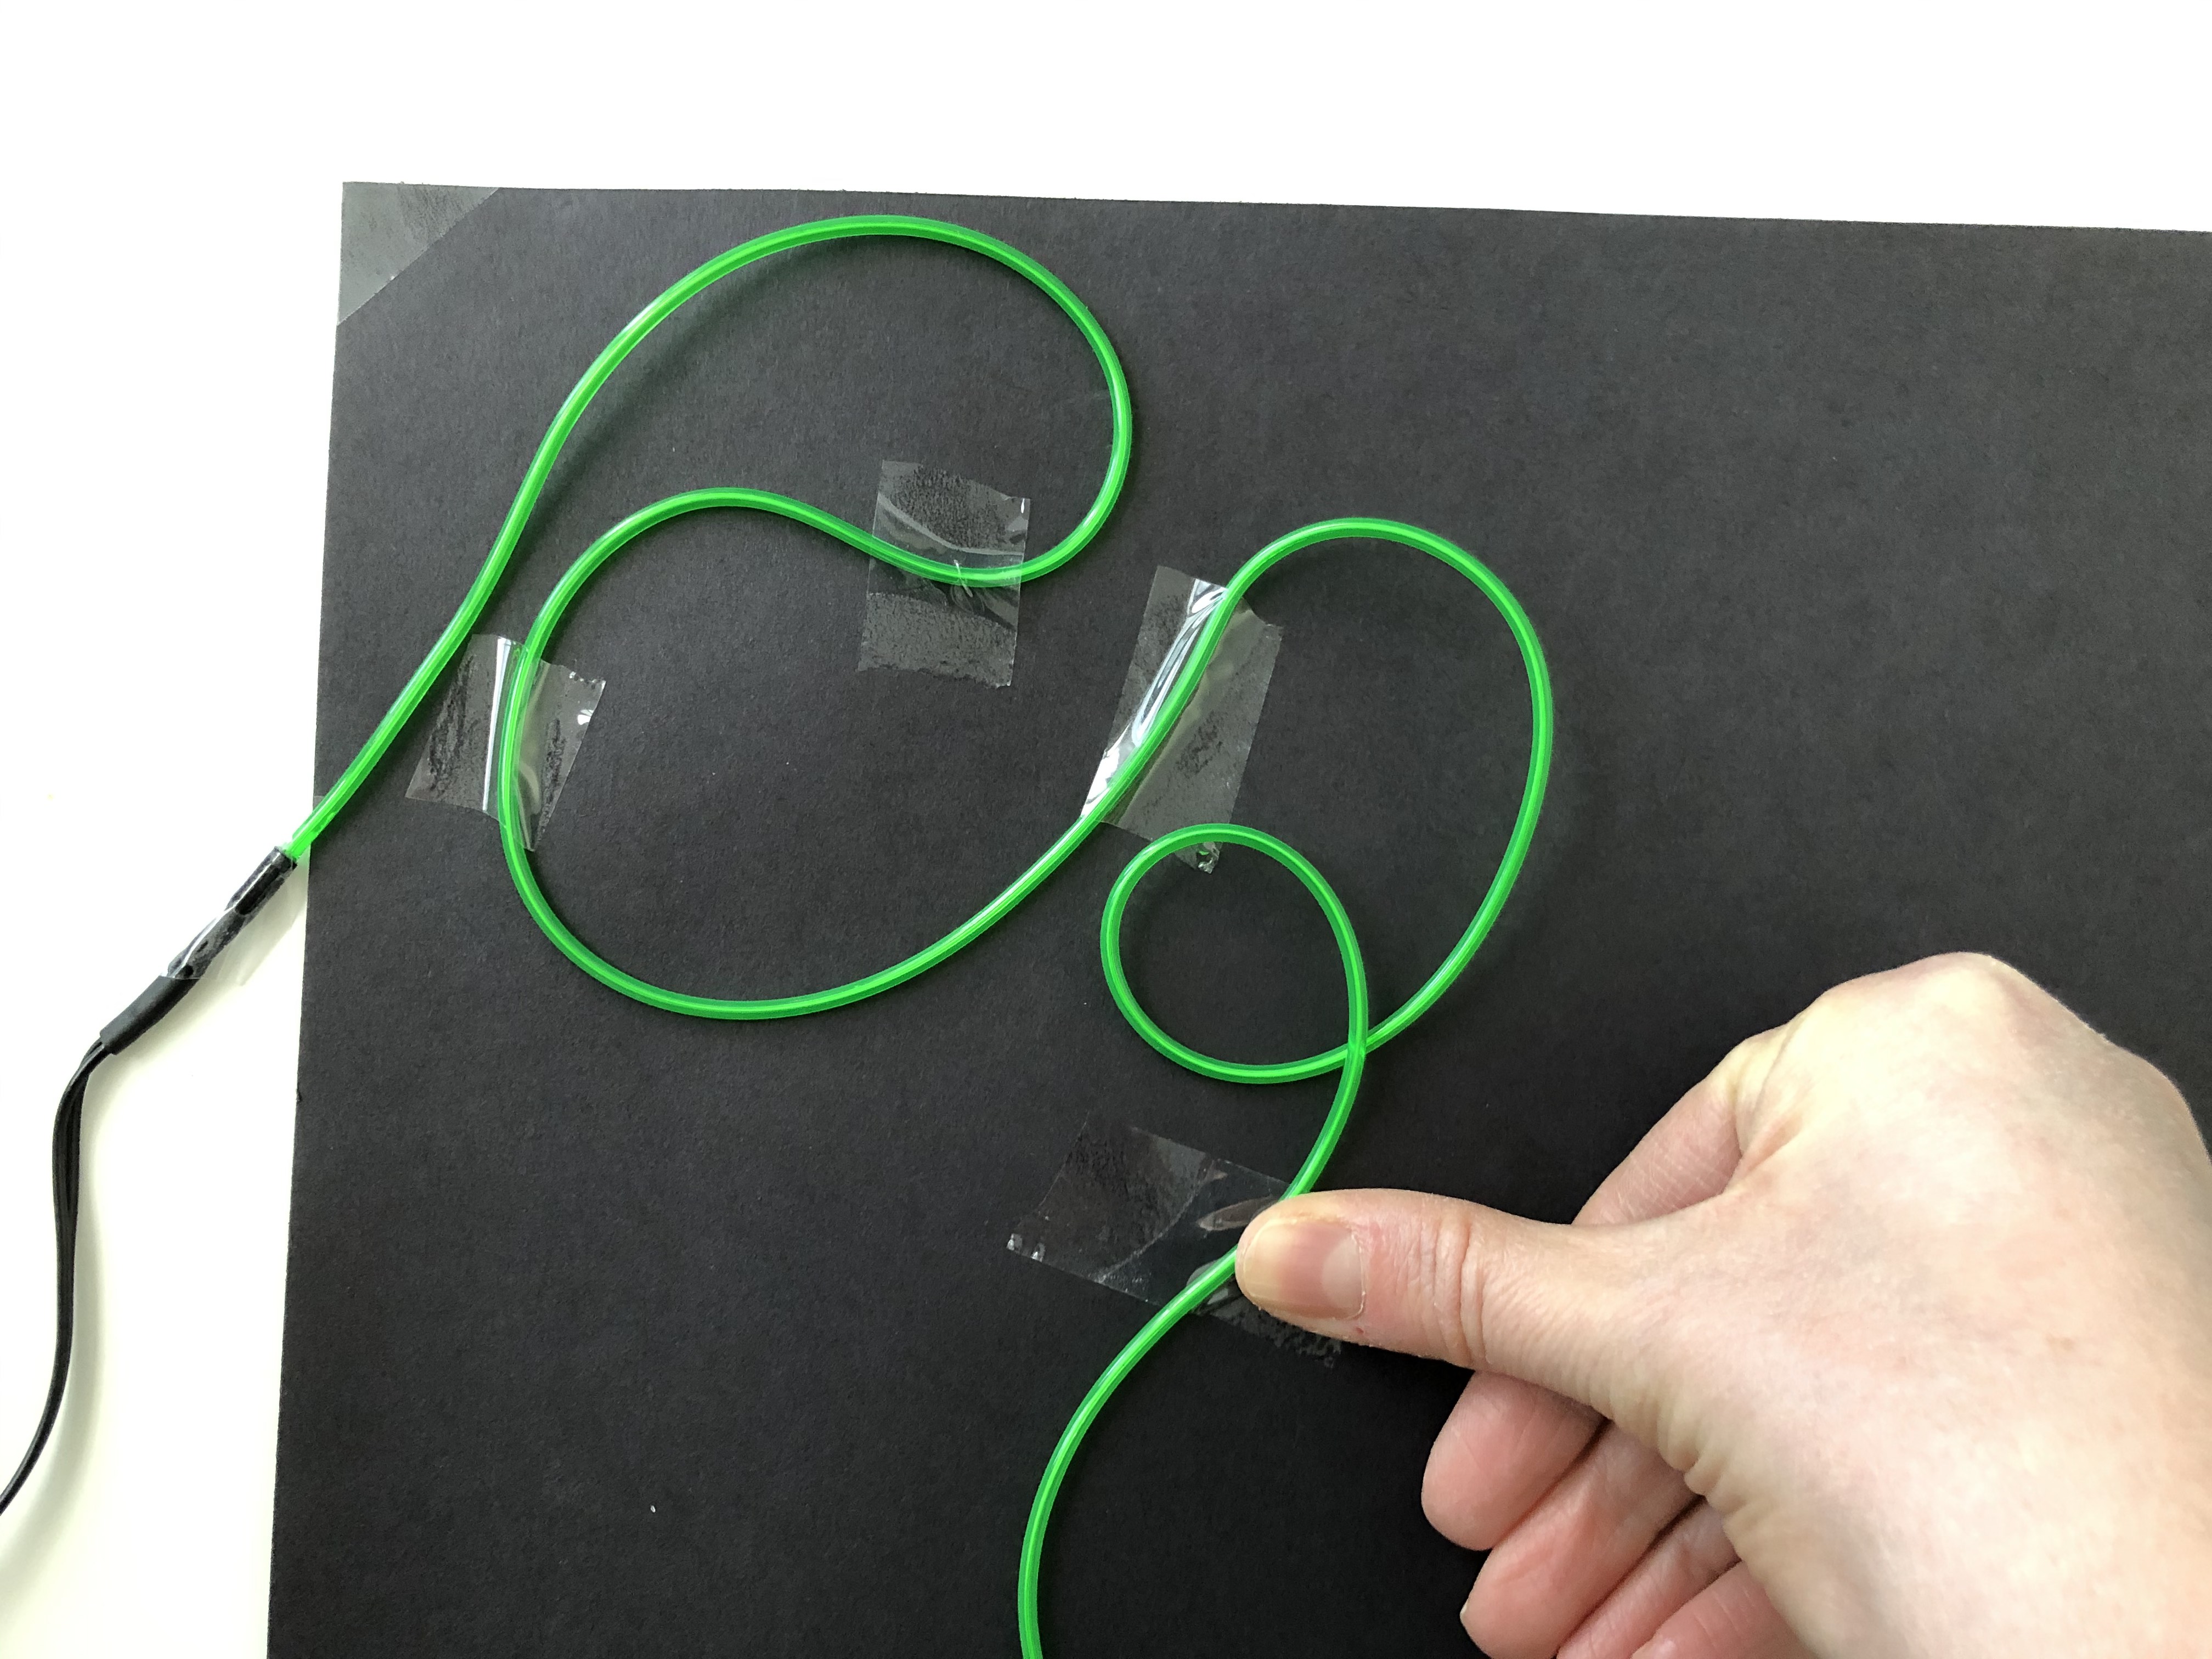
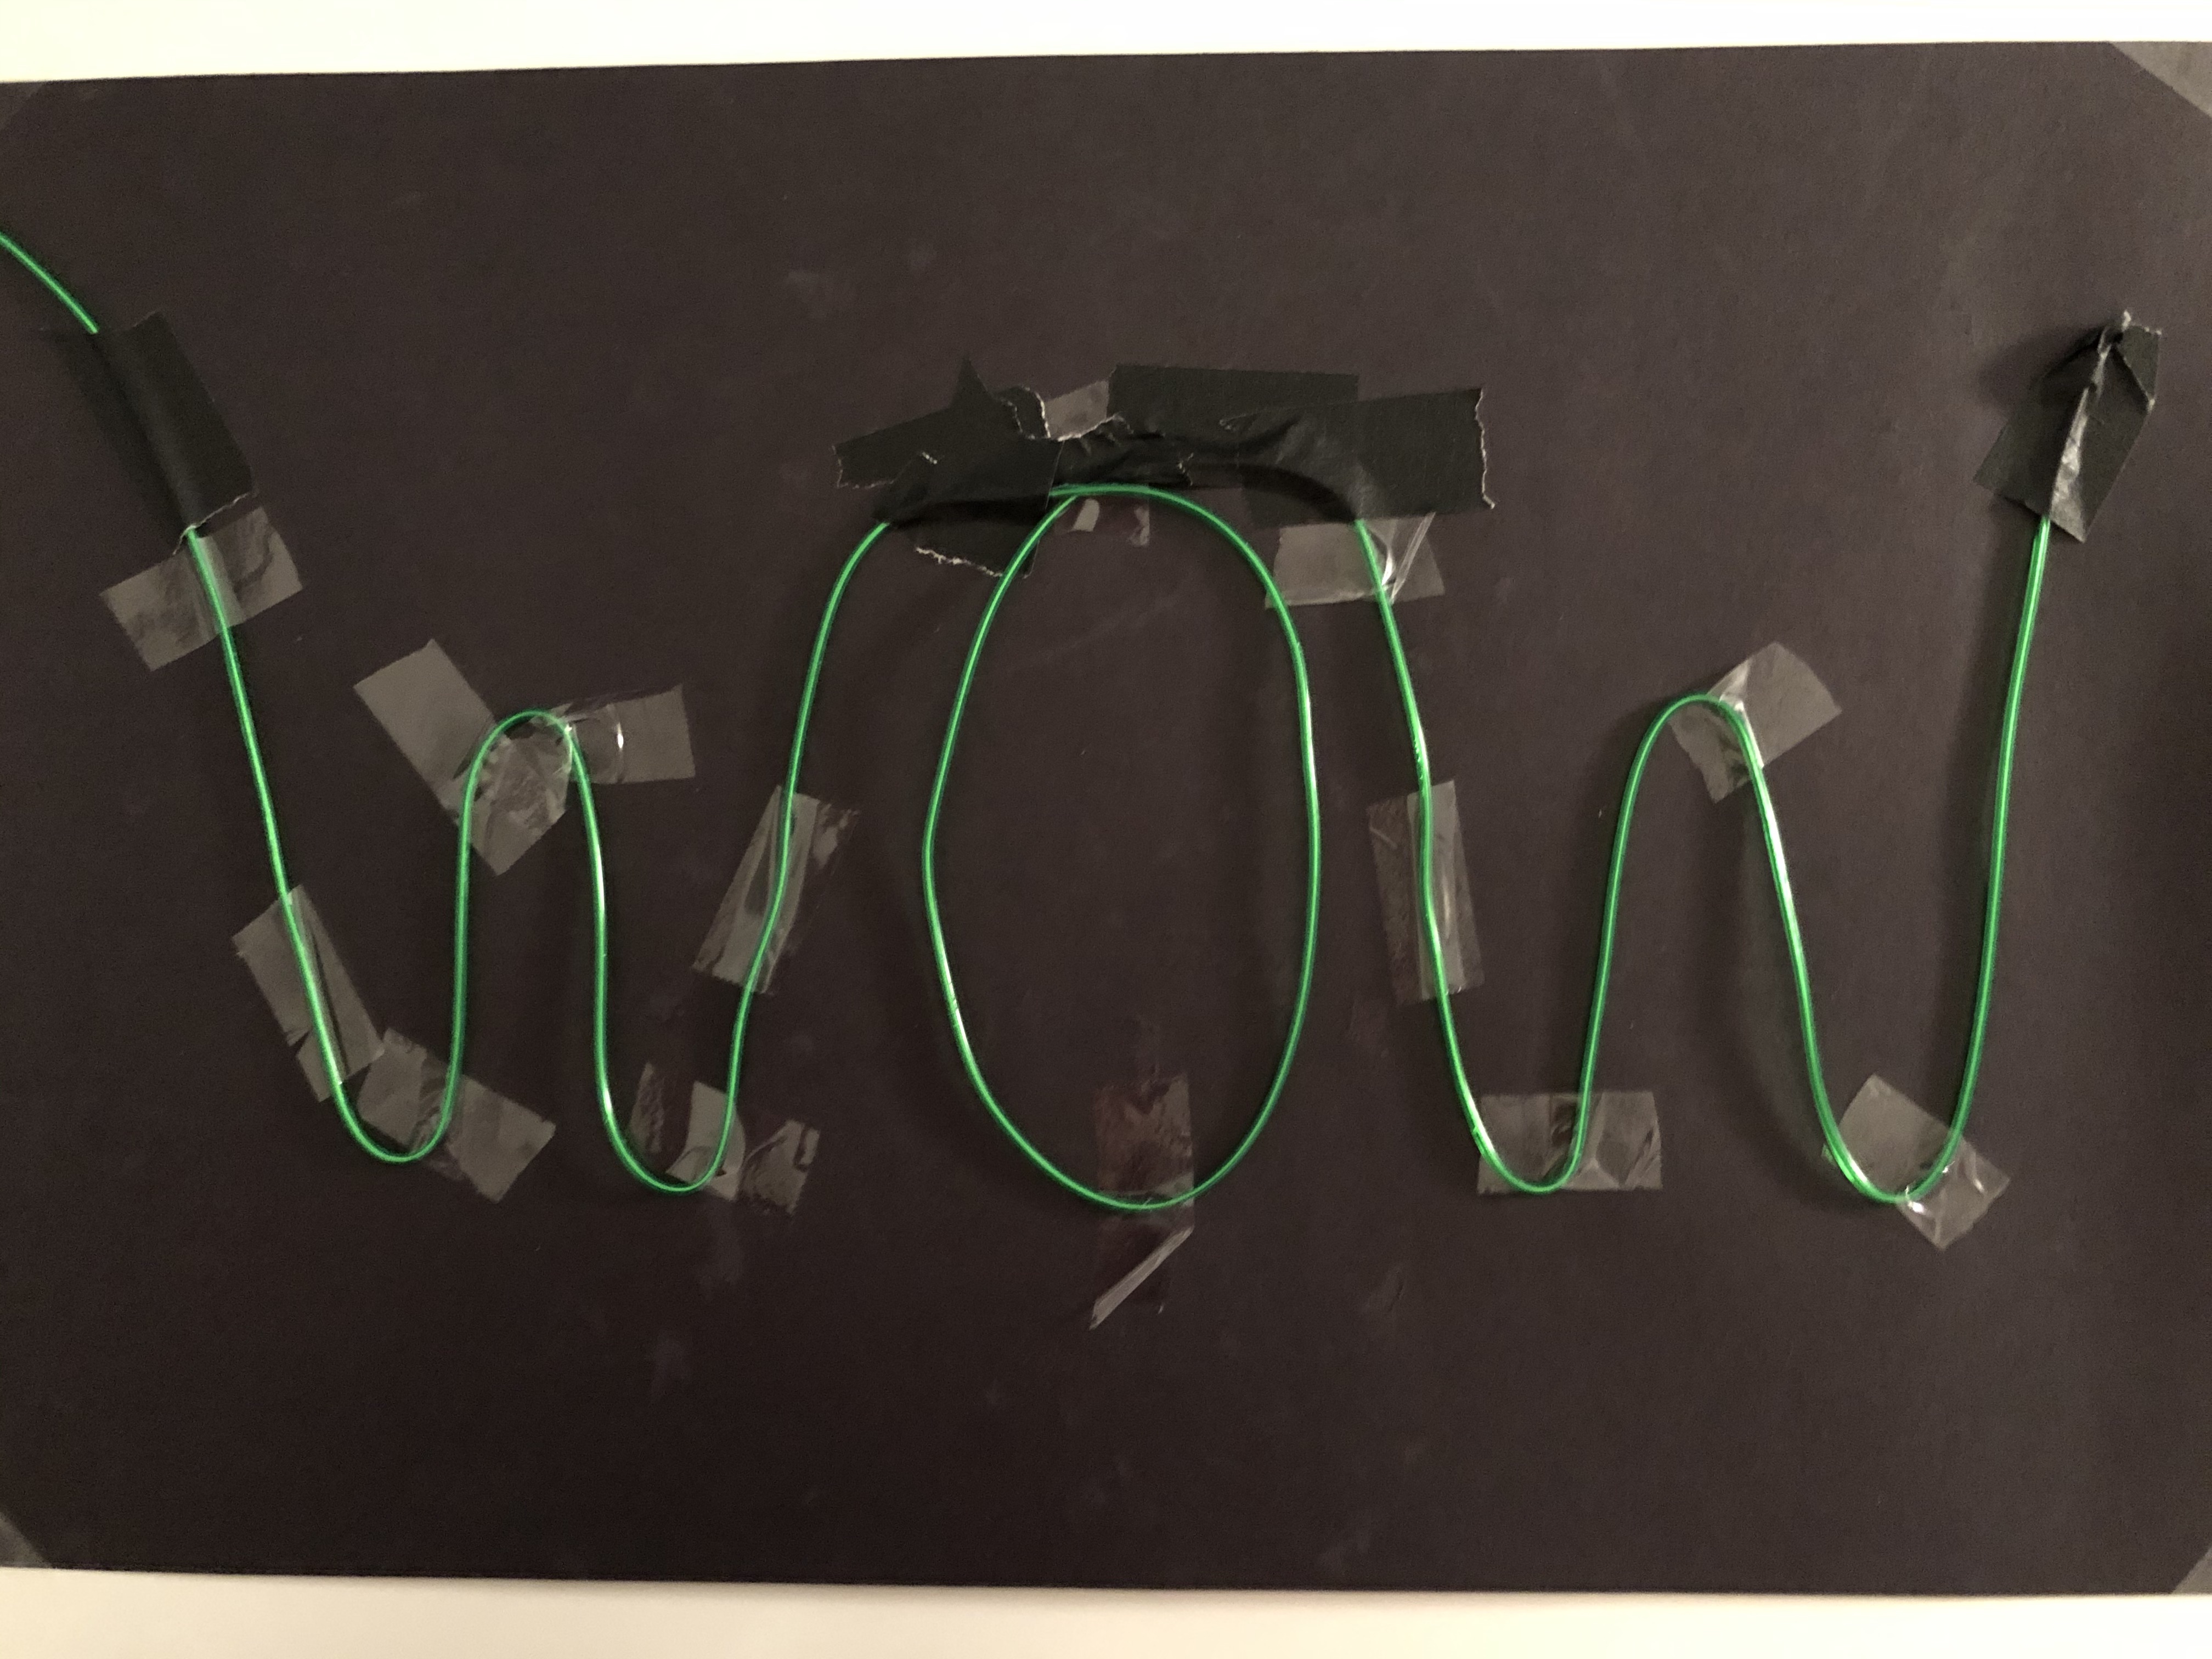
Grades K-2: Light-Up Lines
Create a picture that glows. Register for the February Grades K-2 Take-and-Make Kit here.
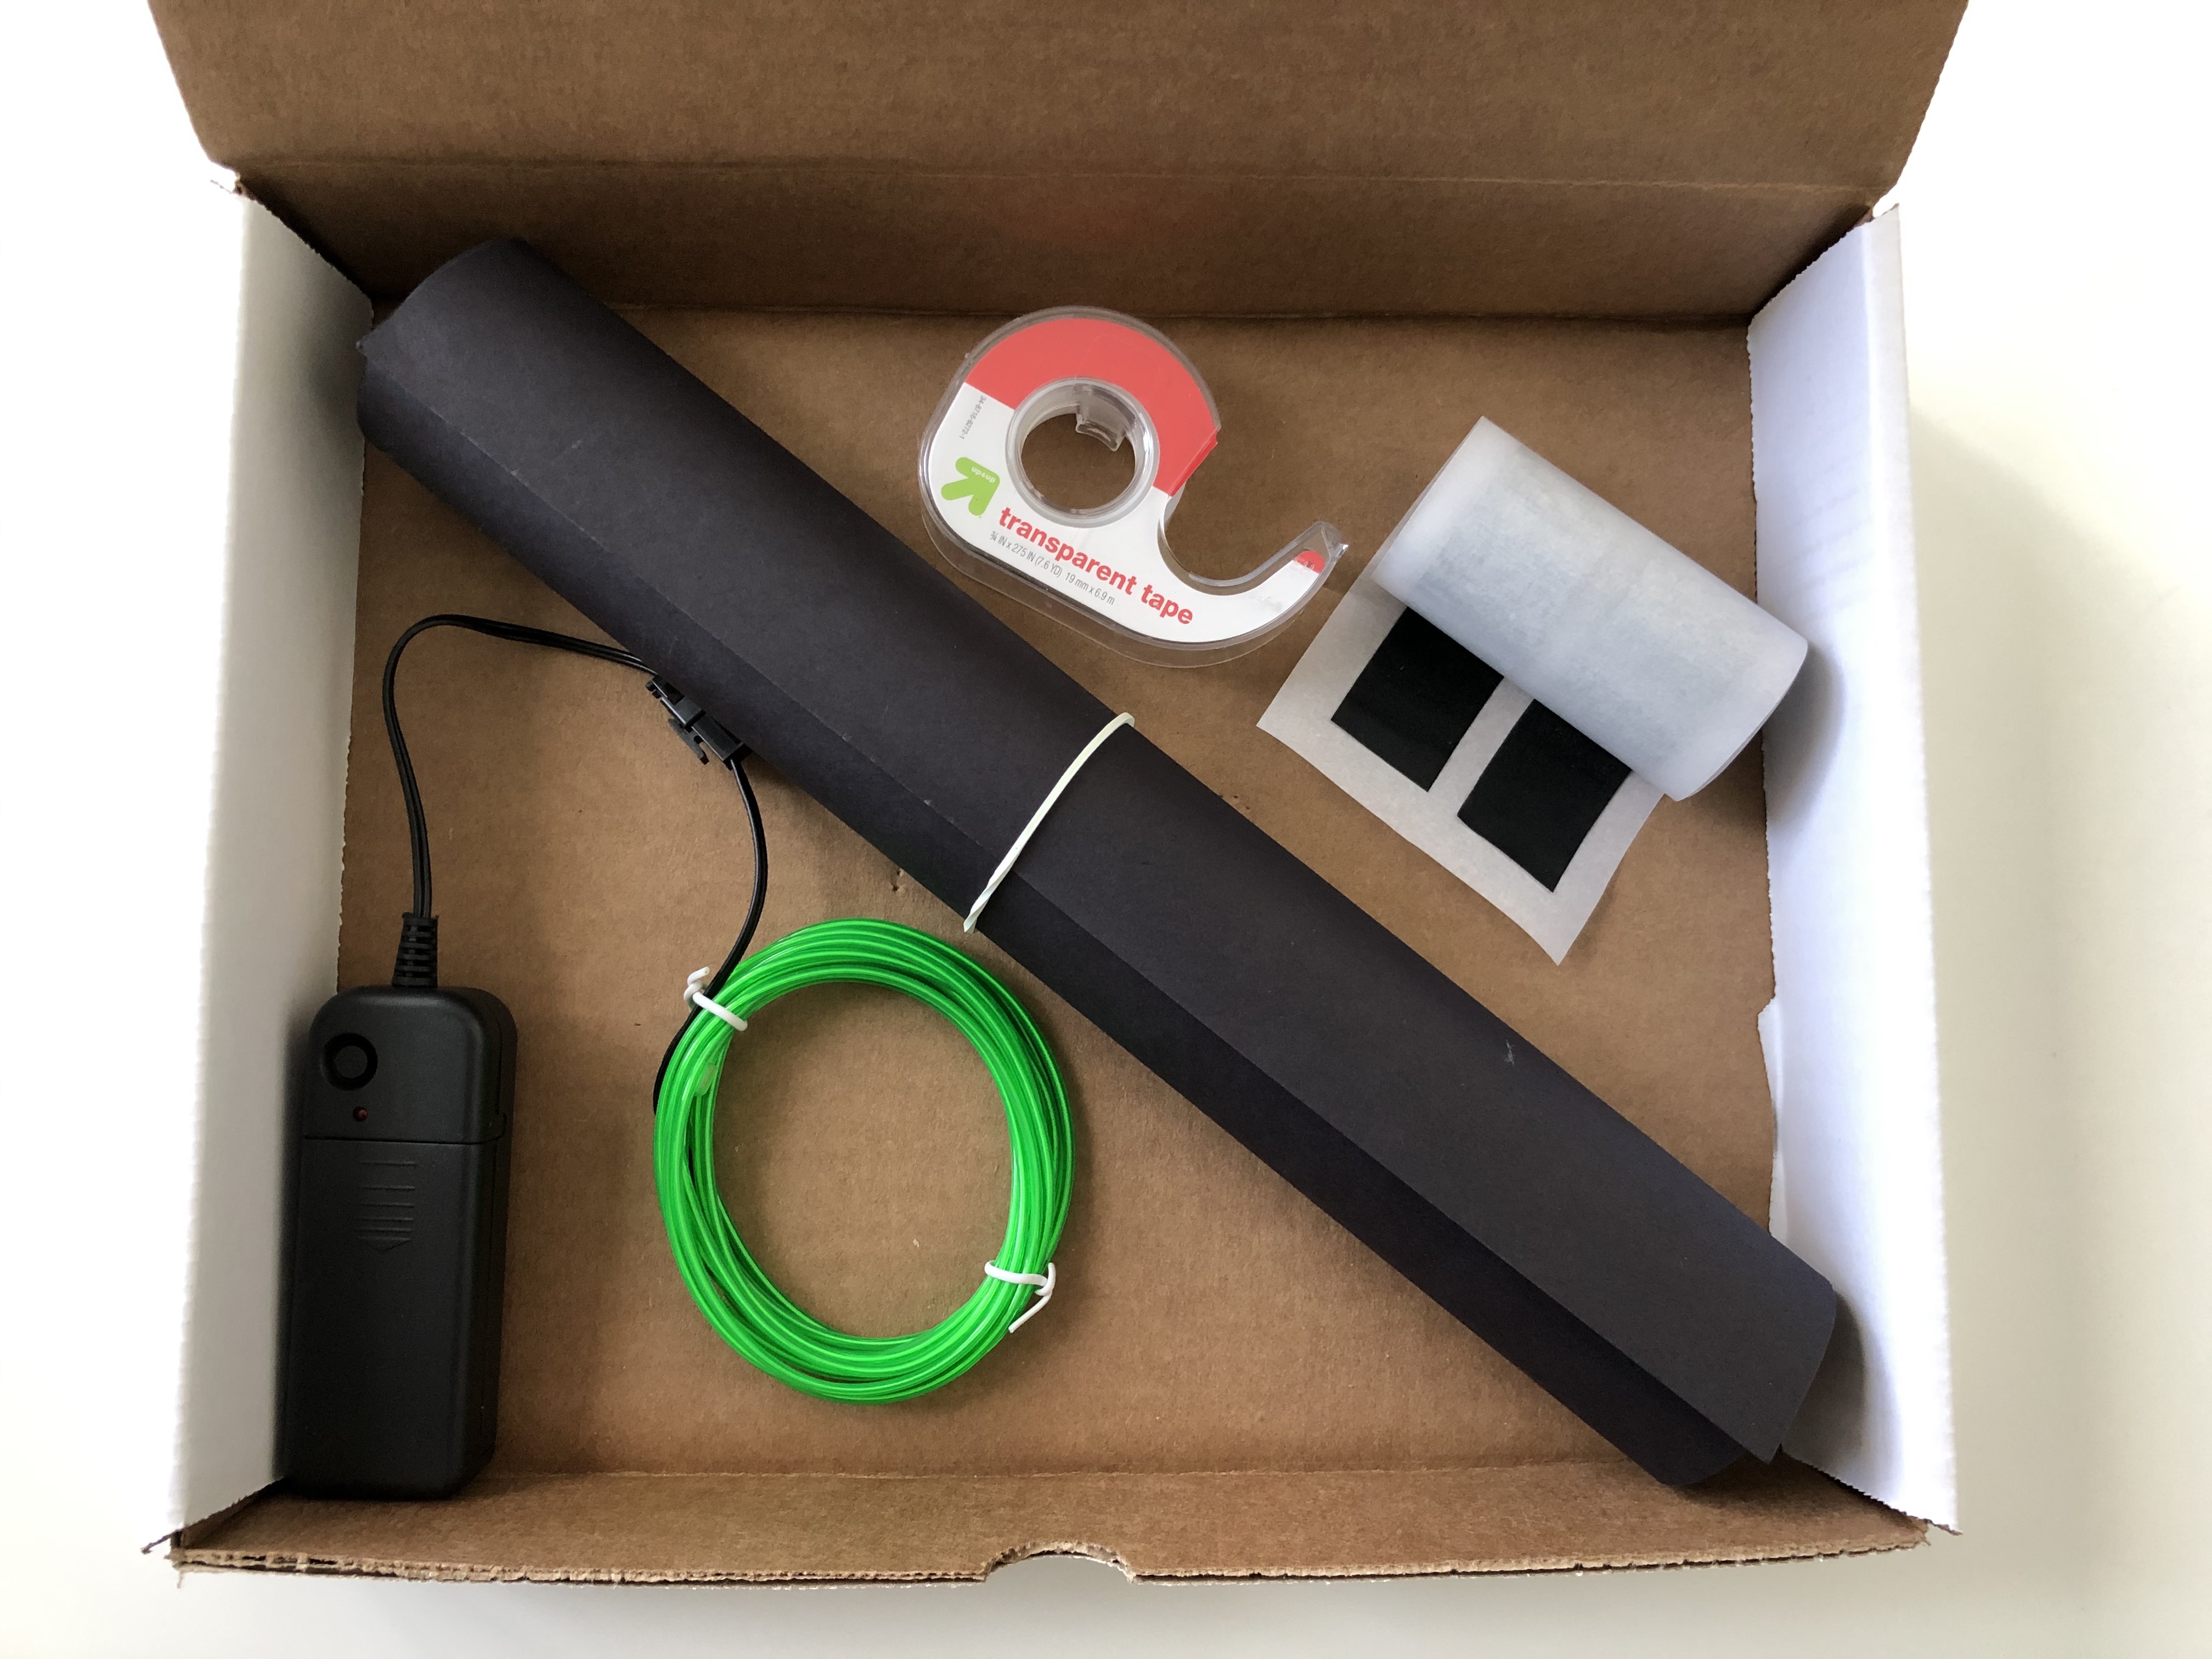
Your kit contains:
1 length of electroluminescent wire with battery pack
1 sheet of black paper
Clear tape
Black masking tape
You will also need:
Scissors (optional, to help cut tape)
A dark space
A camera
Instructions:
1. Roll out the black paper and tape to your workspace.
2. Lay out the wire on the black paper, using tape to keep it in place.
3. You can “draw” an image or just random patterns.
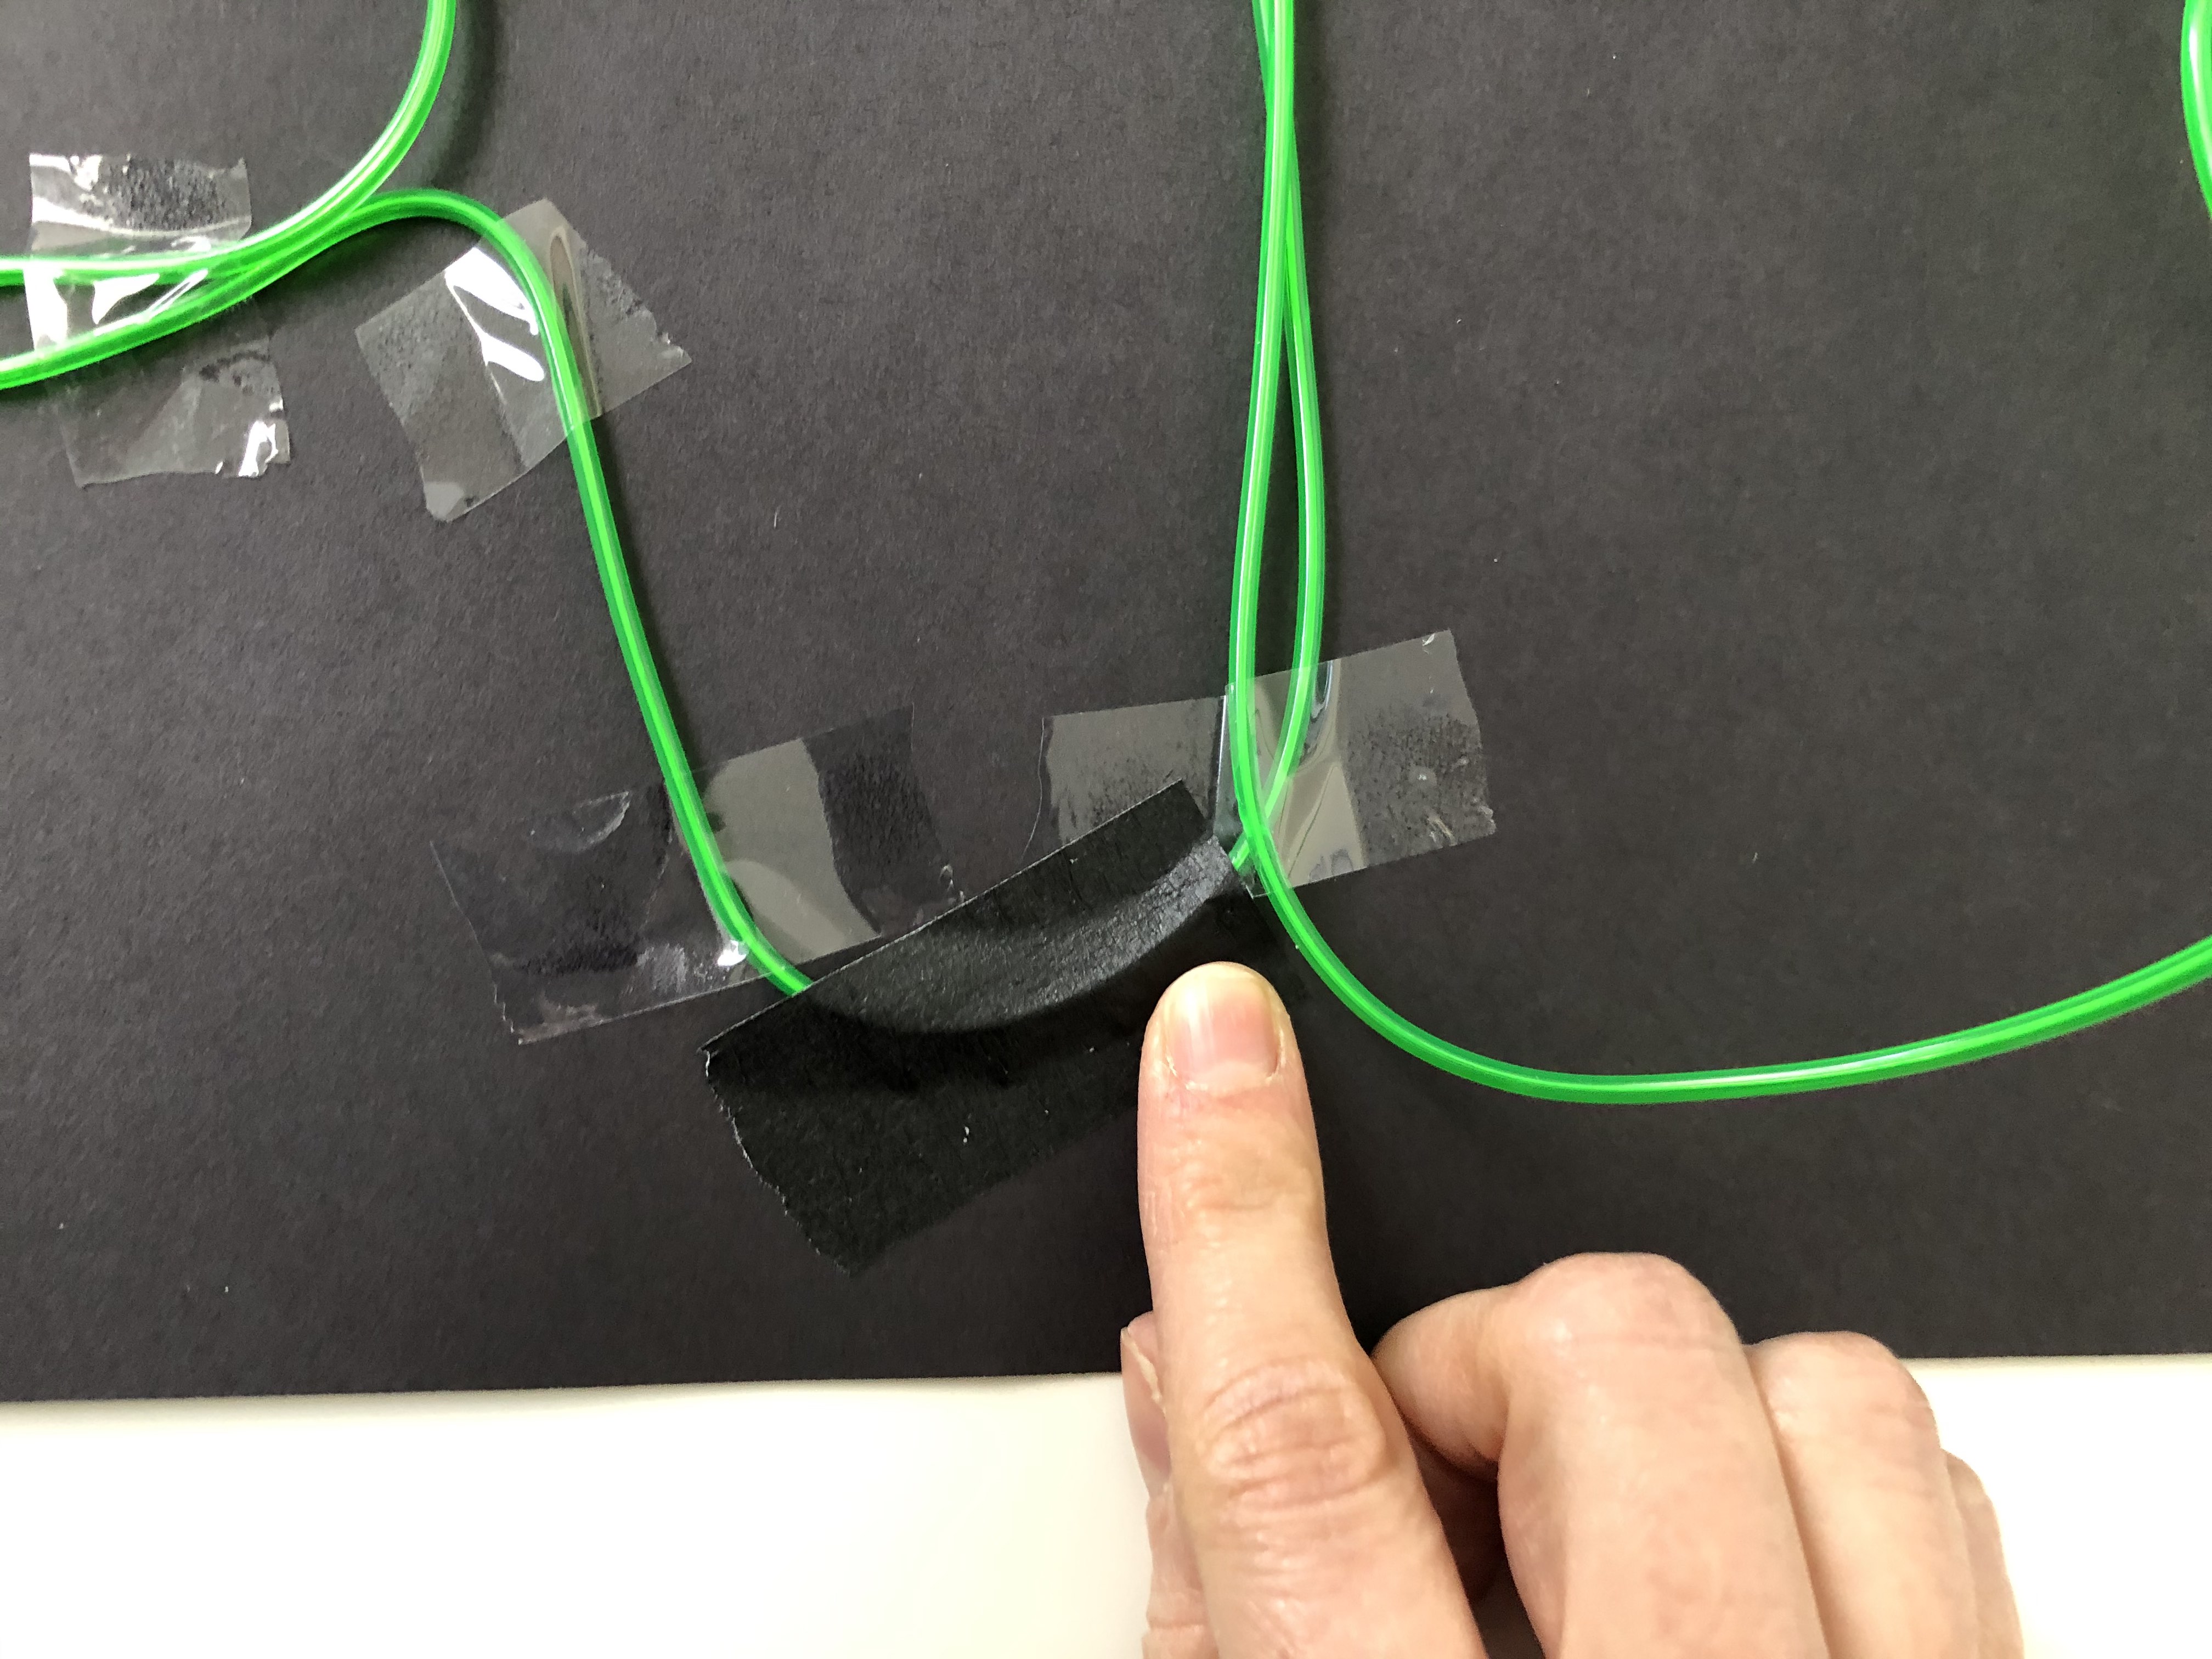
4. Use the clear tape to allow the light to shine through. If you want to stop and start your line (for example, for letters or separate images), you can use the masking tape to “black out” the line.
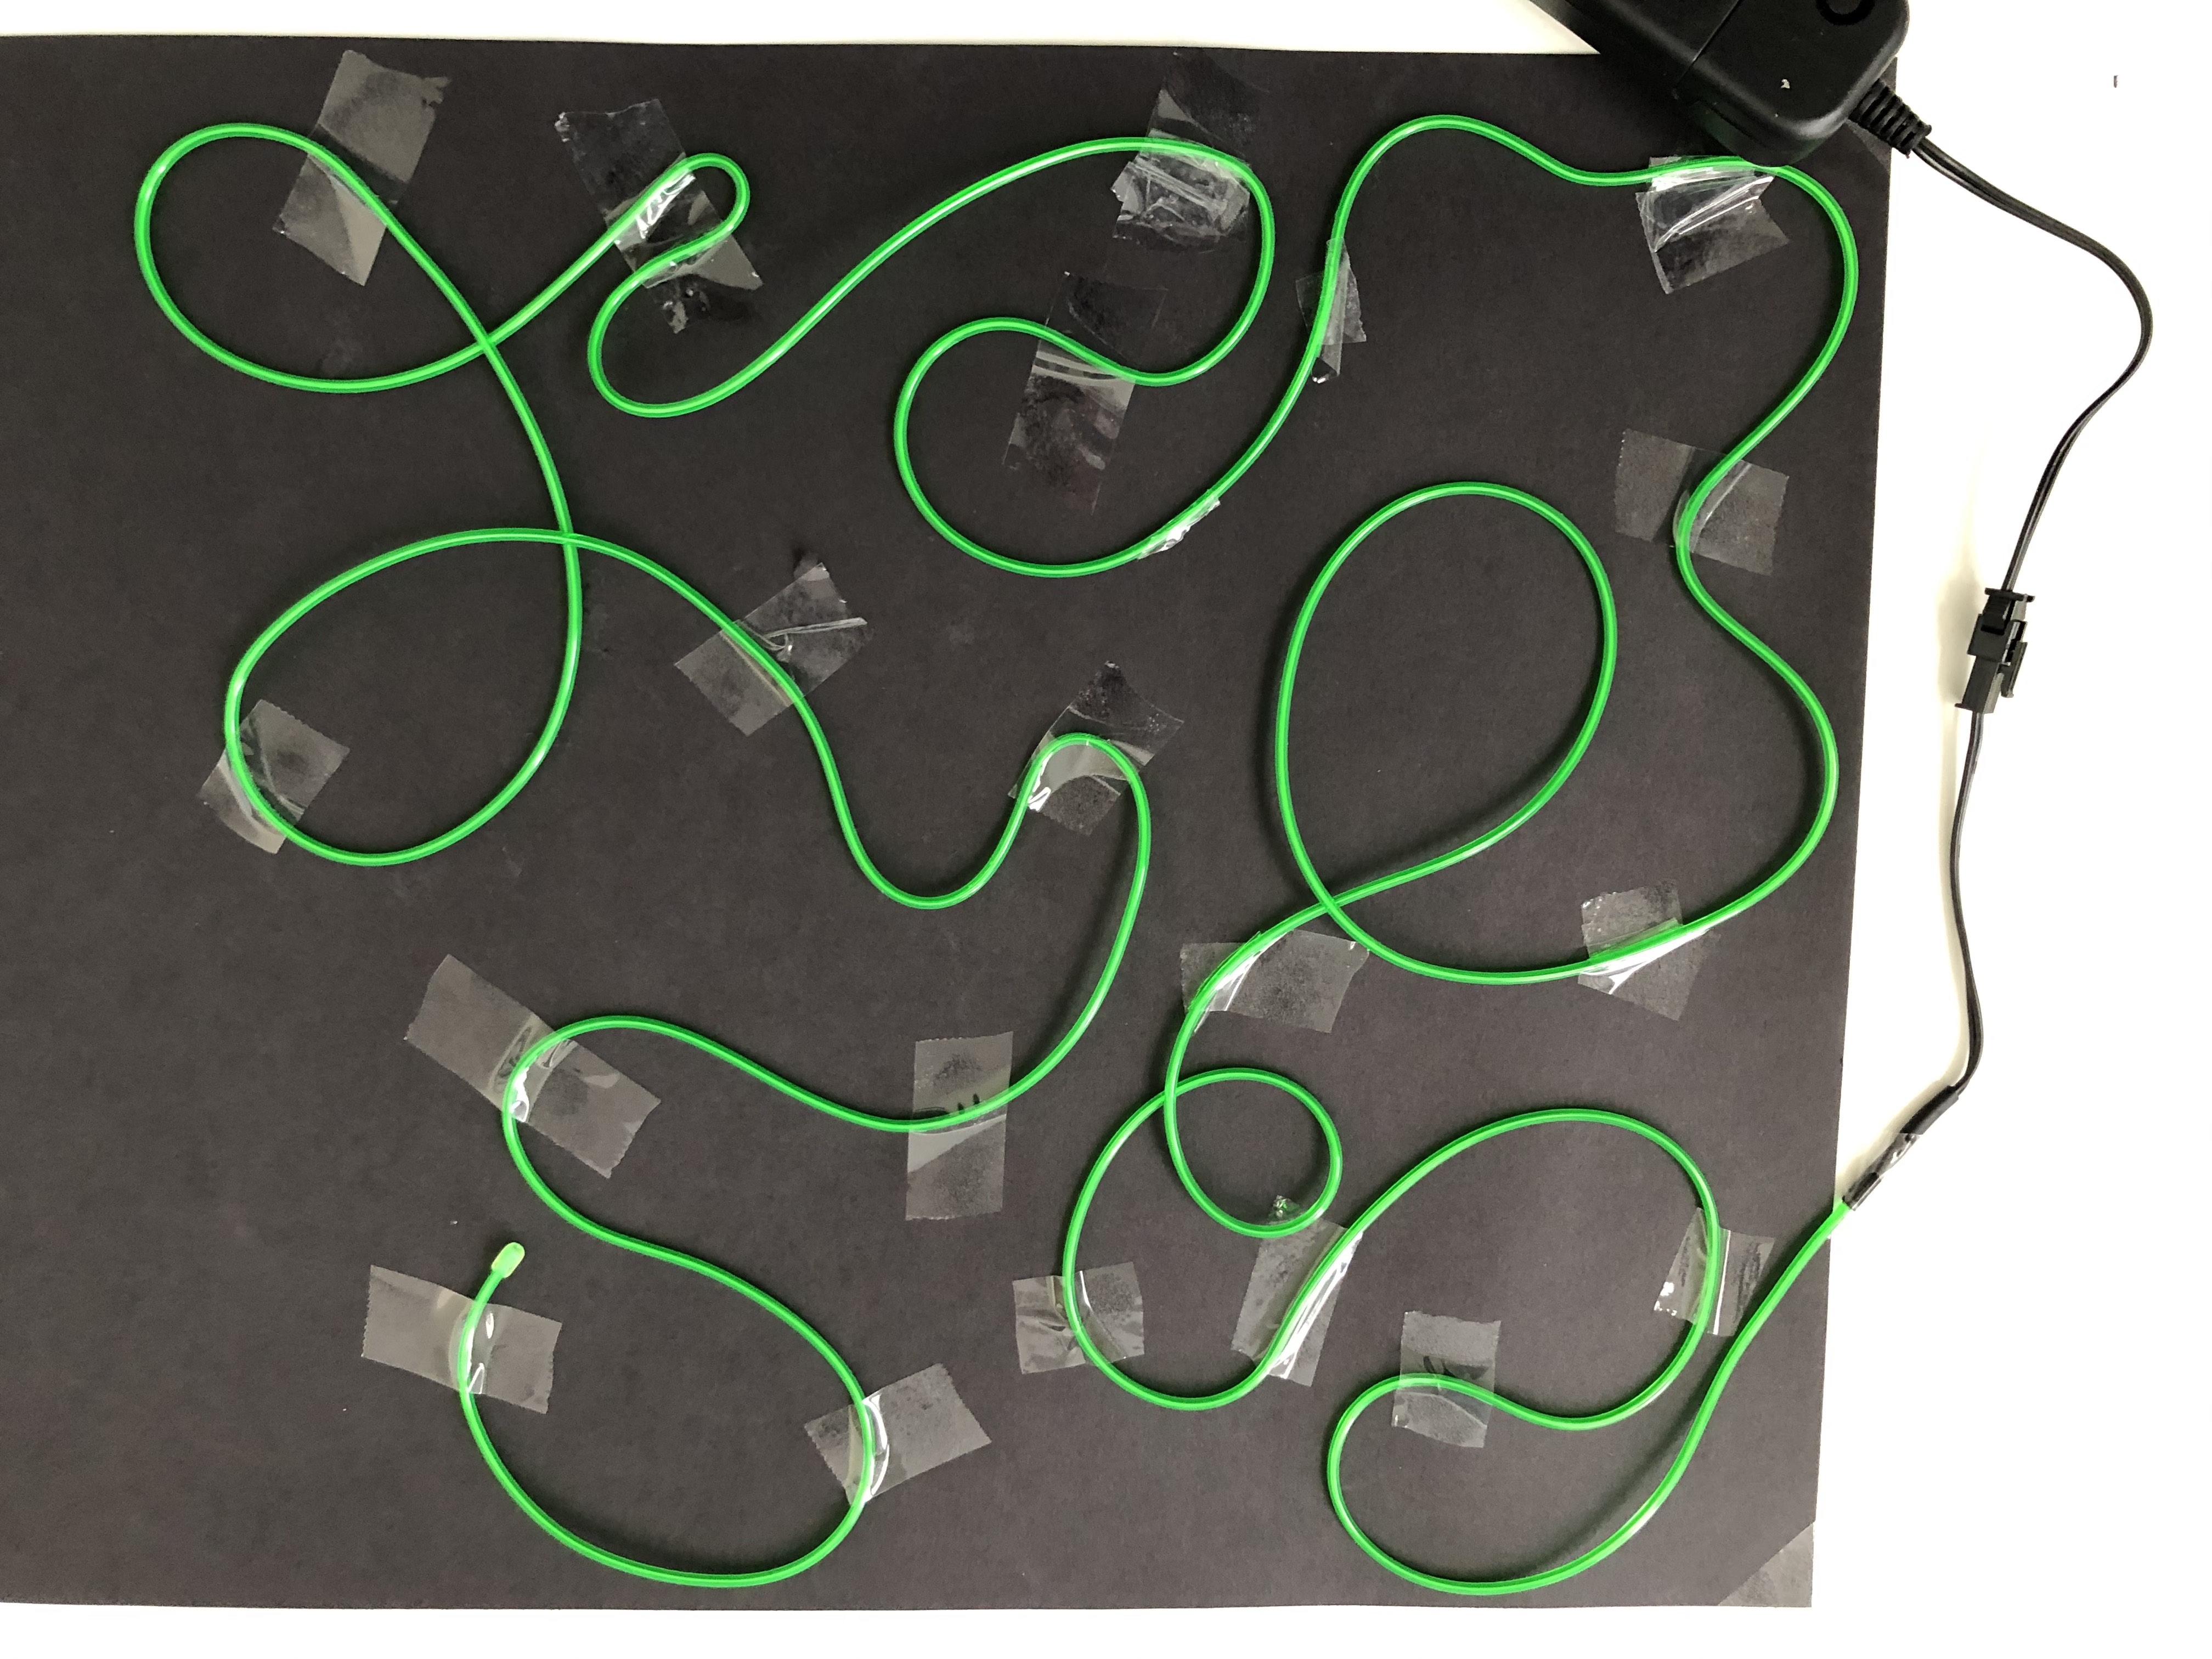
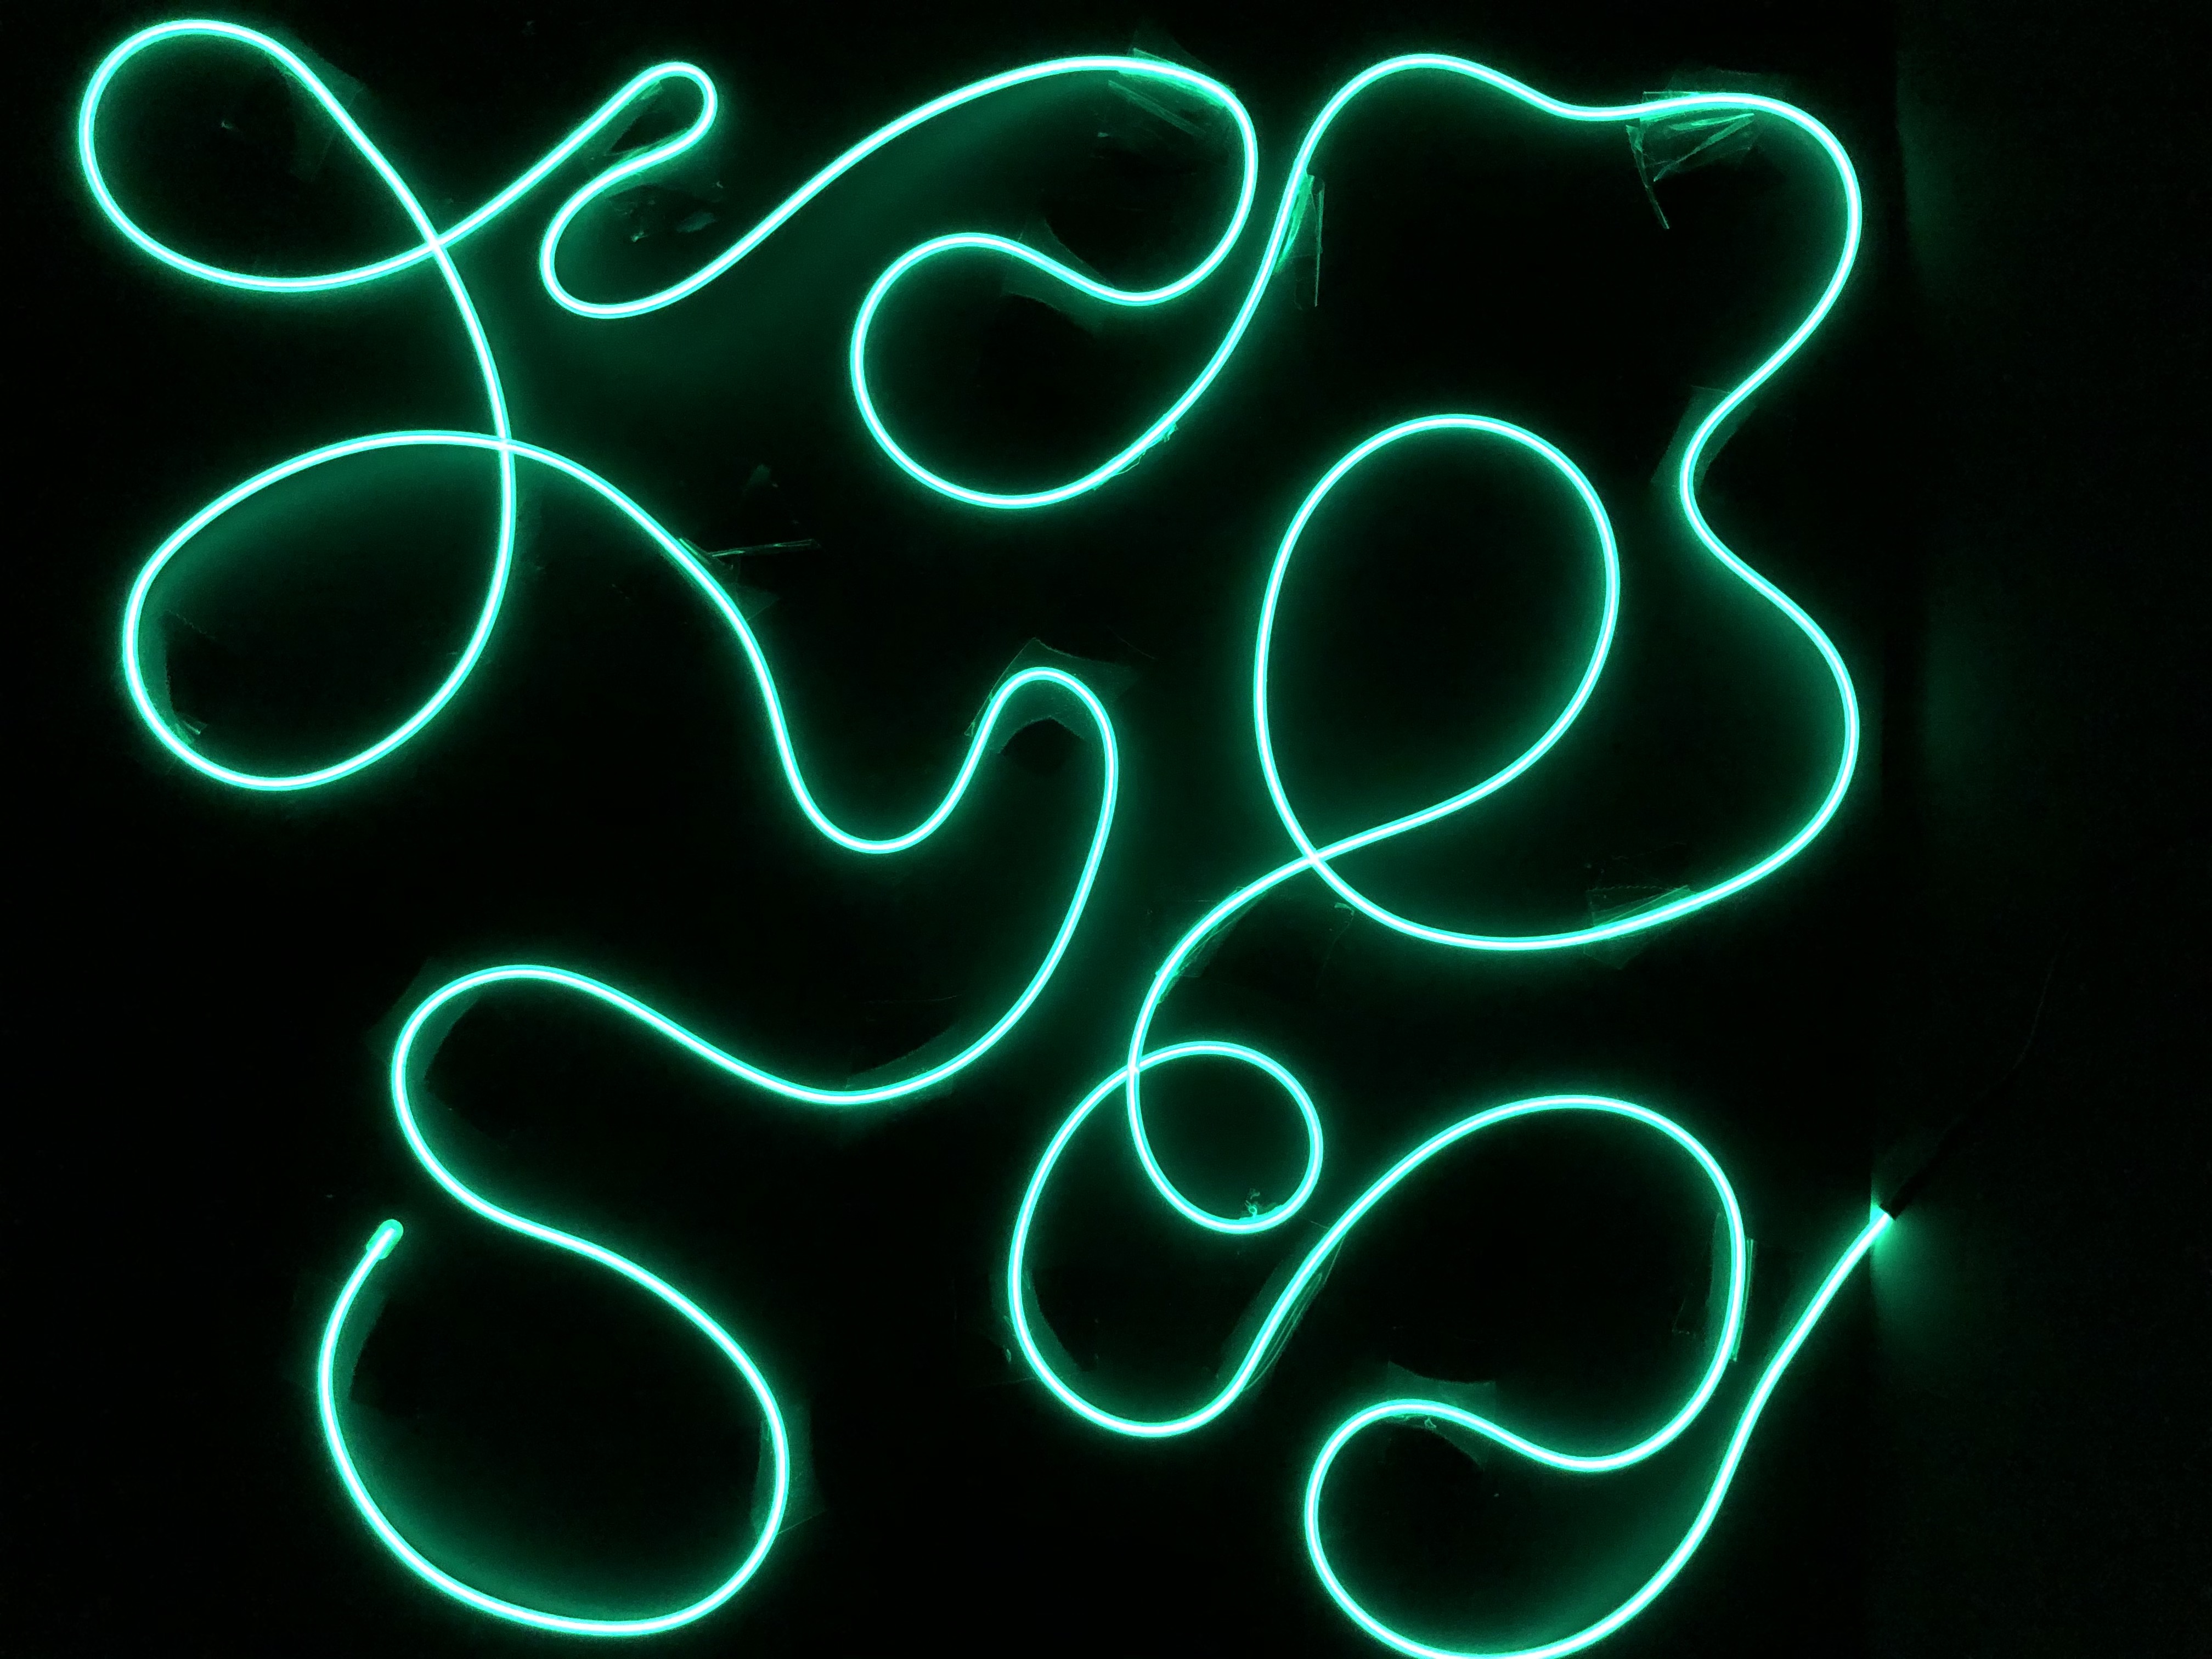
5. When you’re done, turn on your wire, turn out the lights, and see your creation pop! You can take a picture from above.
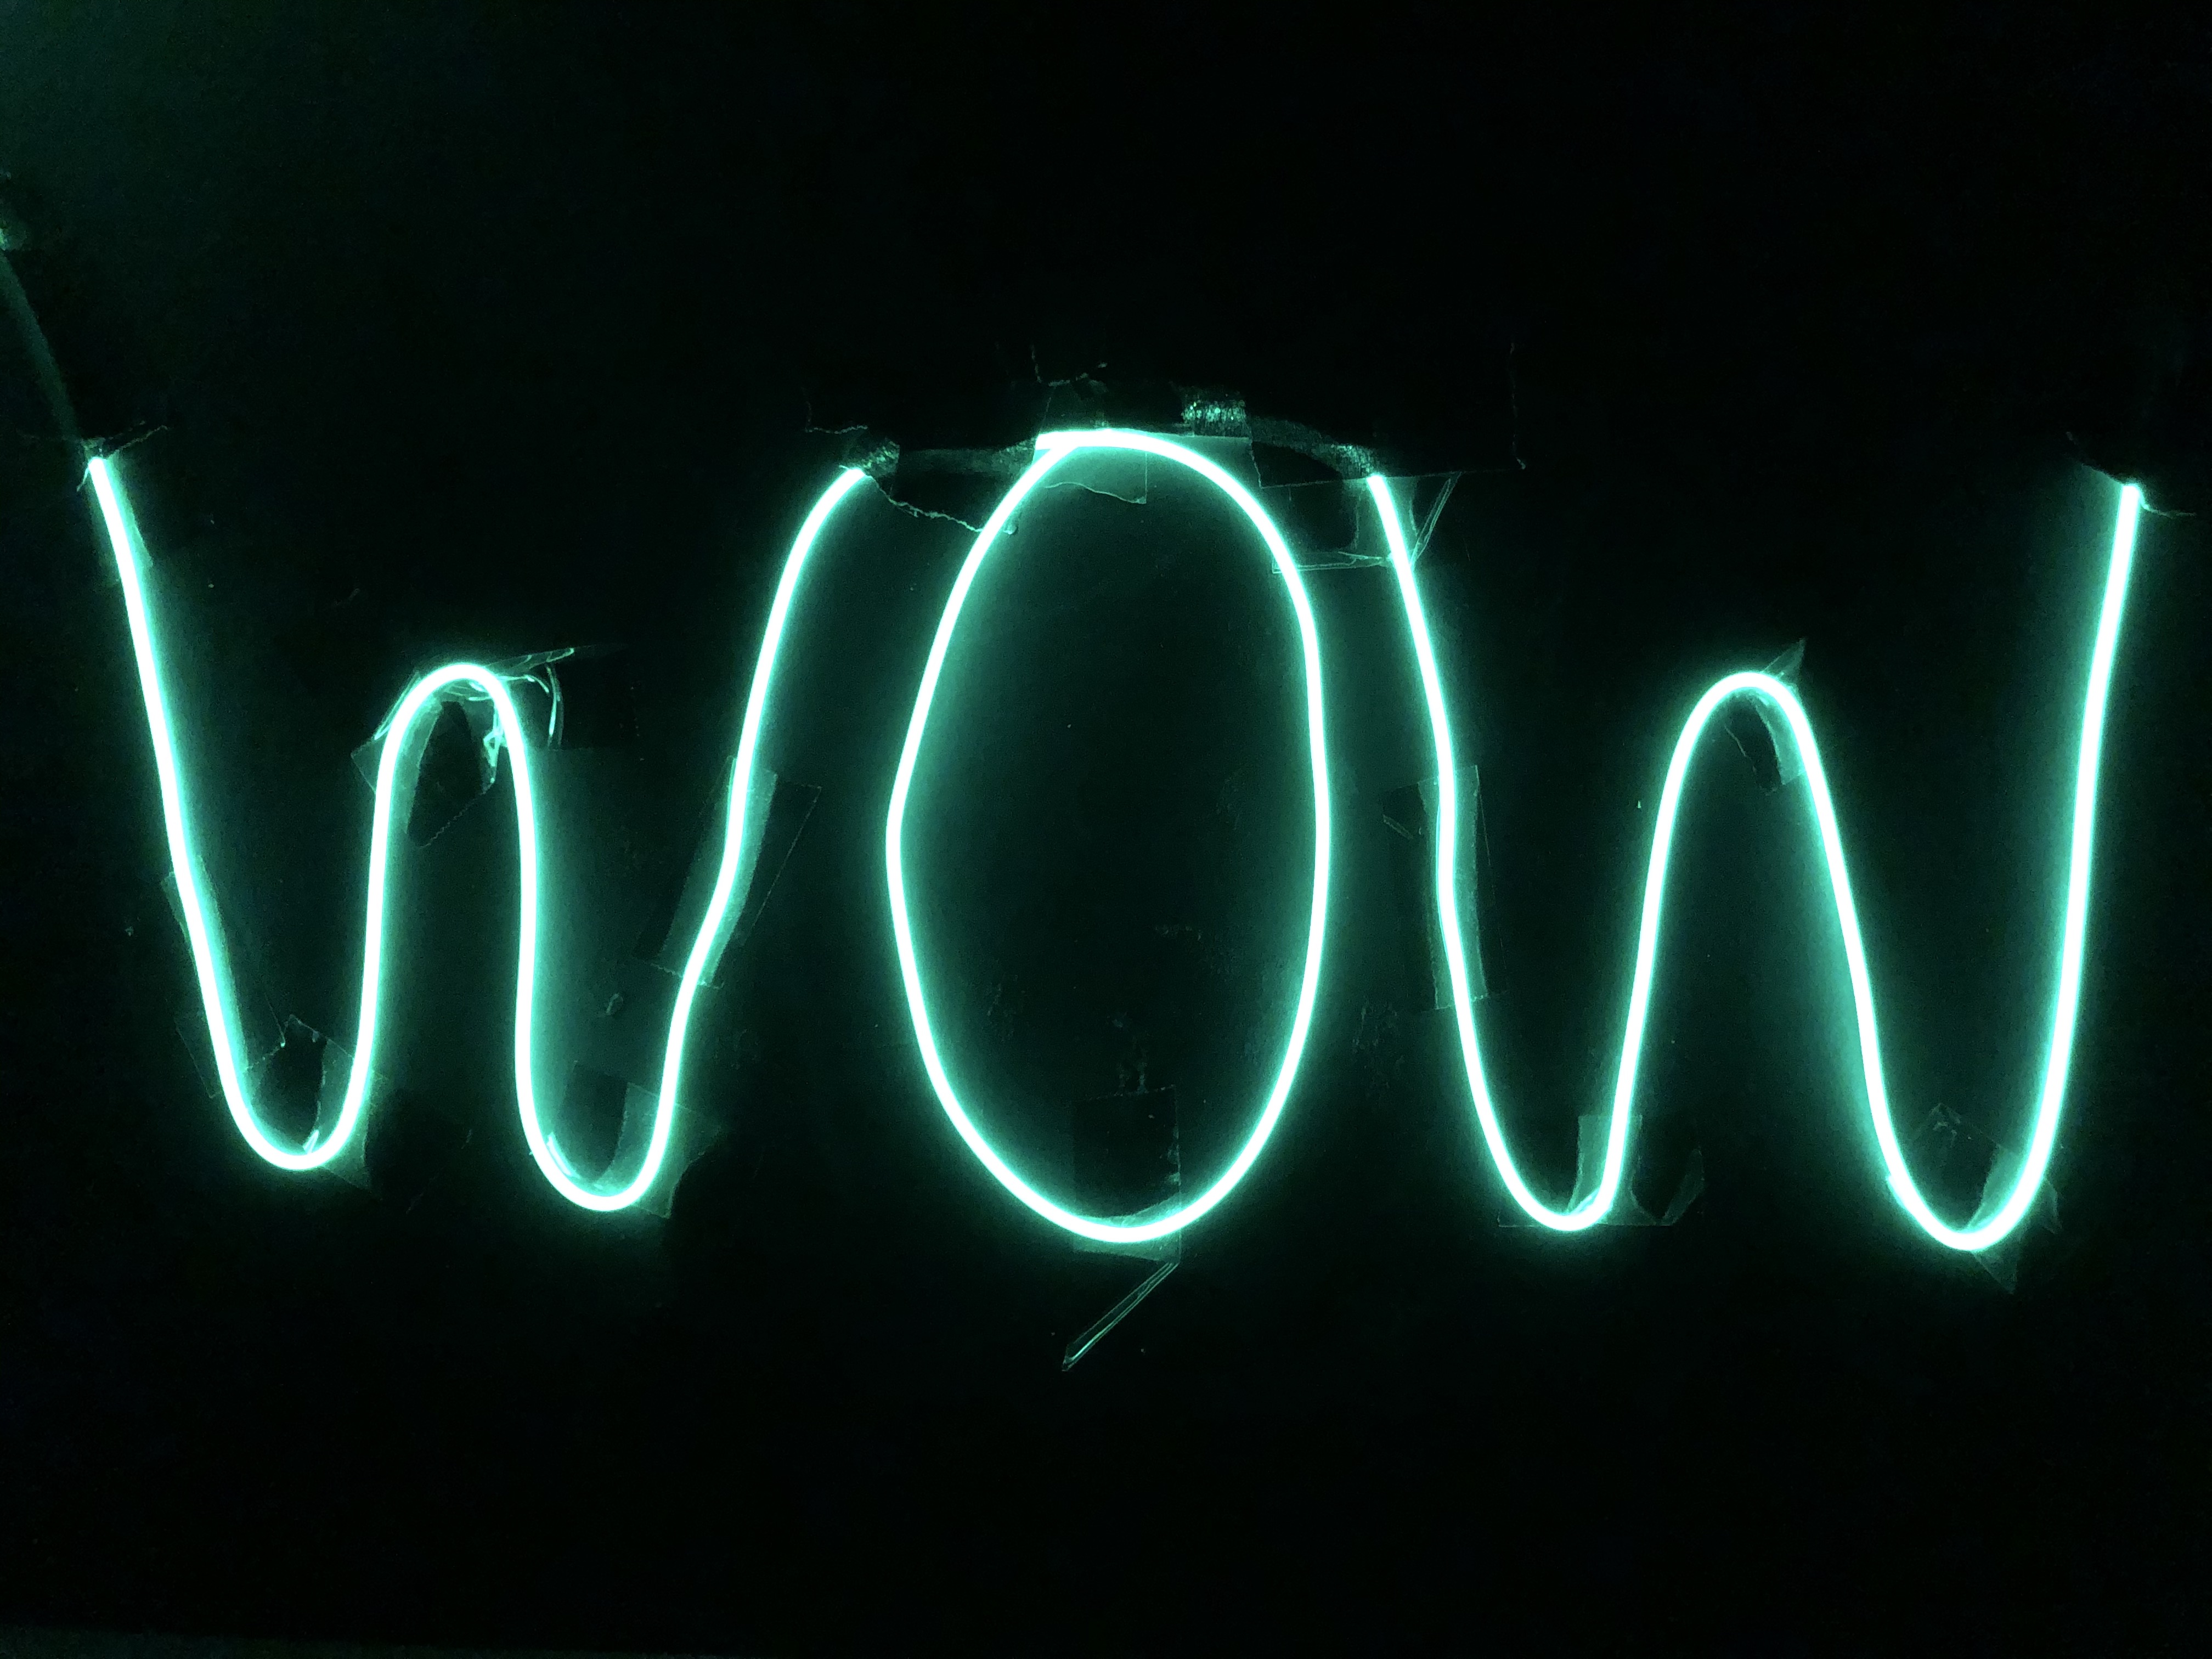
6. Carefully peel off the tape and create something new!Questions to explore:
How is using a wire to create an image different from using a pencil or marker?
Can you write your name or initials with the wire? In print or cursive?
How does your creation change when the room is dark?
What other household objects could you use in this artwork?
If you take a picture, experiment with where you stand and how you hold the camera. Can you change the way the picture looks by tilting the camera? Can you change how much of the artwork you see by zooming in or out?
Taping to the paper creates a flat image (or two-dimensional). Can you also create a sculpture that stands up (three-dimensional) with the wire? How?
Show us what you created! Send us pictures at youthservices@balibrary.org.
Grades 3-8: Cloud Slime
Create a cloud made of slime for a fun sensory experience. Register for the March Grades 3-8 Take-and-Make Kit here.
Your kit contains:
- 5 plastic cups
- 1 bottle of Elmer’s glue
- 1 plastic bottle of liquid starch
- 2 bottles of food coloring
- 2 popsicle sticks
- Instant snow
In addition to these items, you will need a ¼ cup measuring cup, and a 1 tablespoon measuring spoon.
- Pour ¼ cup of the glue into a plastic cup.
- Pour some of the liquid starch into one of the plastic cups.
- Add 2 tablespoons of liquid starch to the cup with the glue.
- Stir well with Popsicle stick.
- Add food coloring and stir well.
- Your should start to see your slime clump together.
- Put the slime on a surface that is okay to get messy, such as a plastic plate or bowl.
- Knead the slime together, pulling it back and forth and folding it over itself.
- Continue to add small amounts of liquid starch to your slime, and knead the slime. Your slime should start to feel less sticky and gooey. The more starch you add, the less sticky the slime will be. However, make sure to add the starch slowly because too much starch will make your slime rubbery.
- Once you are happy with your slime, pour the instant snow into one of the plastic cups.
- Add 2.5 tablespoons of water to the instant snow and stir.
- Knead the instant snow into your slime. You may have extra snow.
Check out the video below to see a visual!
Show us what you created! Send us pictures at youthservices@balibrary.org.
Youth Services Librarian Allison -
February Take-and-Make Kits
Bring home a fun new project! Sign up from our Library Calendar and pick up a kit through our Parking Lot Pickup service between February 8-19.
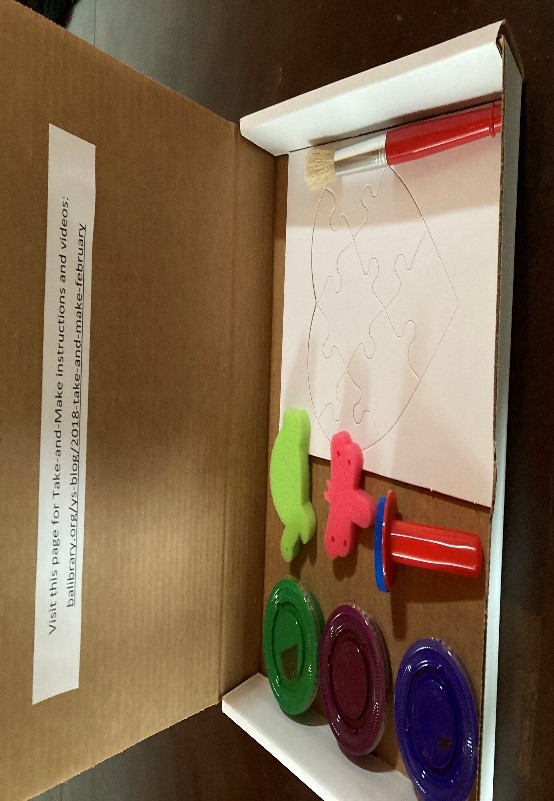
Toddler & PreK: Create Your Own Puzzle
Use paint and stamping to create a unique heart-shaped puzzle that can be enjoyed again and again. Register for the February Toddler & PreK Take-and-Make Kit here.
Your kit contains:
- 1 paint brush
- 1 sponge with handle
- 2 sponges (without handles)
- 3 containers of (different) colored paint
- 1 heart puzzle
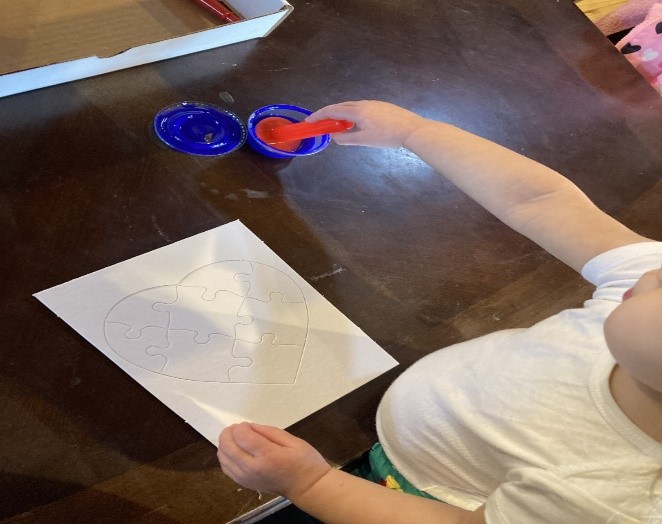
Instructions:
1. Take the puzzle out of the box and place it on a flat surface. (You may want to place some newspaper down first.)
2. Open the paint containers and allow your child to choose which medium(s) they want to use (sponge, sponge with handle or paint brush). Have your child paint the puzzle any way they would like.
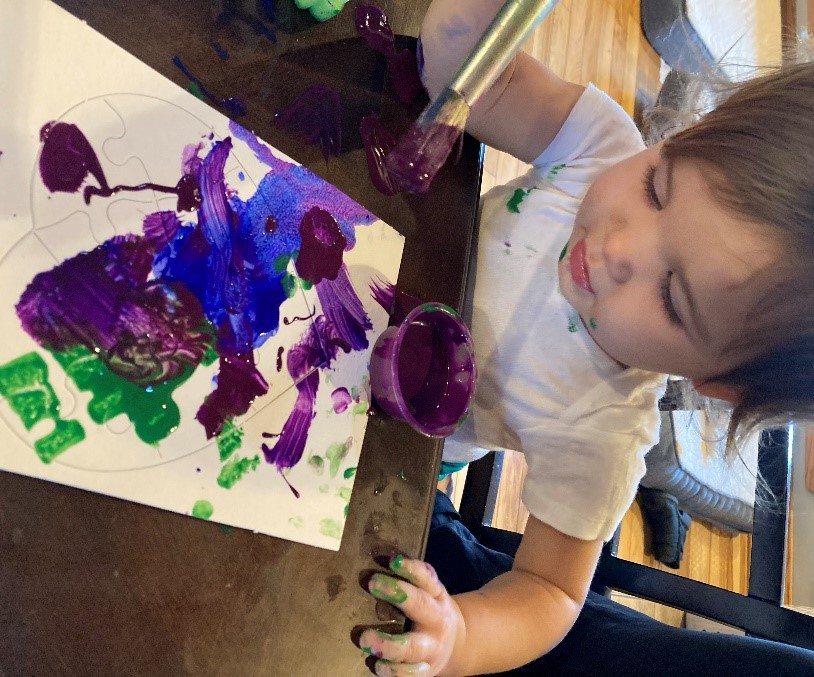
3. Once your child has finished painting, allow your puzzle time to dry.
4. Once the puzzle is dry, allow your child to put together their masterpiece puzzle - as many times as they want!
Talking points to consider:
- Talk to your child about the different colors of paint. Try having them identify each color individually.
- Have your child make a prediction about what happens when you mix two colors together - and then try it!
- Ask your child what each color makes them feel.
- Ask your child to tell you about their painting.
- Have your child identify something else that is the same color they are using. ("What else is blue?")
Show us what you created! Send us pictures at youthservices@balibrary.org.
Grades K-2: Pom Pom Picture Frame
Create a colorful picture frame for your favorite photo. Register for the February Grades K-2 Take-and-Make Kit here.
Your kit contains:
- One bottle of glue
- One wooden picture frame
- Pom-poms
Instructions:
1. Decide on a pattern for your picture frame: stripes, color patches, or random-rainbow! If you want, you can use a pencil and ruler to pattern your picture frame before you start.
2. Place small dots of glue on the frame, and press pom-poms down on the glue.
3. Once you're finished, let the frame dry for at least 1 hour.
4. Carefully remove the back panel, add a photo, and display!
Show us what you created! Send us pictures at youthservices@balibrary.org.
Grades 3-8: Styrofoam Printmaking
Learn the basics of printmaking and design your own art print with simple materials. Register for the February Grades 3-8 Take-and-Make Kit here.
Instructions:
1. Using the pencil, draw a design onto one of the foam plates. The marks you make with the pencil will show up in white. You will be unable to erase lines.
2. Squeeze some paint onto a tray.
3. Roll the paint onto your foam brayer.
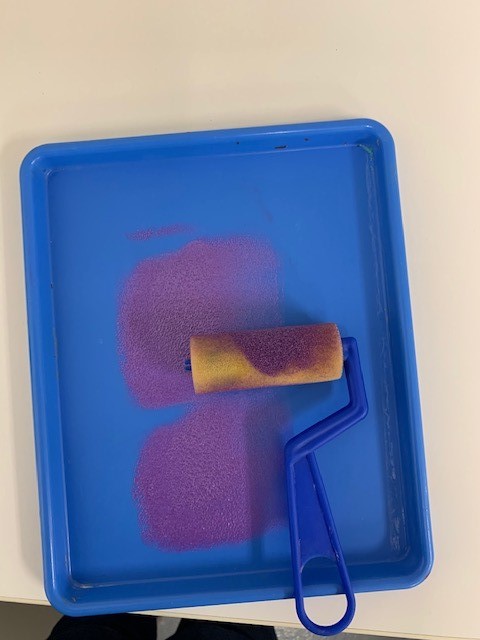
4. Using the brayer, cover your foam plate with paint. Press firmly onto the paint while you use the brayer, this will add more paint to your plate.
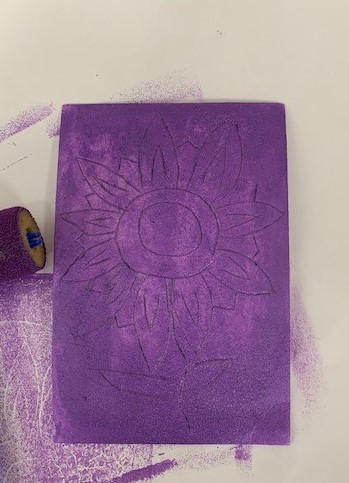
5. Place a piece of sulphite paper on top of the paint covered foam plate
6. Press down and rub all over the piece of paper. Try to get all of the corners.
7. Lift the paper up and see your print!
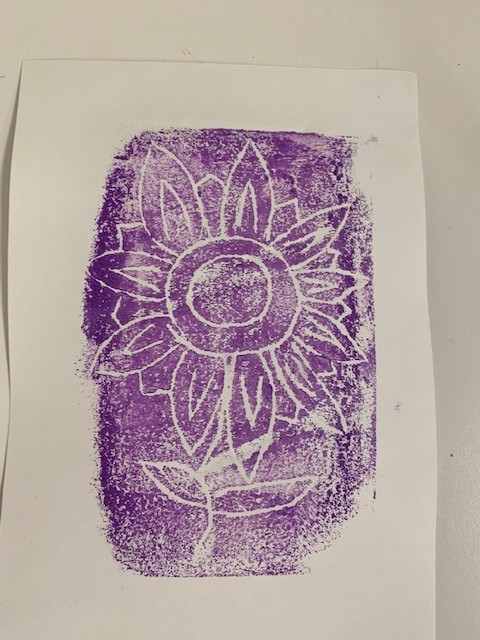
Tips:
- As you continue to make prints, you may need to go over the design again with your pencil.
- If the paint is very light on your print, try adding more paint to your brayer and pressing firmly down on the print as you roll the brayer.
- If you want more than one color on the print, roll paint on one section of the foam plate, wash the brayer, and then roll paint on another section of the plate.
Show us what you created! Send us pictures at youthservices@balibrary.org.
Youth Services Librarian Allison -
January Take-and-Make Kits
Bring home a fun new project! Sign up from our Library Calendar and pick up a kit through our Parking Lot Pickup service between January 11-22.
Toddler & PreK: DIY Activity Dice
Color and create your own movement dice game, then have fun rolling it again and again! Register for the January Toddler & PreK Take-and-Make Kit here.
Your kit contains:
- 1 cube-shaped box
- Velcro dots in two envelopes - keep them separated!
- Labels for the dice
- Con-Tact film
- Crayons
Icons used on dice labels made by Freepik from www.flaticon.comInstructions:
1. Assemble the cube box as your dice.
2. Have your child color the 6 Animal Action labels, 6 Song labels, and 6 blank labels. Decide together what the blank set will be. It could be types of dances, colors to seek and find, sounds to make - it's up to you!
3. Peel the backing off the Con-Tact film, then cover the front of the decorated labels to laminate them.
4. Place the 72 Velcro dots on the four corners of the back of each label. Place them as close to the corners as you can to ensure that the labels will line up. Take care to use only the Velcro from the envelope marked for the labels. The colored sticker on the envelope does not matter.
5. Place the 24 Velcro dots for the dice on the four corners of each side. Take care to use only the Velcro from the envelope marked for the dice. The colored sticker on the envelope does not matter. Some of the box's sides will be a little longer than the square labels, so it's okay if the Velcro are not precisely lined up with the corners.
6. Stick one set of labels to all sides of the dice, roll, play, switch, and repeat!
Show us what you created! Send us pictures at youthservices@balibrary.org.
Grades K-2: Design a Calendar
Personalize and decorate a calendar you can use the whole year. Register for the January Grades K-2 Take-and-Make Kit here.
Your kit contains:
- 9 colored pencils
- 1 sheet of stickers
- 1 blank calendar
- list of holiday dates
It might seems a little obvious, but the first piece to teaching kids about the calendar is to make sure they understand what a calendar is. A calendar is a series of pages that shows the days, weeks, and months of a particular year. It is a tool we use to help us keep track of the days, and it allows us to see when different events will happen.
1. Flip open the calendar, in the long rectangle on the top of each calendar page, have your child label the months.
2. Have your child number the days of the month in the corresponding boxes.
3. The holiday stickers correspond with the dates on the provided half sheet. Help your child locate the dates and add the correct sticker.
4. Allow your child to add dates that important to you and your family: birthdays, play dates, lessons, beginning of a new season, appointments, special plans, etc…
5. Use the provided colored pencils and have your child decorate the calendar however they choose. Feel free to use any material you have at home to add to the calendar design. Consider having your child cutting out images in unused magazines and make a collage.
More ideas to consider:
Research and discuss holidays that you do not celebrate.
Talk about how:
- Each square represents one day,
- A group of 7 days in a row is called a week,
- One week is equal to 7 days, and
- Each day of the week has a name.
- Show where the names of the days of the week are shown on a calendar.
- “If we are this day” (point to a square), “1 week later would be...” (point to square underneath).
- Ask them which square would be 2 weeks later, or 3 weeks later.
- Explain that a square above shows 1 week ago (in the past).
- Ask them which square would be 2 weeks ago or another number of weeks ago.
Show us what you created! Send us pictures at youthservices@balibrary.org.
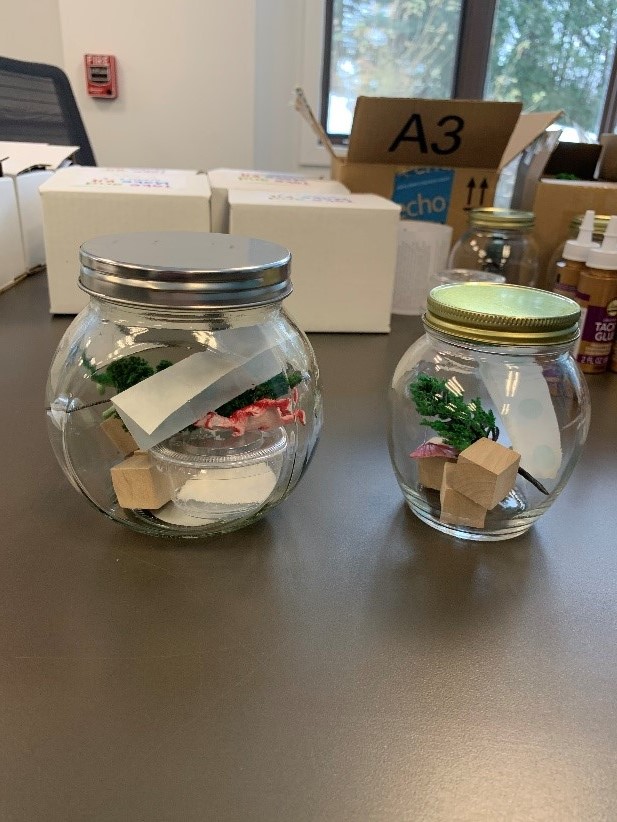
Grades 3-8: Quirky Winter Terrarium
Create your own tiny winter scene, complete with snow and a miniature dinosaur! Register for the January Grades 3-8 Take-and-Make Kit here.
Your kit contains:
- Glass jar or cookie jar
- Container with instant snow
- 4 wooden blocks
- Glue dots
- Tacky glue
- 2 animal figurines
- 1 piece of greenery
1. Remove all of the items from the glass jar or cookie jar. Your kit will contain either a small glass jar with a gold lid or a cookie jar with a silver lid.
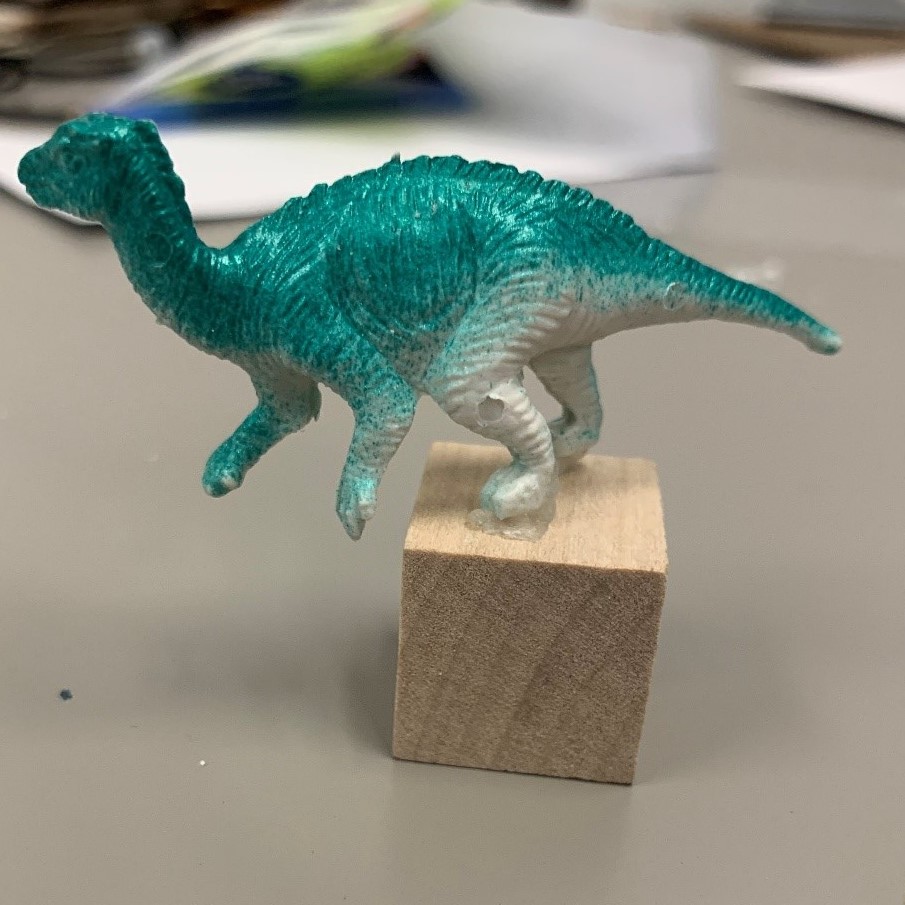
2. Attach your animal figurines to the wooden blocks with a glue dot. 1 or 2 glue dots should be enough to attach your dinosaur.
3. Attach your piece of greenery to one of the wooden blocks with a glue dot. You may need to secure the greenery to one of the sides of the block, instead of the top.

4. Have an adult cut the tip off the tacky glue bottle.
5. Using the tacky glue, glue your wooden blocks with the figurines and greenery to the bottom of the jar. If you have any remaining glue dots, you can also secure the blocks to the jar with a glue dot.
6. Let the glue dry completely.
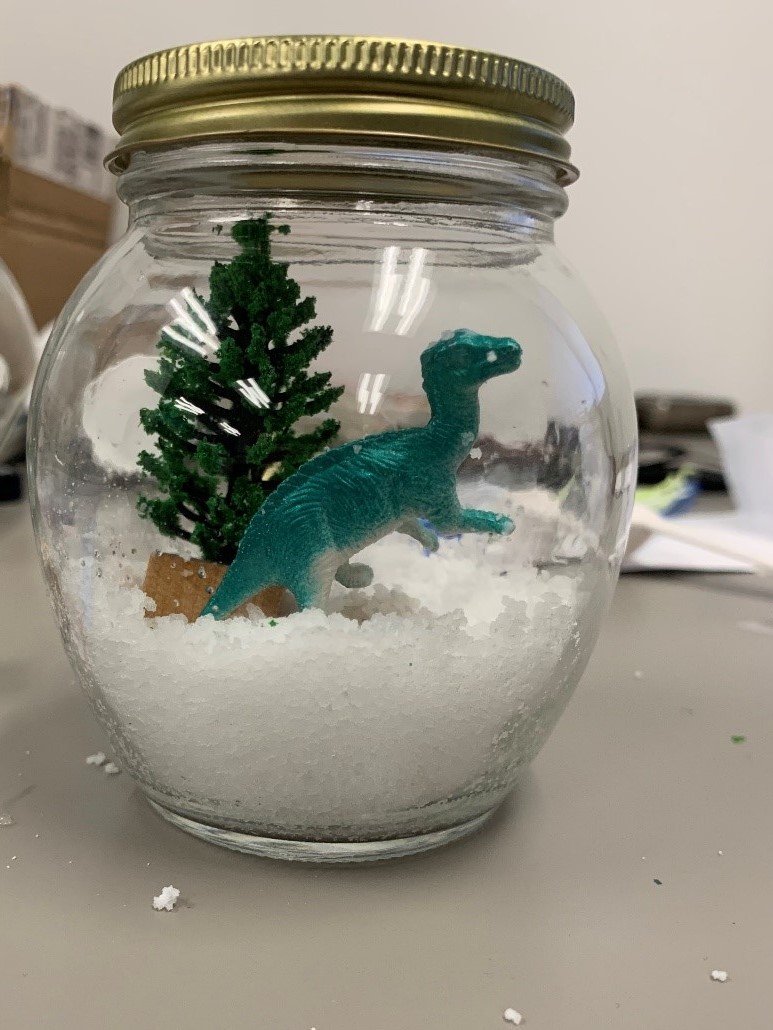
Once you are done creating your scene, and the glue has dried completely, it is time to add your snow! Pay close attention to what type of jar you have. Depending on which jar you have, that will determine how much water you add to the instant snow.
7. Pour the instant snow into your jar.
8. If you have a cookie jar with a silver lid, add 1/3 cup of water to the jar.
If you have a glass jar with a gold lid, add 6 teaspoons of water to the jar.
Your snow will expand, and you will have finished your quirky terrarium! The instant snow will last about 2 weeks, after which it will start to shrink and gather moisture.
Show us what you created! Send us pictures at youthservices@balibrary.org.
Youth Services Assistant Librarian Alyssa -
December Take-and-Make Kits
Bring home a fun new project! Sign up from our Library Calendar and pick up a kit through our Parking Lot Pickup service between December 7-18.

Toddlers and Preschoolers: Mail A Hug
Brighten someone’s day by mailing them a hug. Register for the Toddler/Preschooler Take & Make Kit here.
Instructions for Mailing a Hug:
1. Unfold the sheet of butcher paper.
2. Trace child’s head, arms and torso on paper.
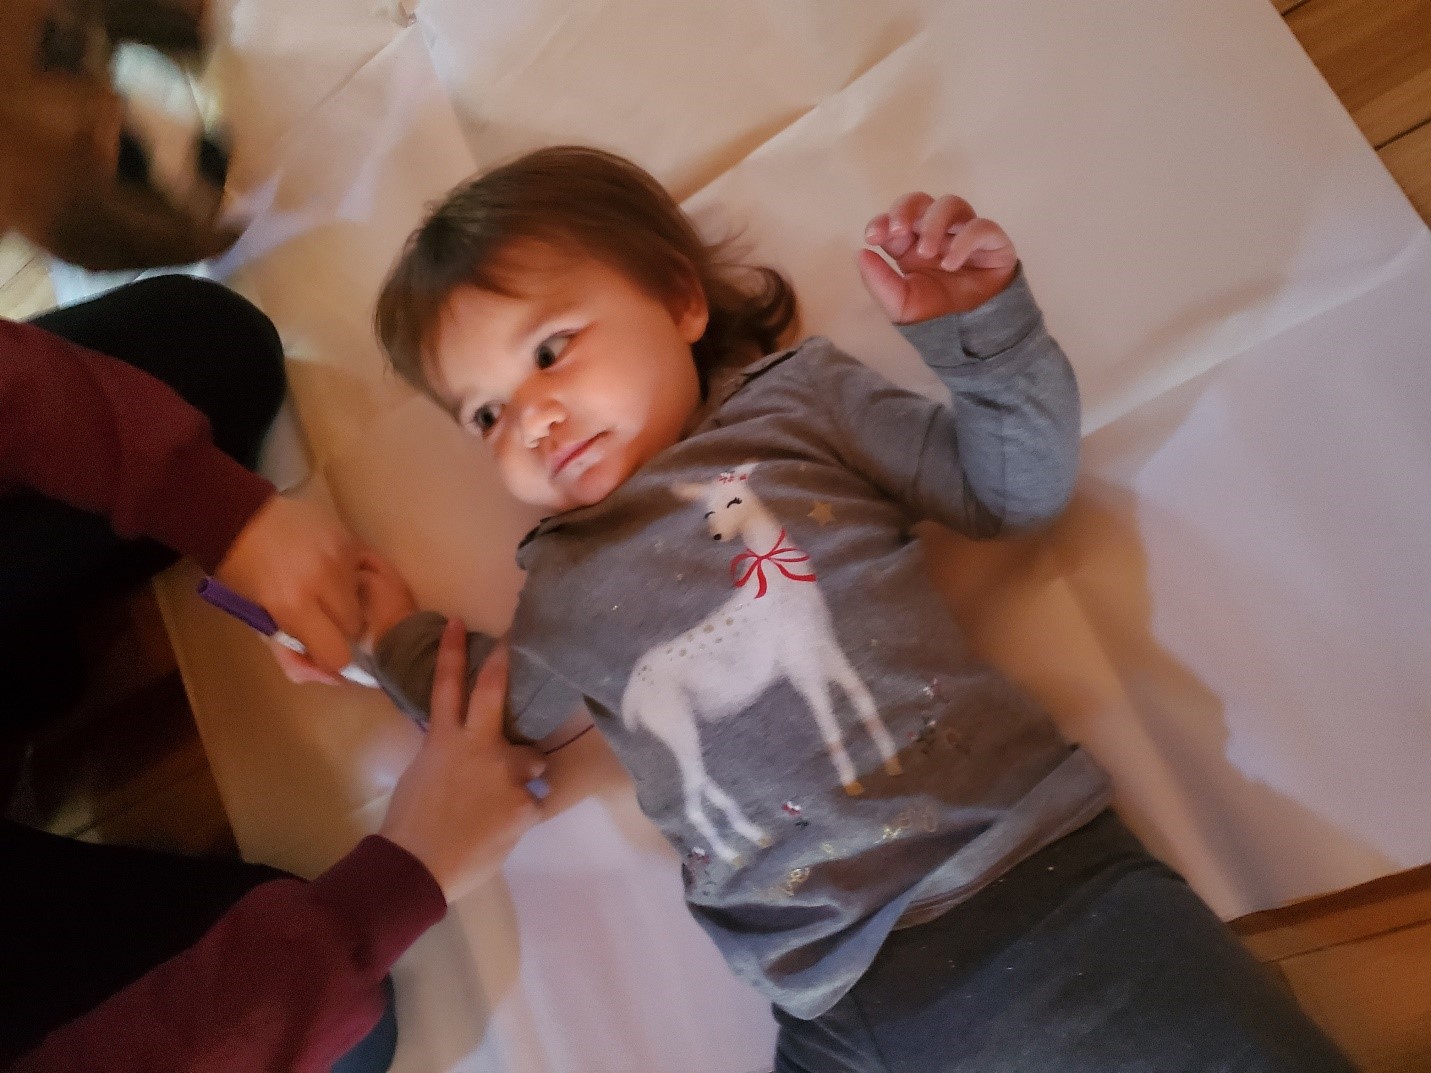
3. Allow your child to fill in and decorate their silhouette.
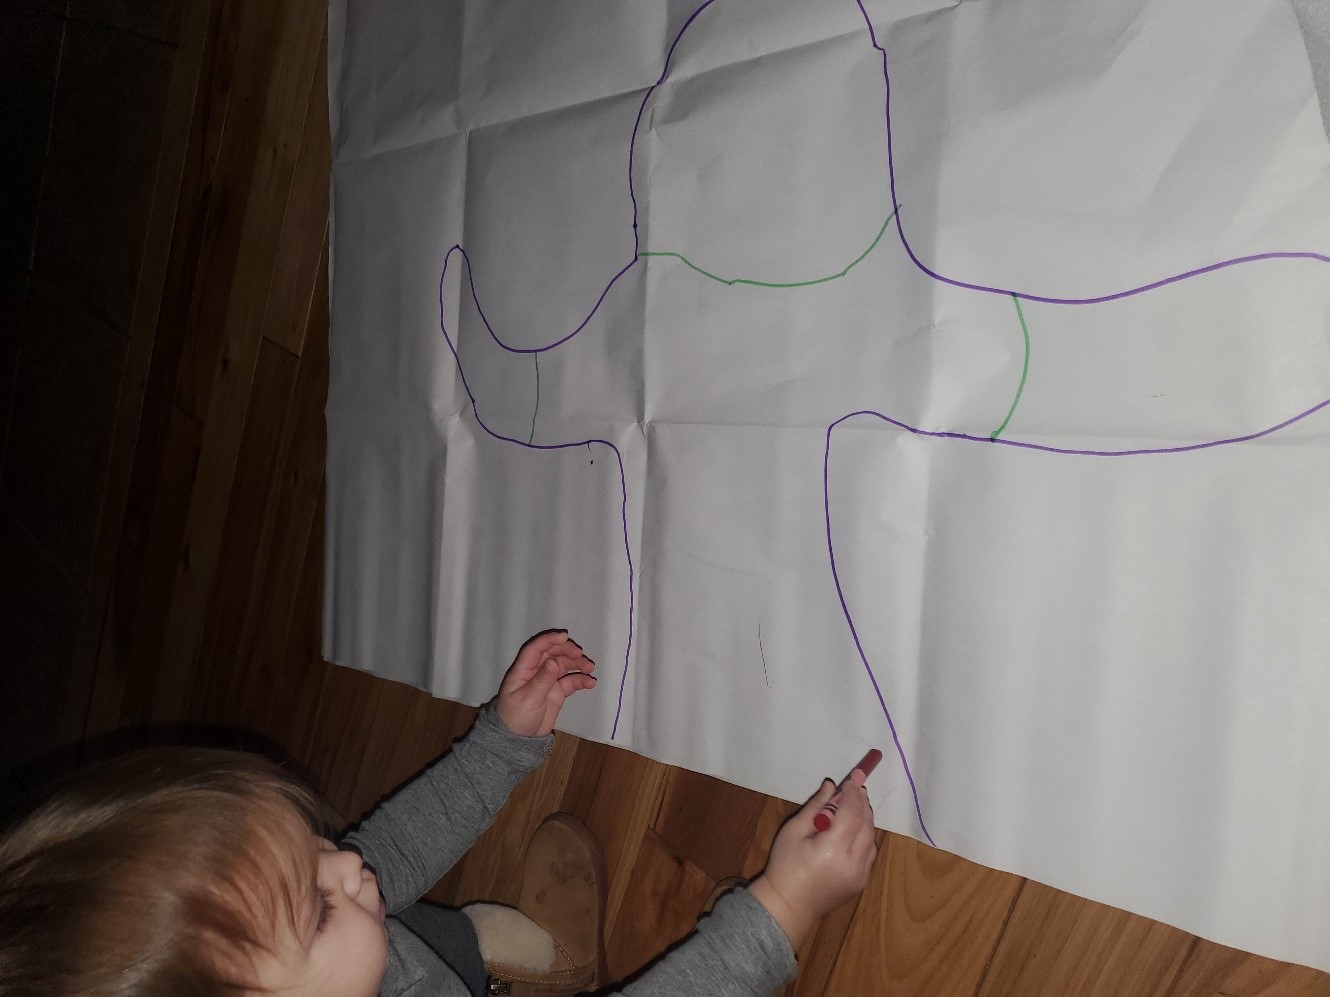
Ideas to consider: Talk to your child about different body parts and different colors.
Use the multicultural crayons to help your child determine the color of their skin and expand on the various skin tones we all have.
4. Cut around your child’s silhouette. If appropriate, allow your child to cut it themselves.
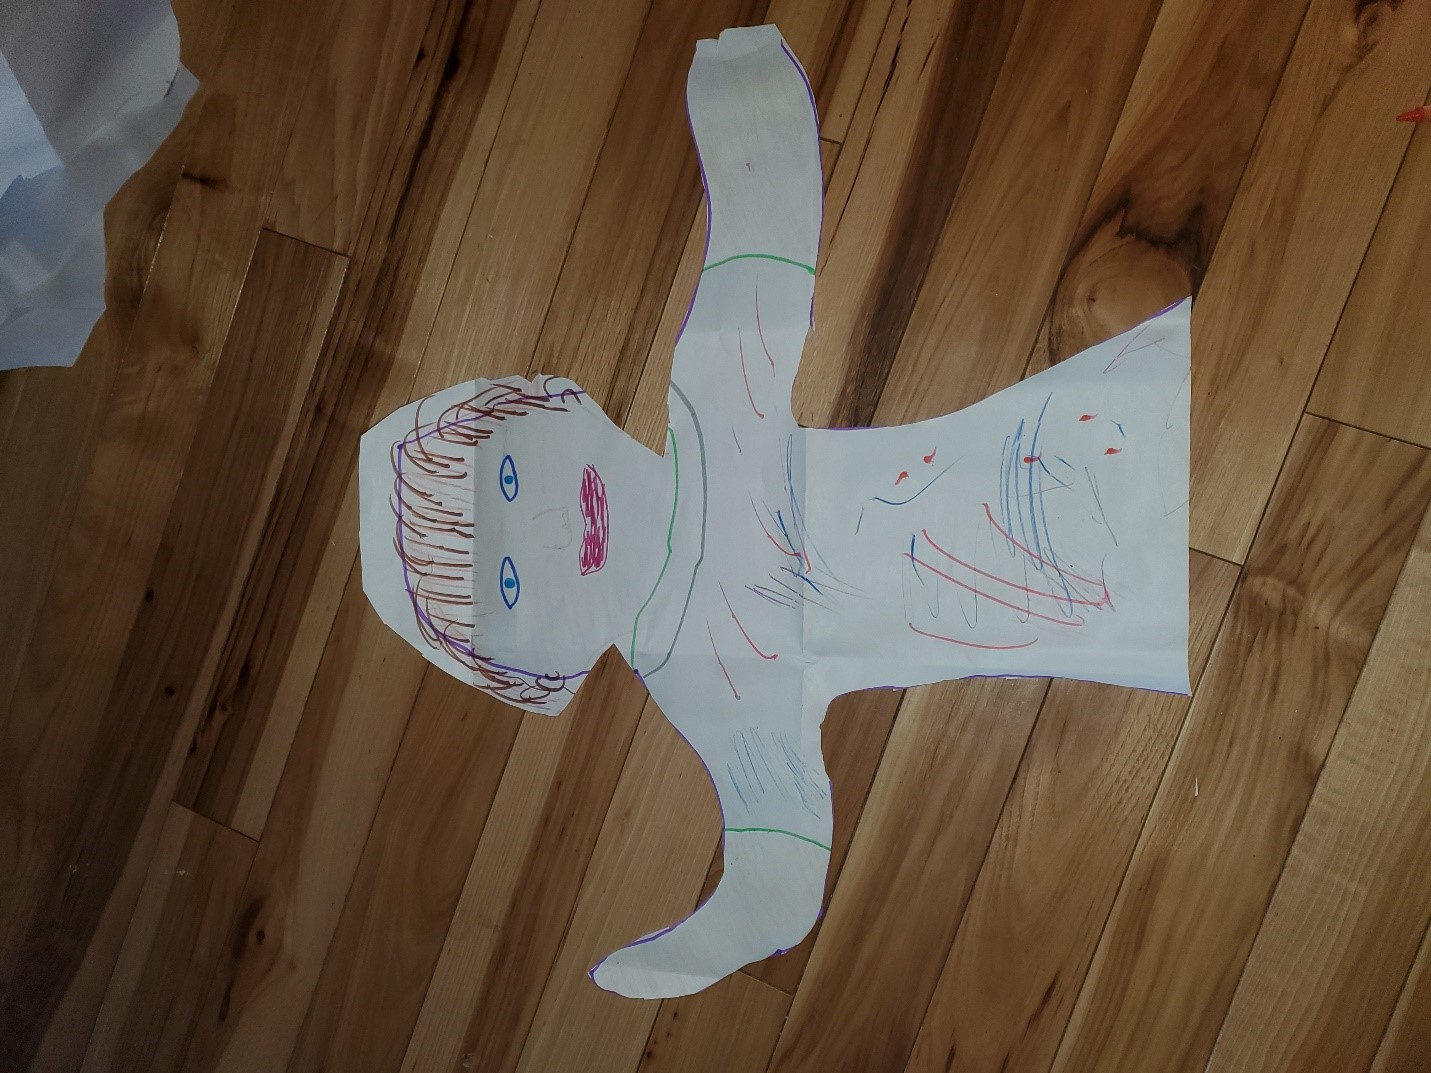
5. Fill in the provided letter (if desired).
See Venessa's original blog post that the inspired the Take & Make Kit!
Show us what you created! Send us pictures at youthservices@balibrary.org.
Grades K-2: Make Your Own Playdough
Make your own dough, then customize it with colors, scents, and textures. Register for the Grades K-2 Take & Make Kit here.
The kit has enough supplies to make two batches of playdough. Things you will need in addition to the items in the kit:
- 1 cup measuring cup
- 1/2 cup measuring cup
- 1/4 cup measuring cup
- 1 tablespoon measuring spoon
- warm water
- large bowl & mixing spoon
Instructions for 1 batch of playdough:
1. Measure 1 cup of the flour and pour into a large bowl.
2. Measure 1/4 cup of the salt and add to bowl.
3. Measure 1 tablespoon of cream of tartar and add to bowl.
4. Mix dry ingredients.
5. Measure and add 1 tablespoon of oil.
6. Measure and pour 1/2 cup of warm water into bowl.
7. Stir until the mixture combines and thickens. Switch to your hands to continue kneading to make a smooth dough.
8. Optionally, add several drops of food coloring, at least 15 drops to get a vivid color. Knead well with hands until no streaks remain.
9. Optionally, add some of the provided glitter.
10. Optionally, add some of the provided colored rice, tinsel, or anything else that might provide a unique sensory experience.
11. Optionally, add a drop of vanilla extract or essential oils for another sensory experience.
Watch the how-to video here:
Show us what you created! Send us pictures at youthservices@balibrary.org.
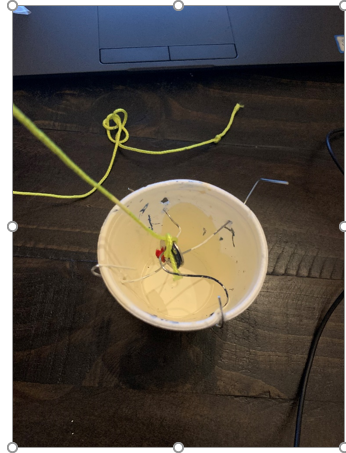
Grades 3-8: Pendulum Art
Make a one-of-a-kind painting when gravity and art combine in this STEM based experiment. Please note, this project can get messy! Register for the Grades 3-8 Take & Make Kit here.
Things you will need in addition to the items in the kit:
- Tape
- Ruler
Instructions for Pendulum Art:
1. Take the items out of the box.
2. Using the pencil, poke a hole in the bottom of one of the Styrofoam cups.
3. Poke 2 holes in the top of the cup directly across from each other.
4. Poke another 2 holes at the top of the cup directly across from each other.
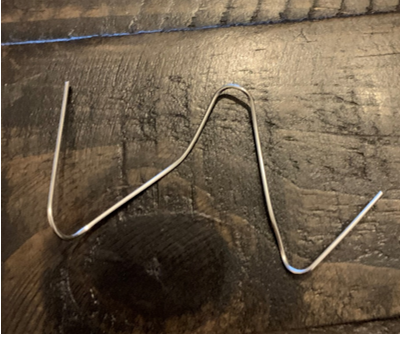
5. Fold 2 paperclips into a W shape.
6. Tie one of the pieces of string to a washer.
7. Slide the washer and string through one of the bent paper clips so that it is hanging in the middle of the W.
8. Insert the paper clip and washer with string into two of the holes at the top of the cup.
9. Insert the 2nd paper clip into the remaining two holes. You may need to bend the ends of the paper clip a little to secure it around the cup. You have now made your pendulum!
10. Spread the newspaper on the floor. Get approval from an adult about where you can make your painting. It will be messy!
11. Tie the pendulum to the wooden dowel
12. Tape the wooden dowel between 2 chairs or 2 tables
13. Place a sheet of cardstock below your pendulum and on top of the newspaper.
14. Start out by having the cup about 6 inches from the ground. You can adjust the height later.
15. Measure a 2 to 1 ratio of paint to water into one of the Styrofoam cups. You can start with 10 ml water and 20 ml paint.
16. Mix paint and water together. The paint should be fairly runny.
17. Cover the hole in the bottom of your pendulum with your finger and pour the paint into the cup.
18. Swing back the cup and let your pendulum fly! Paint should start to drip out of the cup.
19. Try swinging the pendulum in a circular motion.
*If your paint is not coming out of the cup, try adjusting the paint and water ratio. We started with a 2 to 1 ratio. Try adding a little more water to the mixture slowly and then a little more paint if needed.
As you make your pendulum paintings, experiment! What happens if….
- You adjust the paint and water ratio?
- Poke another hole in the bottom of the cup?
- Adjust the height of the pendulum?
- Add more washers to the pendulum?
- Add another color to your painting?
Watch the how-to video here:
Show us what you created! Send us pictures at youthservices@balibrary.org.
Family: Pom-Pom Party
For December only, enjoy a special box with an activity for everyone. Transform yarn into colorful pom poms for decorating gifts, trees, mantels, or yourself! Register for the Family Take & Make Kit here.
In addition to the Take & Make Box, you will need one sharp pair of scissors.
Directions to make a pom-pom:
1. Select a yarn color (or two, or three!) and a pom-pom maker. (There are four different sizes.)
2. Pull one half of the pom-pom maker away from the white circle. You should see a crescent shape now, pointing away from the main pom-pom maker.
3. Wrap yarn around the crescent, many times. The more yarn you use, the thicker and fluffier the pom-pom will be.
4. Once it's pretty thick, cut the end of the yarn. Don't stress about the end of the yarn - you can trim it later if needed.
5. Push the crescent, now wrapped up in yarn, back into the center of the pom-pom maker.
6. Pull the other half away from the center, and wrap this crescent in yarn. Try to do about the same amount of yarn, but don't worry about making it perfectly even.
7. Once both sides look about the same thickness, cut the yarn again, and fold up the crescents towards the middle. It should now look like a disc with fuzzy sides.
8. Find the seam running under the yarn strands. Wiggle your scissors into that little gap, and cut the yarn wraps across. The yarn should start fluffing out, but it shouldn't fall out of the pom-pom maker. Repeat on the other half.
9. Set aside the pom-pom maker, now bursting with yarn strands. Grab the extra yarn (or string you might have) and cut a short length, 6-8 inches or so.
10. Pull the thread through the pom-pom maker gap that you just cut along. Pull tightly and tie on the other side. Double or triple knot to keep it secure.
11. Pull the crescents away from the pom-pom.
12. Pull the two circles apart, so now your pom-pom is free.
13. Trim any long strands if you'd like to make the pom-pom as round as possible.
Watch the video to see how it's done:
Show us what you created! Send us pictures at youthservices@balibrary.org.
Youth Services Assistant Librarian Alyssa -
November Take-and-Make Kits
Bring home a fun new project! You can now register to pick up a Take-and-Make Kit from the Youth Services desk. Here are the instructions for each kit:
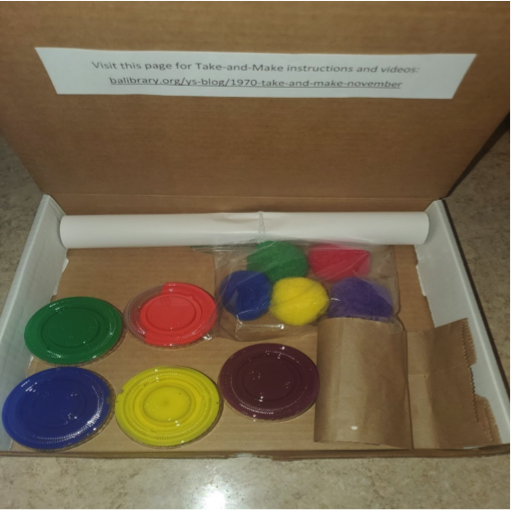
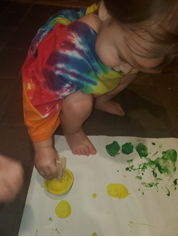
Toddlers and Preschoolers: Paint with Pom Poms
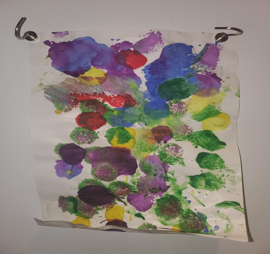
Pompoms are great for fine motor play. Before beginning the painting activity, you may consider taking an opportunity to allow your child to explore the texture of the pompoms. Additional activities to consider when allowing your child to manipulate the pompoms; providing spoons, tweezer and/or the provided clothes pins to allow for an unstructured play activity. If you wanted to add an additional educational activity you can add cotton balls and help your child create a pattern or use the pompoms to teach counting or one-to-one correspondence.
Let’s get started!
Unroll the rolled paper and place it on a flat surface.
Pinch one clothes pin, to each pompom. This is a great fine motor activity for your child to try.
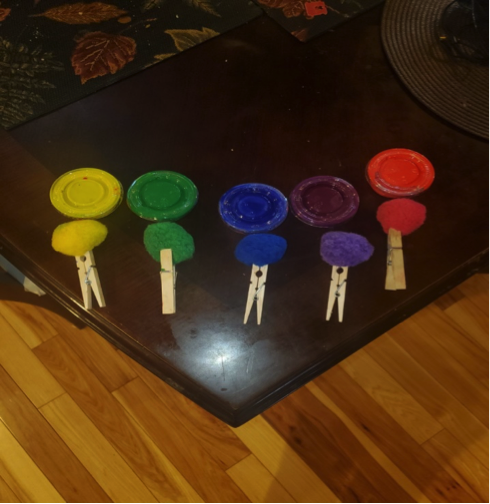
Have your child match the color of the pompom to the color of the paint. This is a wonderful opportunity to work on color recognition. (It will also help remind your child which pompom goes with which paint).
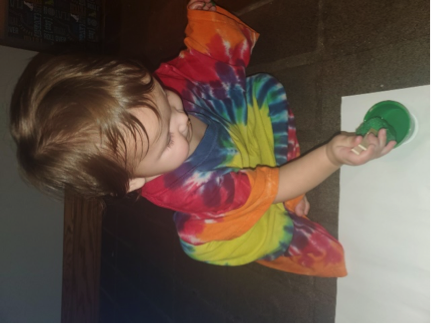
Now that you and your child have created pompom paint brushes, let your child explore making dots and creating their master piece!
Register for a Toddler/PreK Kit here.
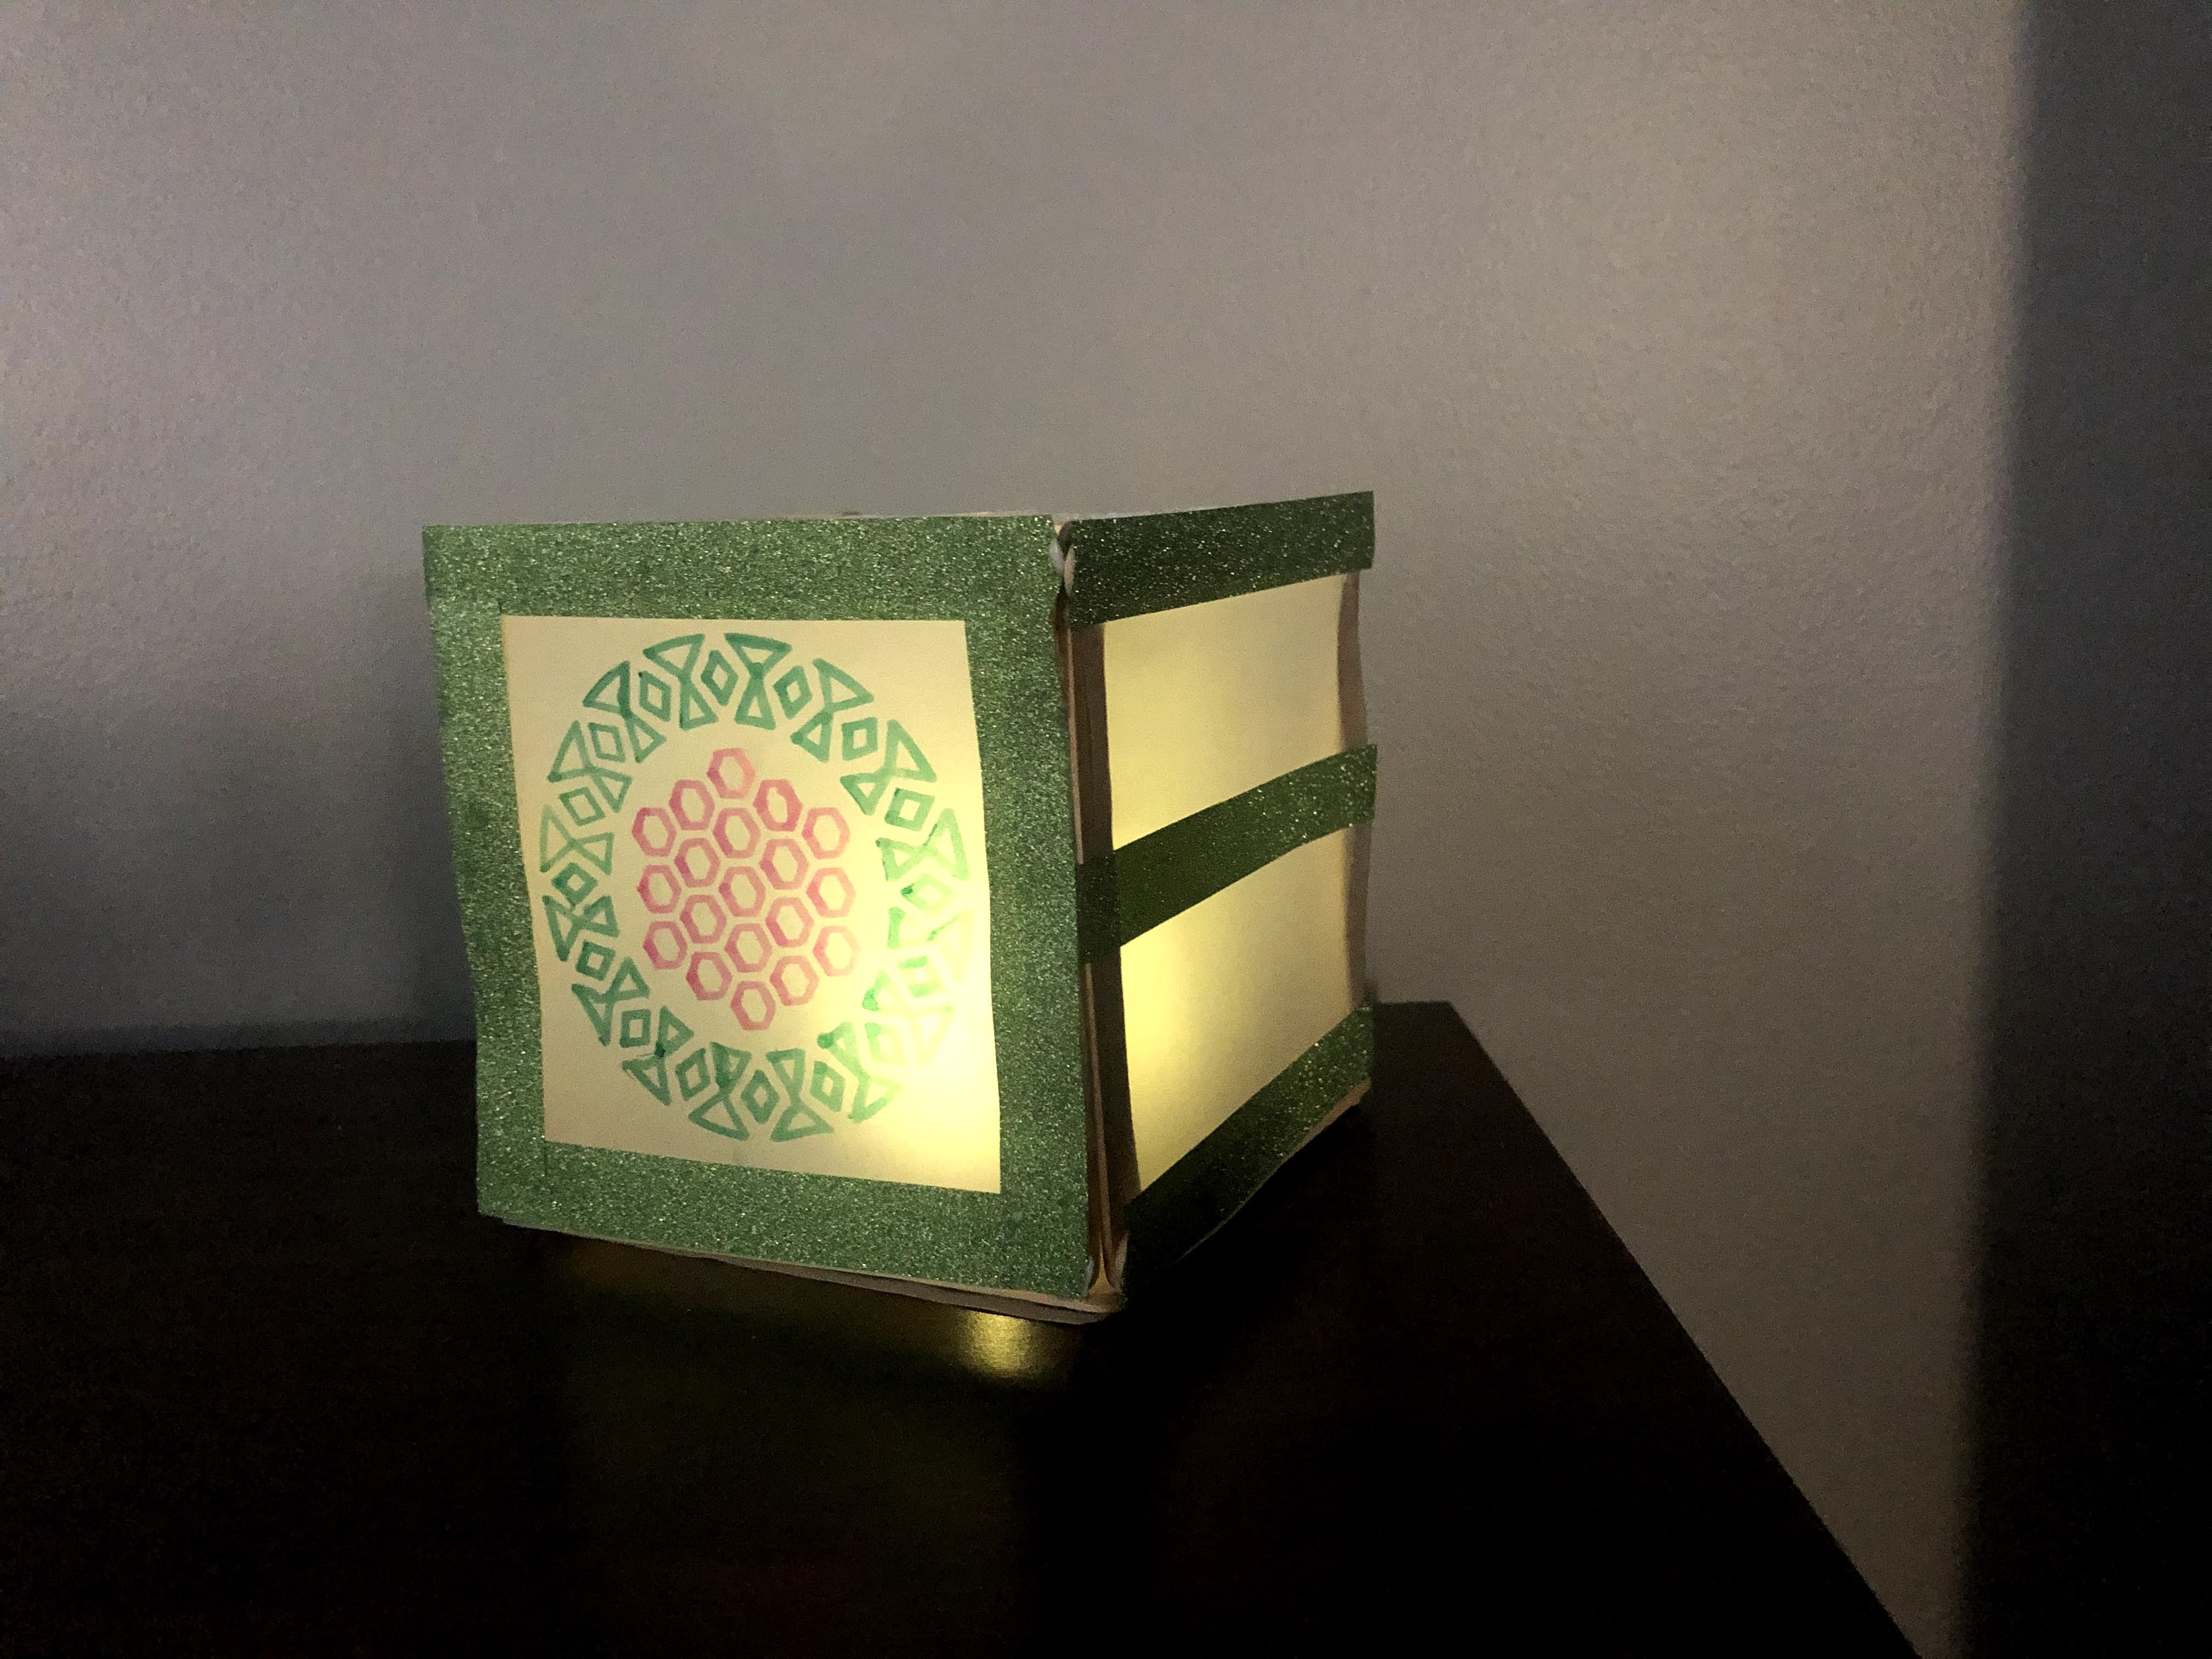
Grades K-2: Paper Lanterns
Things you will need in addition to what is included in the kit:
- Scissors
- Ruler
- Pencil
Instructions:
1. Take Items out of the box.
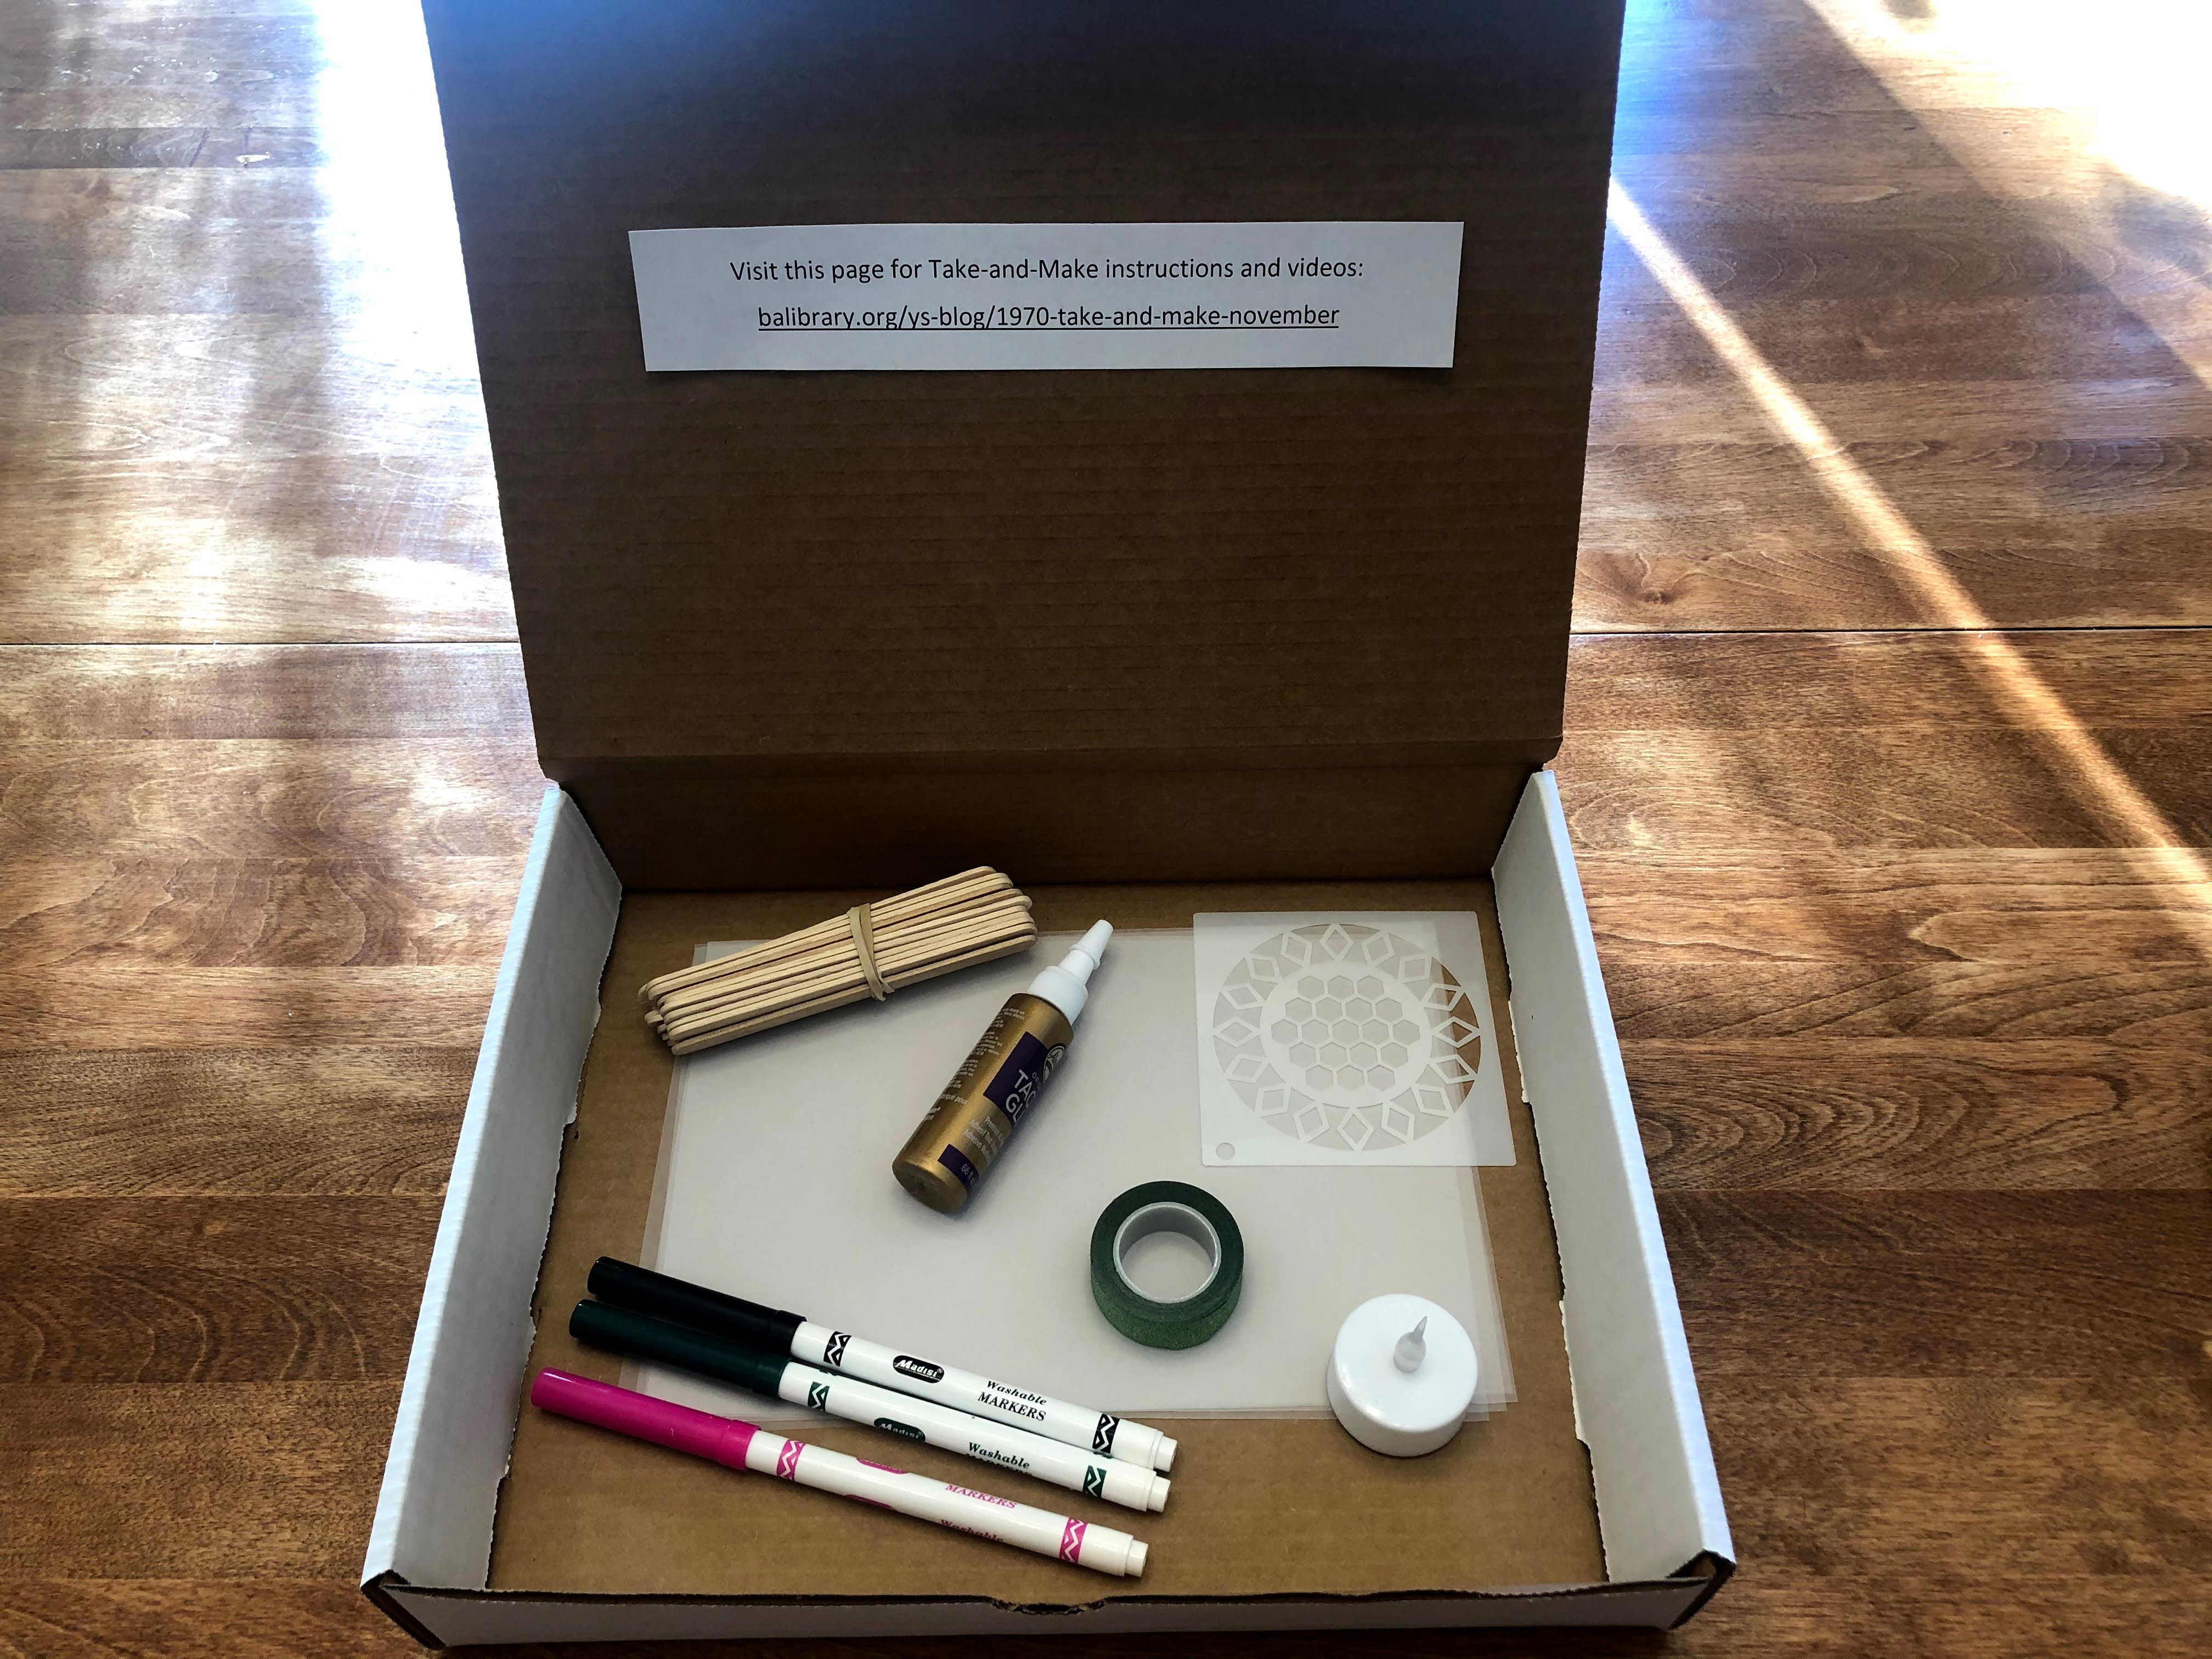
2. Gather extra supplies – scissors, ruler, and pencil.
3. Uncap the glue and snip the top of the applicator. Ask an adult to help!
4. Remove the rubber band from the craft sticks.
5. Create a square using 4 of the craft sticks.
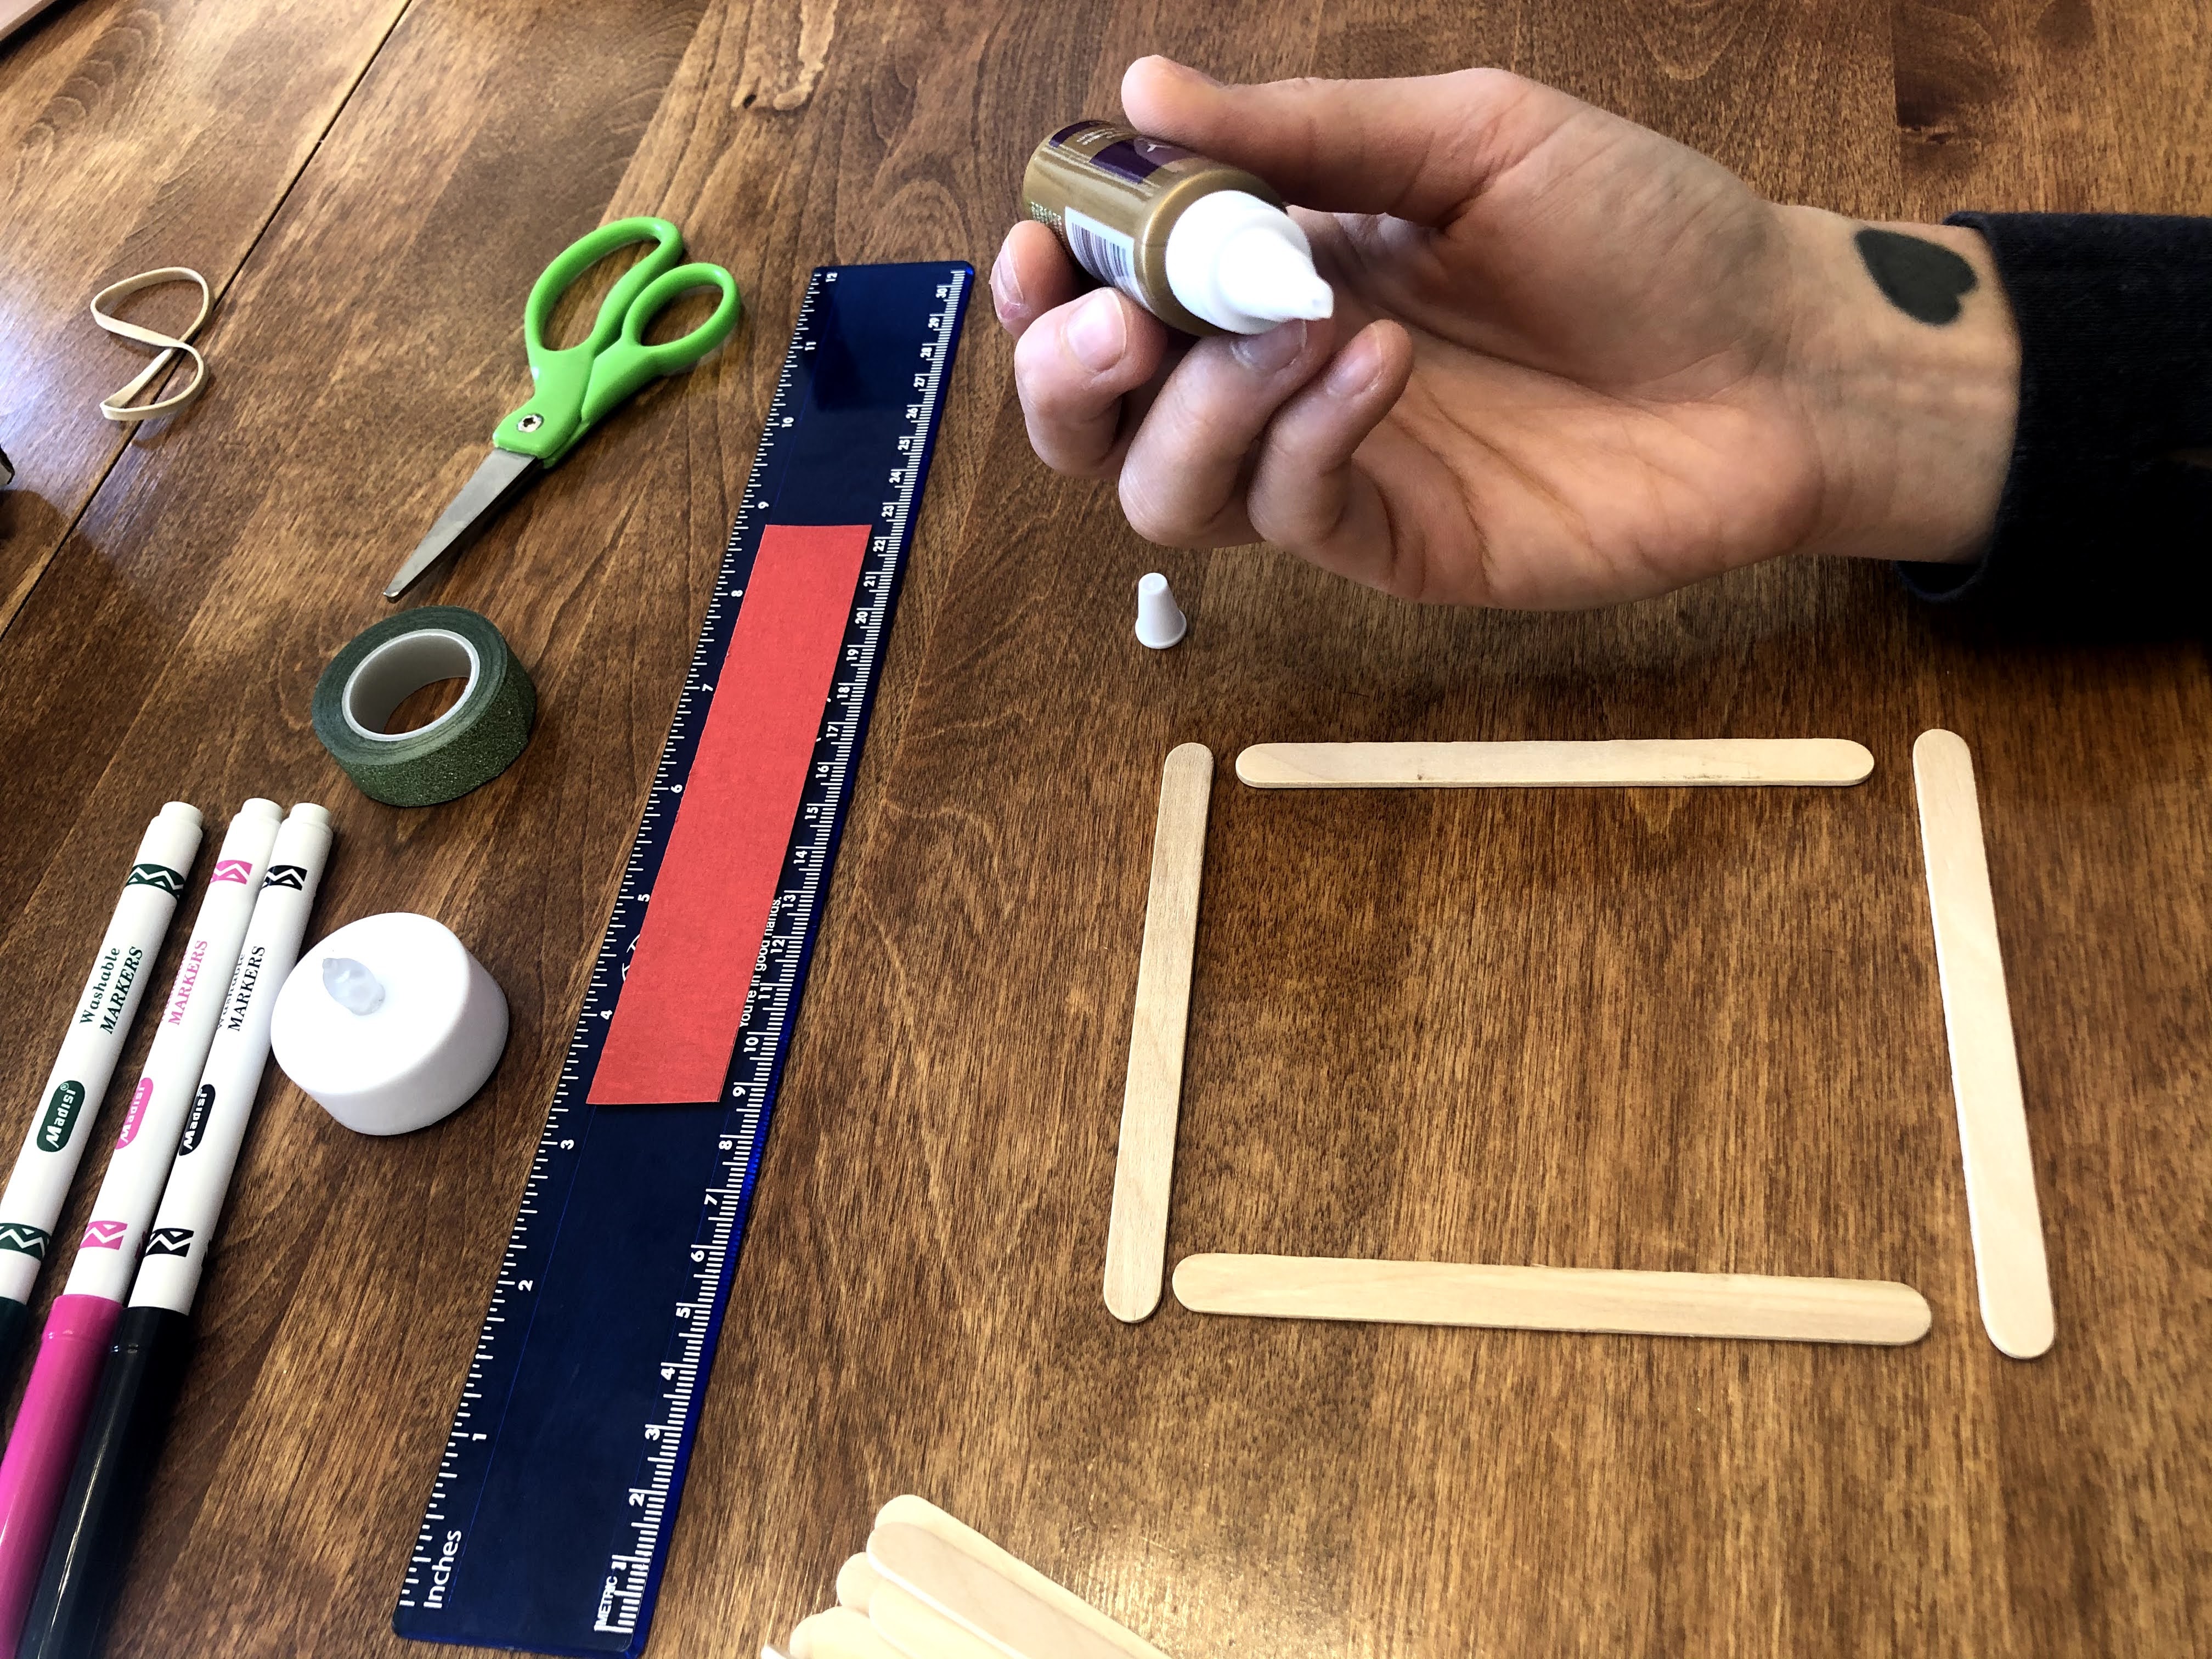
6. Place a dot of glue on each of the four corners of your square in between the craft sticks.
7. Repeat steps 5 and 6 until you have 5 squares.
8. Carefully set all but one square aside to dry.
9. Use your ruler to measure the side of the square.
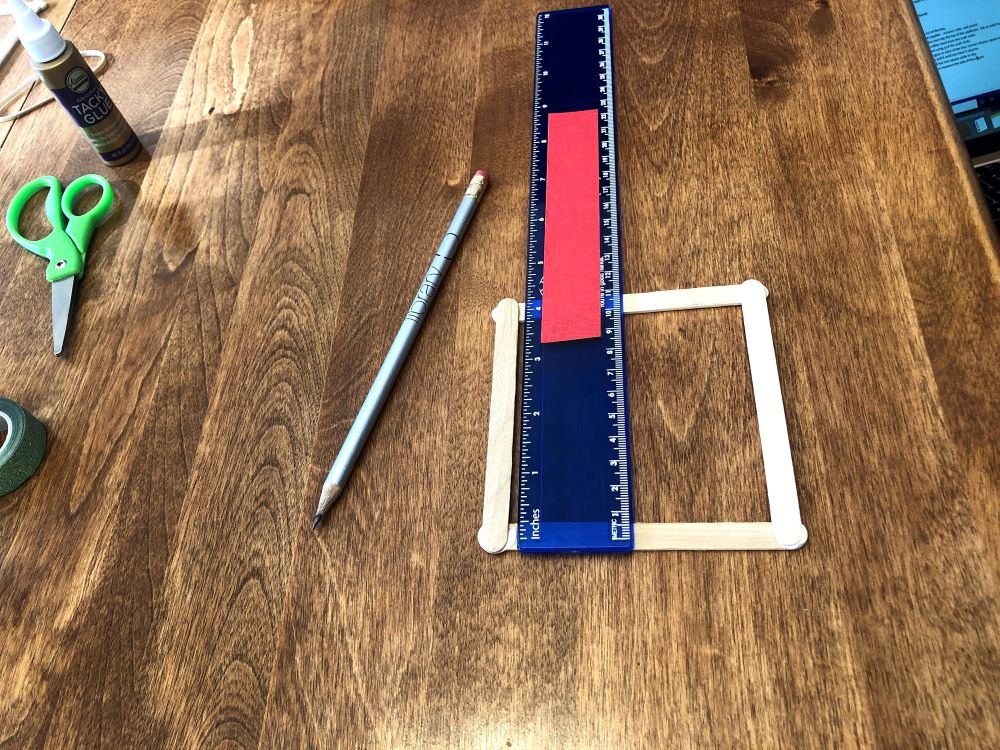
10. Now, using your ruler, measure out 5 squares on your tracing paper. If you cut your tracing papers in half first it will help you make sure you have enough paper to cut all of your squares.
11. Use your scissors to cut out all 5 squares.
12. Now it is time to decorate! You can decorate all 4 sides, just one or any number in between.
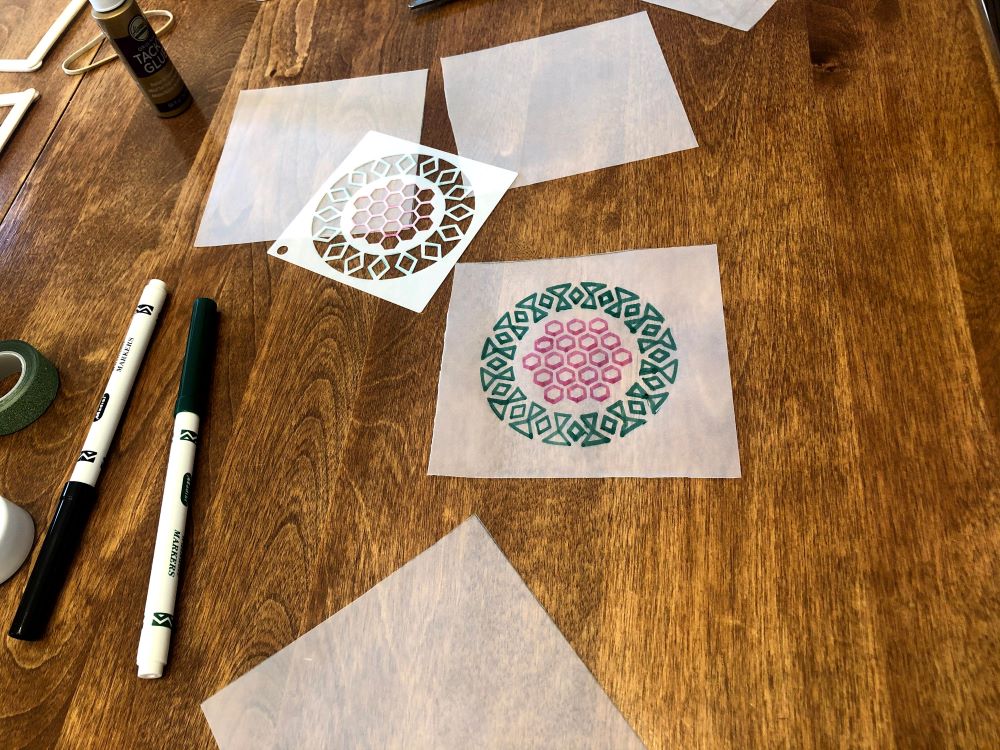
13. You can use your mandala stencil and markers, or you can use your markers to make any design you want! Remember one of the squares goes on the bottom, so you don’t need to decorate that one.
14. Glue each of the paper squares to the craft stick squares. You don’t need much glue, just a dot on each corner of the craft stick square.

15. Let all the glue dry before moving on to the next step.
16. Use your washi tape to add some flair to the sides of the lantern.
17. Assemble the lantern by gluing the squares together to create a cube with an open top. You may need an adult to help with holding the pieces in place as the glue sets.
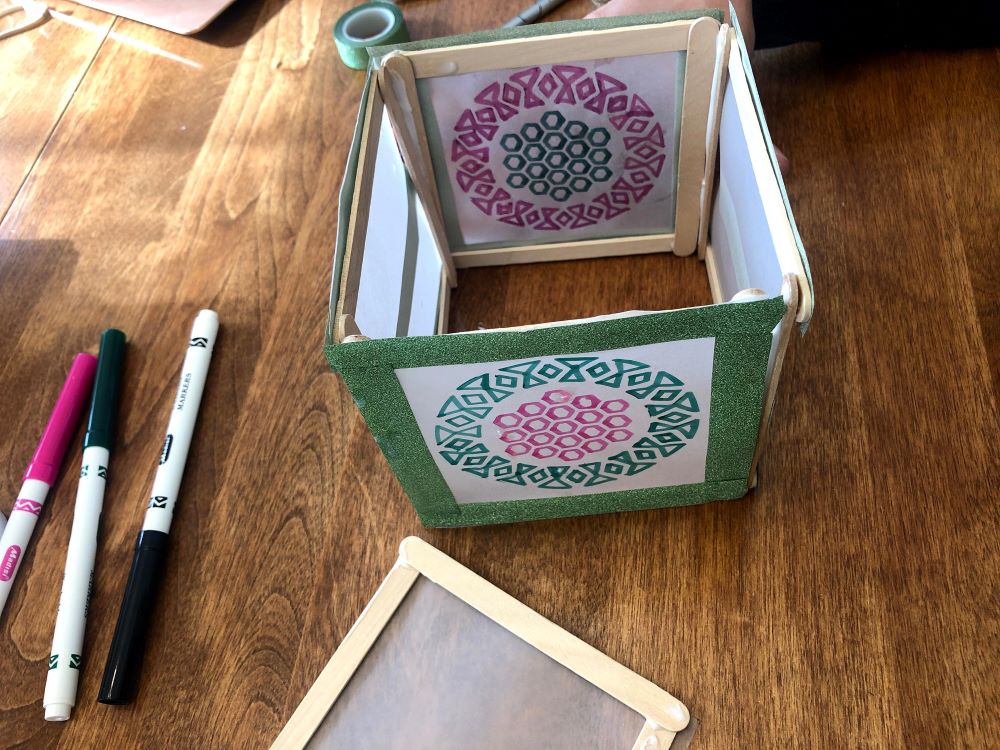
18. Wait for project to completely dry.
19. Turn on the LED tealight and place in the lantern.
20. Enjoy the glow!
Register for a Grades K-2 Kit here.
Grades 3-8: Washi Tape Bookmarks
- Cut strips of washi tape.
- Decorate a bookmark with the strips of washi tape however you like.
- Loop a tassel through the bookmark's hole.
Register for a Grades 3-8 Kit here.
Youth Services Assistant Librarian Alyssa