
Bring home a fun new project! Sign up from our Library Calendar and pick up a kit at the Youth Services desk or through our Parking Lot Pickup service between June 14-25.
Toddler & PreK: Paper Bag Kites
Decorate a paper bag and watch it soar as a kite. Register for the June Toddler & PreK Take-and-Make Kit here.
Instructions:
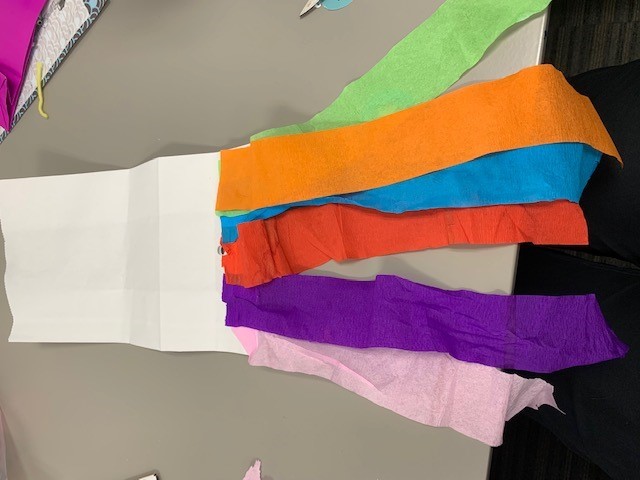
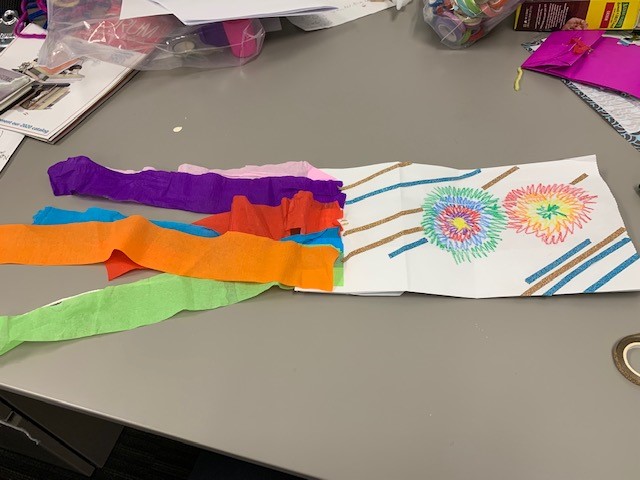
1. Decorate your paper bag with crayons and washi tape.
2. Glue 6 streamers to the bottom of your paper bag. You will need to overlap them to fit all 6 on.
3. Tie a piece of twine to the middle of one of the popsicle sticks.
4. Open the paper bag. Put the popsicle stick with the twine on it inside the bag and thread the string through the hole at the bottom of the bag. Your bag has two holes punched in it, but you only need to thread the string through the hole at the bottom of the bag.
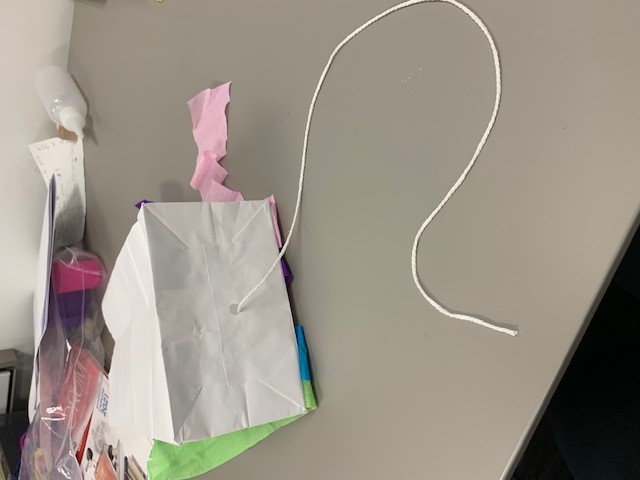
5. The string will be your kite string and the popsicle stick will keep it in place in the bag.
6. Fly your kite by holding on to the string and running. If the string is too long for your child, wrap it around their hand. Enjoy flying your kite!
Show us what you created! Send us pictures at youthservices@balibrary.org.
Grades K-2: Make Your Own Kinetic Sand
Mix together the ingredients to make moldable sand that won’t stick to your hands. Register for the June Grades K-2 Take-and-Make Kit here.
Show us what you created! Send us pictures at youthservices@balibrary.org.
Grades 3-8: No-Sew Pillows
Spruce up your space with a DIY pillow — no sewing skills required. Register for the June Grades 3-8 Take-and-Make Kit here.
Your kit contains:
- two squares of fleecy fabric
- one bag of stuffing
- one ring-shaped paper stencil
- one piece of chalk
- one roll of tape (optional)
You will also need one pair of very sharp scissors.
Instructions:
1. Lay out one square of fabric on a table or desk. Place the paper stencil on top of the fabric. Optionally, use the tape to hold the stencil in place.
2. Using the chalk, trace both the outside circle and the inside circle on the fabric. It's okay if your work isn't super neat.
3. Set the first square aside.
4. Lay out the second square of fabric, put the stencil on top, and trace the same two circles (outside and inside edges) on the fabric.
5. Using your sharp scissors, cut along just the outside (larger) chalk line on both of the fabric pieces. Leave the inside (smaller) chalk circle alone for now.
6. Layer the two fabric circles on top of each other, as exact as you can.
7. Cut slits from the outer edge of the fabric circle to the inside chalk line. Cut through both layers of fabric at once. You're making fringe strips, about 1/2-1 inch wide. Keep your scissors pointing towards the middle of the circle as you cut slits all the way around.
8. Don't separate the two layers!
9. Take the top and bottom layers of one set of fringe, and tie a double knot, connecting the front and back of the pillow.
10. Continue to tie knots around the circular pillow.
11. Leave a few inches untied, enough space you can put your hand in the pillow.
12. Stuff the pillow with stuffing, as much or as little as you'd like.
13. Finish tying the fringe strips all the way around the pillow.
14. Trim any fringe if it looks too long or uneven.
Show us what you created! Send us pictures at youthservices@balibrary.org.