
Bring home a fun new project! Sign up from our Library Calendar and pick up a kit at the Youth Services desk or through our Parking Lot Pickup service between March 8-19.
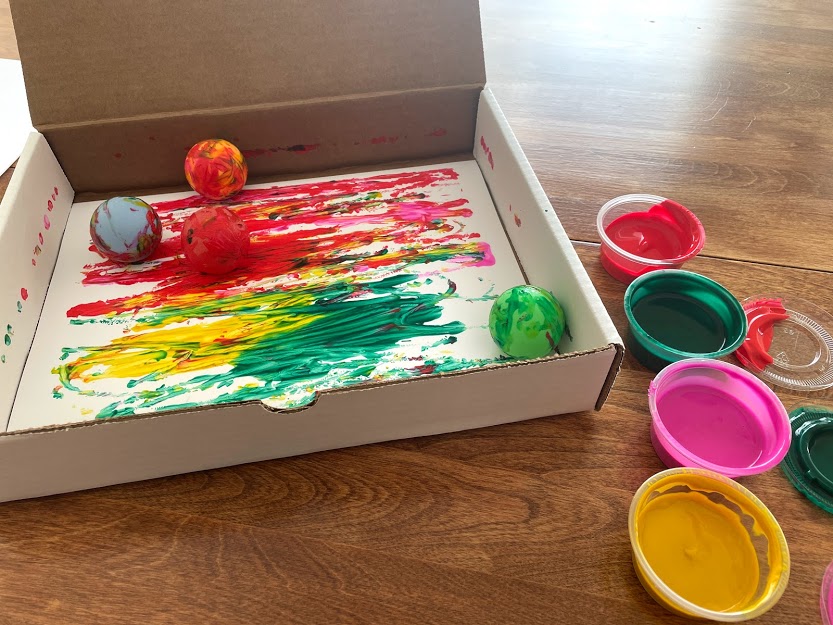
Toddler & PreK: Ping Pong Ball Painting
Use ping pong balls to create a unique work of art. Register for the March Toddler & PreK Take-and-Make Kit here.
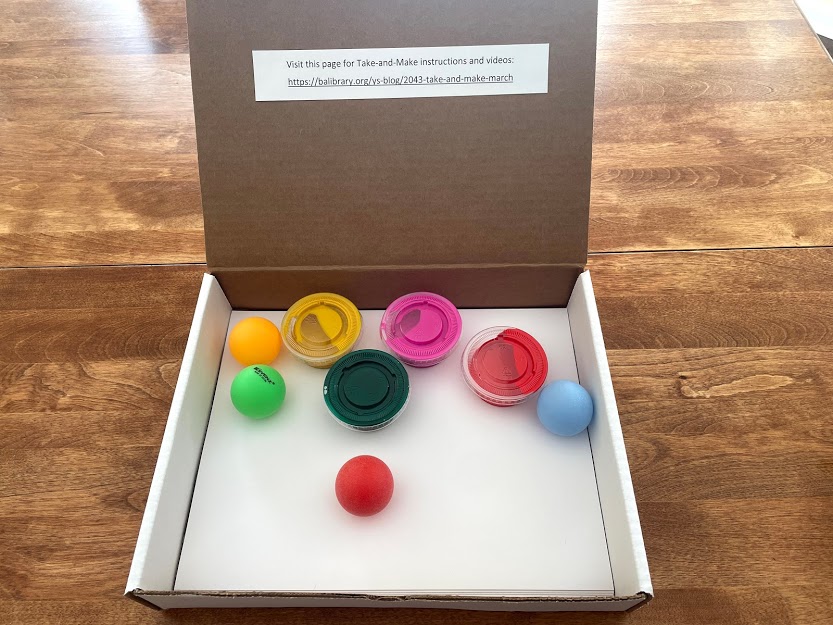
Your kit contains:
· 4 containers of different colored paint
· 4 ping pong balls
· 10 sheets of cardstock
Instructions:
1. Remove all the items from the box.
2. Place one sheet of cardstock into the bottom of the box.
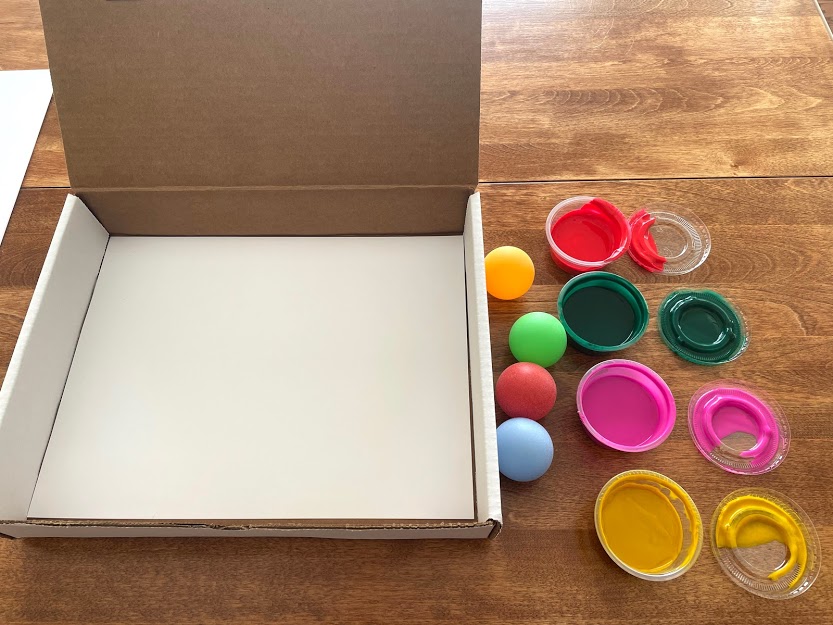
3. Open the paint containers.
4. Dip each of the ping pong balls into a different color of paint.
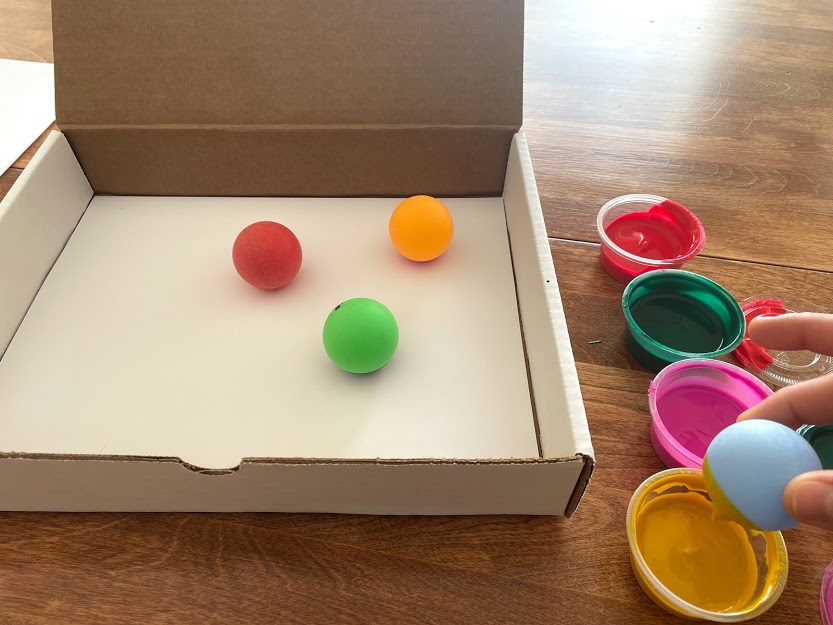
5. Place them on top of the cardstock in the box.
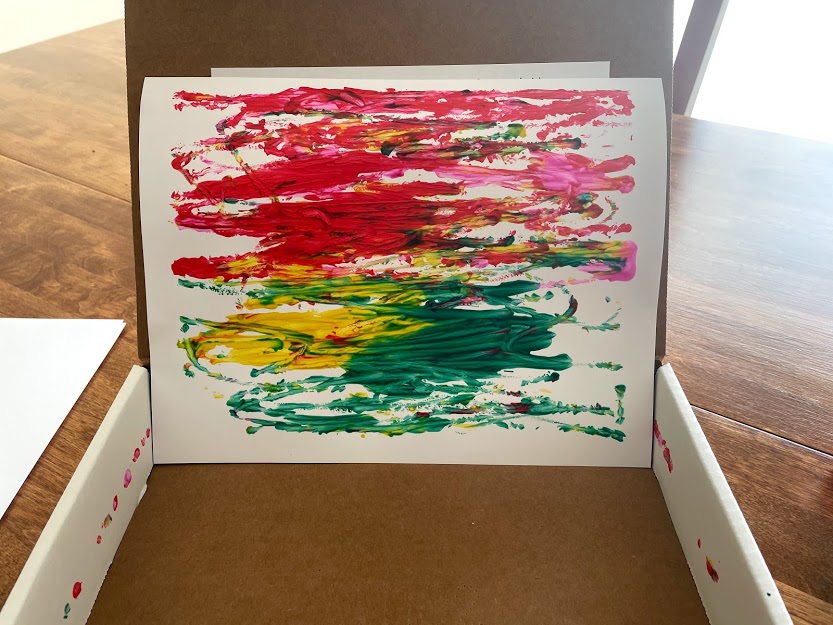
6. Leave the box open and move the box back and forth to roll the ping pong balls across the cardstock. Watch the paint as it streaks across your cardstock.
7. Remove the ping pong balls.
8. Take the piece of cardstock out of the box and admire your art work!
9. Rinse and dry the ping pong balls to make another work of art!
Talking points to consider and alternate ways to create art:
· Talk to your child about the different colors of paint. Have them identify each one individually.
· Talk about the new colors created as the original colors mix together.
· Use only one, two, or three of the ping pong balls with different colors and talk about how the art looks different with less or more colors.
· Instead of leaving the box open, close the box with the ping pong balls and paint inside and give it a good shake! Compare the art you make with the rolling technique vs. the shaking technique.
Show us what you created! Send us pictures at youthservices@balibrary.org.
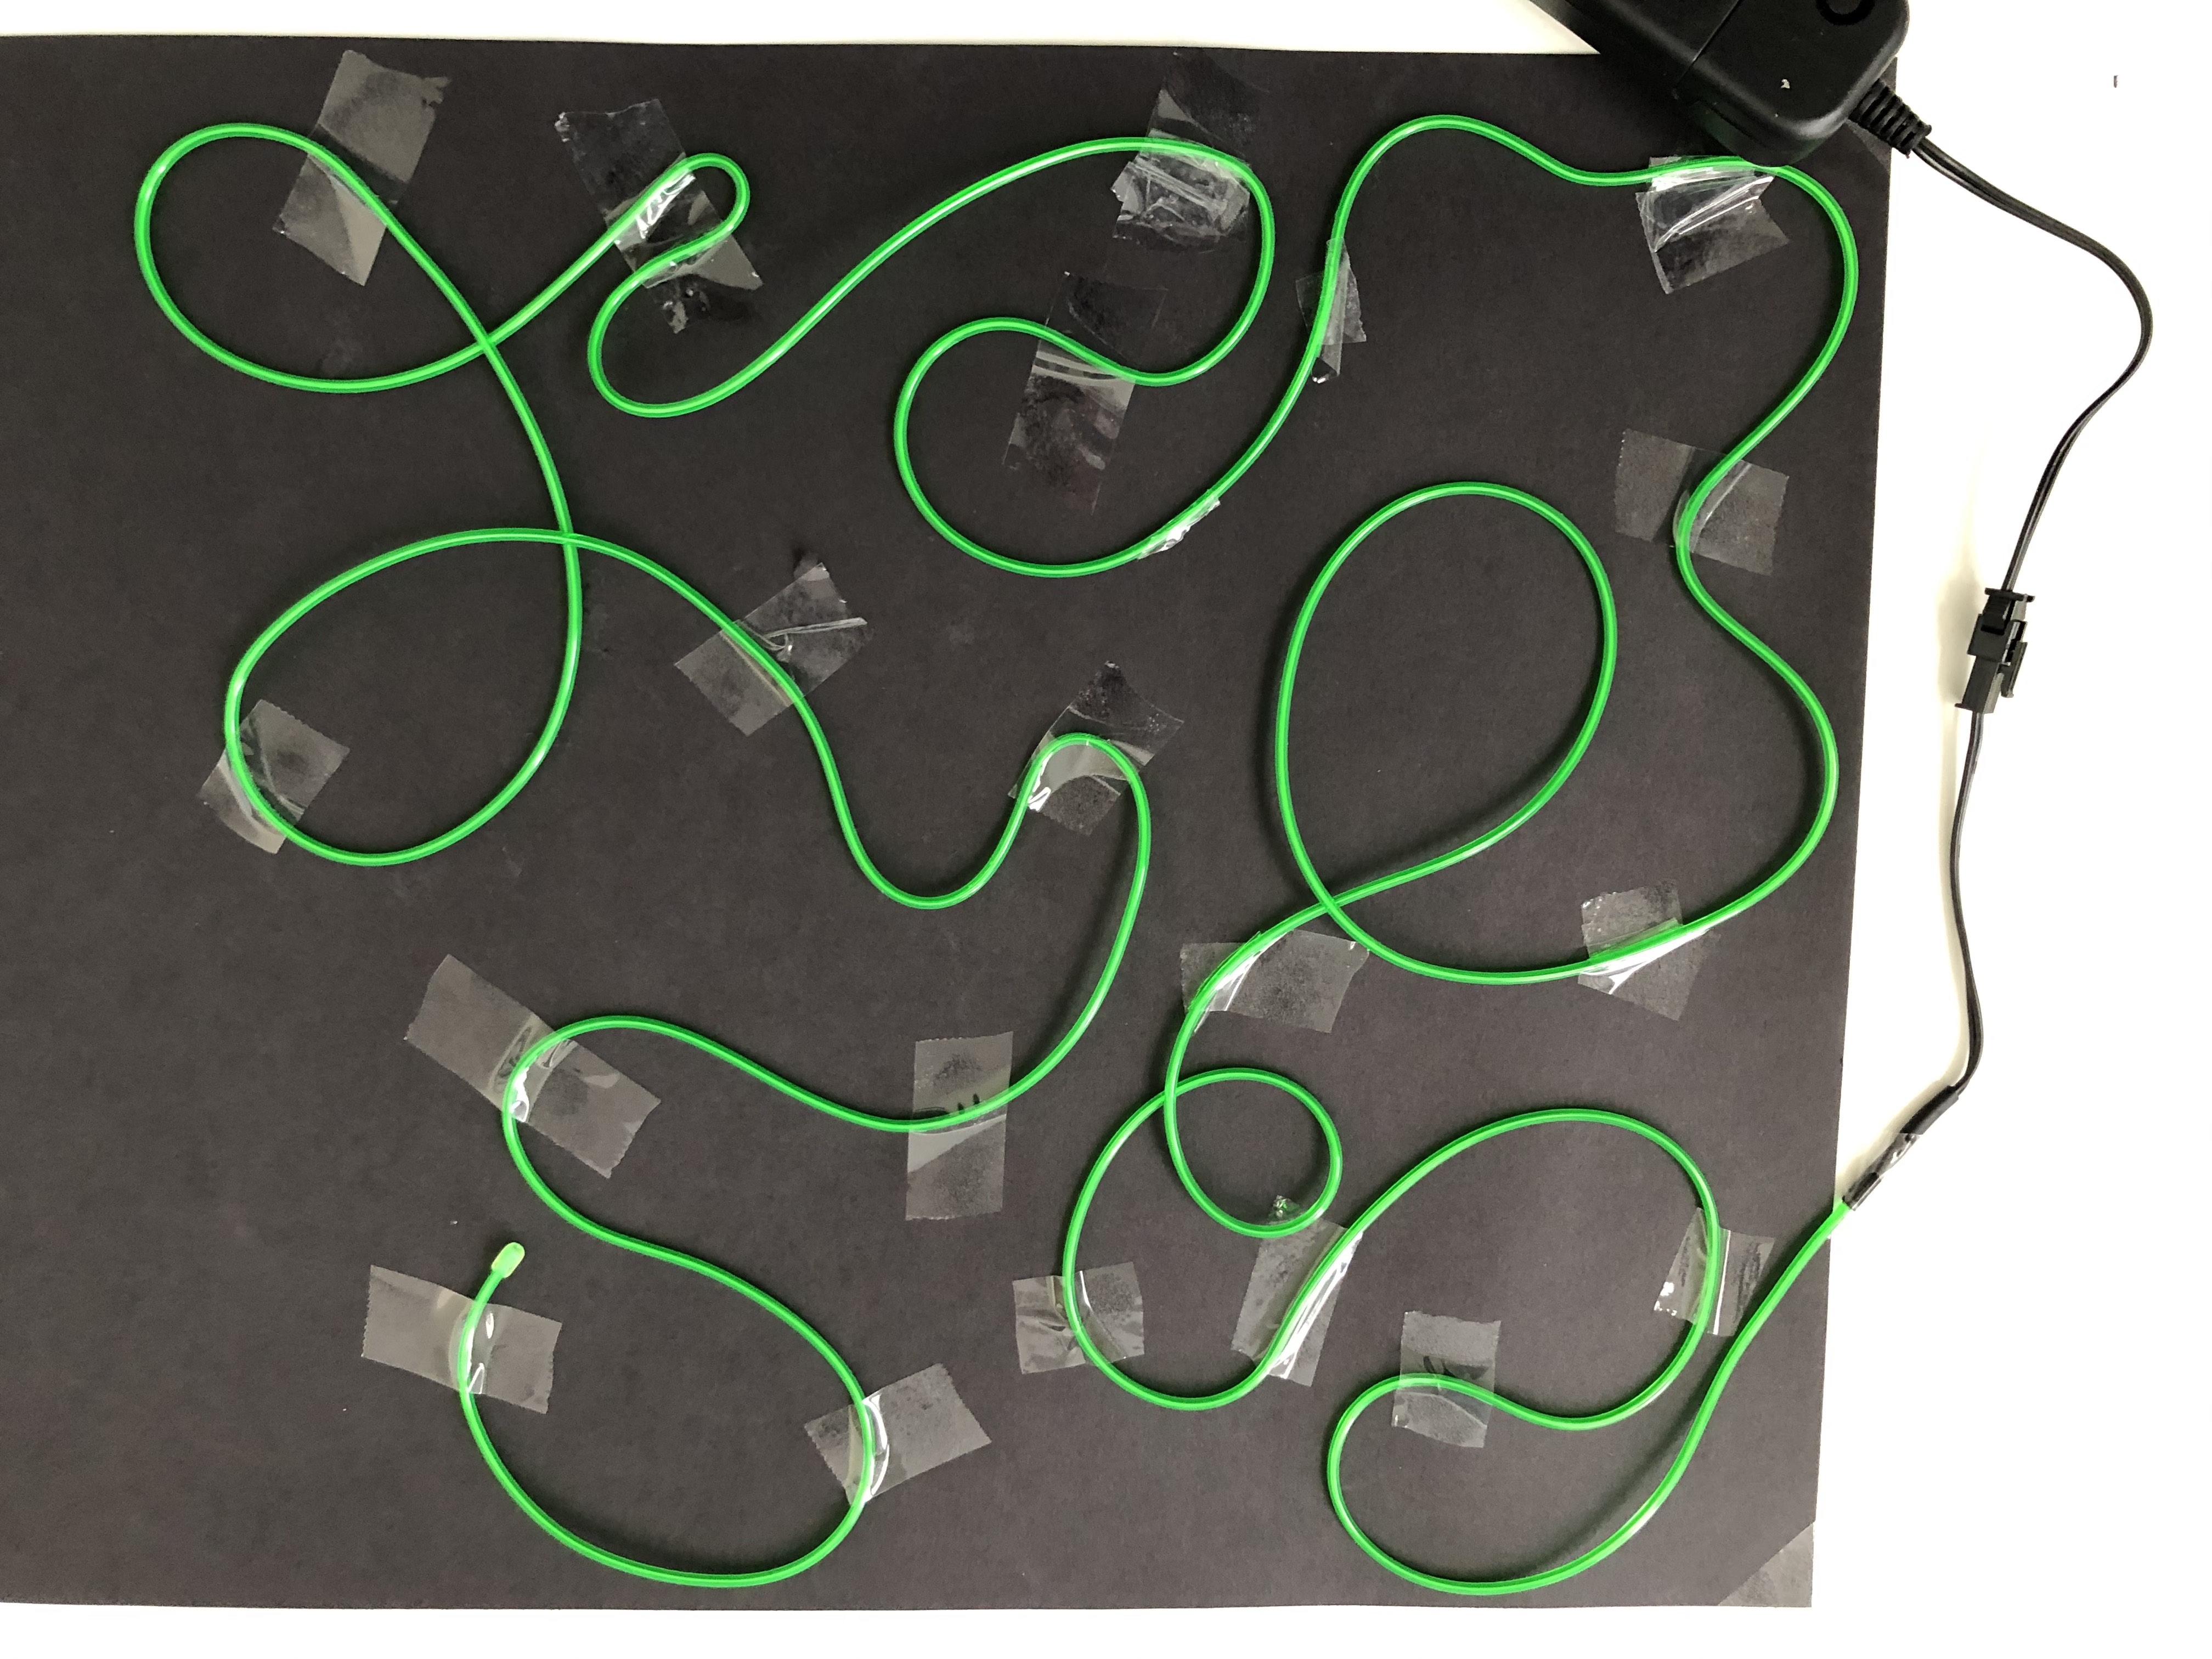
Grades K-2: Light-Up Lines
Create a picture that glows. Register for the February Grades K-2 Take-and-Make Kit here.
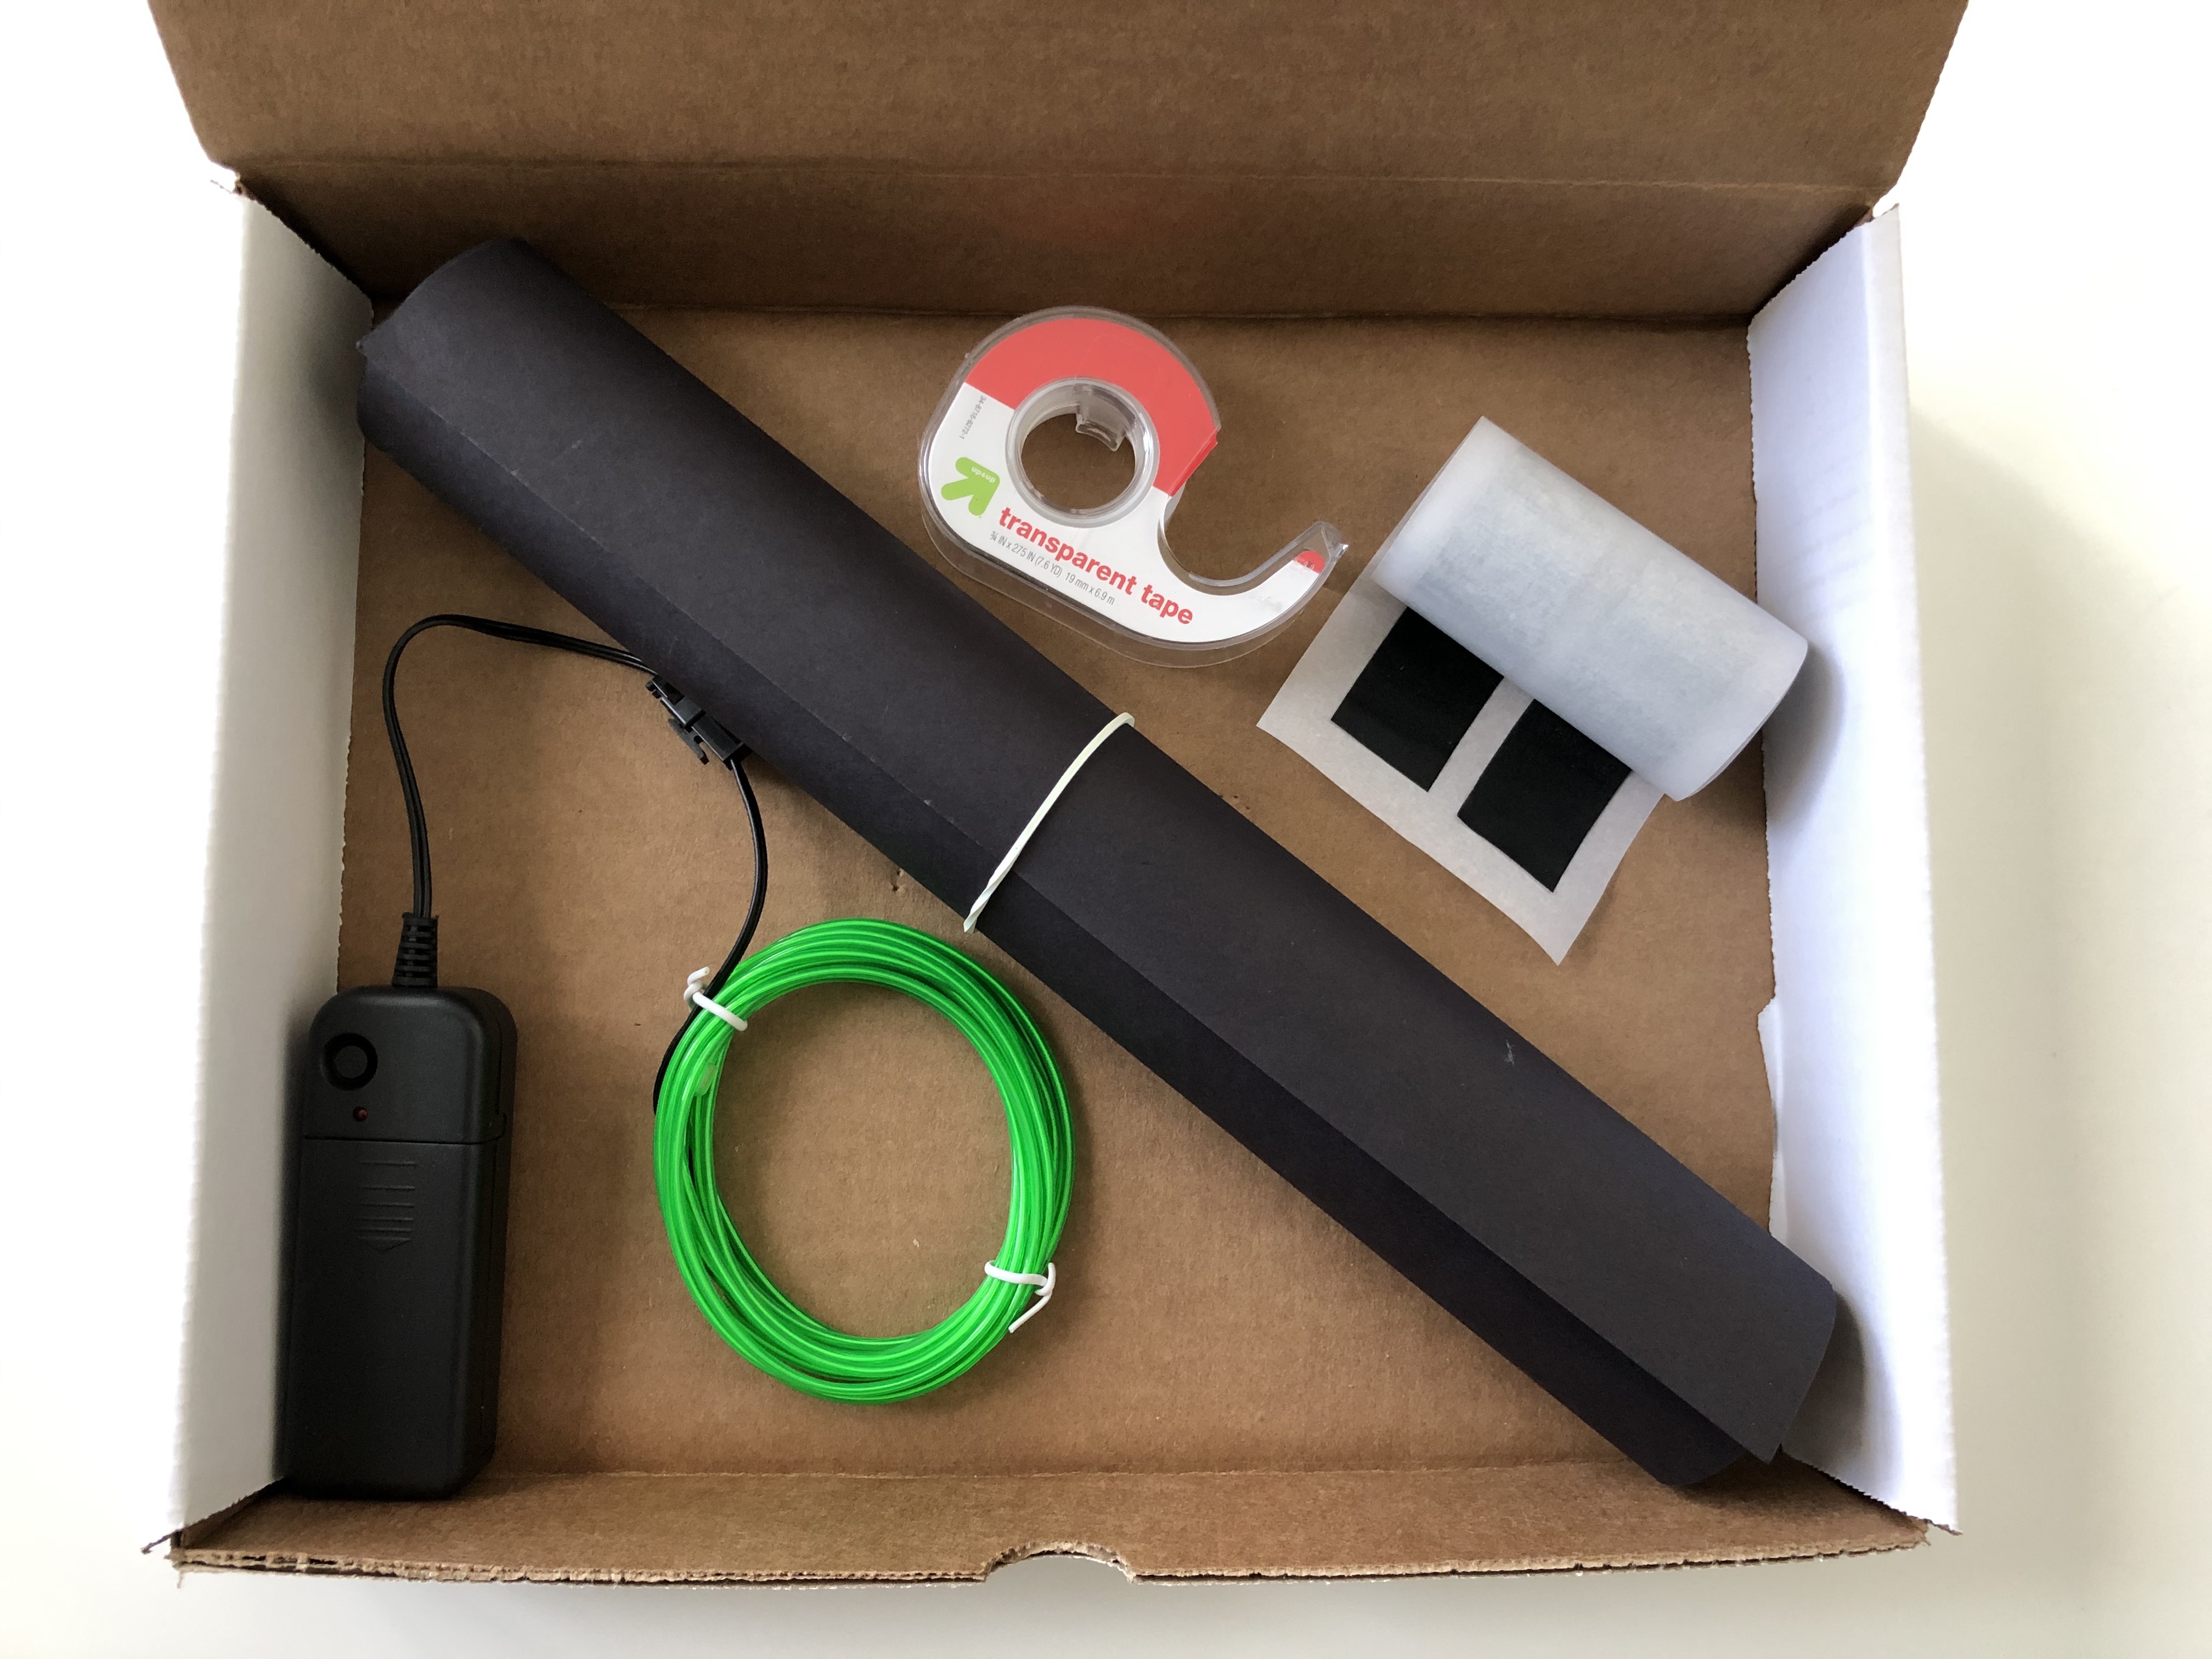
Your kit contains:
1 length of electroluminescent wire with battery pack
1 sheet of black paper
Clear tape
Black masking tape
You will also need:
Scissors (optional, to help cut tape)
A dark space
A camera
Instructions:
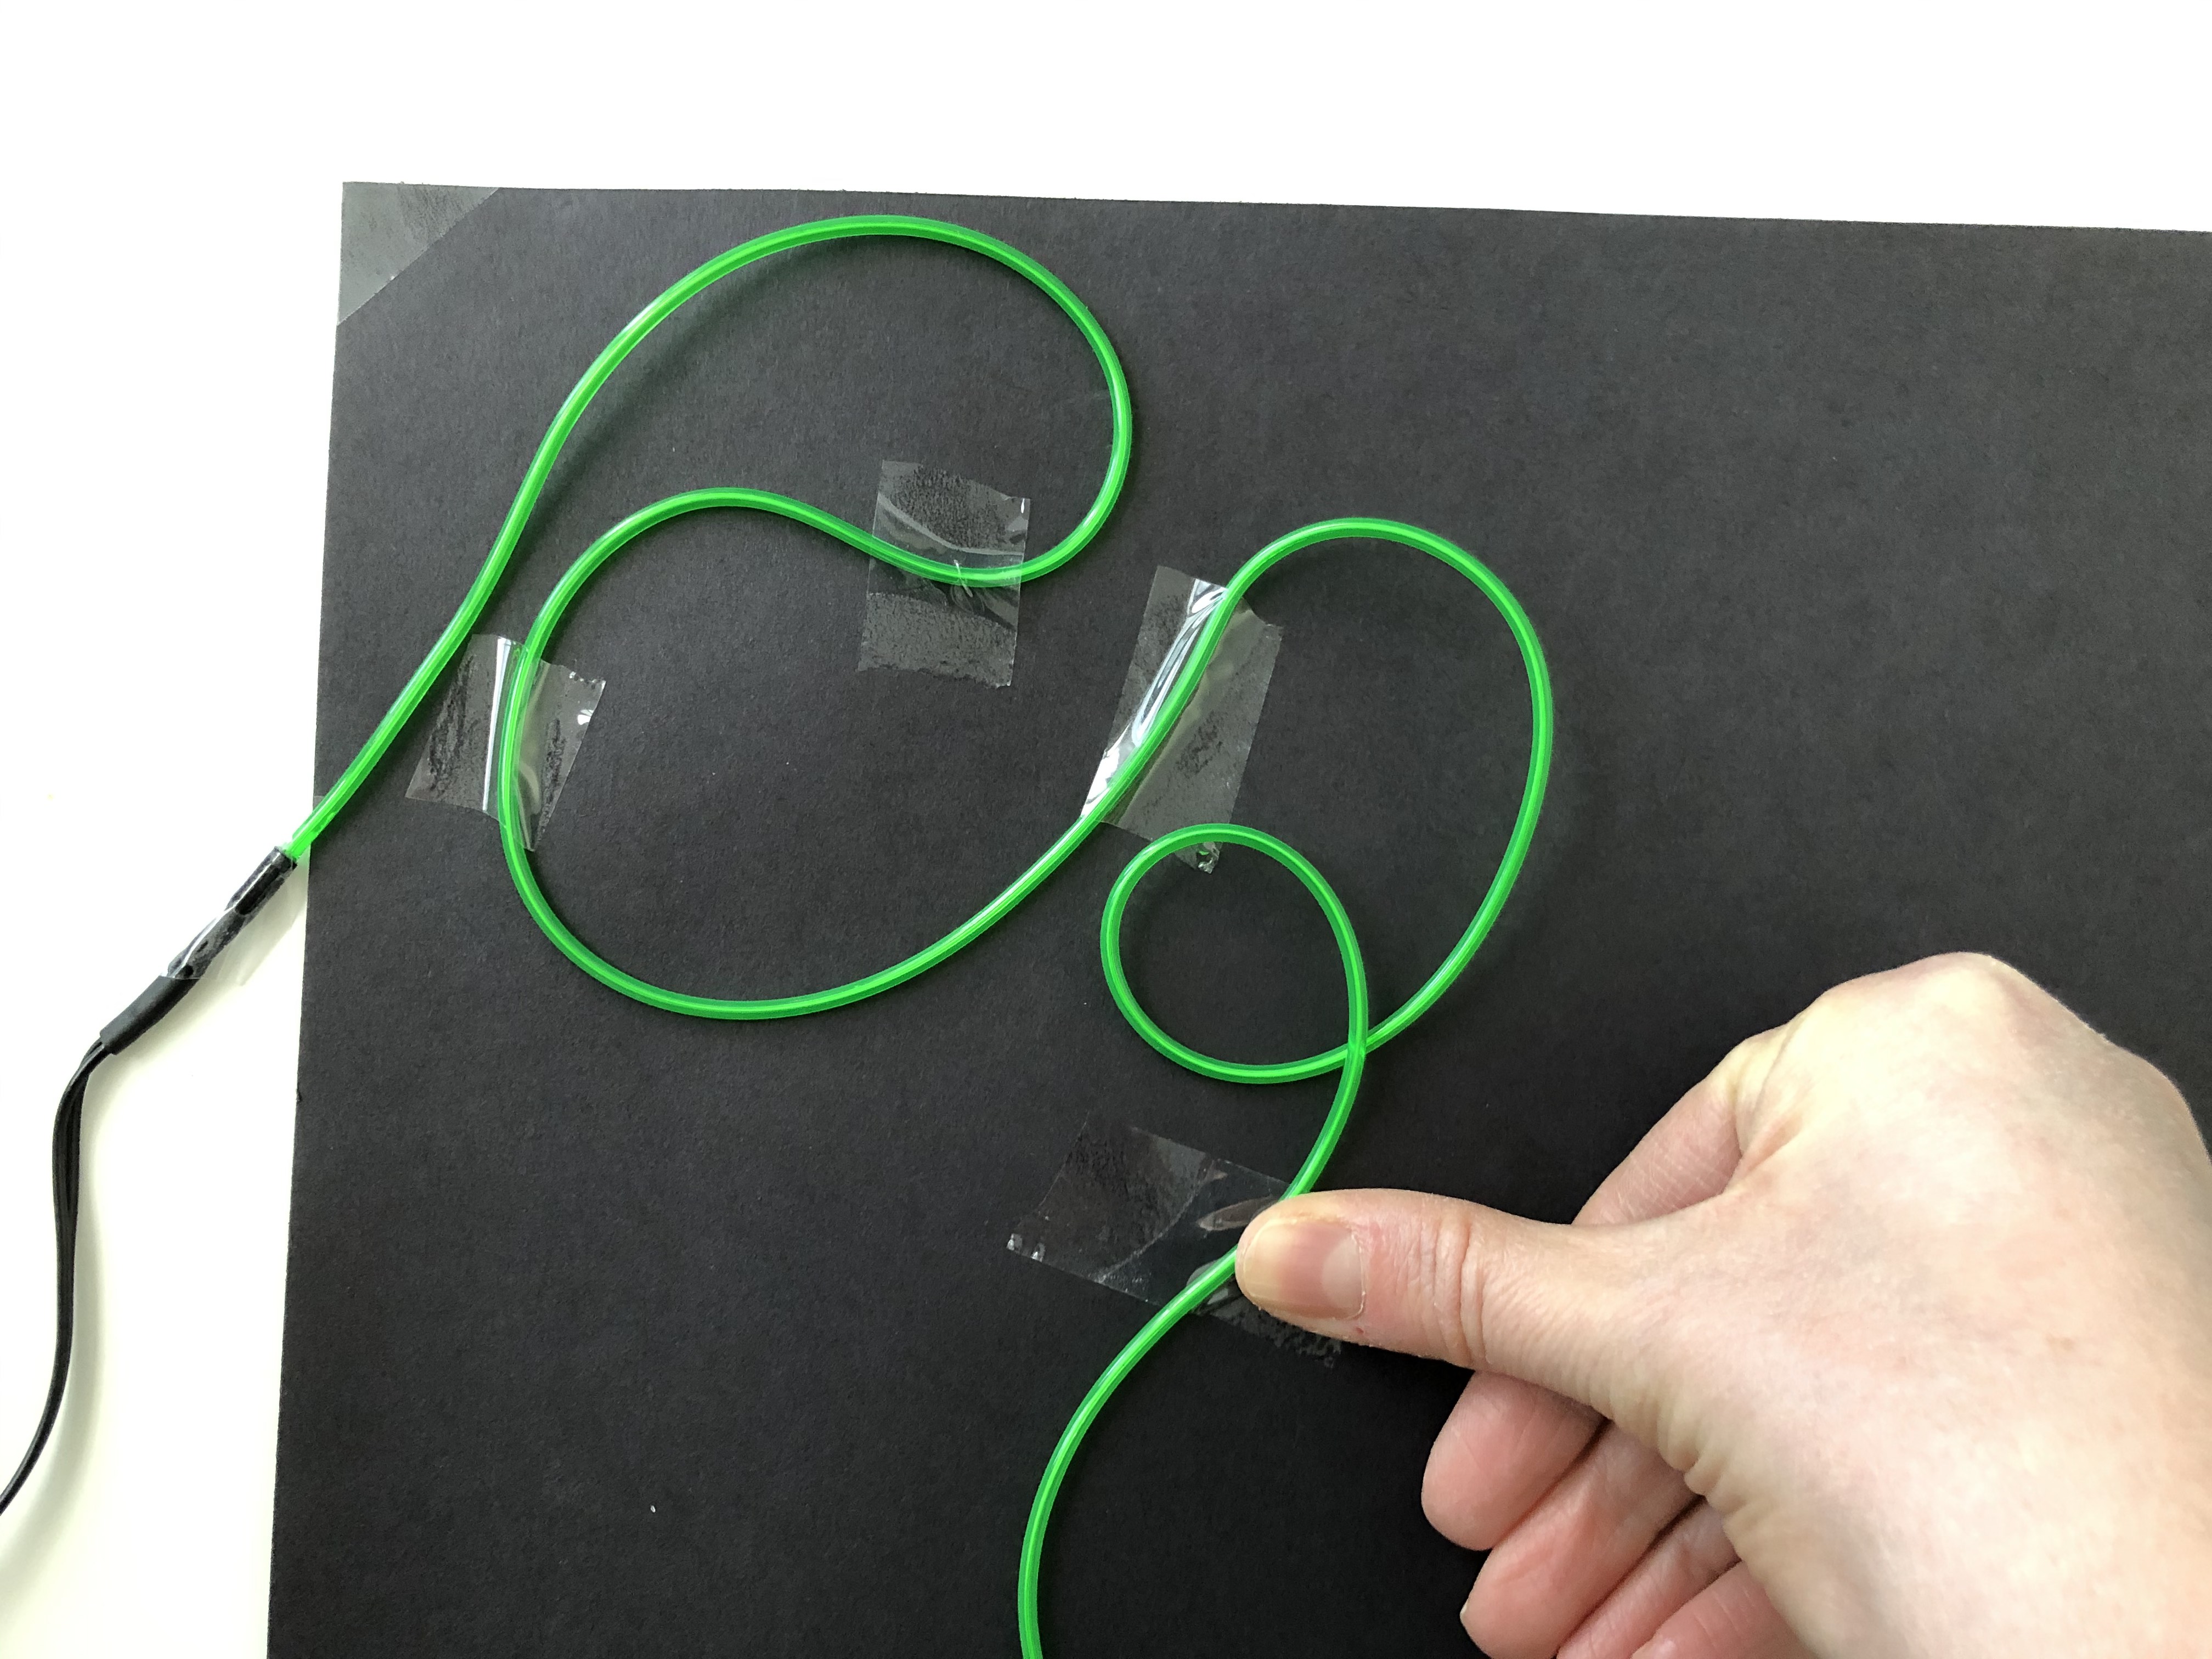
1. Roll out the black paper and tape to your workspace.
2. Lay out the wire on the black paper, using tape to keep it in place.
3. You can “draw” an image or just random patterns.
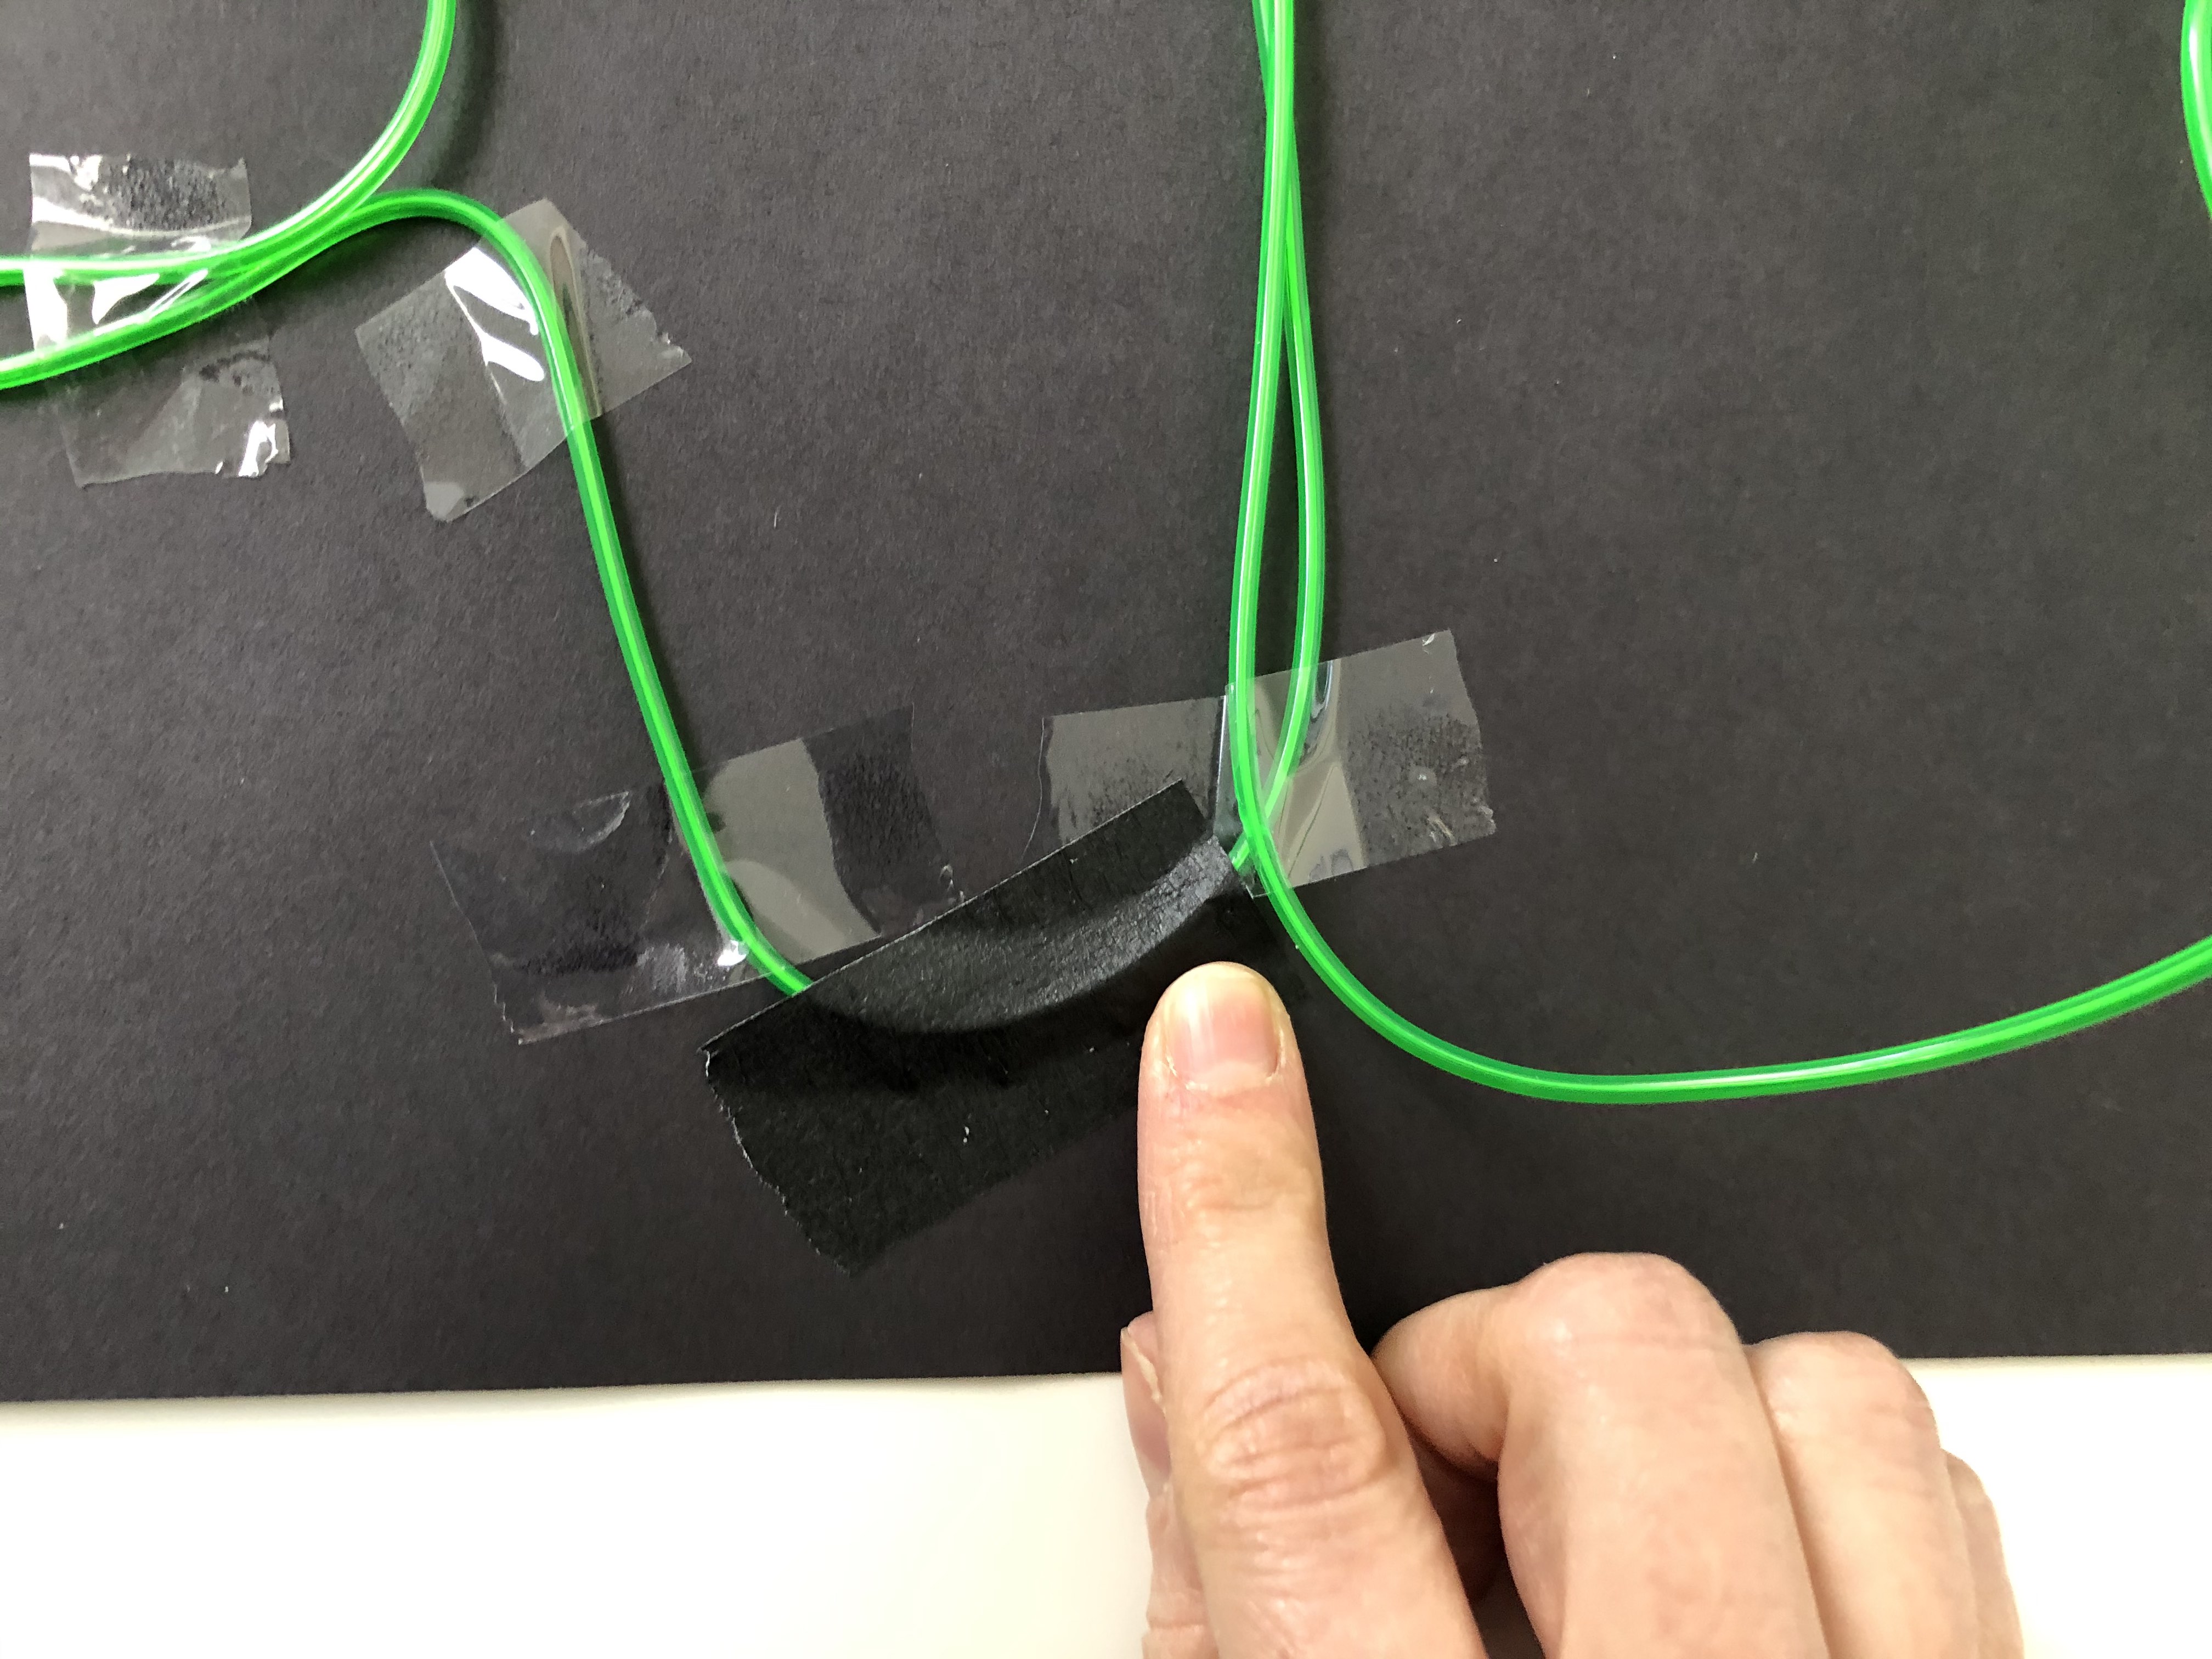
4. Use the clear tape to allow the light to shine through. If you want to stop and start your line (for example, for letters or separate images), you can use the masking tape to “black out” the line.
 |
 |
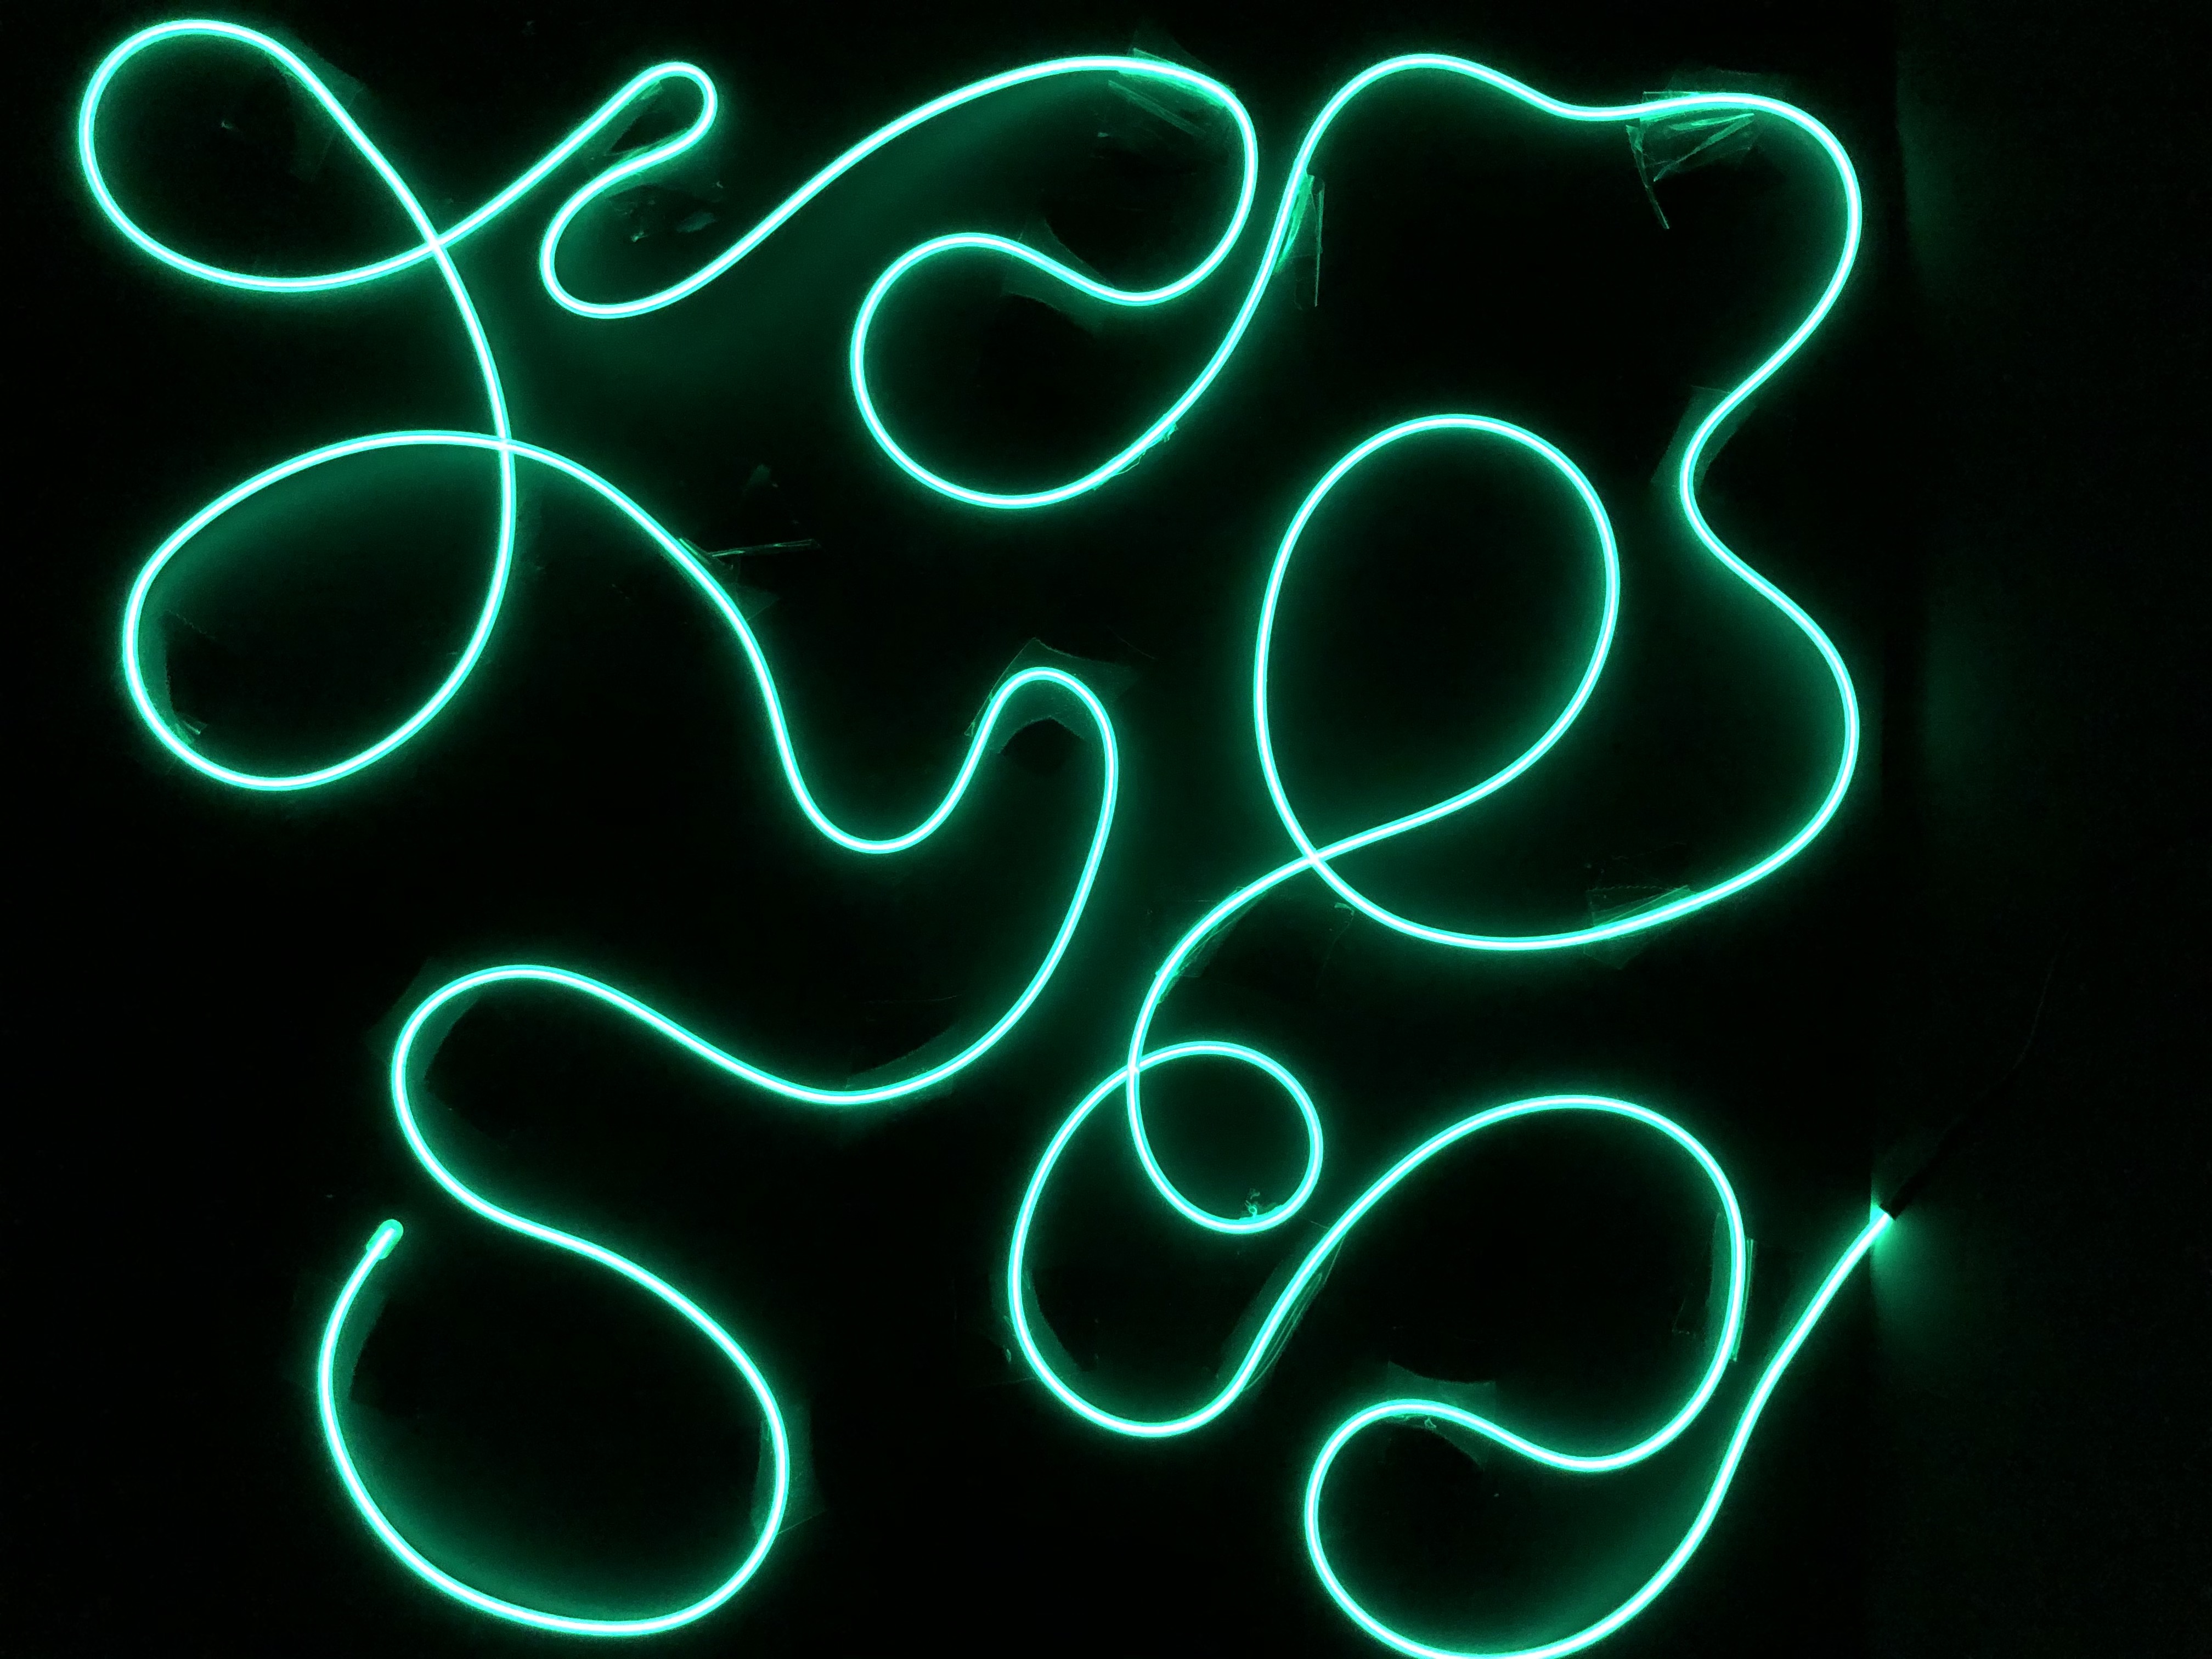
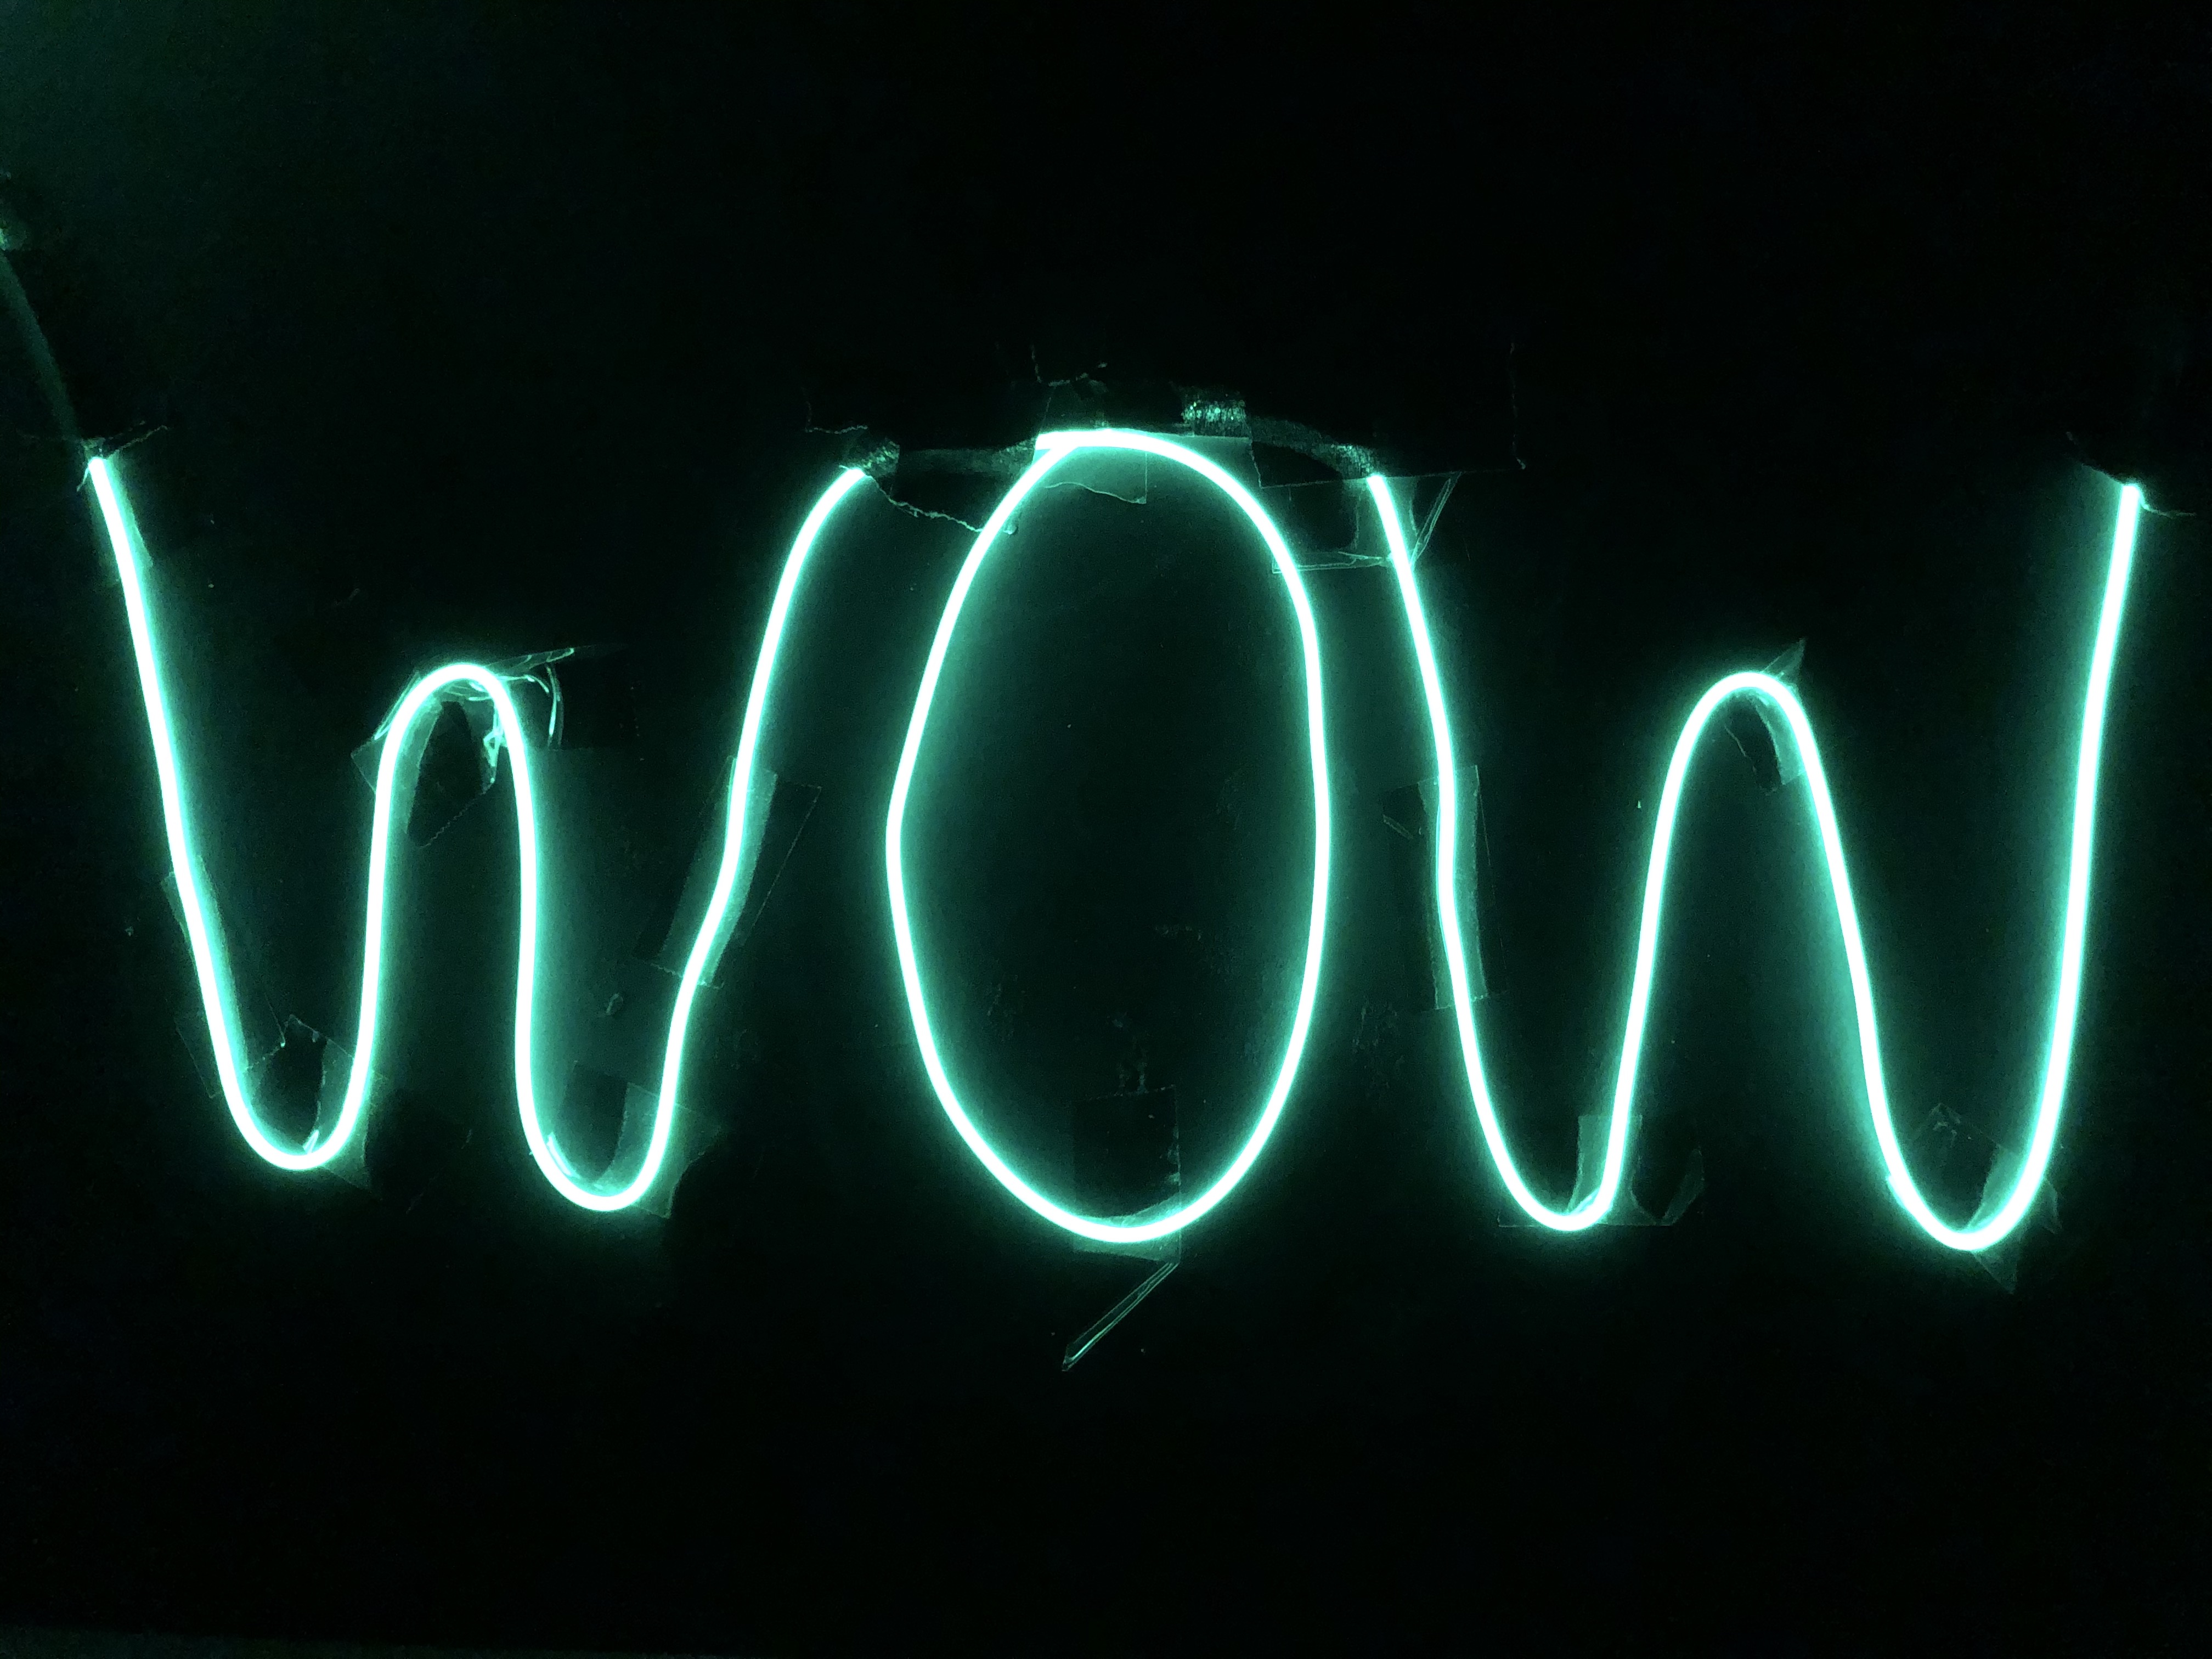
5. When you’re done, turn on your wire, turn out the lights, and see your creation pop! You can take a picture from above.
 |
 |
 |
 |
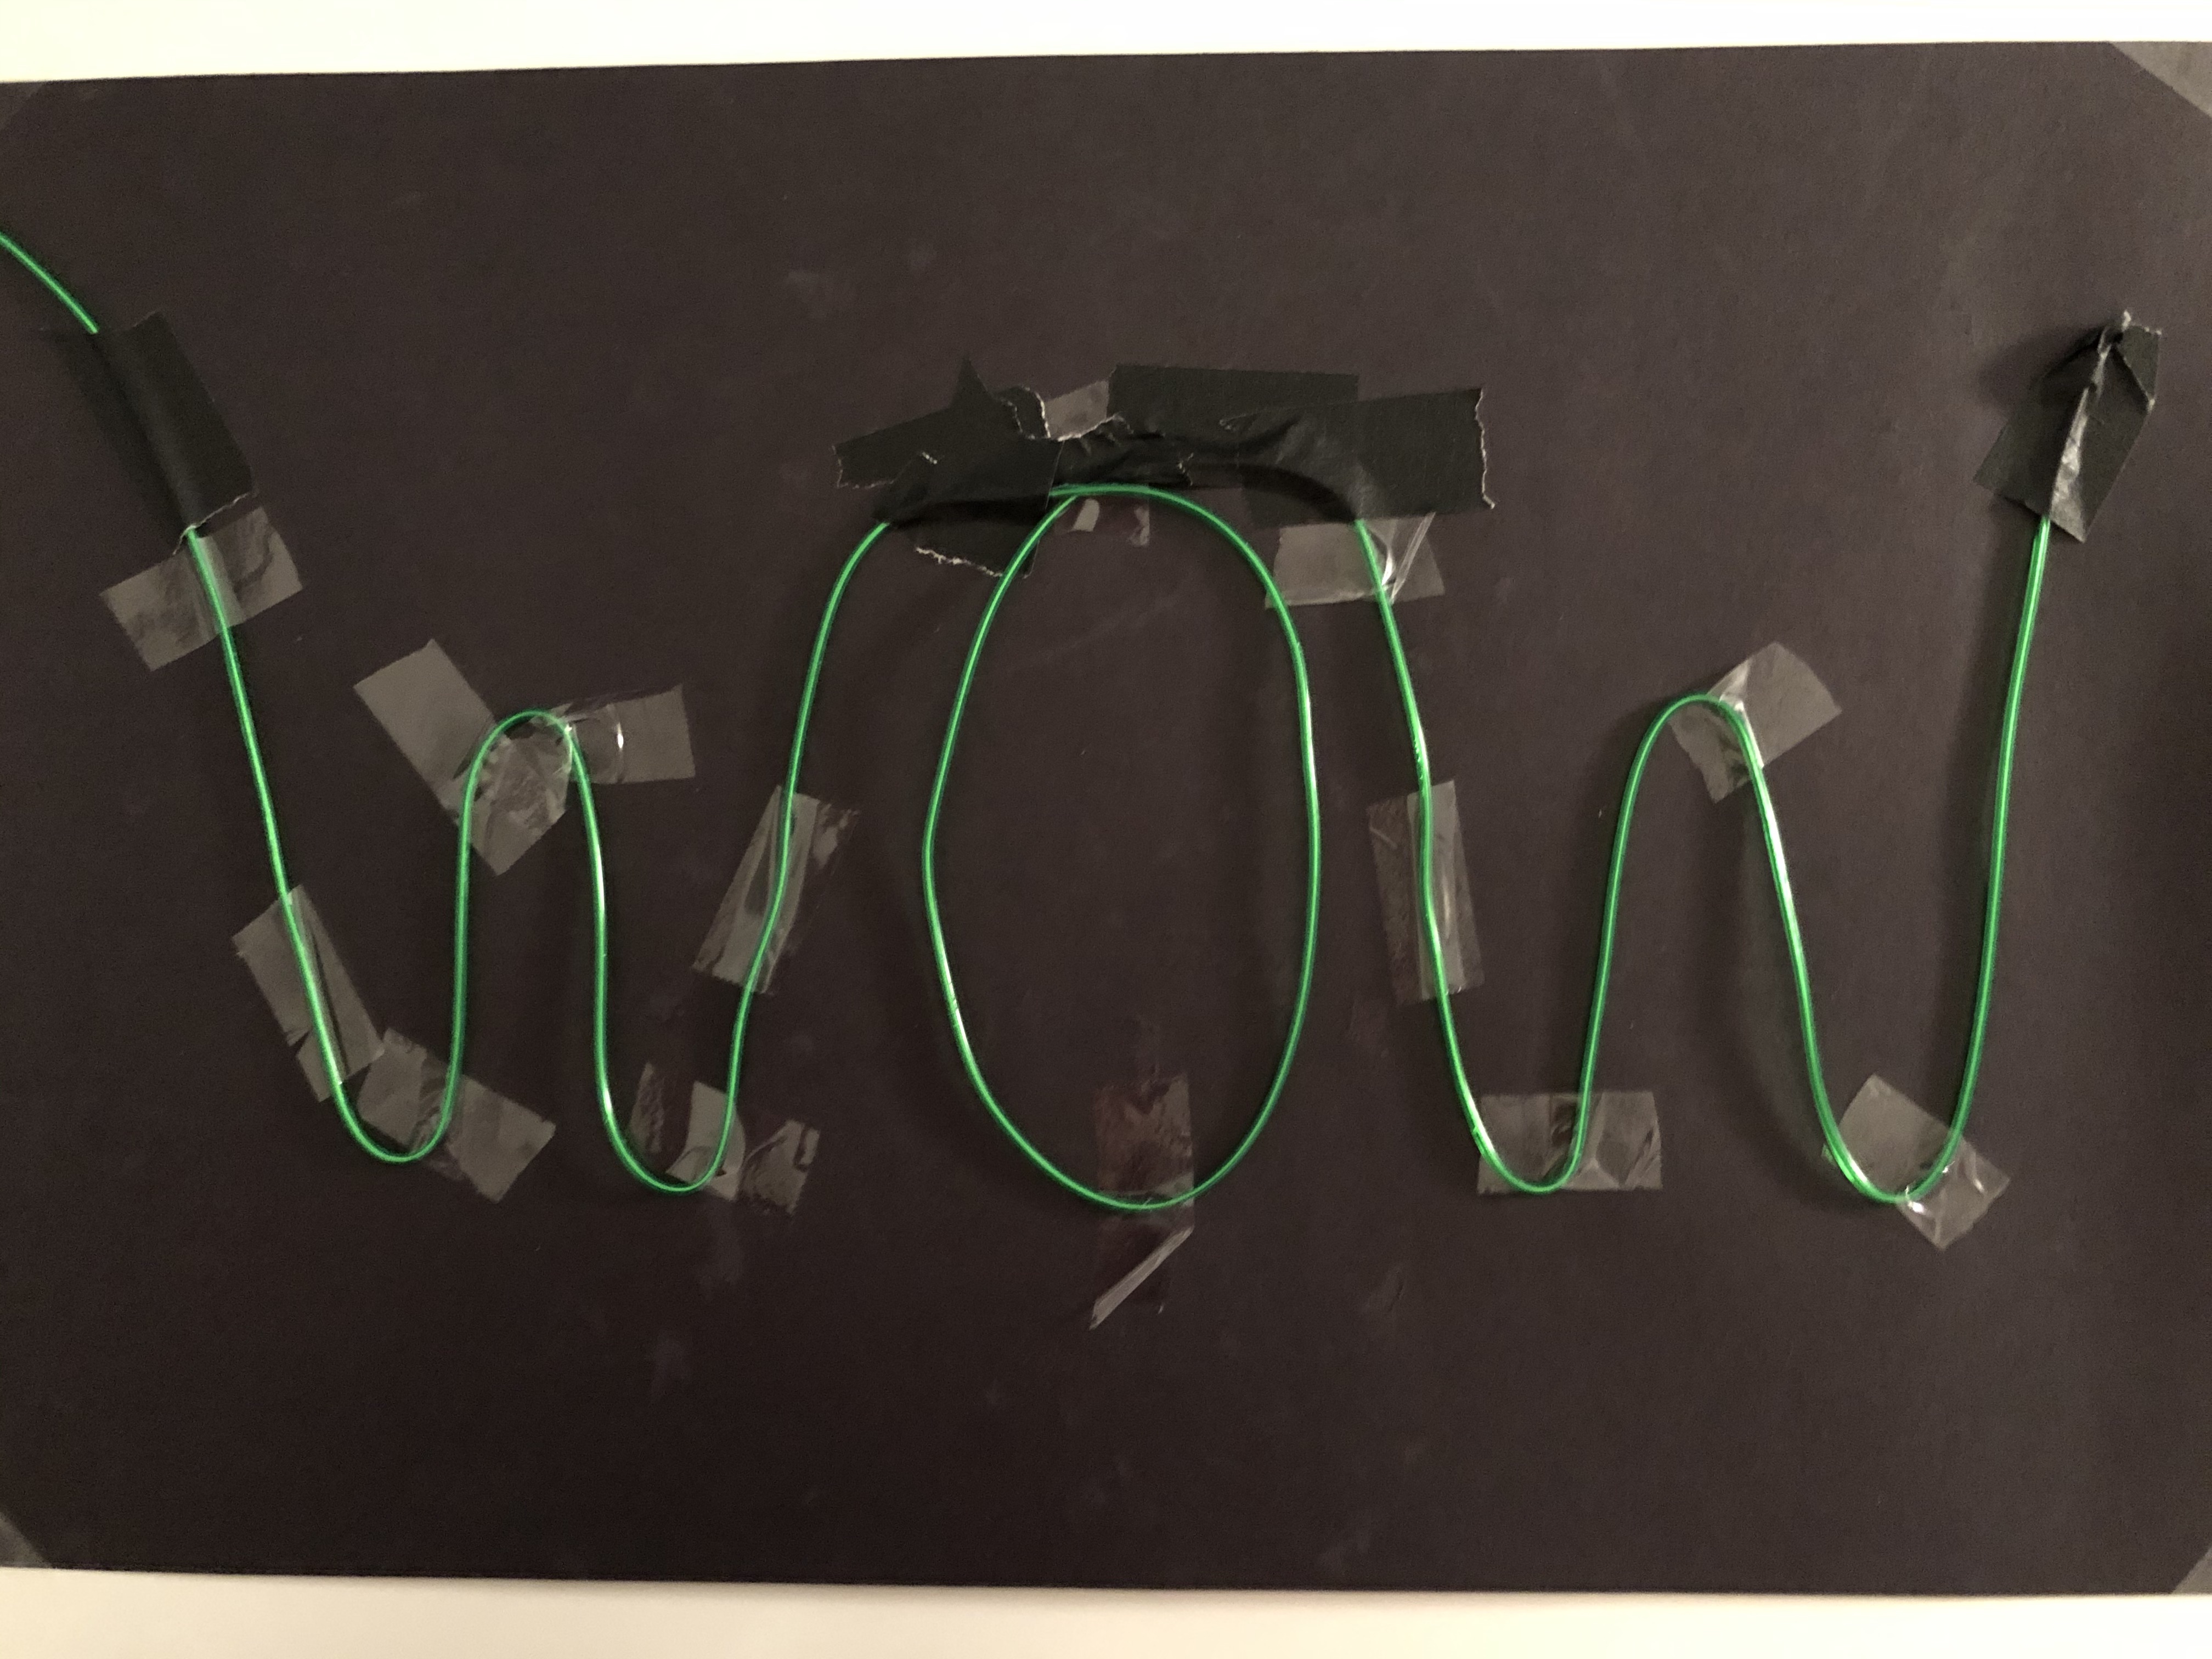
6. Carefully peel off the tape and create something new!
Questions to explore:
How is using a wire to create an image different from using a pencil or marker?
Can you write your name or initials with the wire? In print or cursive?
How does your creation change when the room is dark?
What other household objects could you use in this artwork?
If you take a picture, experiment with where you stand and how you hold the camera. Can you change the way the picture looks by tilting the camera? Can you change how much of the artwork you see by zooming in or out?
Taping to the paper creates a flat image (or two-dimensional). Can you also create a sculpture that stands up (three-dimensional) with the wire? How?
Show us what you created! Send us pictures at youthservices@balibrary.org.
Grades 3-8: Cloud Slime
Create a cloud made of slime for a fun sensory experience. Register for the March Grades 3-8 Take-and-Make Kit here.
Your kit contains:
- 5 plastic cups
- 1 bottle of Elmer’s glue
- 1 plastic bottle of liquid starch
- 2 bottles of food coloring
- 2 popsicle sticks
- Instant snow
In addition to these items, you will need a ¼ cup measuring cup, and a 1 tablespoon measuring spoon.
- Pour ¼ cup of the glue into a plastic cup.
- Pour some of the liquid starch into one of the plastic cups.
- Add 2 tablespoons of liquid starch to the cup with the glue.
- Stir well with Popsicle stick.
- Add food coloring and stir well.
- Your should start to see your slime clump together.
- Put the slime on a surface that is okay to get messy, such as a plastic plate or bowl.
- Knead the slime together, pulling it back and forth and folding it over itself.
- Continue to add small amounts of liquid starch to your slime, and knead the slime. Your slime should start to feel less sticky and gooey. The more starch you add, the less sticky the slime will be. However, make sure to add the starch slowly because too much starch will make your slime rubbery.
- Once you are happy with your slime, pour the instant snow into one of the plastic cups.
- Add 2.5 tablespoons of water to the instant snow and stir.
- Knead the instant snow into your slime. You may have extra snow.
Check out the video below to see a visual!
Show us what you created! Send us pictures at youthservices@balibrary.org.
 Youth Services Librarian Allison