
Bring home a fun new project! Sign up from our Library Calendar and pick up a kit through our Parking Lot Pickup service between December 7-18.

Toddlers and Preschoolers: Mail A Hug
Brighten someone’s day by mailing them a hug. Register for the Toddler/Preschooler Take & Make Kit here.
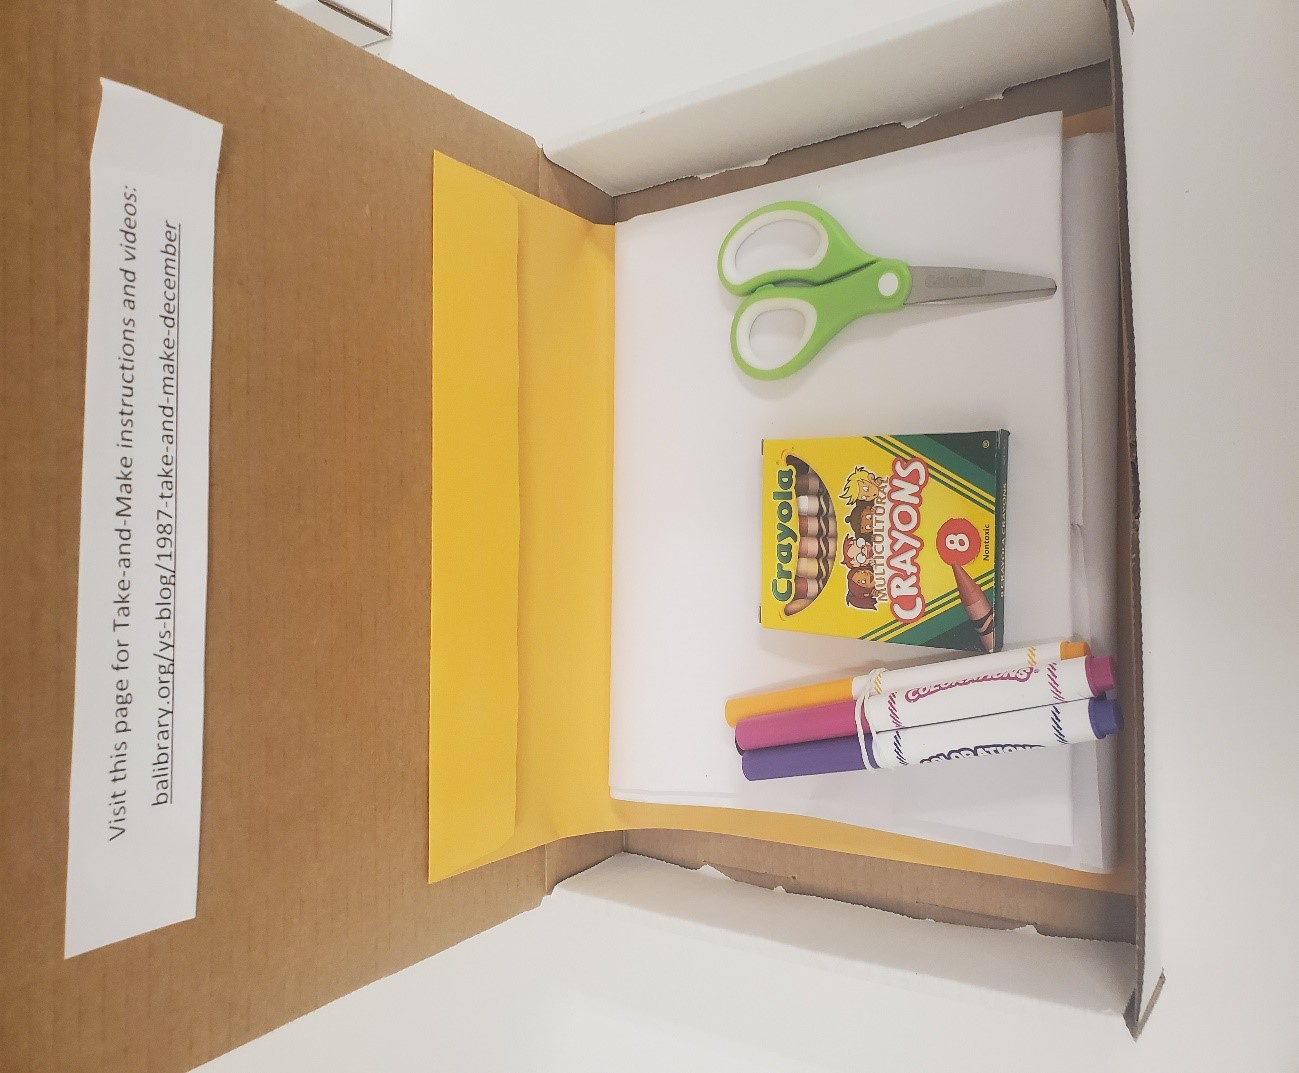
Instructions for Mailing a Hug:
1. Unfold the sheet of butcher paper.
2. Trace child’s head, arms and torso on paper.
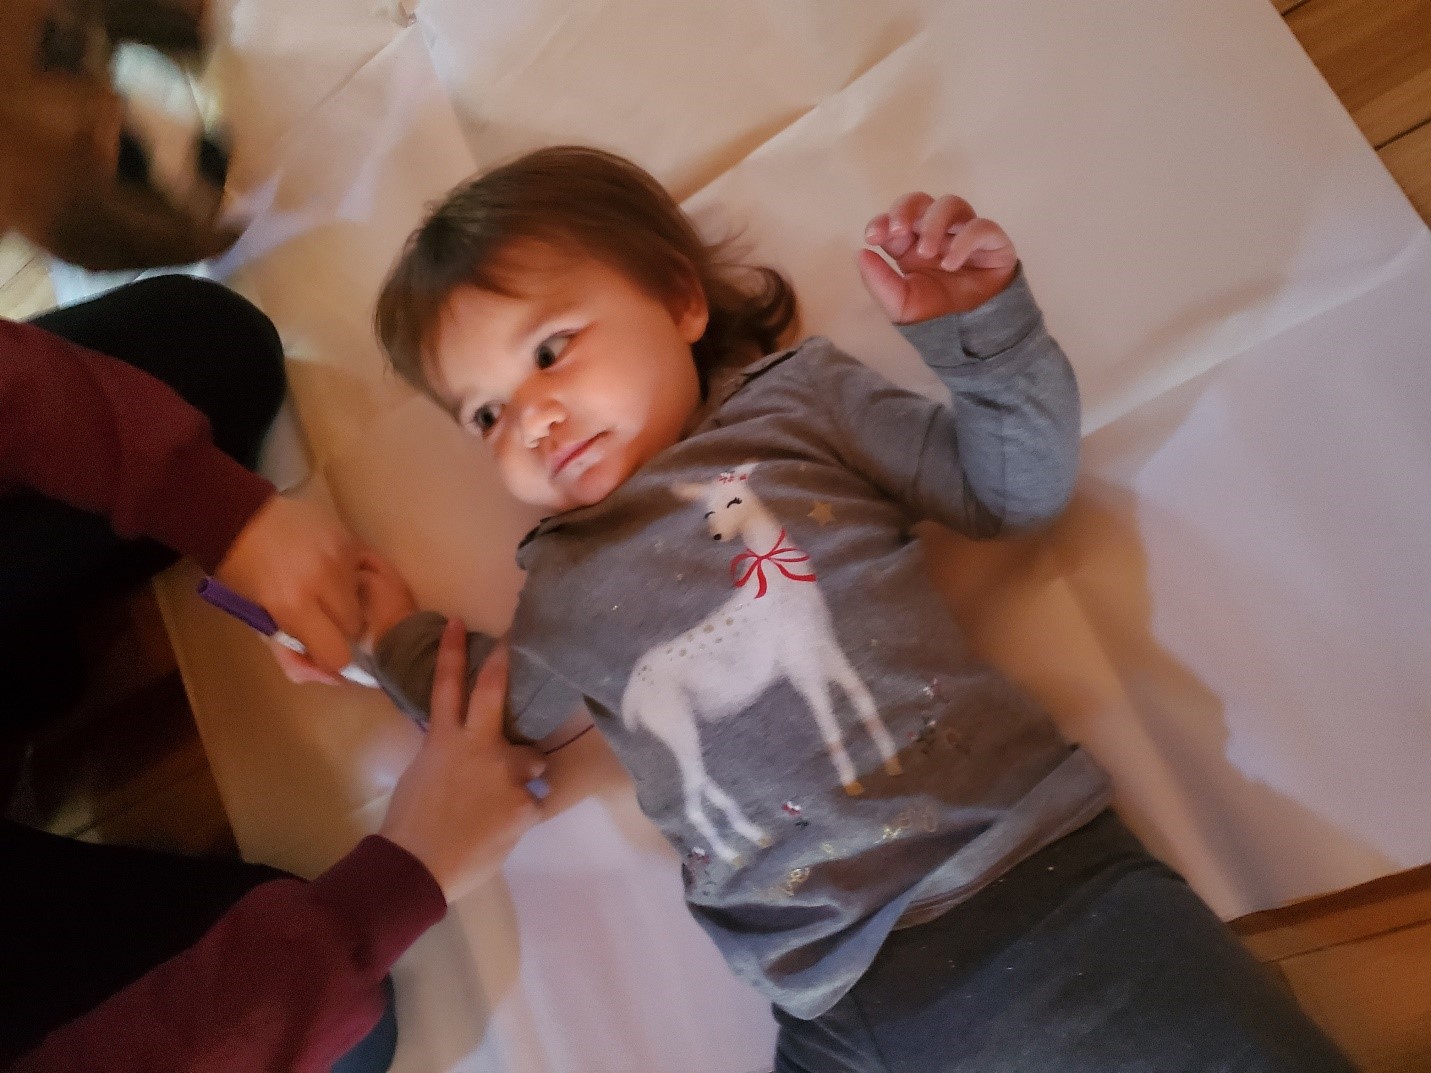
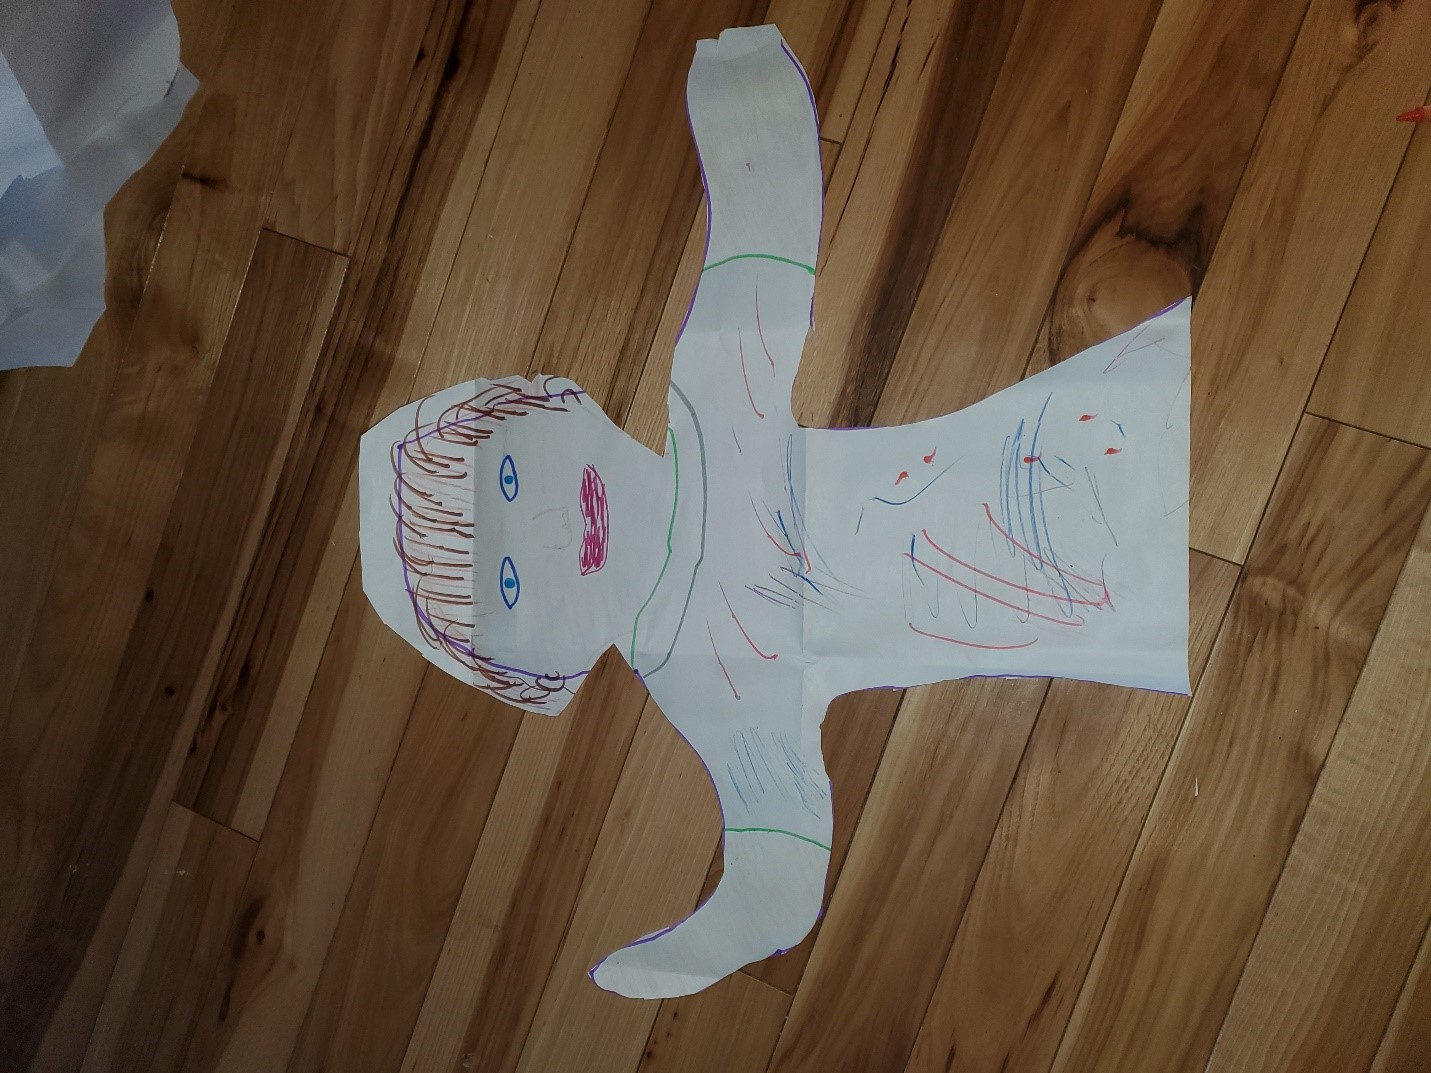
3. Allow your child to fill in and decorate their silhouette.
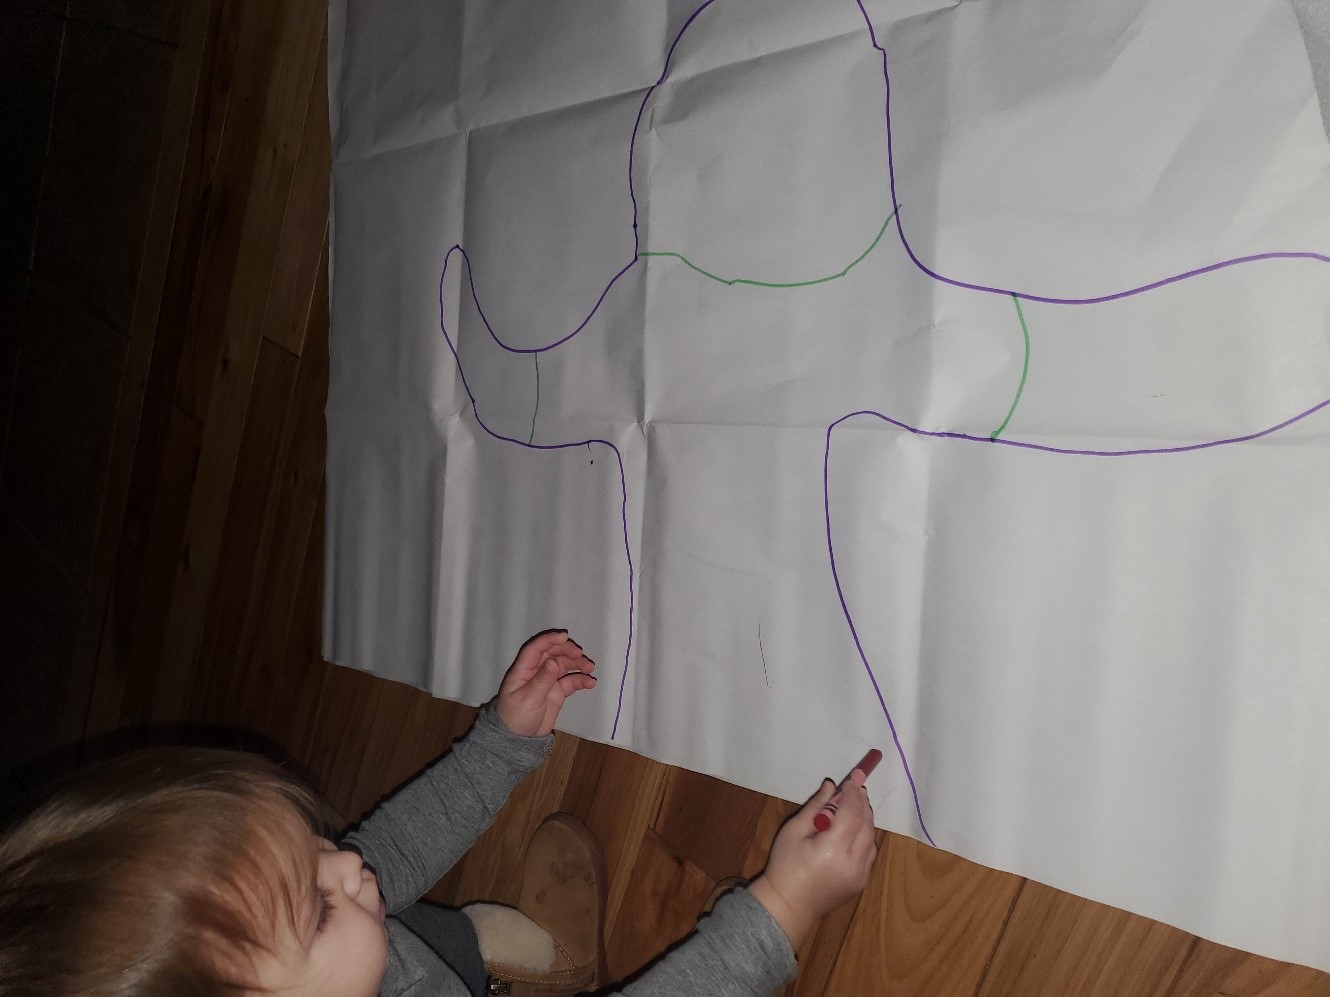
Ideas to consider: Talk to your child about different body parts and different colors.
Use the multicultural crayons to help your child determine the color of their skin and expand on the various skin tones we all have.
4. Cut around your child’s silhouette. If appropriate, allow your child to cut it themselves.
5. Fill in the provided letter (if desired).
See Venessa's original blog post that the inspired the Take & Make Kit!
Show us what you created! Send us pictures at youthservices@balibrary.org.
Grades K-2: Make Your Own Playdough
Make your own dough, then customize it with colors, scents, and textures. Register for the Grades K-2 Take & Make Kit here.
The kit has enough supplies to make two batches of playdough. Things you will need in addition to the items in the kit:
- 1 cup measuring cup
- 1/2 cup measuring cup
- 1/4 cup measuring cup
- 1 tablespoon measuring spoon
- warm water
- large bowl & mixing spoon
Instructions for 1 batch of playdough:
1. Measure 1 cup of the flour and pour into a large bowl.
2. Measure 1/4 cup of the salt and add to bowl.
3. Measure 1 tablespoon of cream of tartar and add to bowl.
4. Mix dry ingredients.
5. Measure and add 1 tablespoon of oil.
6. Measure and pour 1/2 cup of warm water into bowl.
7. Stir until the mixture combines and thickens. Switch to your hands to continue kneading to make a smooth dough.
8. Optionally, add several drops of food coloring, at least 15 drops to get a vivid color. Knead well with hands until no streaks remain.
9. Optionally, add some of the provided glitter.
10. Optionally, add some of the provided colored rice, tinsel, or anything else that might provide a unique sensory experience.
11. Optionally, add a drop of vanilla extract or essential oils for another sensory experience.
Watch the how-to video here:
Show us what you created! Send us pictures at youthservices@balibrary.org.
Grades 3-8: Pendulum Art
Make a one-of-a-kind painting when gravity and art combine in this STEM based experiment. Please note, this project can get messy! Register for the Grades 3-8 Take & Make Kit here.
Things you will need in addition to the items in the kit:
- Tape
- Ruler
Instructions for Pendulum Art:
1. Take the items out of the box.
2. Using the pencil, poke a hole in the bottom of one of the Styrofoam cups.
3. Poke 2 holes in the top of the cup directly across from each other.
4. Poke another 2 holes at the top of the cup directly across from each other.
5. Fold 2 paperclips into a W shape.
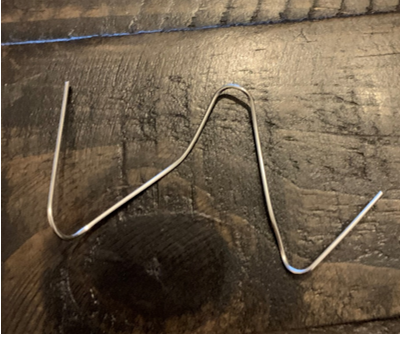
6. Tie one of the pieces of string to a washer.
7. Slide the washer and string through one of the bent paper clips so that it is hanging in the middle of the W.
8. Insert the paper clip and washer with string into two of the holes at the top of the cup.
9. Insert the 2nd paper clip into the remaining two holes. You may need to bend the ends of the paper clip a little to secure it around the cup. You have now made your pendulum!
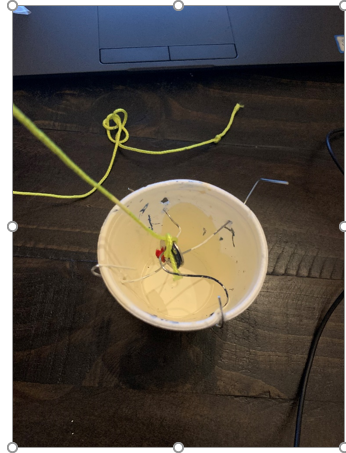
10. Spread the newspaper on the floor. Get approval from an adult about where you can make your painting. It will be messy!
11. Tie the pendulum to the wooden dowel
12. Tape the wooden dowel between 2 chairs or 2 tables
13. Place a sheet of cardstock below your pendulum and on top of the newspaper.
14. Start out by having the cup about 6 inches from the ground. You can adjust the height later.
15. Measure a 2 to 1 ratio of paint to water into one of the Styrofoam cups. You can start with 10 ml water and 20 ml paint.
16. Mix paint and water together. The paint should be fairly runny.
17. Cover the hole in the bottom of your pendulum with your finger and pour the paint into the cup.
18. Swing back the cup and let your pendulum fly! Paint should start to drip out of the cup.
19. Try swinging the pendulum in a circular motion.
*If your paint is not coming out of the cup, try adjusting the paint and water ratio. We started with a 2 to 1 ratio. Try adding a little more water to the mixture slowly and then a little more paint if needed.
As you make your pendulum paintings, experiment! What happens if….
- You adjust the paint and water ratio?
- Poke another hole in the bottom of the cup?
- Adjust the height of the pendulum?
- Add more washers to the pendulum?
- Add another color to your painting?
Watch the how-to video here:
Show us what you created! Send us pictures at youthservices@balibrary.org.
Family: Pom-Pom Party
For December only, enjoy a special box with an activity for everyone. Transform yarn into colorful pom poms for decorating gifts, trees, mantels, or yourself! Register for the Family Take & Make Kit here.
In addition to the Take & Make Box, you will need one sharp pair of scissors.
Directions to make a pom-pom:
1. Select a yarn color (or two, or three!) and a pom-pom maker. (There are four different sizes.)
2. Pull one half of the pom-pom maker away from the white circle. You should see a crescent shape now, pointing away from the main pom-pom maker.
3. Wrap yarn around the crescent, many times. The more yarn you use, the thicker and fluffier the pom-pom will be.
4. Once it's pretty thick, cut the end of the yarn. Don't stress about the end of the yarn - you can trim it later if needed.
5. Push the crescent, now wrapped up in yarn, back into the center of the pom-pom maker.
6. Pull the other half away from the center, and wrap this crescent in yarn. Try to do about the same amount of yarn, but don't worry about making it perfectly even.
7. Once both sides look about the same thickness, cut the yarn again, and fold up the crescents towards the middle. It should now look like a disc with fuzzy sides.
8. Find the seam running under the yarn strands. Wiggle your scissors into that little gap, and cut the yarn wraps across. The yarn should start fluffing out, but it shouldn't fall out of the pom-pom maker. Repeat on the other half.
9. Set aside the pom-pom maker, now bursting with yarn strands. Grab the extra yarn (or string you might have) and cut a short length, 6-8 inches or so.
10. Pull the thread through the pom-pom maker gap that you just cut along. Pull tightly and tie on the other side. Double or triple knot to keep it secure.
11. Pull the crescents away from the pom-pom.
12. Pull the two circles apart, so now your pom-pom is free.
13. Trim any long strands if you'd like to make the pom-pom as round as possible.
Watch the video to see how it's done:
Show us what you created! Send us pictures at youthservices@balibrary.org.
 Youth Services Assistant Librarian Alyssa