-
Happy Earth Day from the Barrington Area Library!
Thank you to everyone who created a piece of our patchwork murals to celebrate Earth Day! Just like the Earth and all its inhabitants, these individual artworks are diverse, lively, colorful, and surprising. Yet when we step back, we see a unified world, connected and dependent on all its pieces.
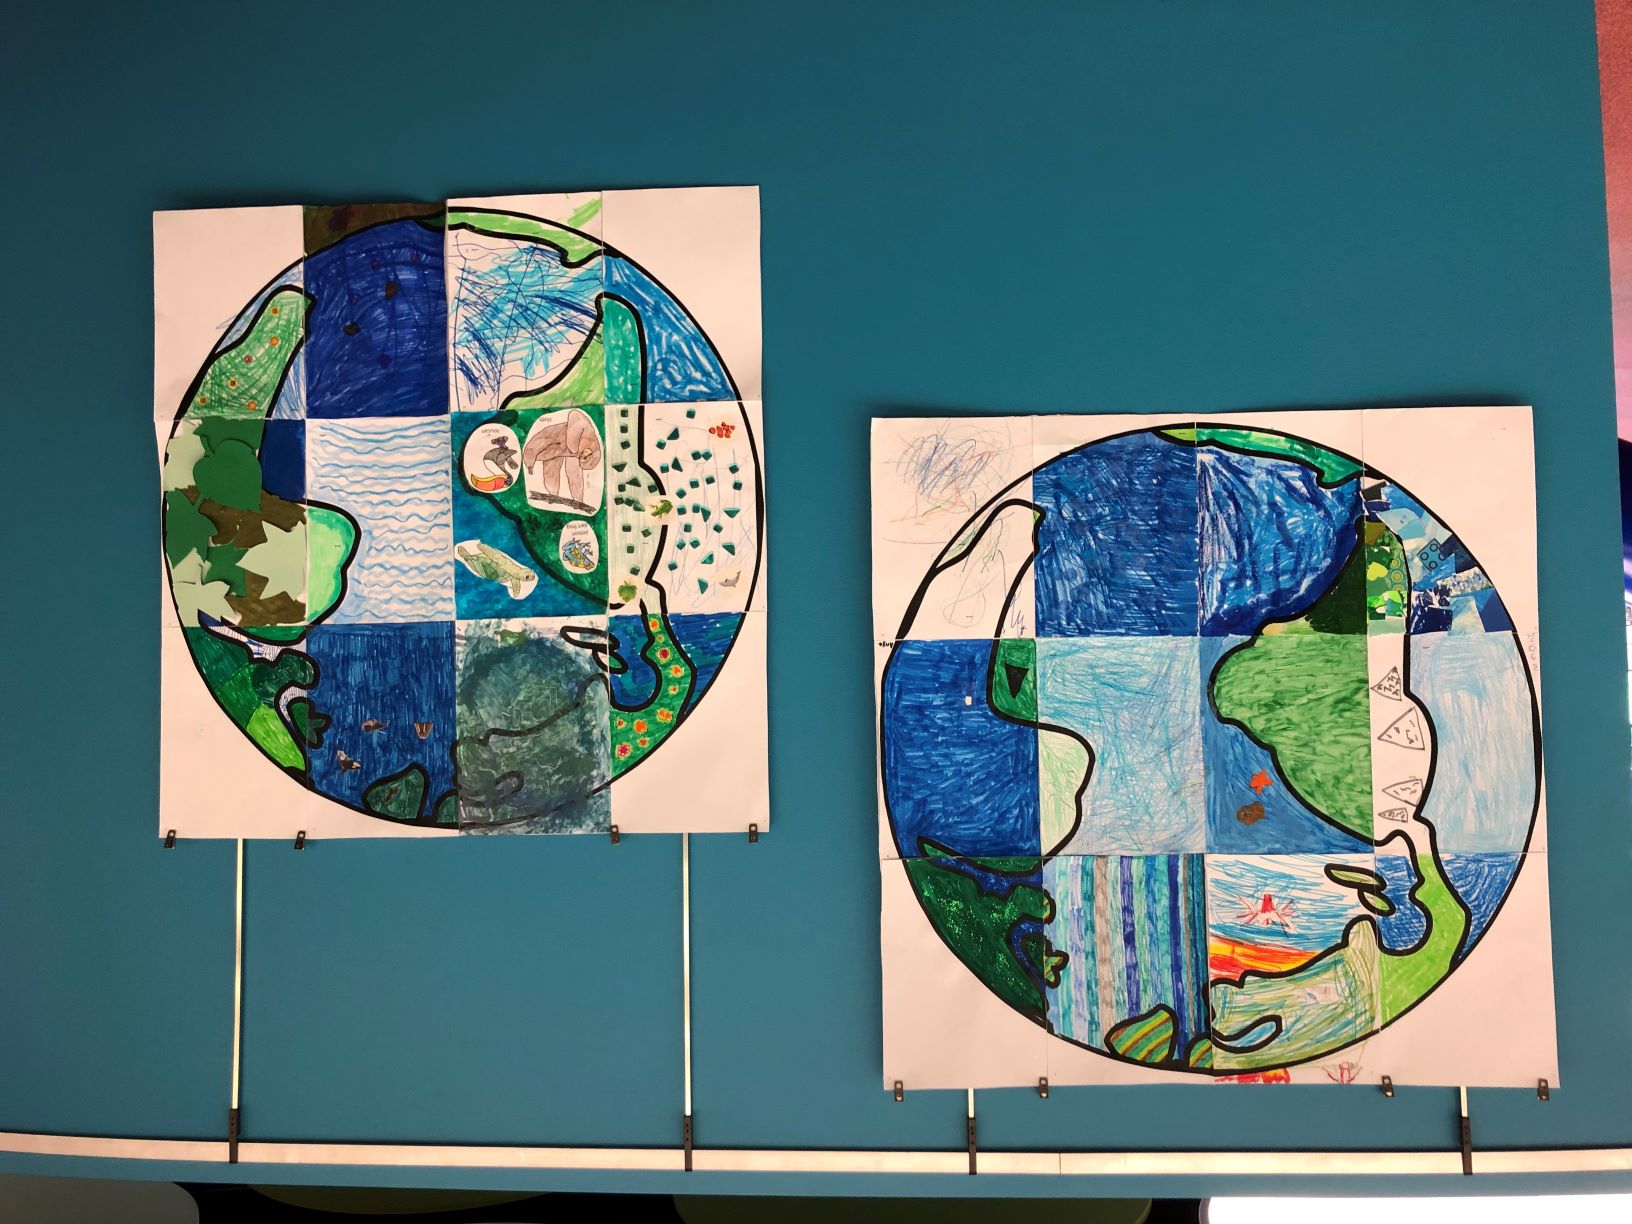
Stop by the Library to see more of these Earth artworks, created by kids in our community.
 Youth Services Librarian Allison
 -
April Take-and-Make Kits
Bring home a fun new project! Sign up from our Library Calendar and pick up a kit at the Youth Services desk or through our Parking Lot Pickup service between April 12-23.
Toddler & PreK: Make a Puppet
Create a unique puppet of your own. Register for the April Toddler & PreK Take-and-Make Kit here.
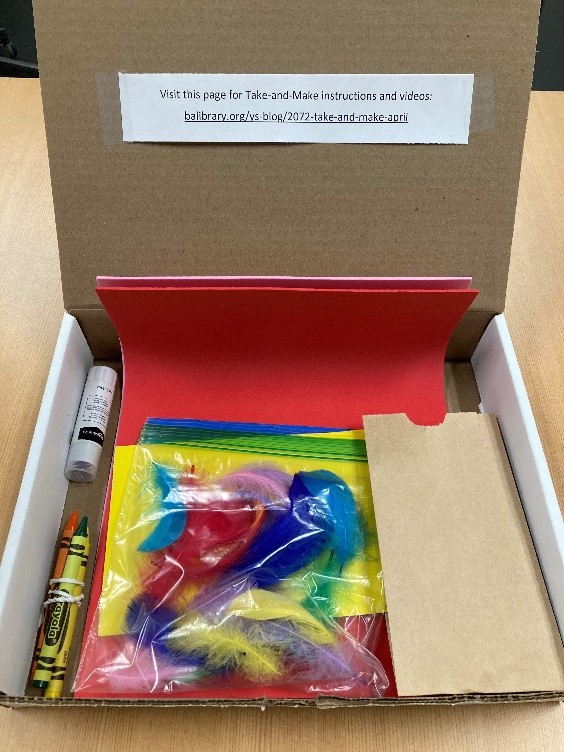
Your kit contains:
1 glue stick
1 bag of feathers
1 brown bag filled with 4 googly eyes
2 foam sheets
2 colored goody bags
3 or 4 crayons
Not included: Scissors
Instructions:
1. Lay a colored goody bag on its smooth side. Keep the bottom flap facing up. (Point the opening toward you).
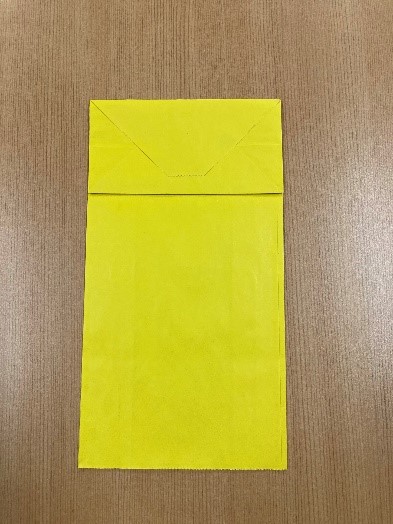
2. The flap will be the mouth of the puppet. Have your child draw or decorate the puppet as they please.
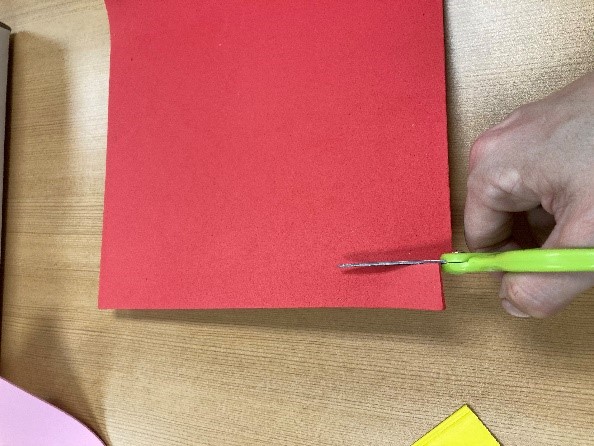
Scissors are not provided in your kit. However, please feel free to utilize your own scissors. If appropriate, have your child cut out shapes or different designs. You may also choose to cut out different shapes and designs for your child if they are unable to do so themselves.
3. Have your child use the glue stick to glue the googly eyes, feathers and foam shapes to their puppet.
4. Once the puppet has dried, your child may use their puppet! Have them slide their hand into the opening and curl their fingers up and under the flap. They can extend and curl their fingers to make the puppet “talk.”
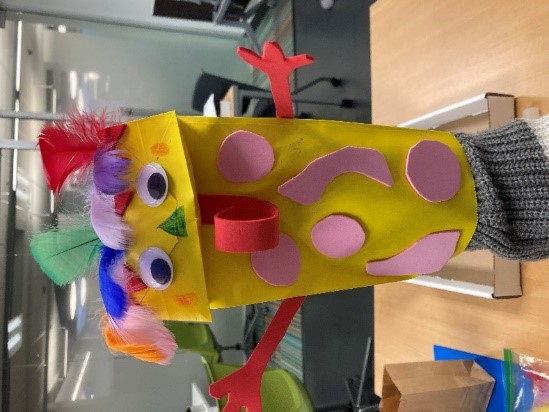
Optional talking points to consider: Use this activity as an opportunity to practice color recognition; ask your child to find the “blue feather”. Cut out different shapes from the foam paper and have your child identify the shapes. Have your child create patterns with the shapes you have cut out. Talk about different body parts and have your child locate theirs as well as their puppets.
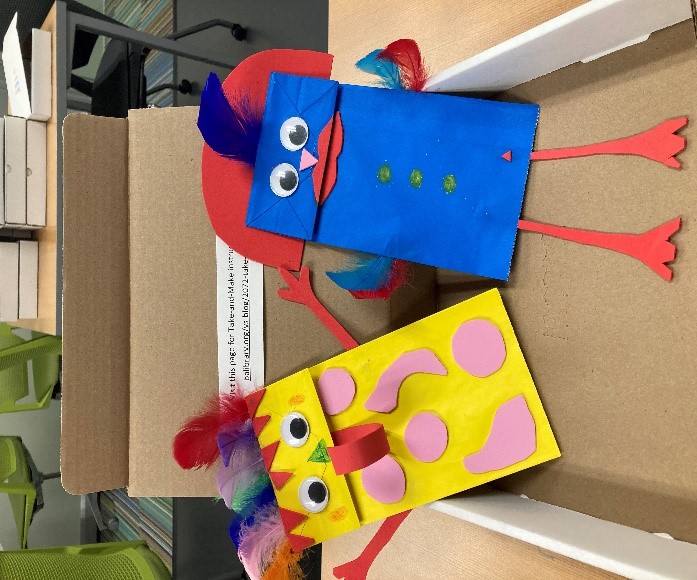
There are enough materials to make two puppets! (You may also use the brown bag that the googly eyes came in to create a third puppet!)
Show us what you created! Send us pictures at youthservices@balibrary.org.
Grades K-2: Glue and Chalk Art
Experiment with glue and chalk pastels to create a colorful work of art. Register for the April Grades K-2 Take-and-Make Kit here.
Your Kit Contains:
5 sheets of white construction paper
5 sheets of black construction paper
1 pencil
1 bottle of school glue
1 bag of chalk pastels
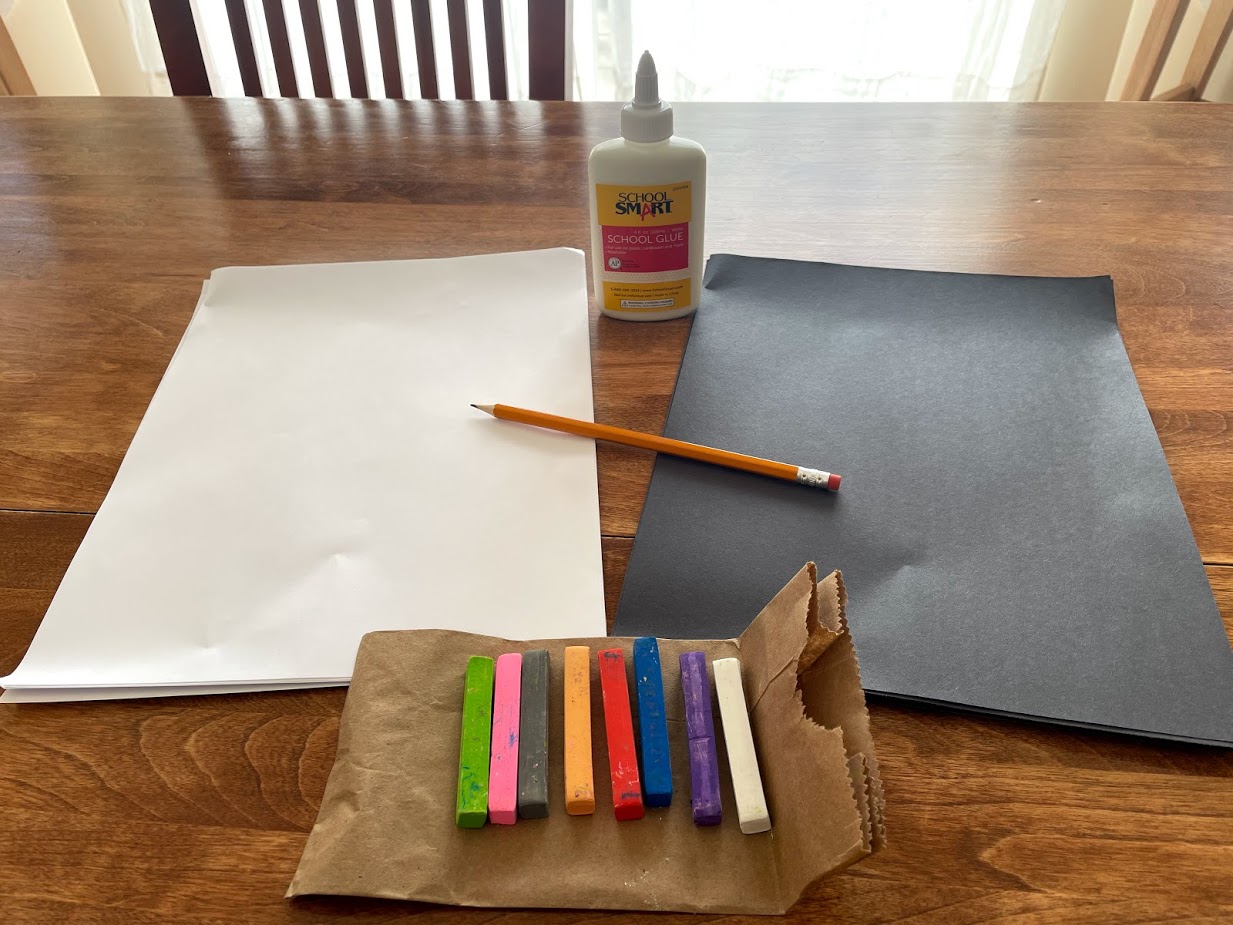
Instructions:
1. Open the box and empty out your supplies.
2. Select either a white or black piece of paper for your first creation.
3. Trace out your design with pencil – bold designs like flowers and leaves lend themselves nicely to this technique.
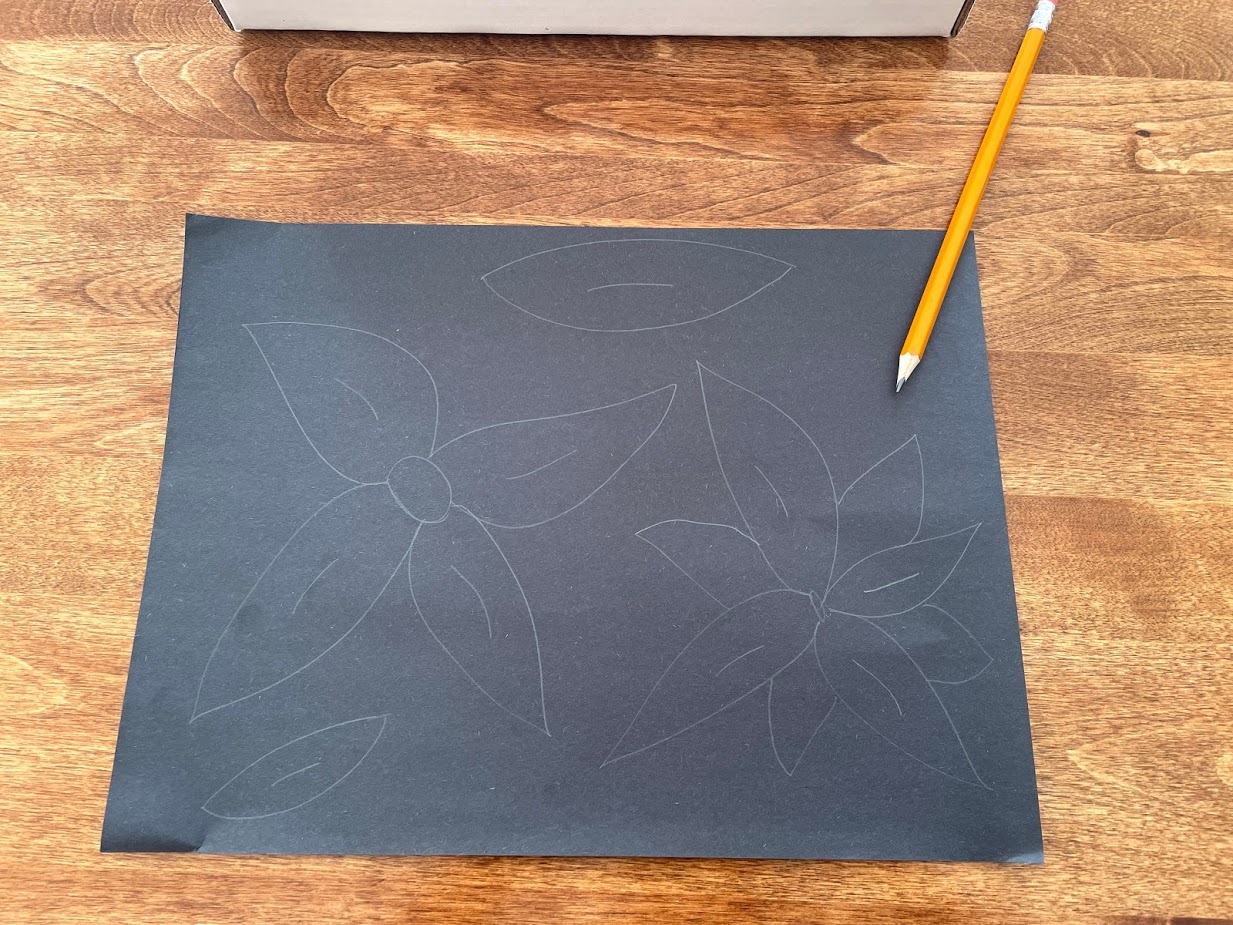
4. Trace your pencil lines in glue. Try not to touch the tip of the glue bottle directly to the paper. Instead just lay a continuous line of glue.
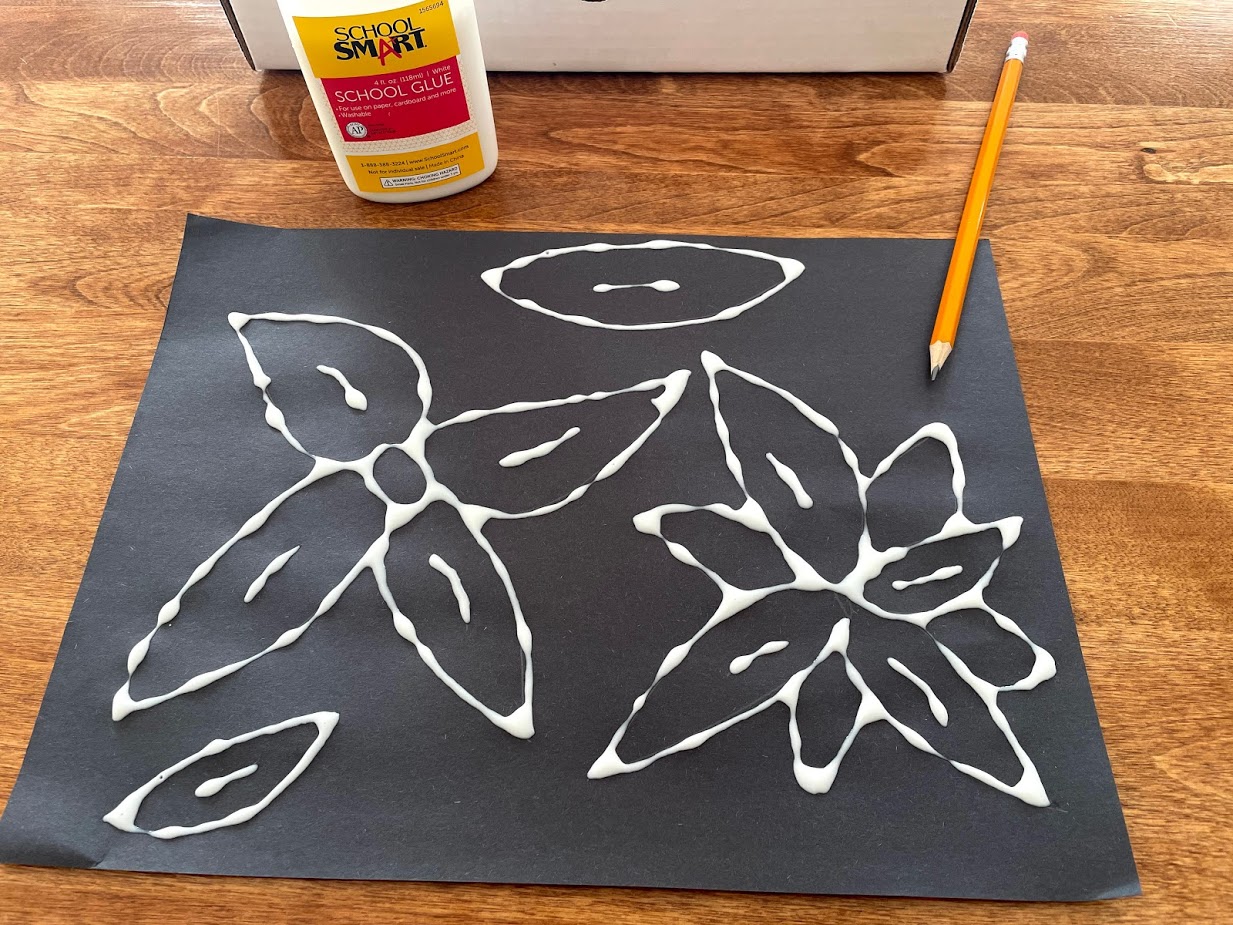
5. Wait for glue to completely dry. This will take time – be patient!
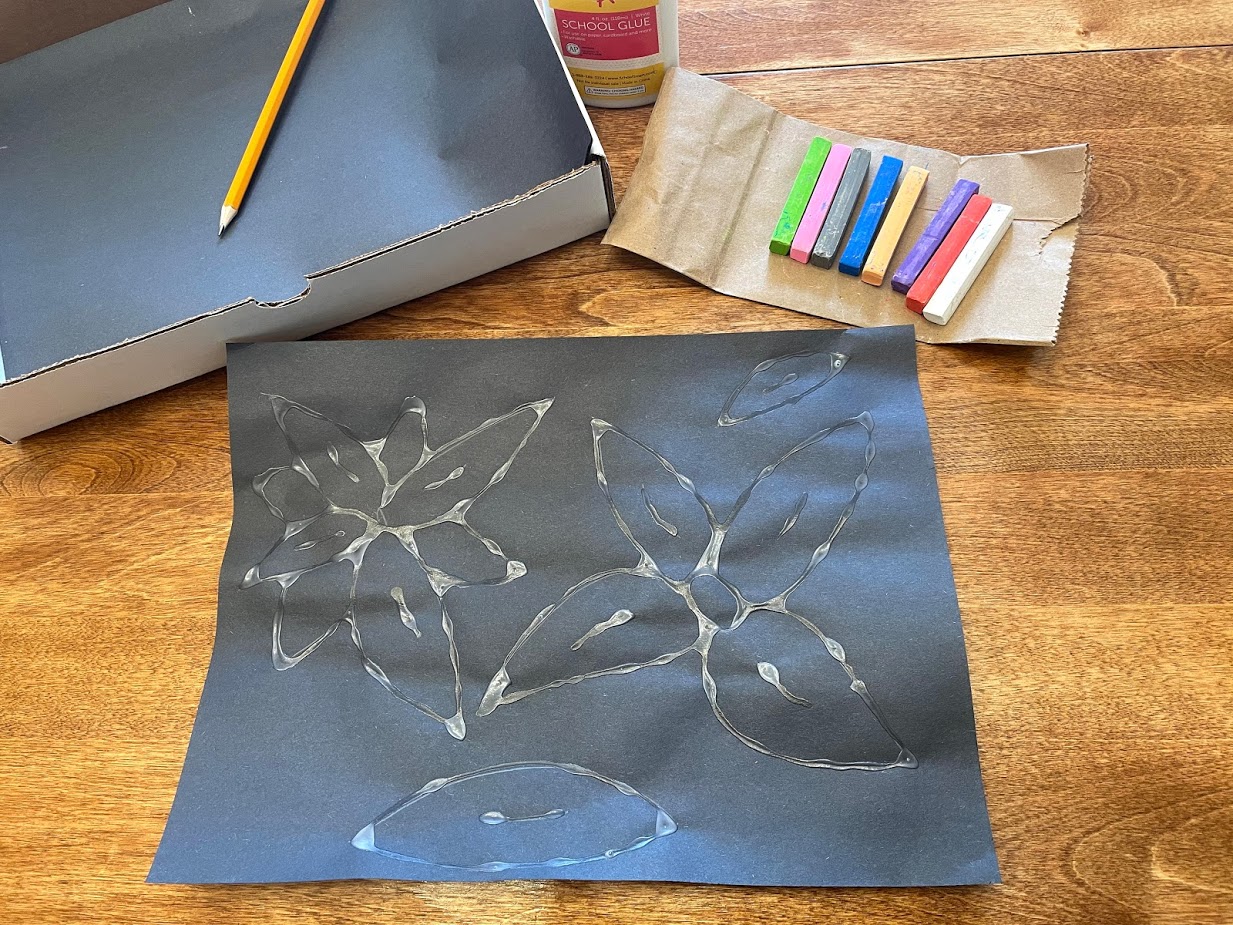
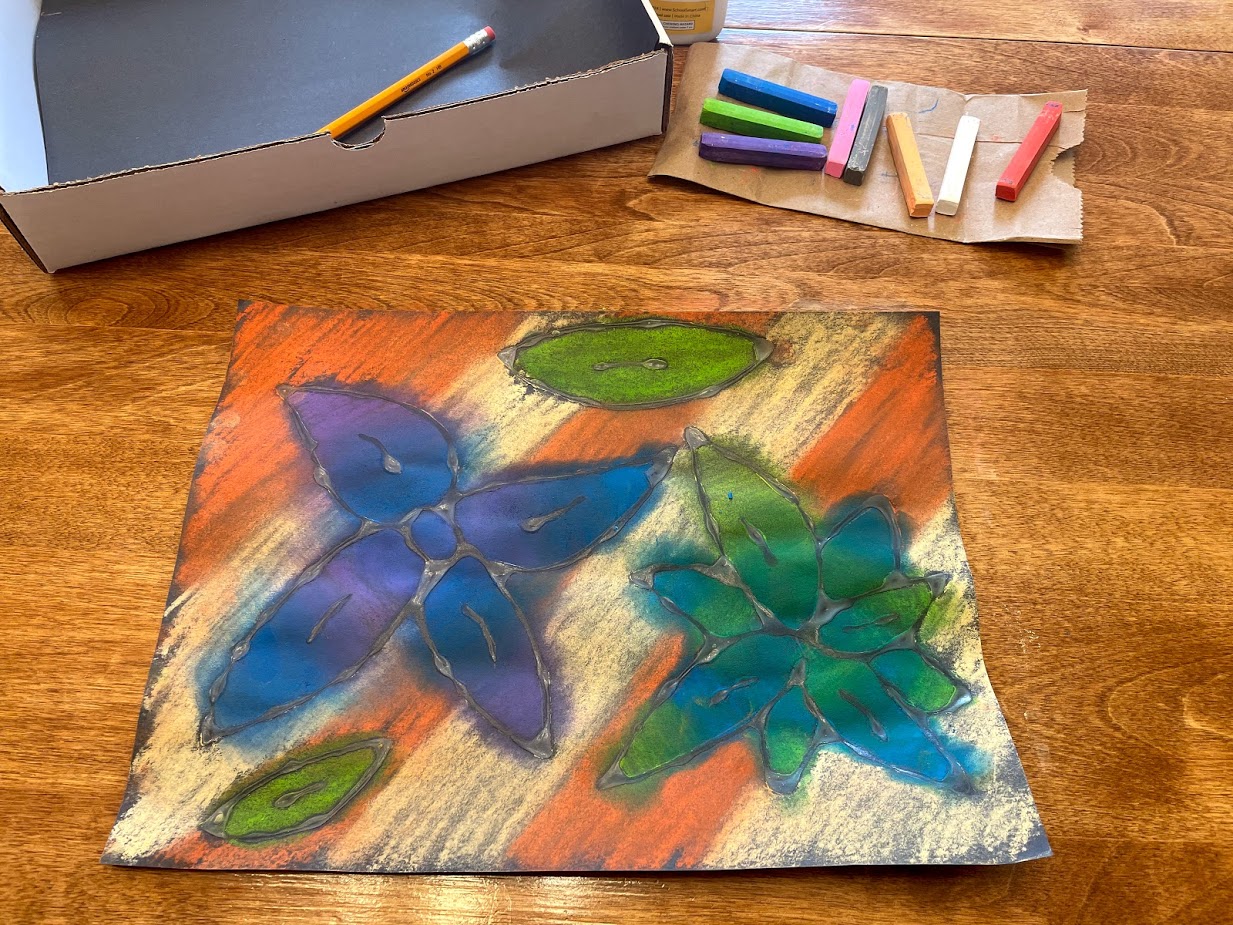
6. Time to add color! Use your chalk pastels to color both the inside and outside of your design. Use your fingertip to blend some of the colors together.
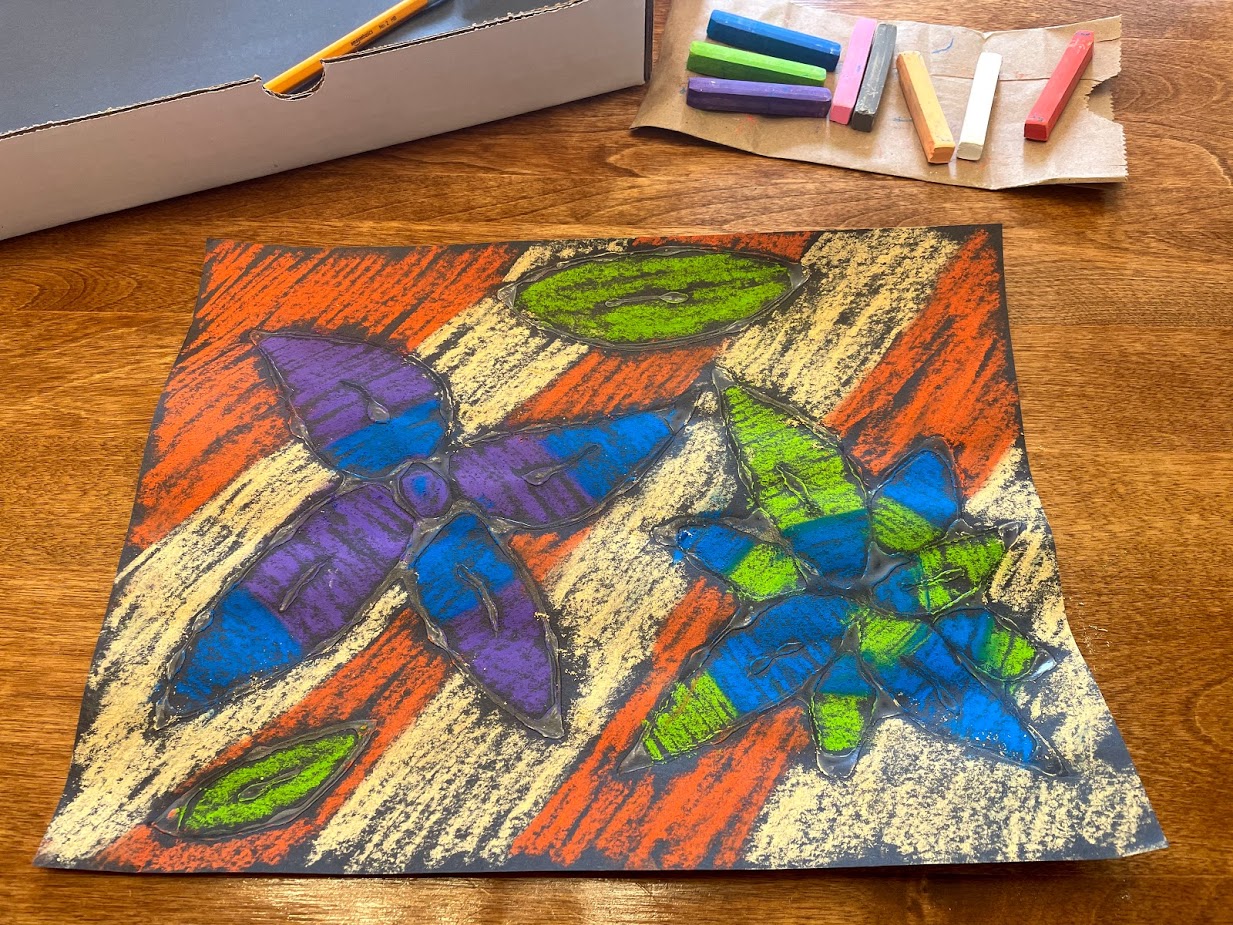
7. Enjoy your finished art piece!
Concepts to explore:
Positive and negative space – the inside of your design is the positive space and rest of the paper is negative space. How can you choose colors to show the differences between those two elements?
Warm and cool colors – colors like reds, oranges and yellows are warm, while blues, purples and greens are cool. How can you blend your pastels to create more warm or more cool shades?
Show us what you created! Send us pictures at youthservices@balibrary.org.
Grades 3-8: DIY Magnetic Poetry Kit
Create your own magnetic words set and use it to write poetry. Register for the April Grades 3-8 Take-and-Make Kit here.
Your kit contains:
- 1 8x10 magnetic adhesive sheet
- 1 printed sheet of words
- 1 tin box
- Extra magnetic sheet/blank paper
You will also need:
- Scissors
- Pencil (for tracing)
- Pen
Instructions:
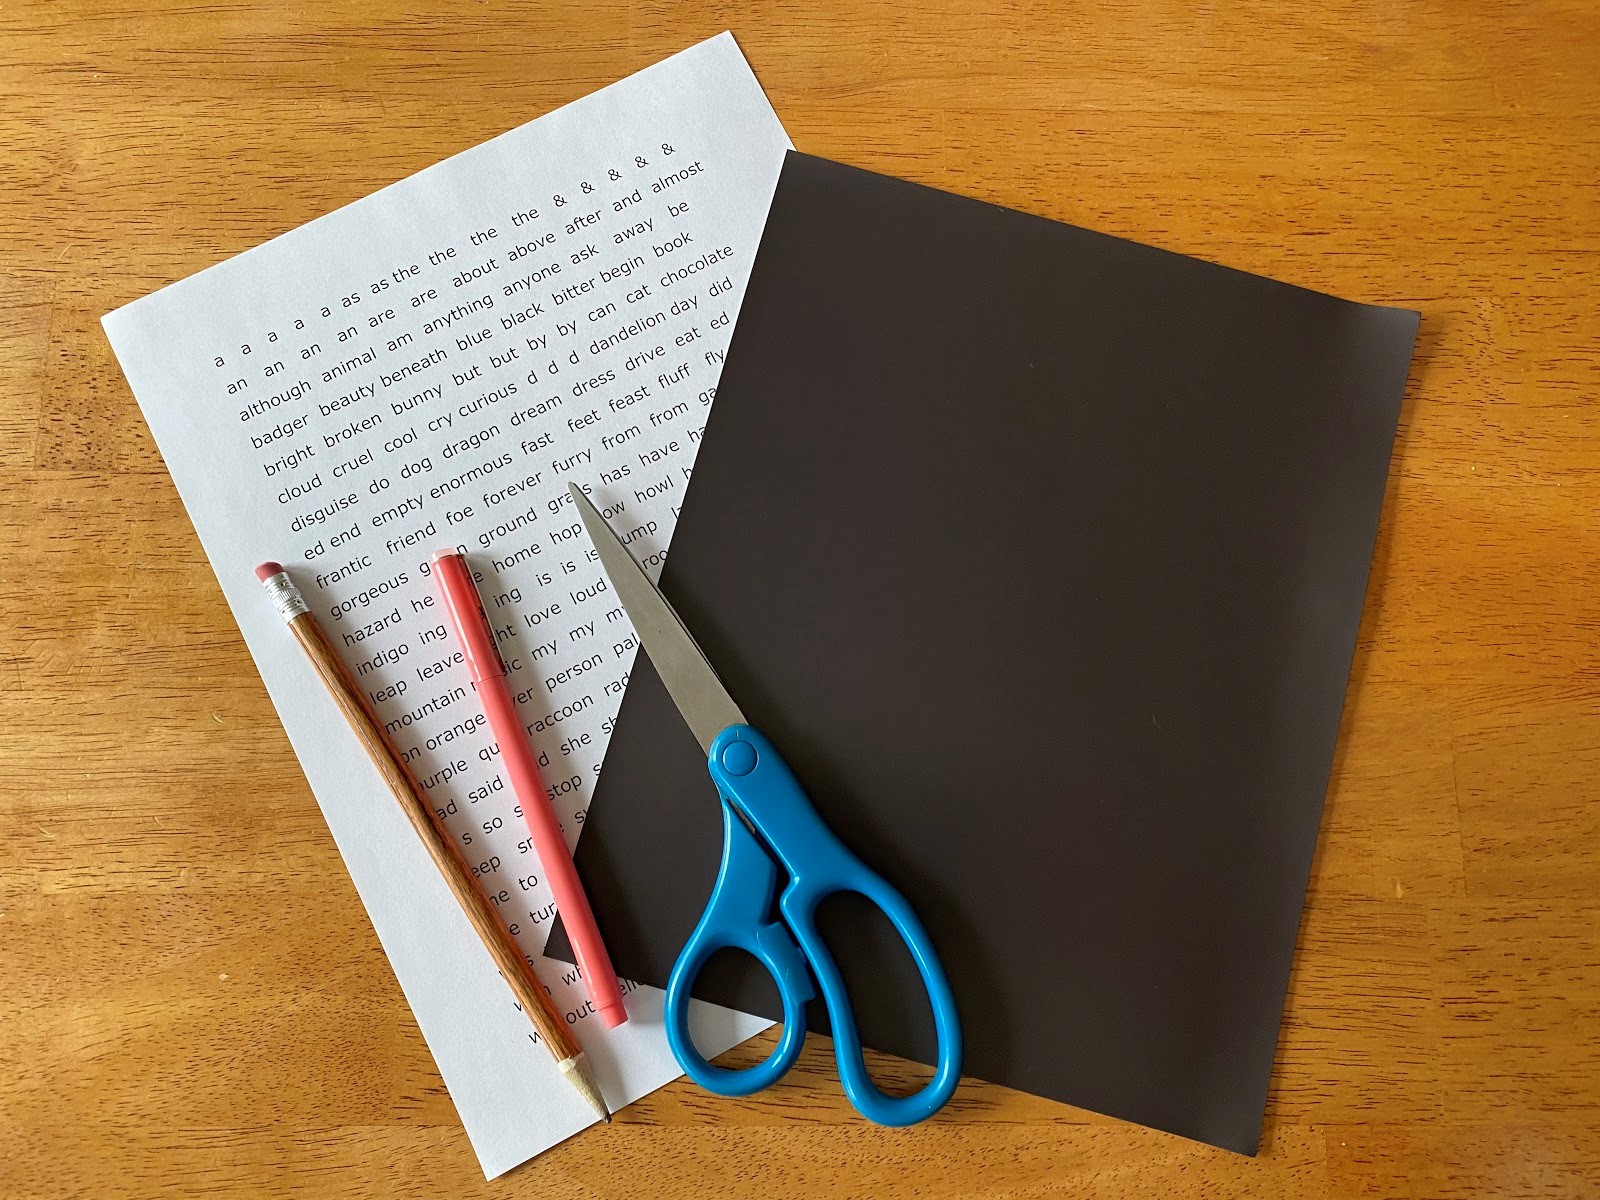
1. Lay the full sheet of paper with the words on it face up and lay your magnetic sheet on top. Trace the shape of the magnetic sheet onto the piece of paper, making sure that all of the words will fit onto the magnetic sheet. Cut the paper where you traced, just trimming the excess.
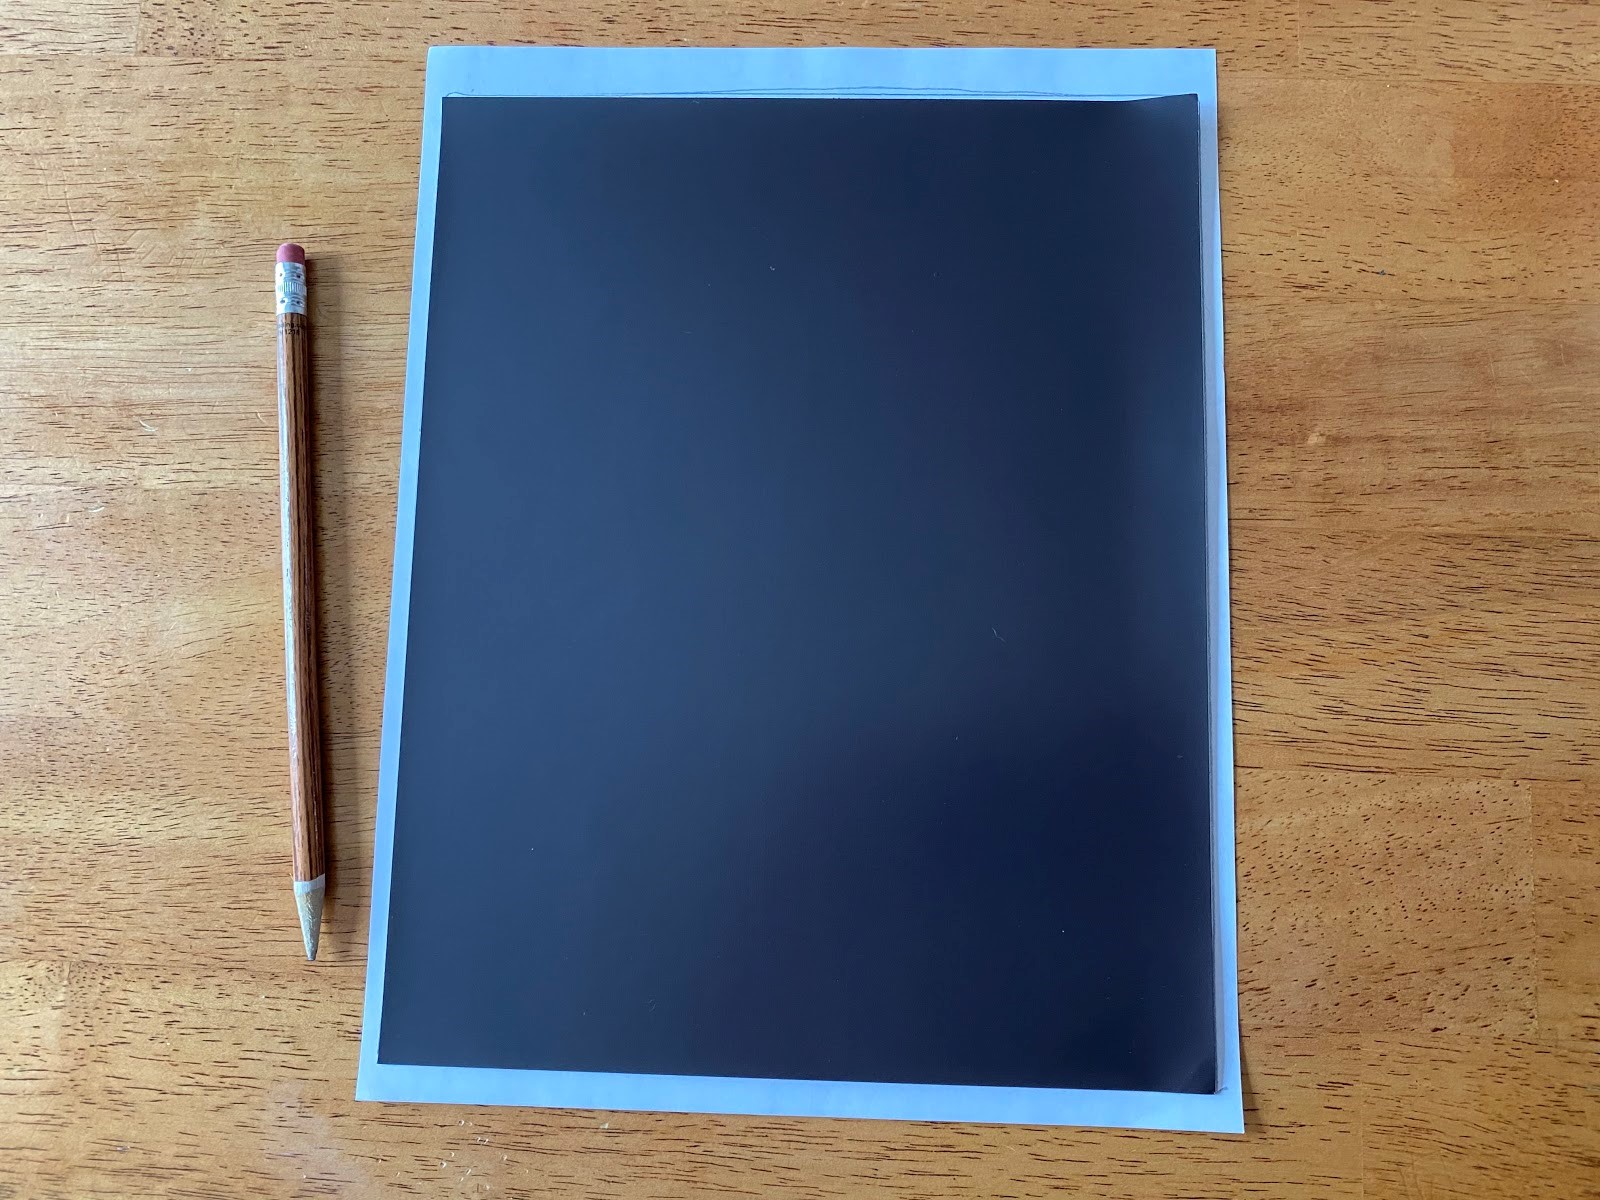
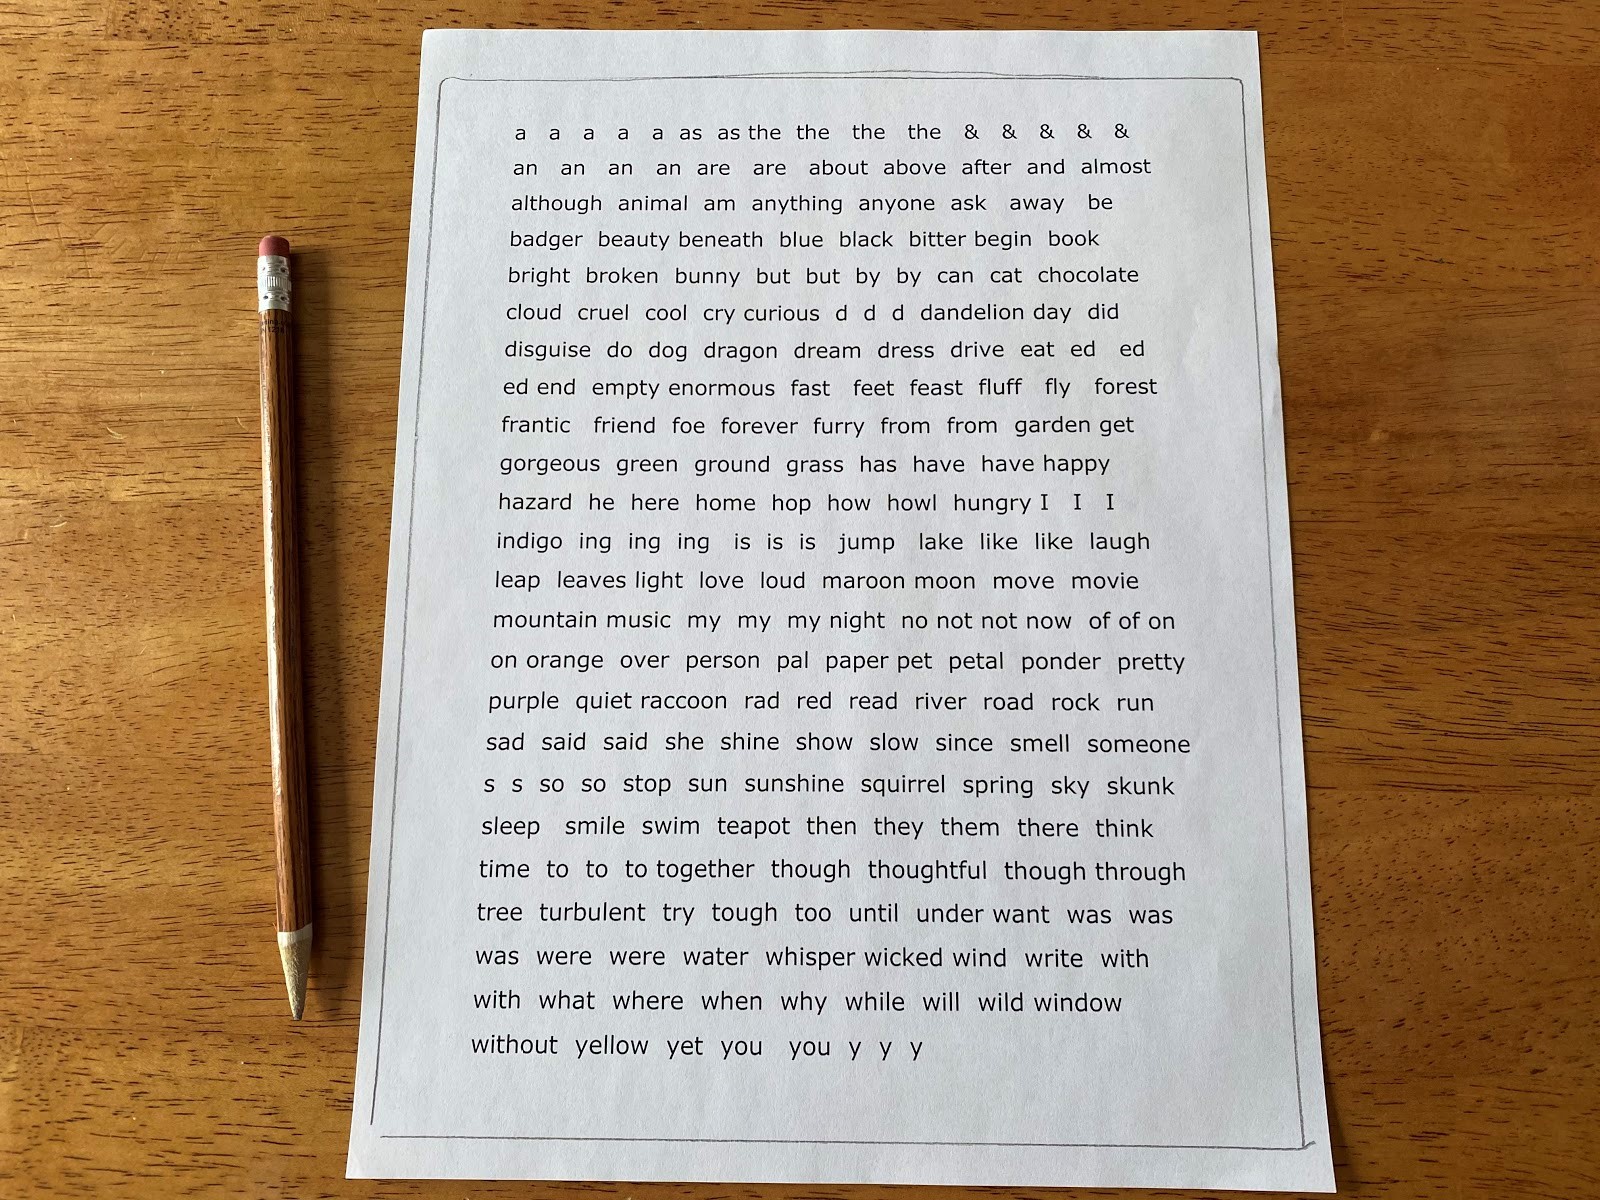
2. Once you’ve trimmed the sheet of words, carefully peel the cover off of the magnetic sheet, so that the adhesive is facing up.
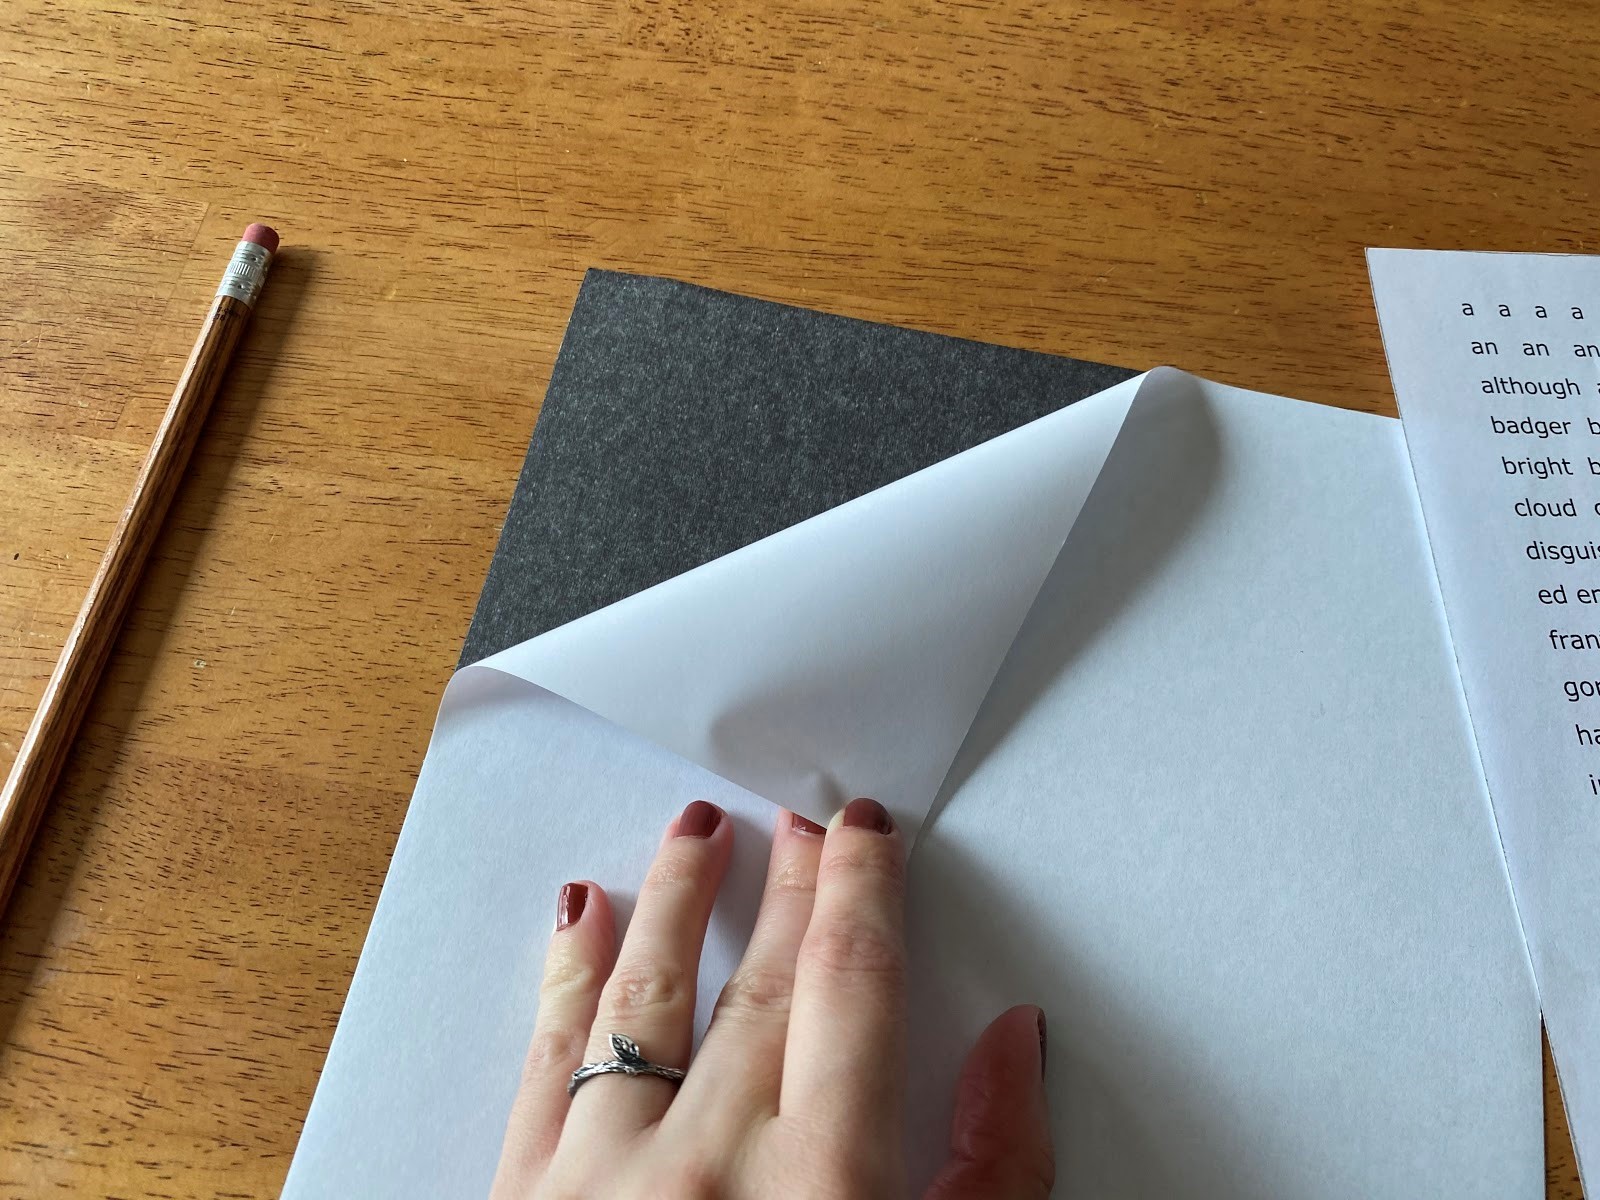
3. Place your sheet of words onto the adhesive very slowly, starting from the top, and working your way down, making the paper fit as smoothly as possible onto the magnetic sheet. Be careful not to stick it on all at once. This part is a little tricky, so feel free to ask a grown up for help!
4. Once your words are fully stuck to the adhesive, smooth it over with your fingers a few times to make sure it’s sticking really well.
5. Do you notice any blank spaces? Feel free to write your own words in those spaces, or trace some rectangular shapes to fill in words later. I recommend doing this part before you start cutting, to make the process a little easier.
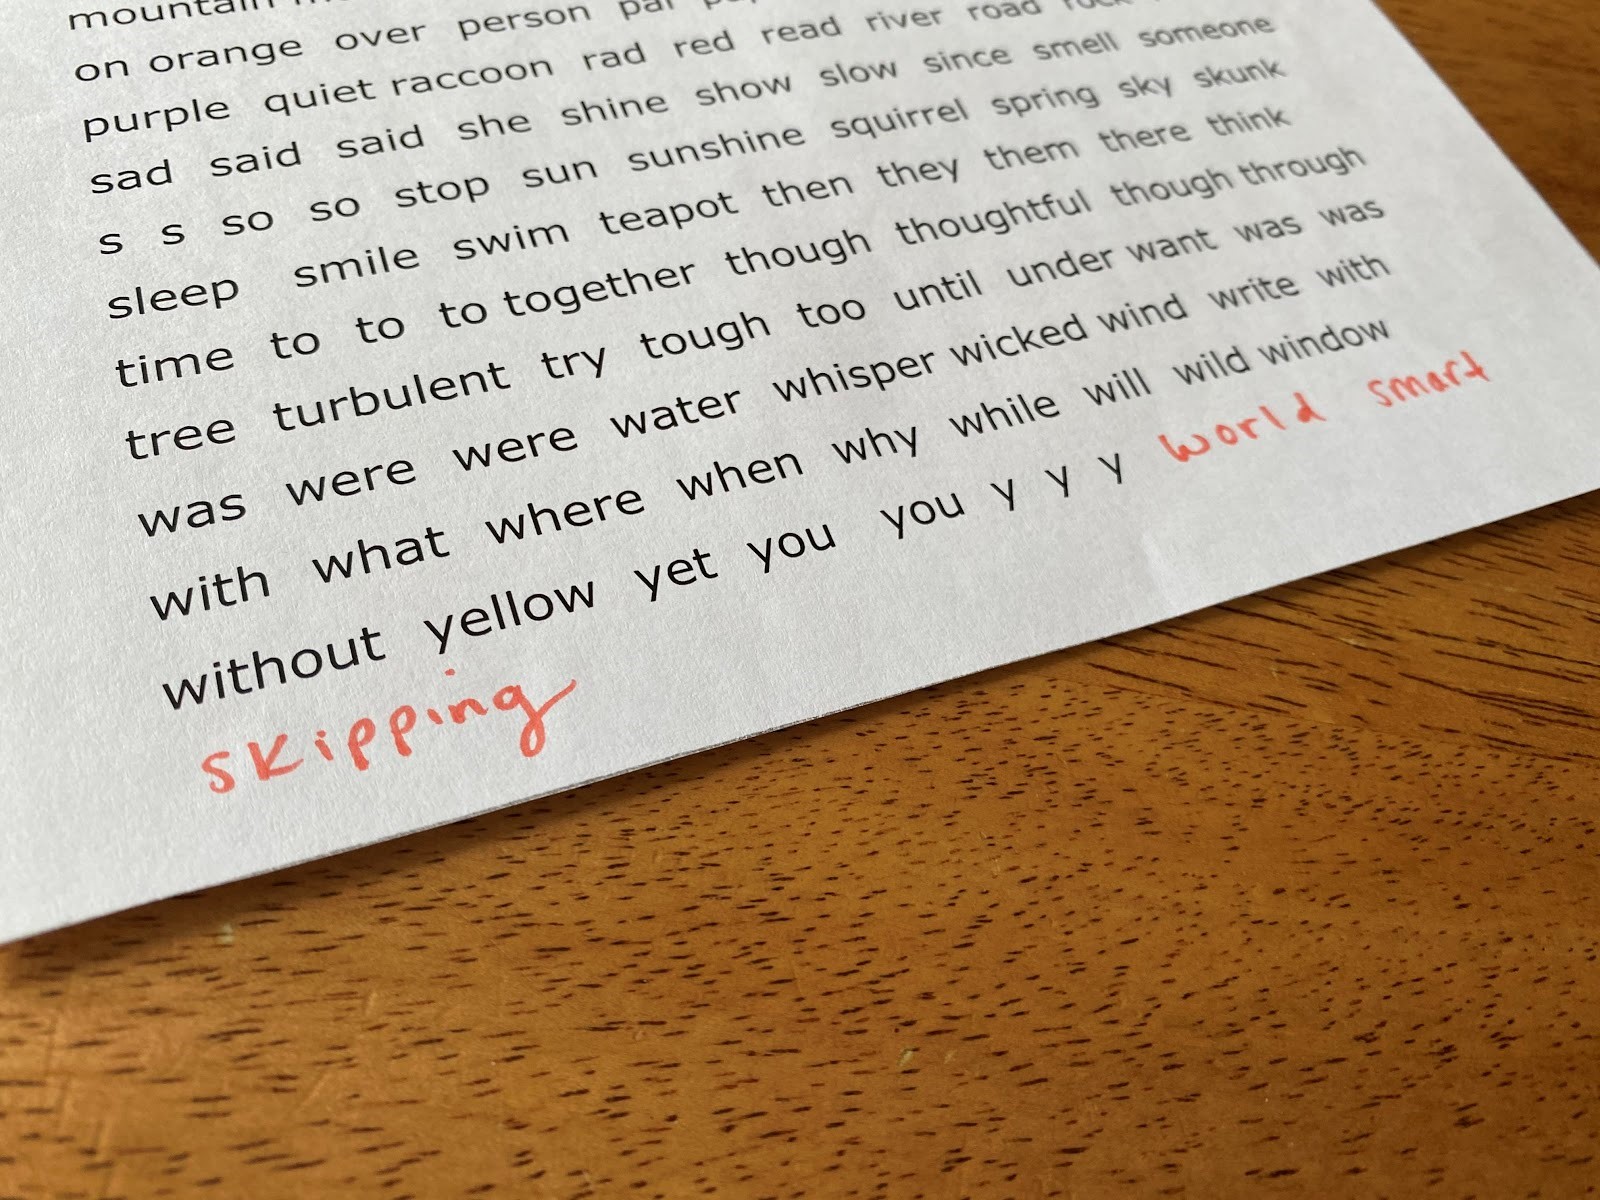
6. Now you’re ready to cut! Begin cutting your words out. I recommend cutting the page into strips, and then trimming the individual words from there. Place your words into your tin box as you cut them out.
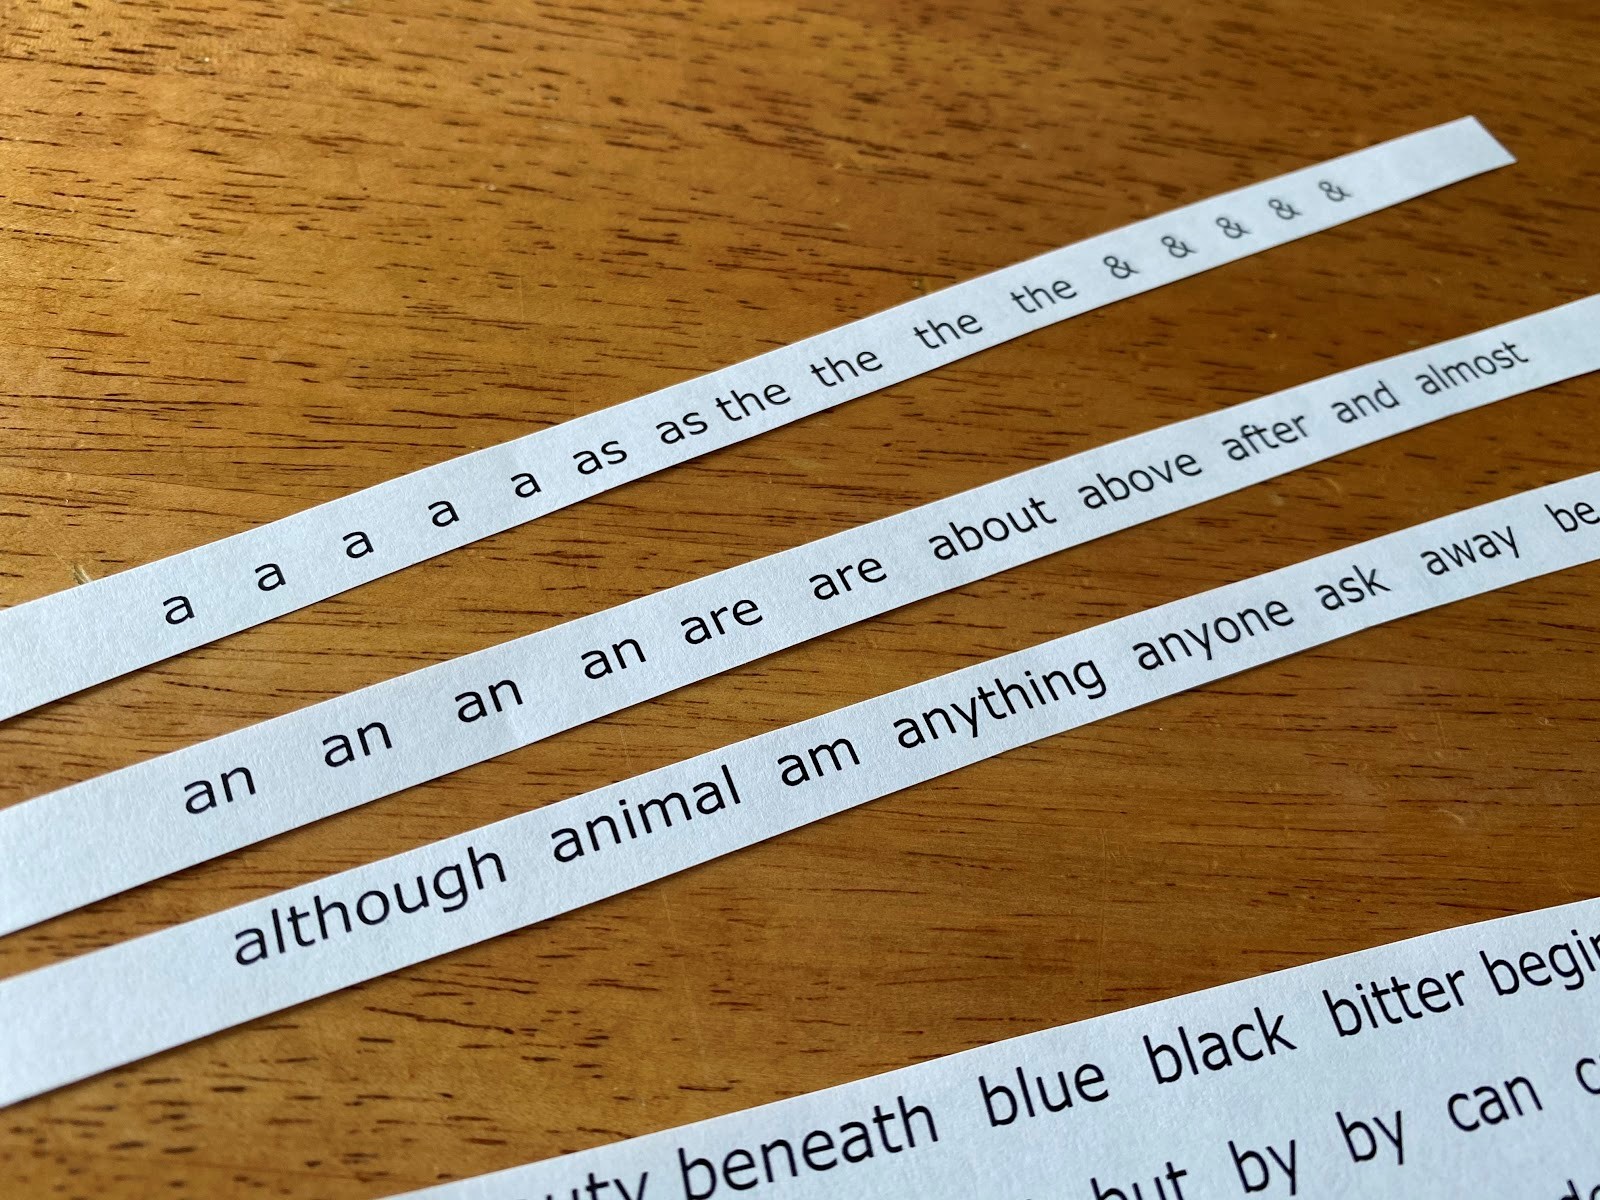
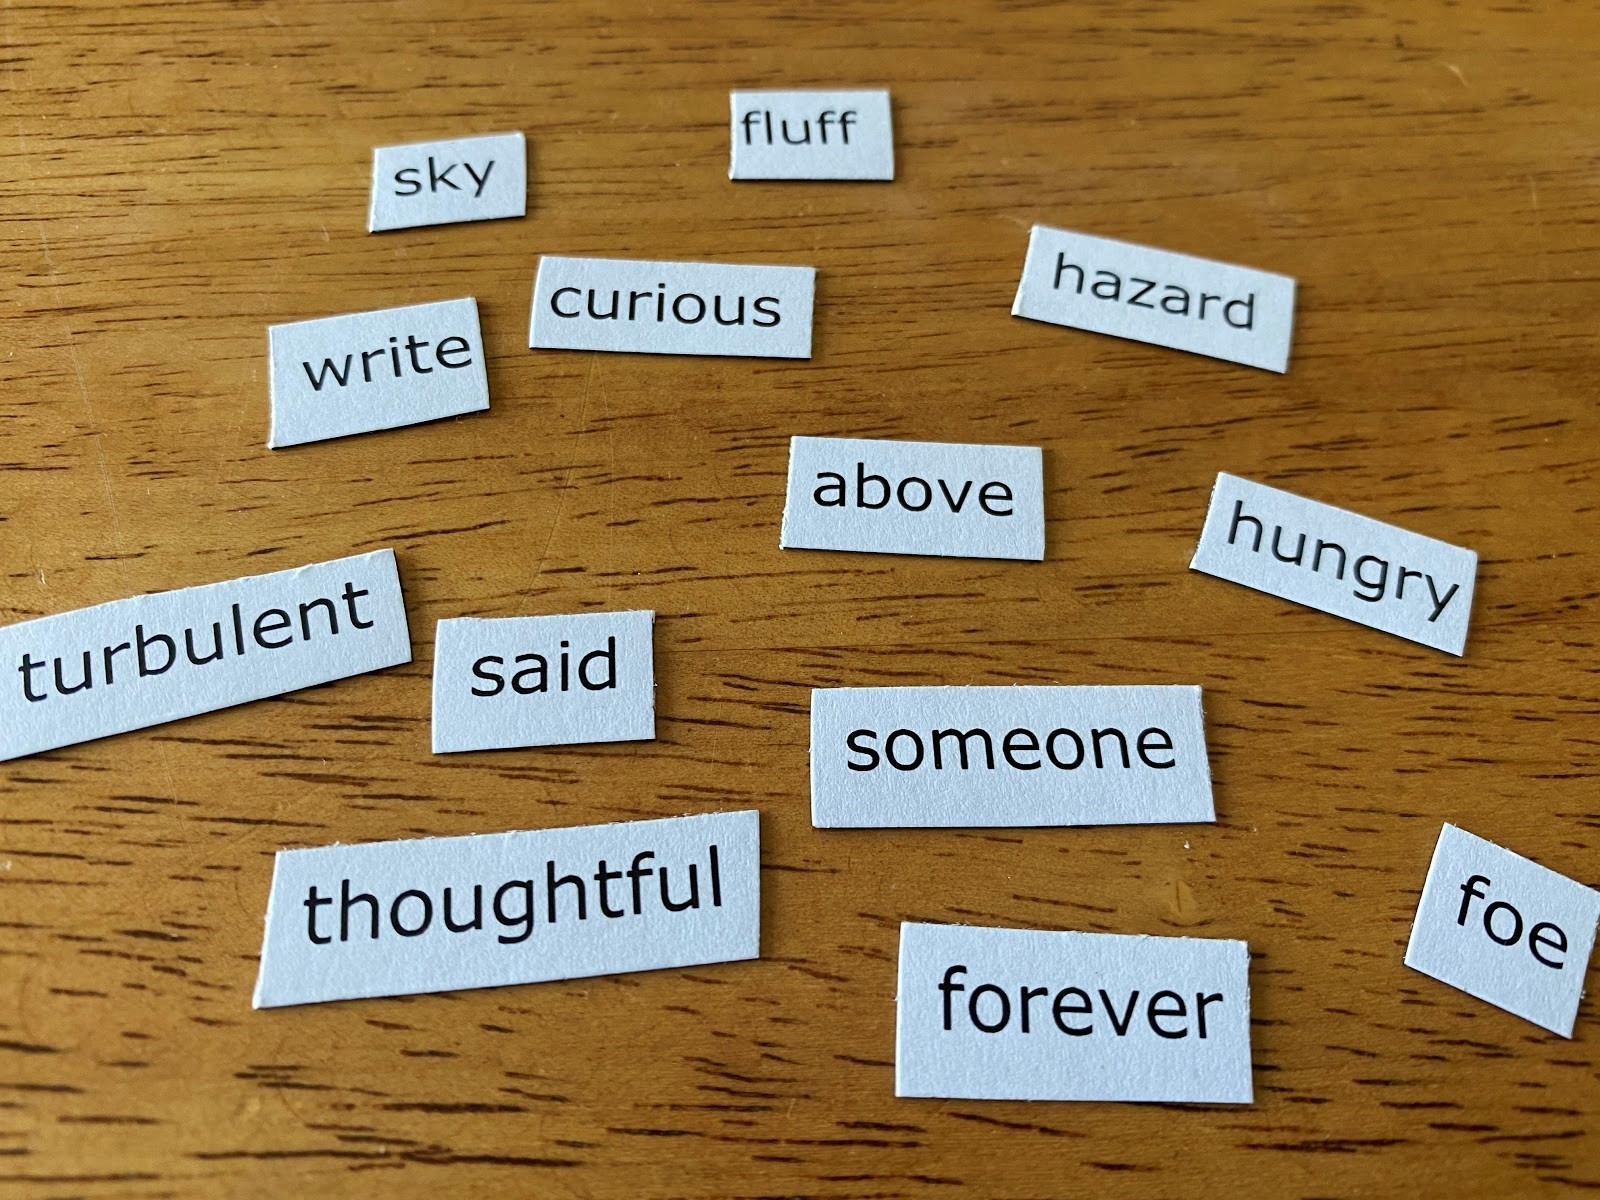
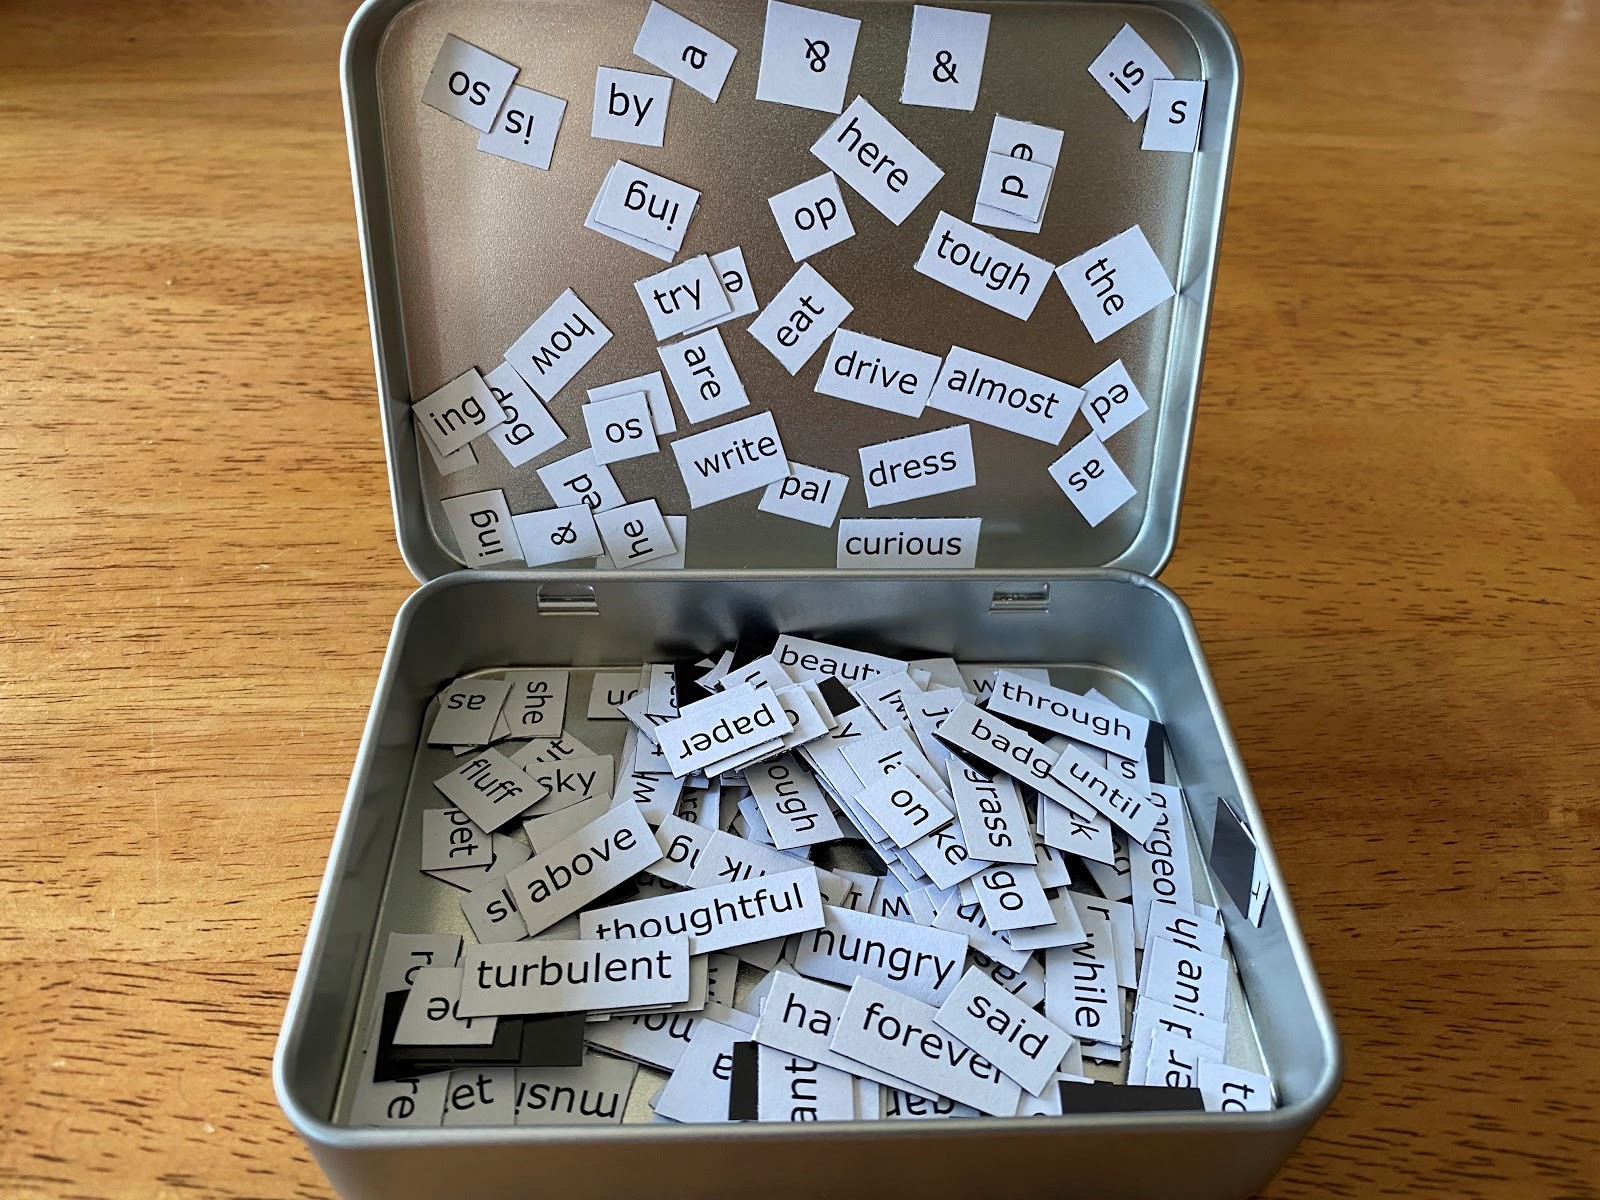
7. It’s time to get creative! Now you can use your words to write some poetry. Place them on your fridge, a magnetic board, a cookie sheet, or anything else you can find that is magnetic. Think of some more words you could add? You have been given an extra piece of magnet and blank paper to personalize your kits.
Some ideas for how to use your DIY Magnetic Poetry Kit:
- Check out a book on poetry to go along with your Take and Make Kit for inspiration!
- Write a poem with your family and/or friends. Take turns adding a word each until you’re satisfied.
- Make it into a game! Give each person participating a specific number of words (like 10 or 15). See what you all can come up with!
Show us what you created! Send us pictures at youthservices@balibrary.org.
 Youth Services Librarian Allison
 -
March Take-and-Make Kits
Bring home a fun new project! Sign up from our Library Calendar and pick up a kit at the Youth Services desk or through our Parking Lot Pickup service between March 8-19.
Toddler & PreK: Ping Pong Ball Painting
Use ping pong balls to create a unique work of art. Register for the March Toddler & PreK Take-and-Make Kit here.
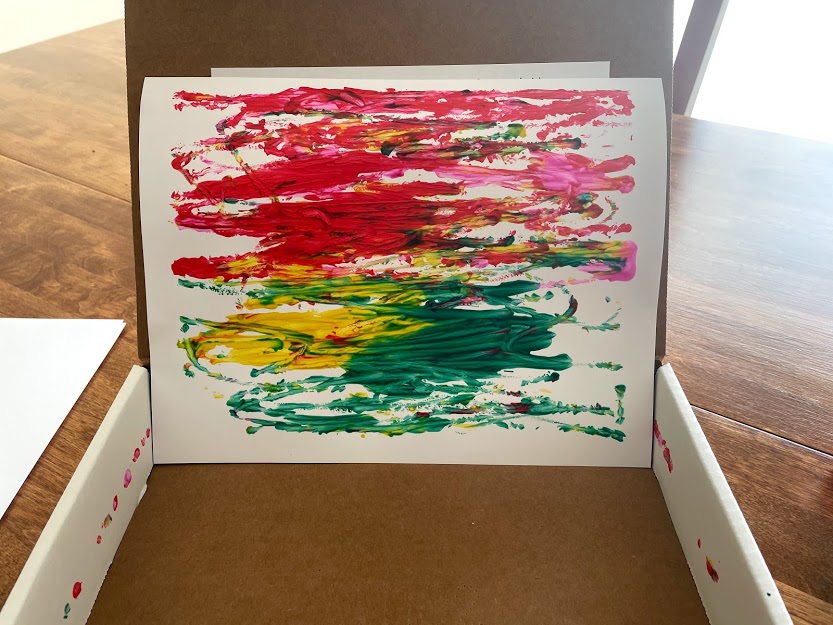
Your kit contains:
· 4 containers of different colored paint
· 4 ping pong balls
· 10 sheets of cardstock
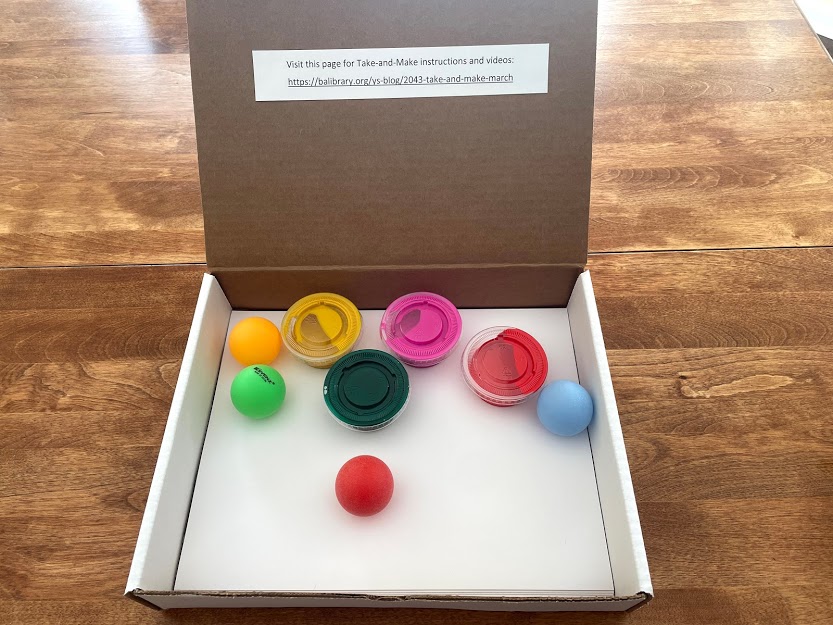
Instructions:
1. Remove all the items from the box.
2. Place one sheet of cardstock into the bottom of the box.
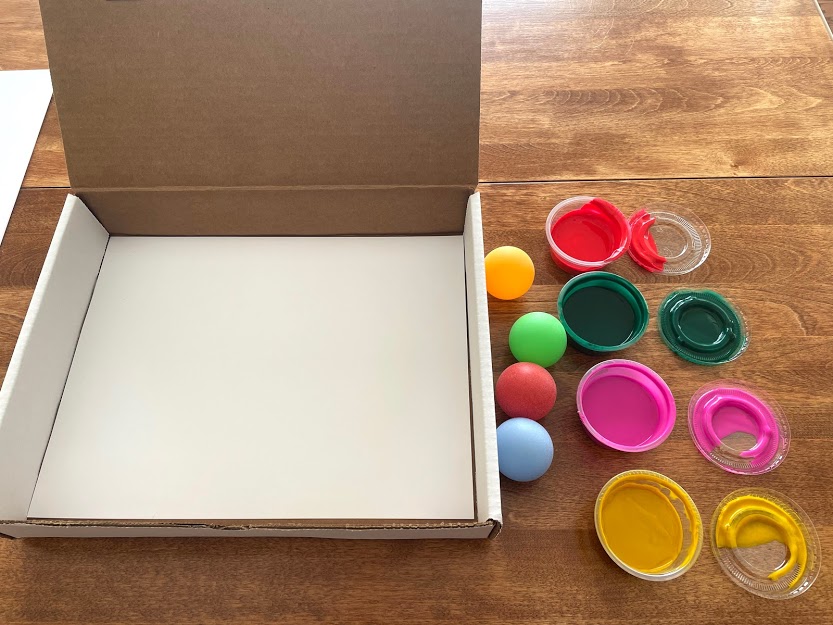
3. Open the paint containers.
4. Dip each of the ping pong balls into a different color of paint.
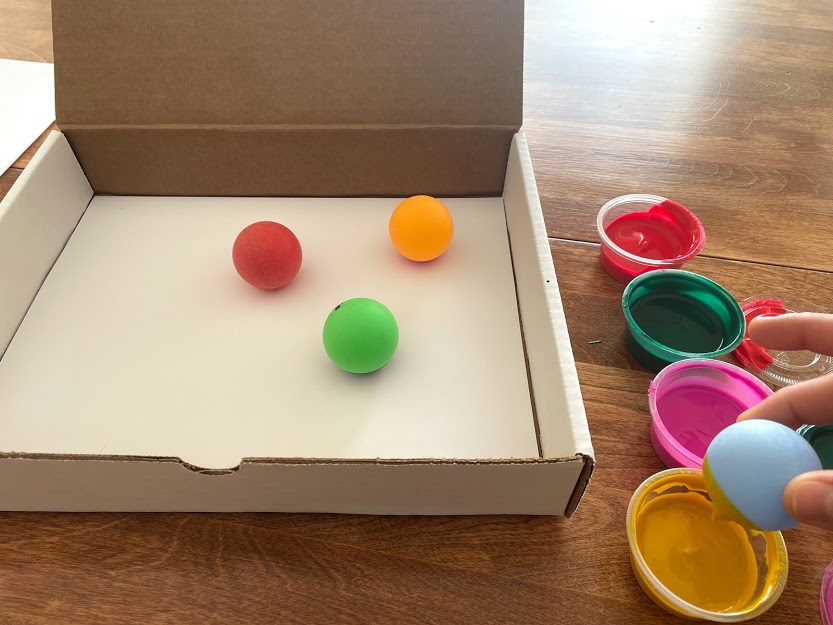
5. Place them on top of the cardstock in the box.
6. Leave the box open and move the box back and forth to roll the ping pong balls across the cardstock. Watch the paint as it streaks across your cardstock.
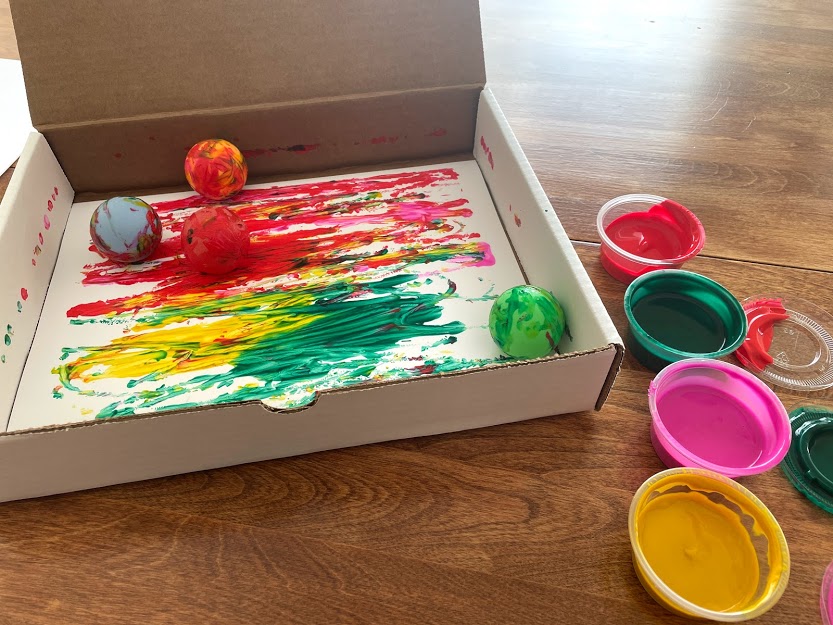
7. Remove the ping pong balls.
8. Take the piece of cardstock out of the box and admire your art work!
9. Rinse and dry the ping pong balls to make another work of art!
Talking points to consider and alternate ways to create art:
· Talk to your child about the different colors of paint. Have them identify each one individually.
· Talk about the new colors created as the original colors mix together.
· Use only one, two, or three of the ping pong balls with different colors and talk about how the art looks different with less or more colors.
· Instead of leaving the box open, close the box with the ping pong balls and paint inside and give it a good shake! Compare the art you make with the rolling technique vs. the shaking technique.
Show us what you created! Send us pictures at youthservices@balibrary.org.
Grades K-2: Light-Up Lines
Create a picture that glows. Register for the February Grades K-2 Take-and-Make Kit here.
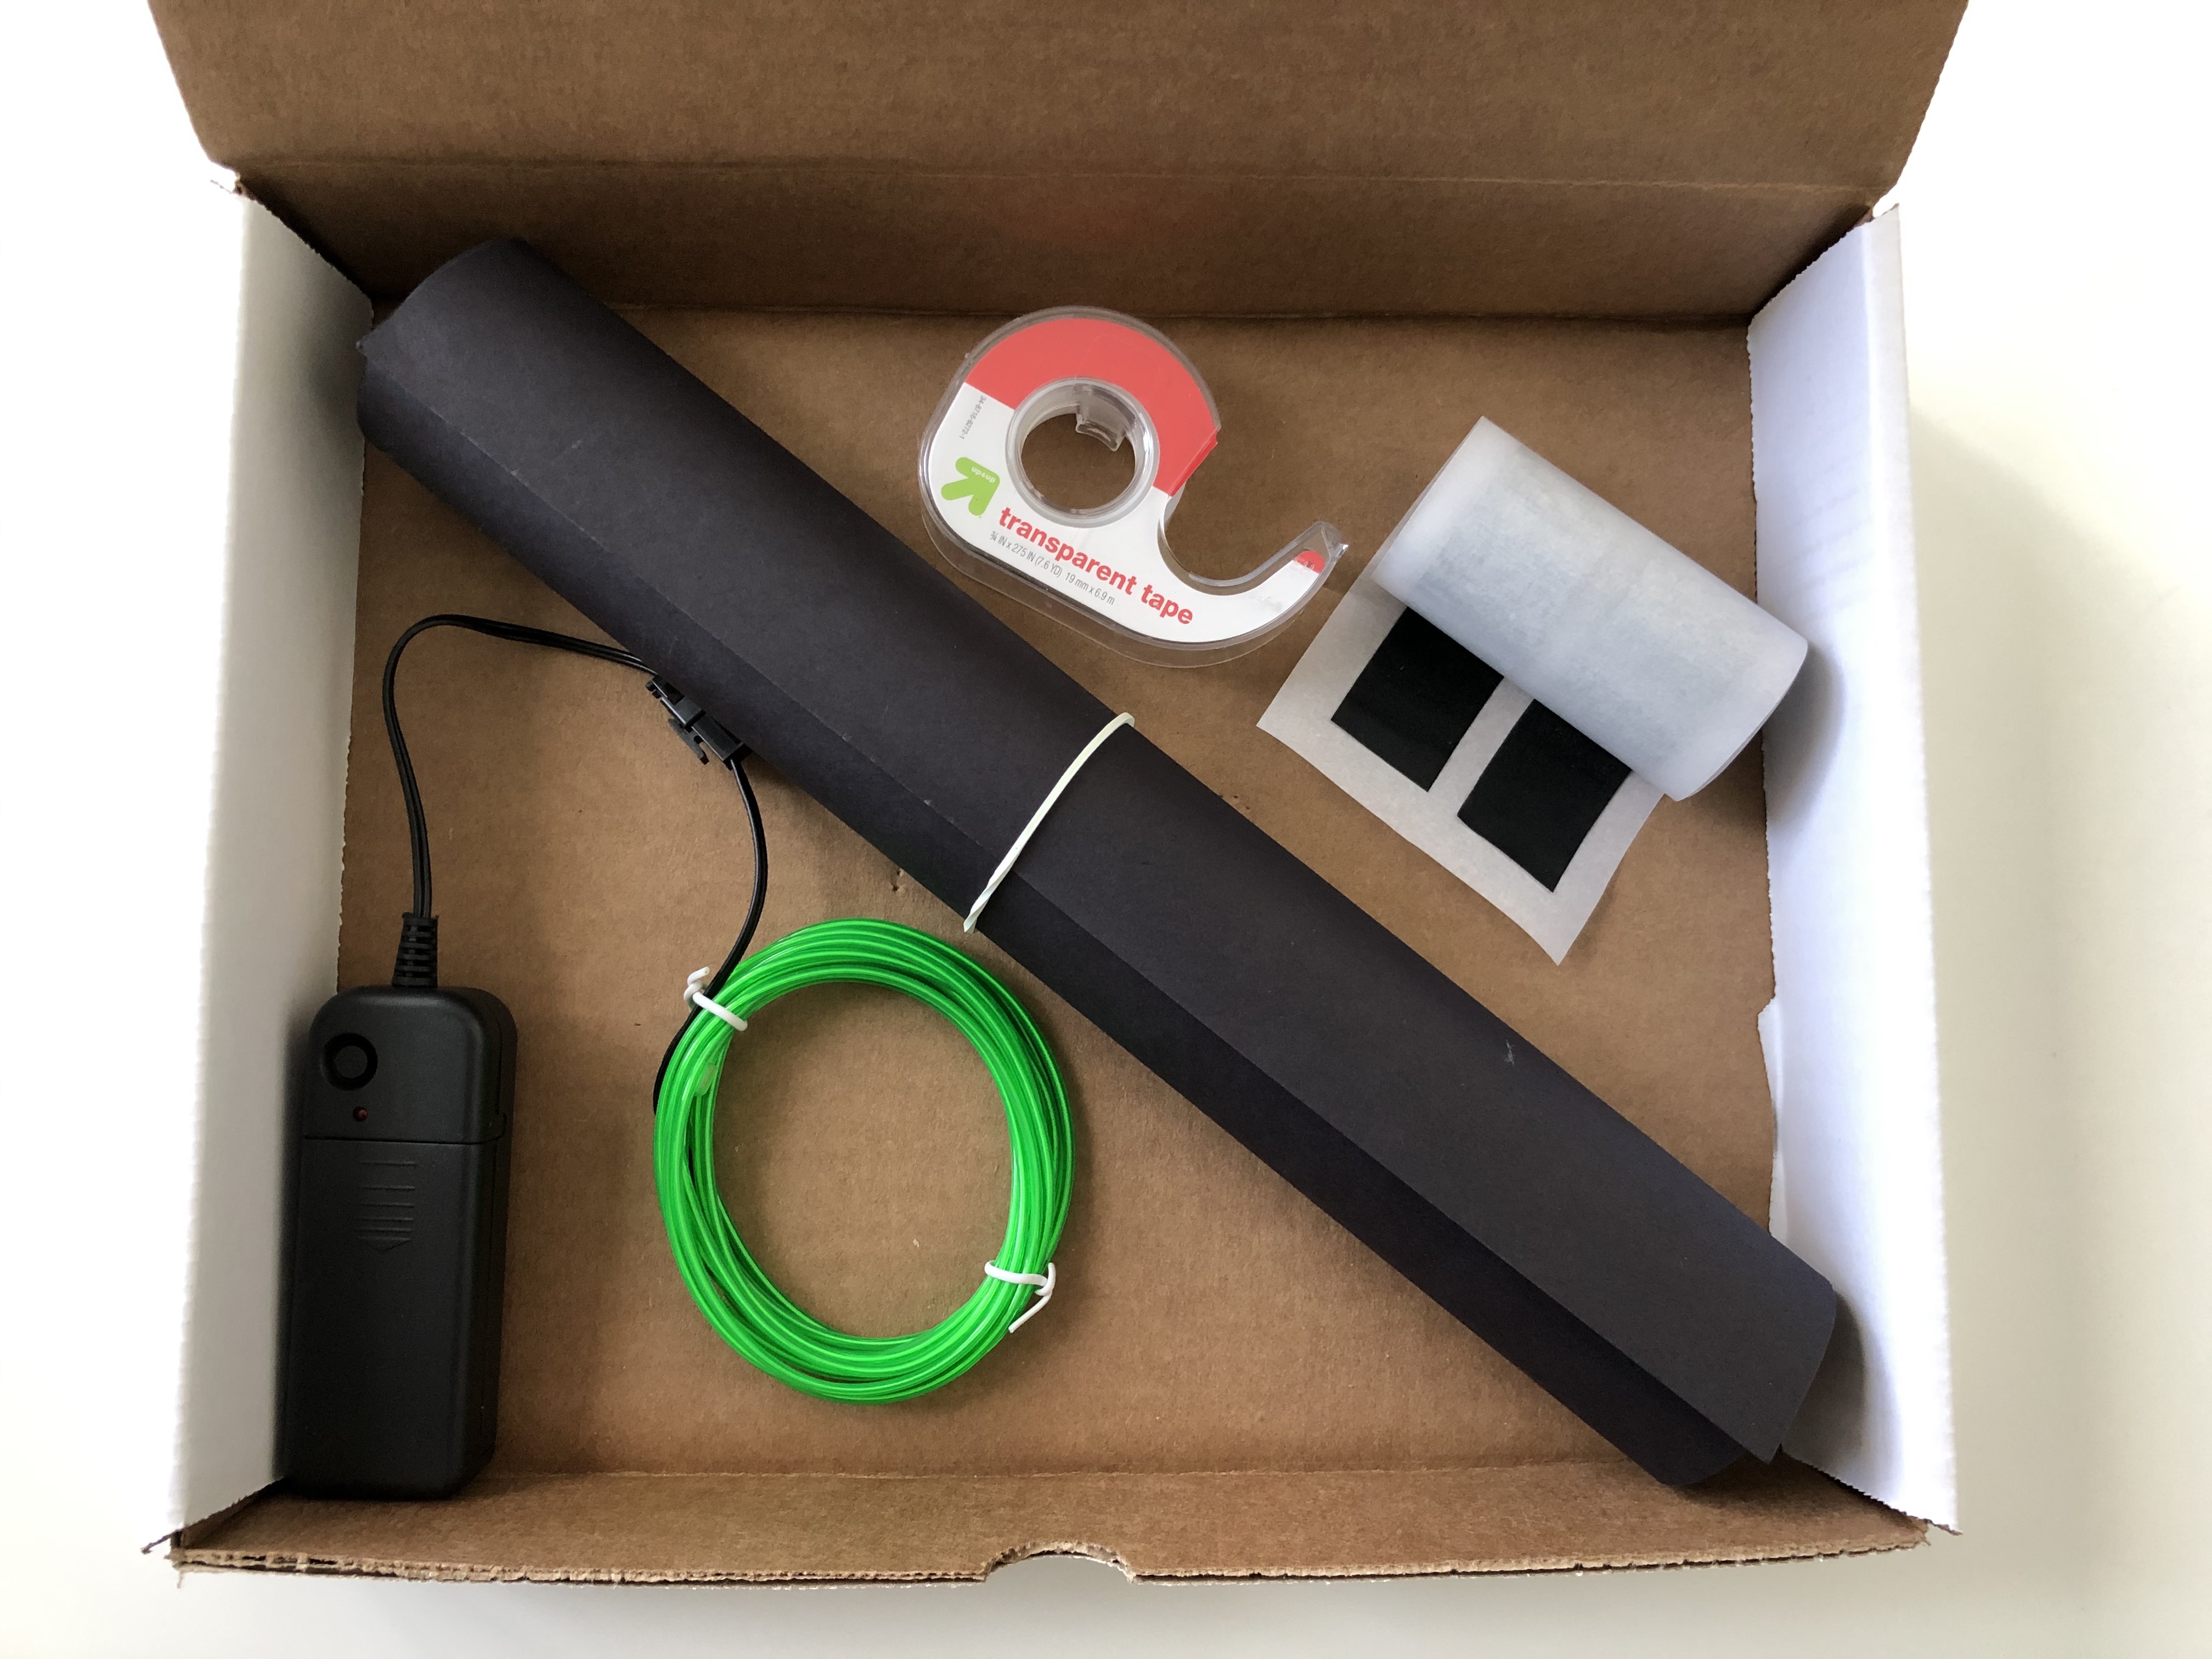
Your kit contains:
1 length of electroluminescent wire with battery pack
1 sheet of black paper
Clear tape
Black masking tape
You will also need:
Scissors (optional, to help cut tape)
A dark space
A camera
Instructions:
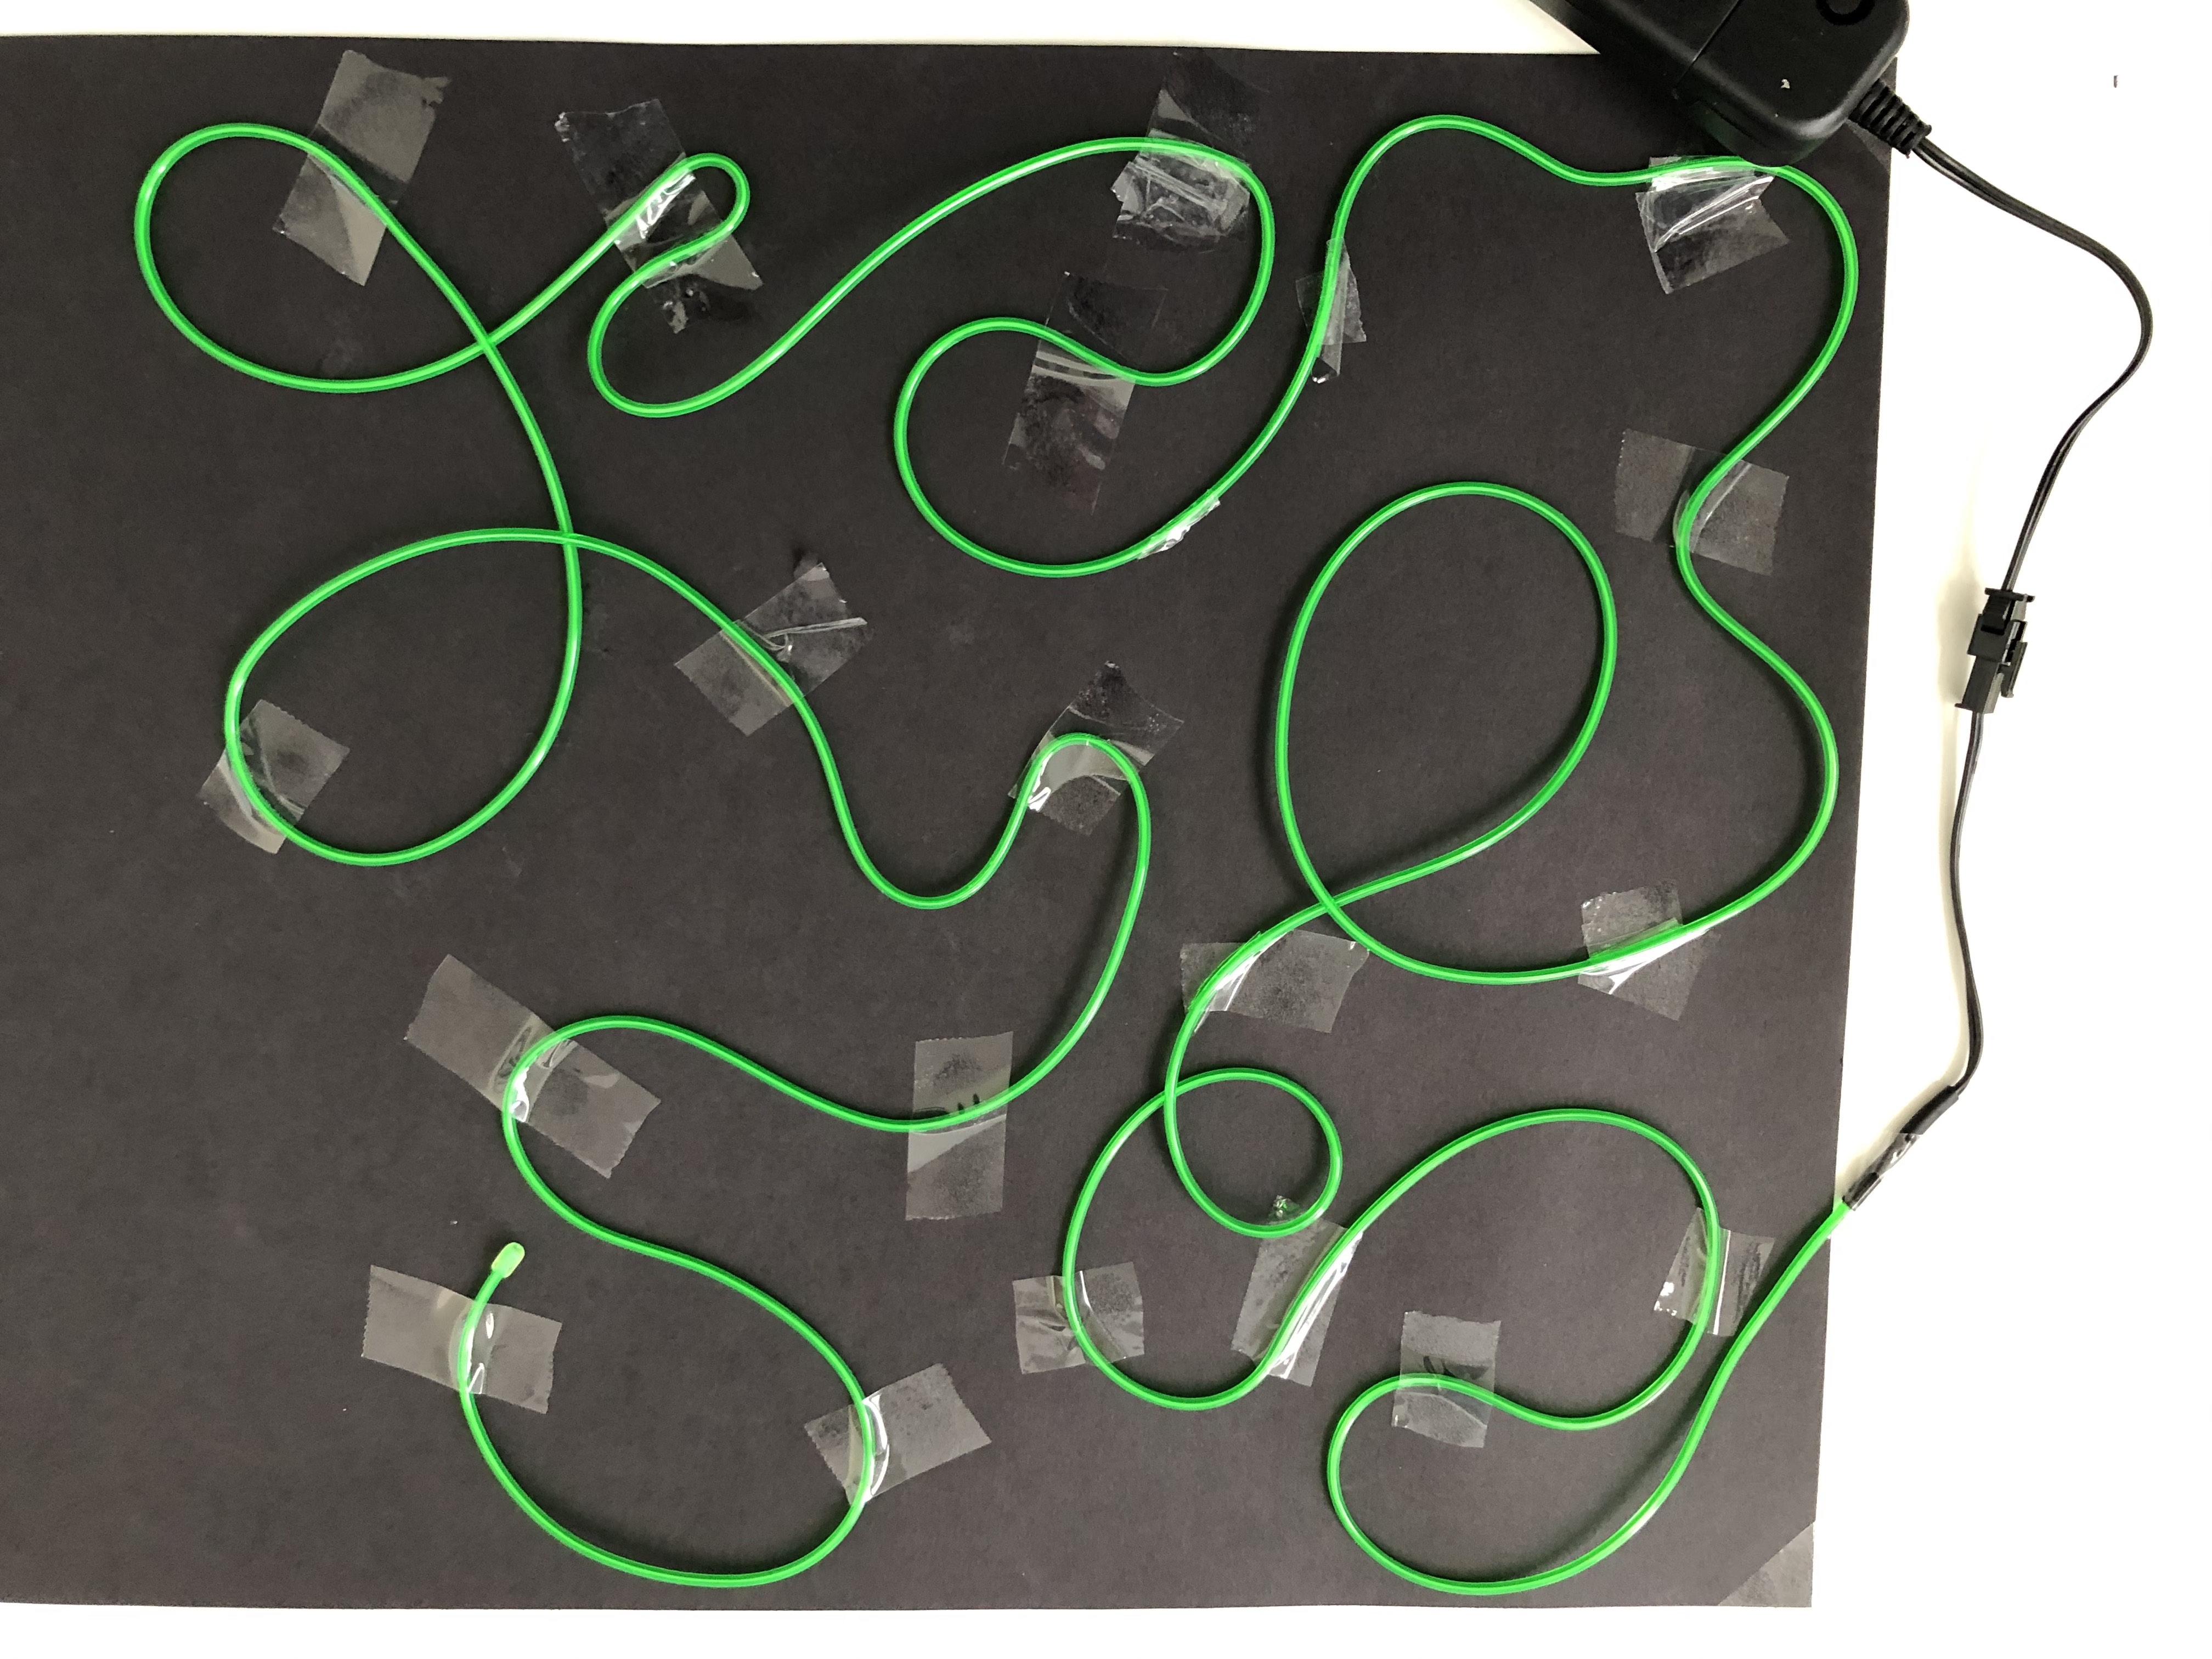
1. Roll out the black paper and tape to your workspace.
2. Lay out the wire on the black paper, using tape to keep it in place.
3. You can “draw” an image or just random patterns.
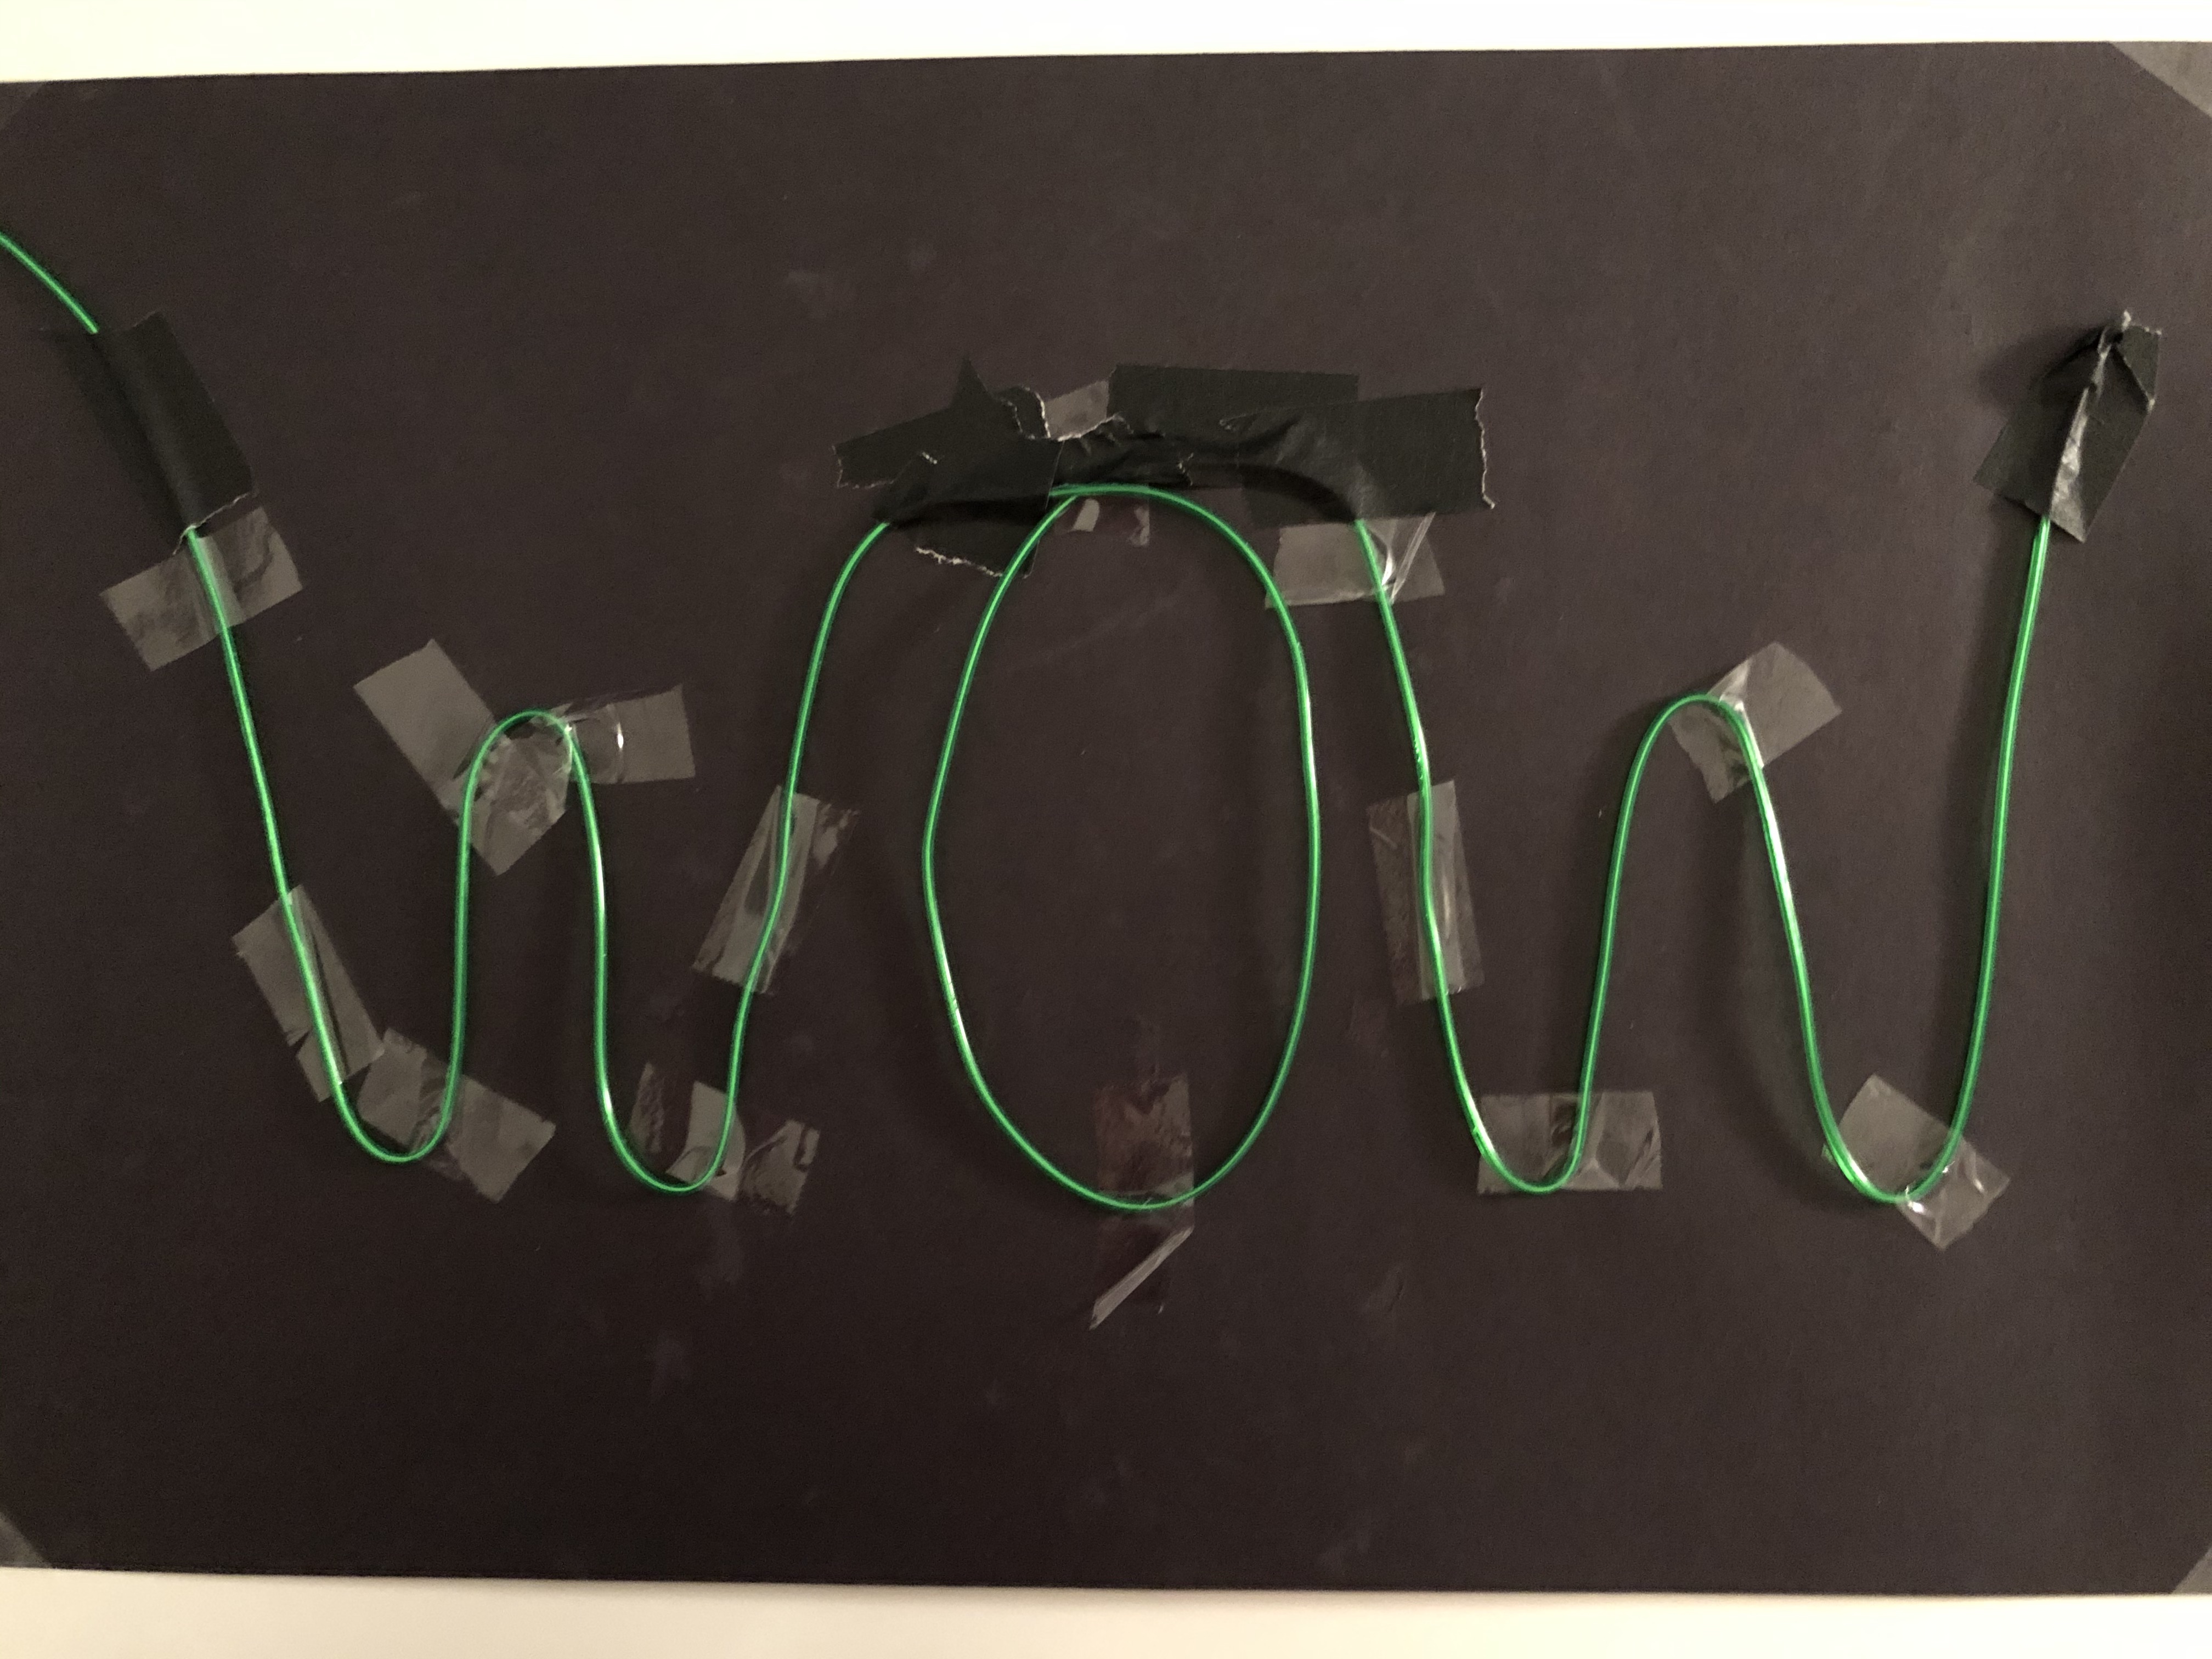
4. Use the clear tape to allow the light to shine through. If you want to stop and start your line (for example, for letters or separate images), you can use the masking tape to “black out” the line.
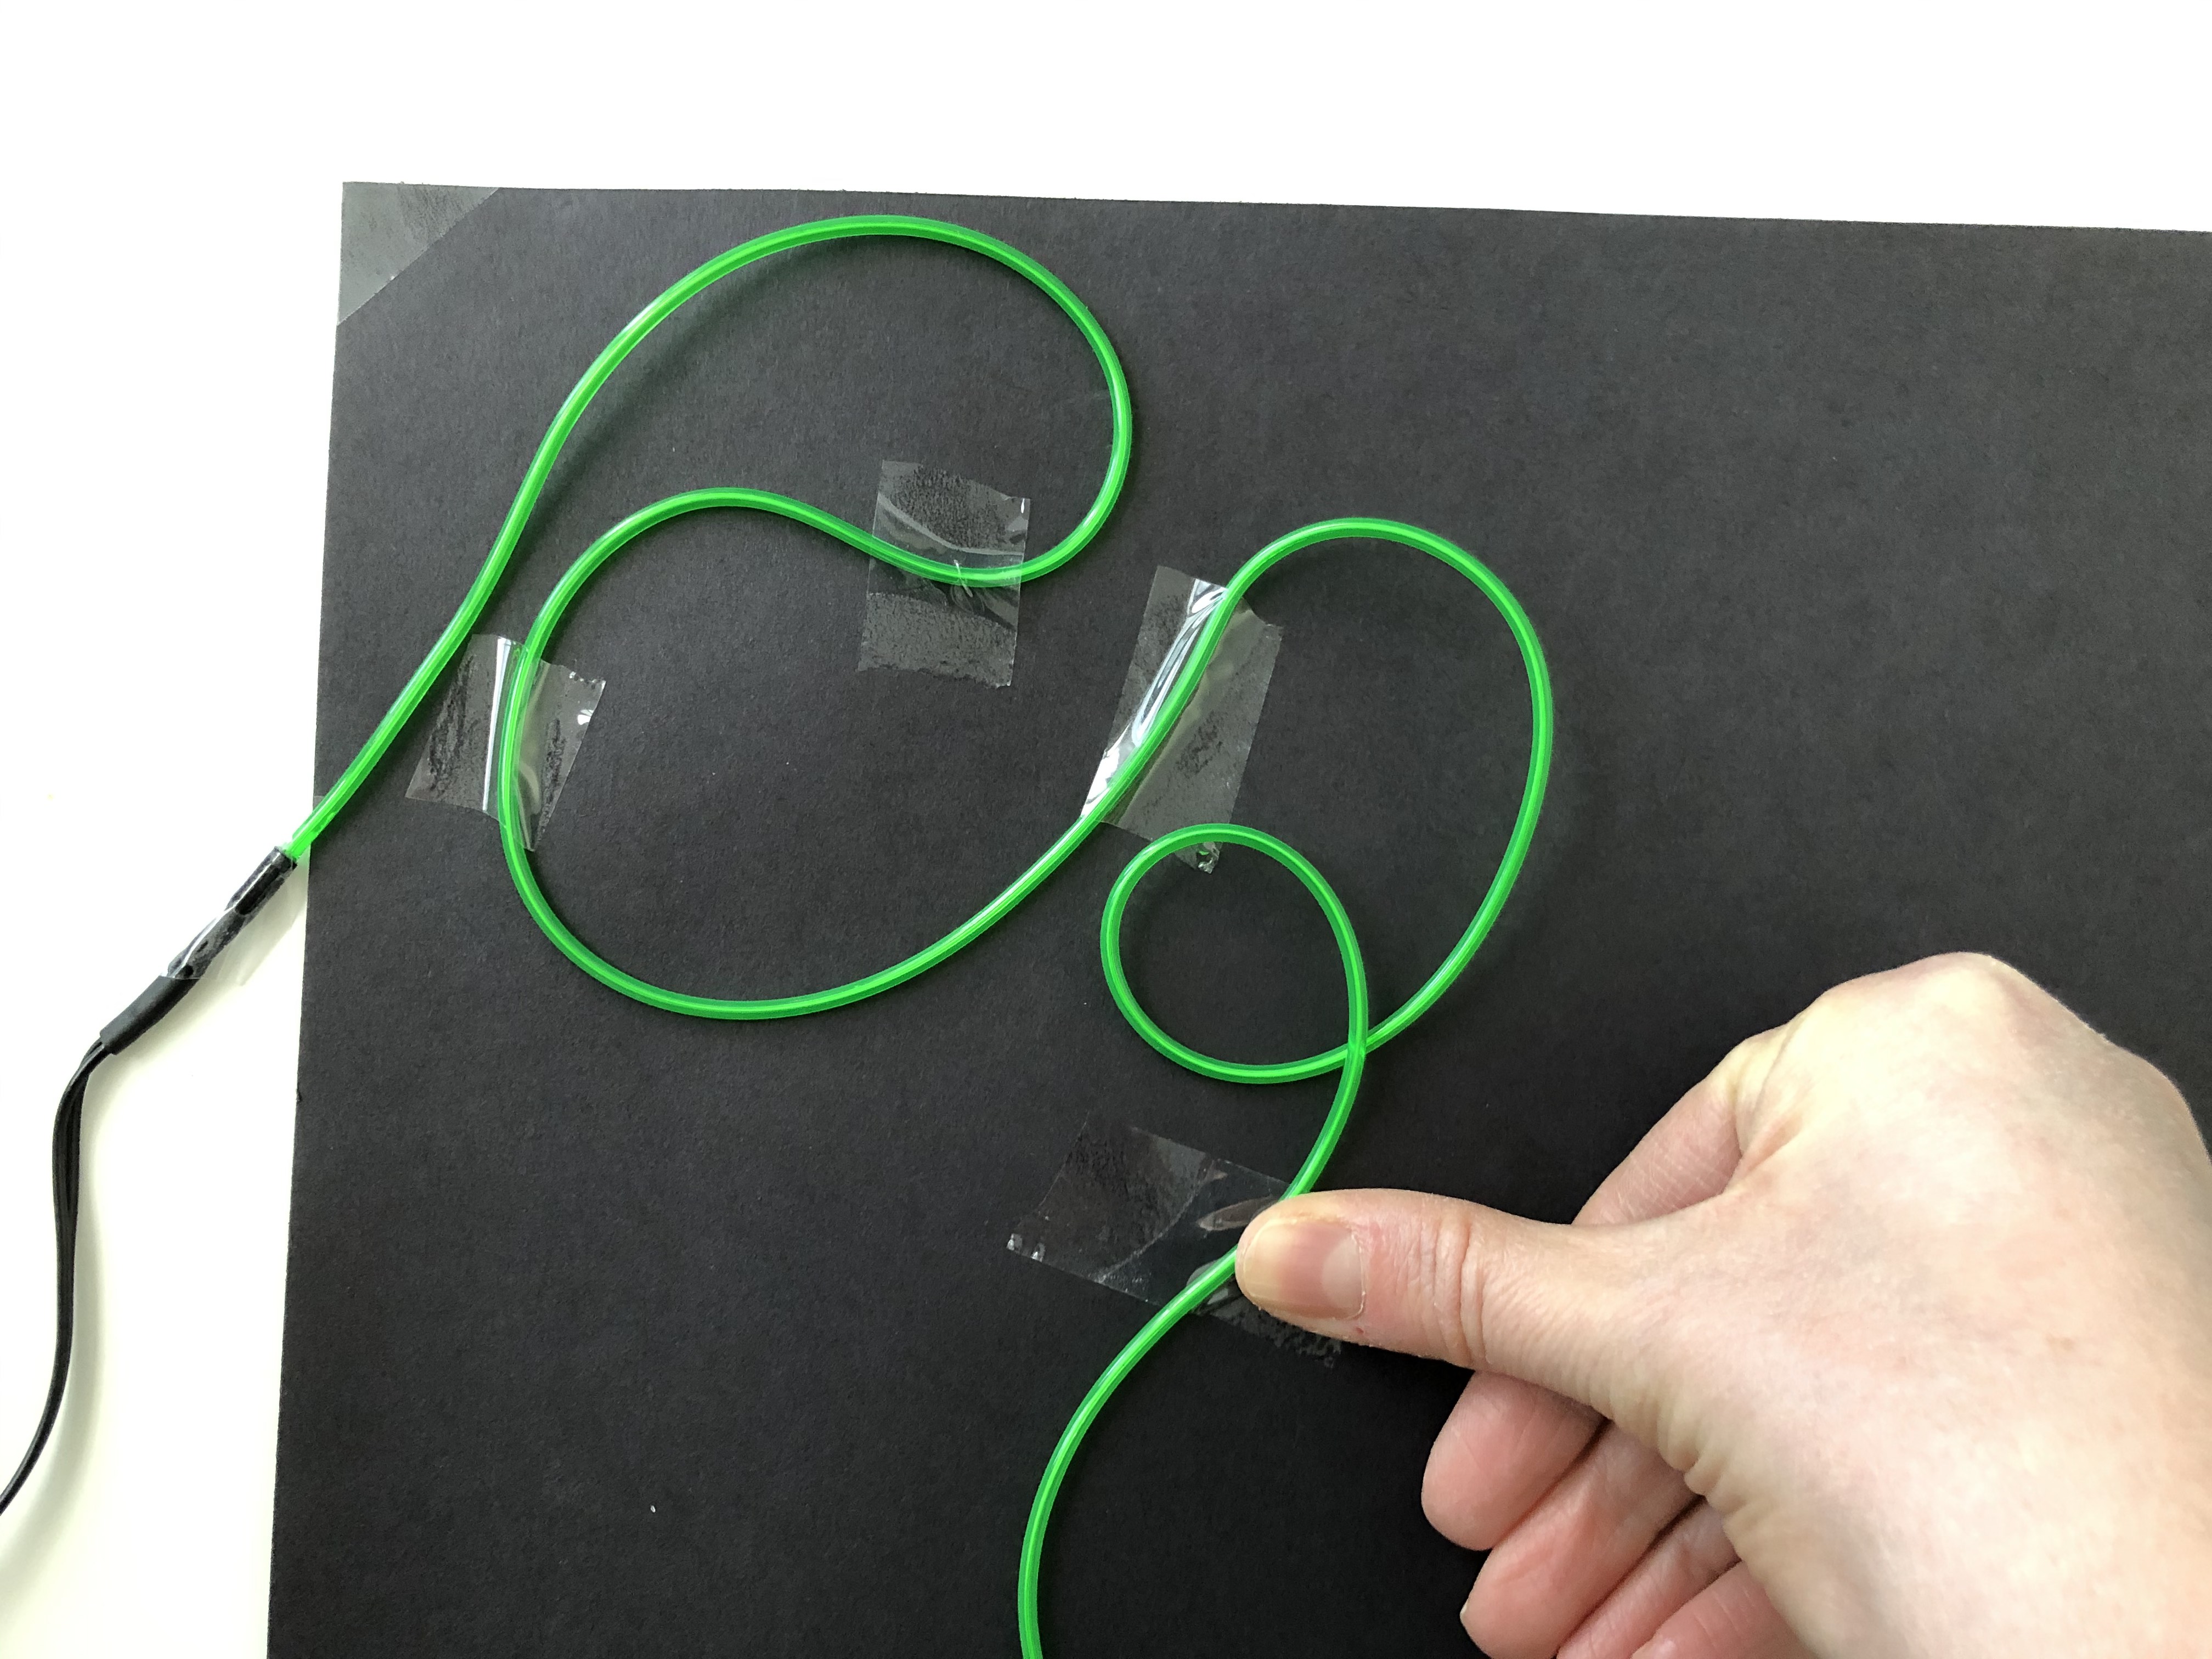
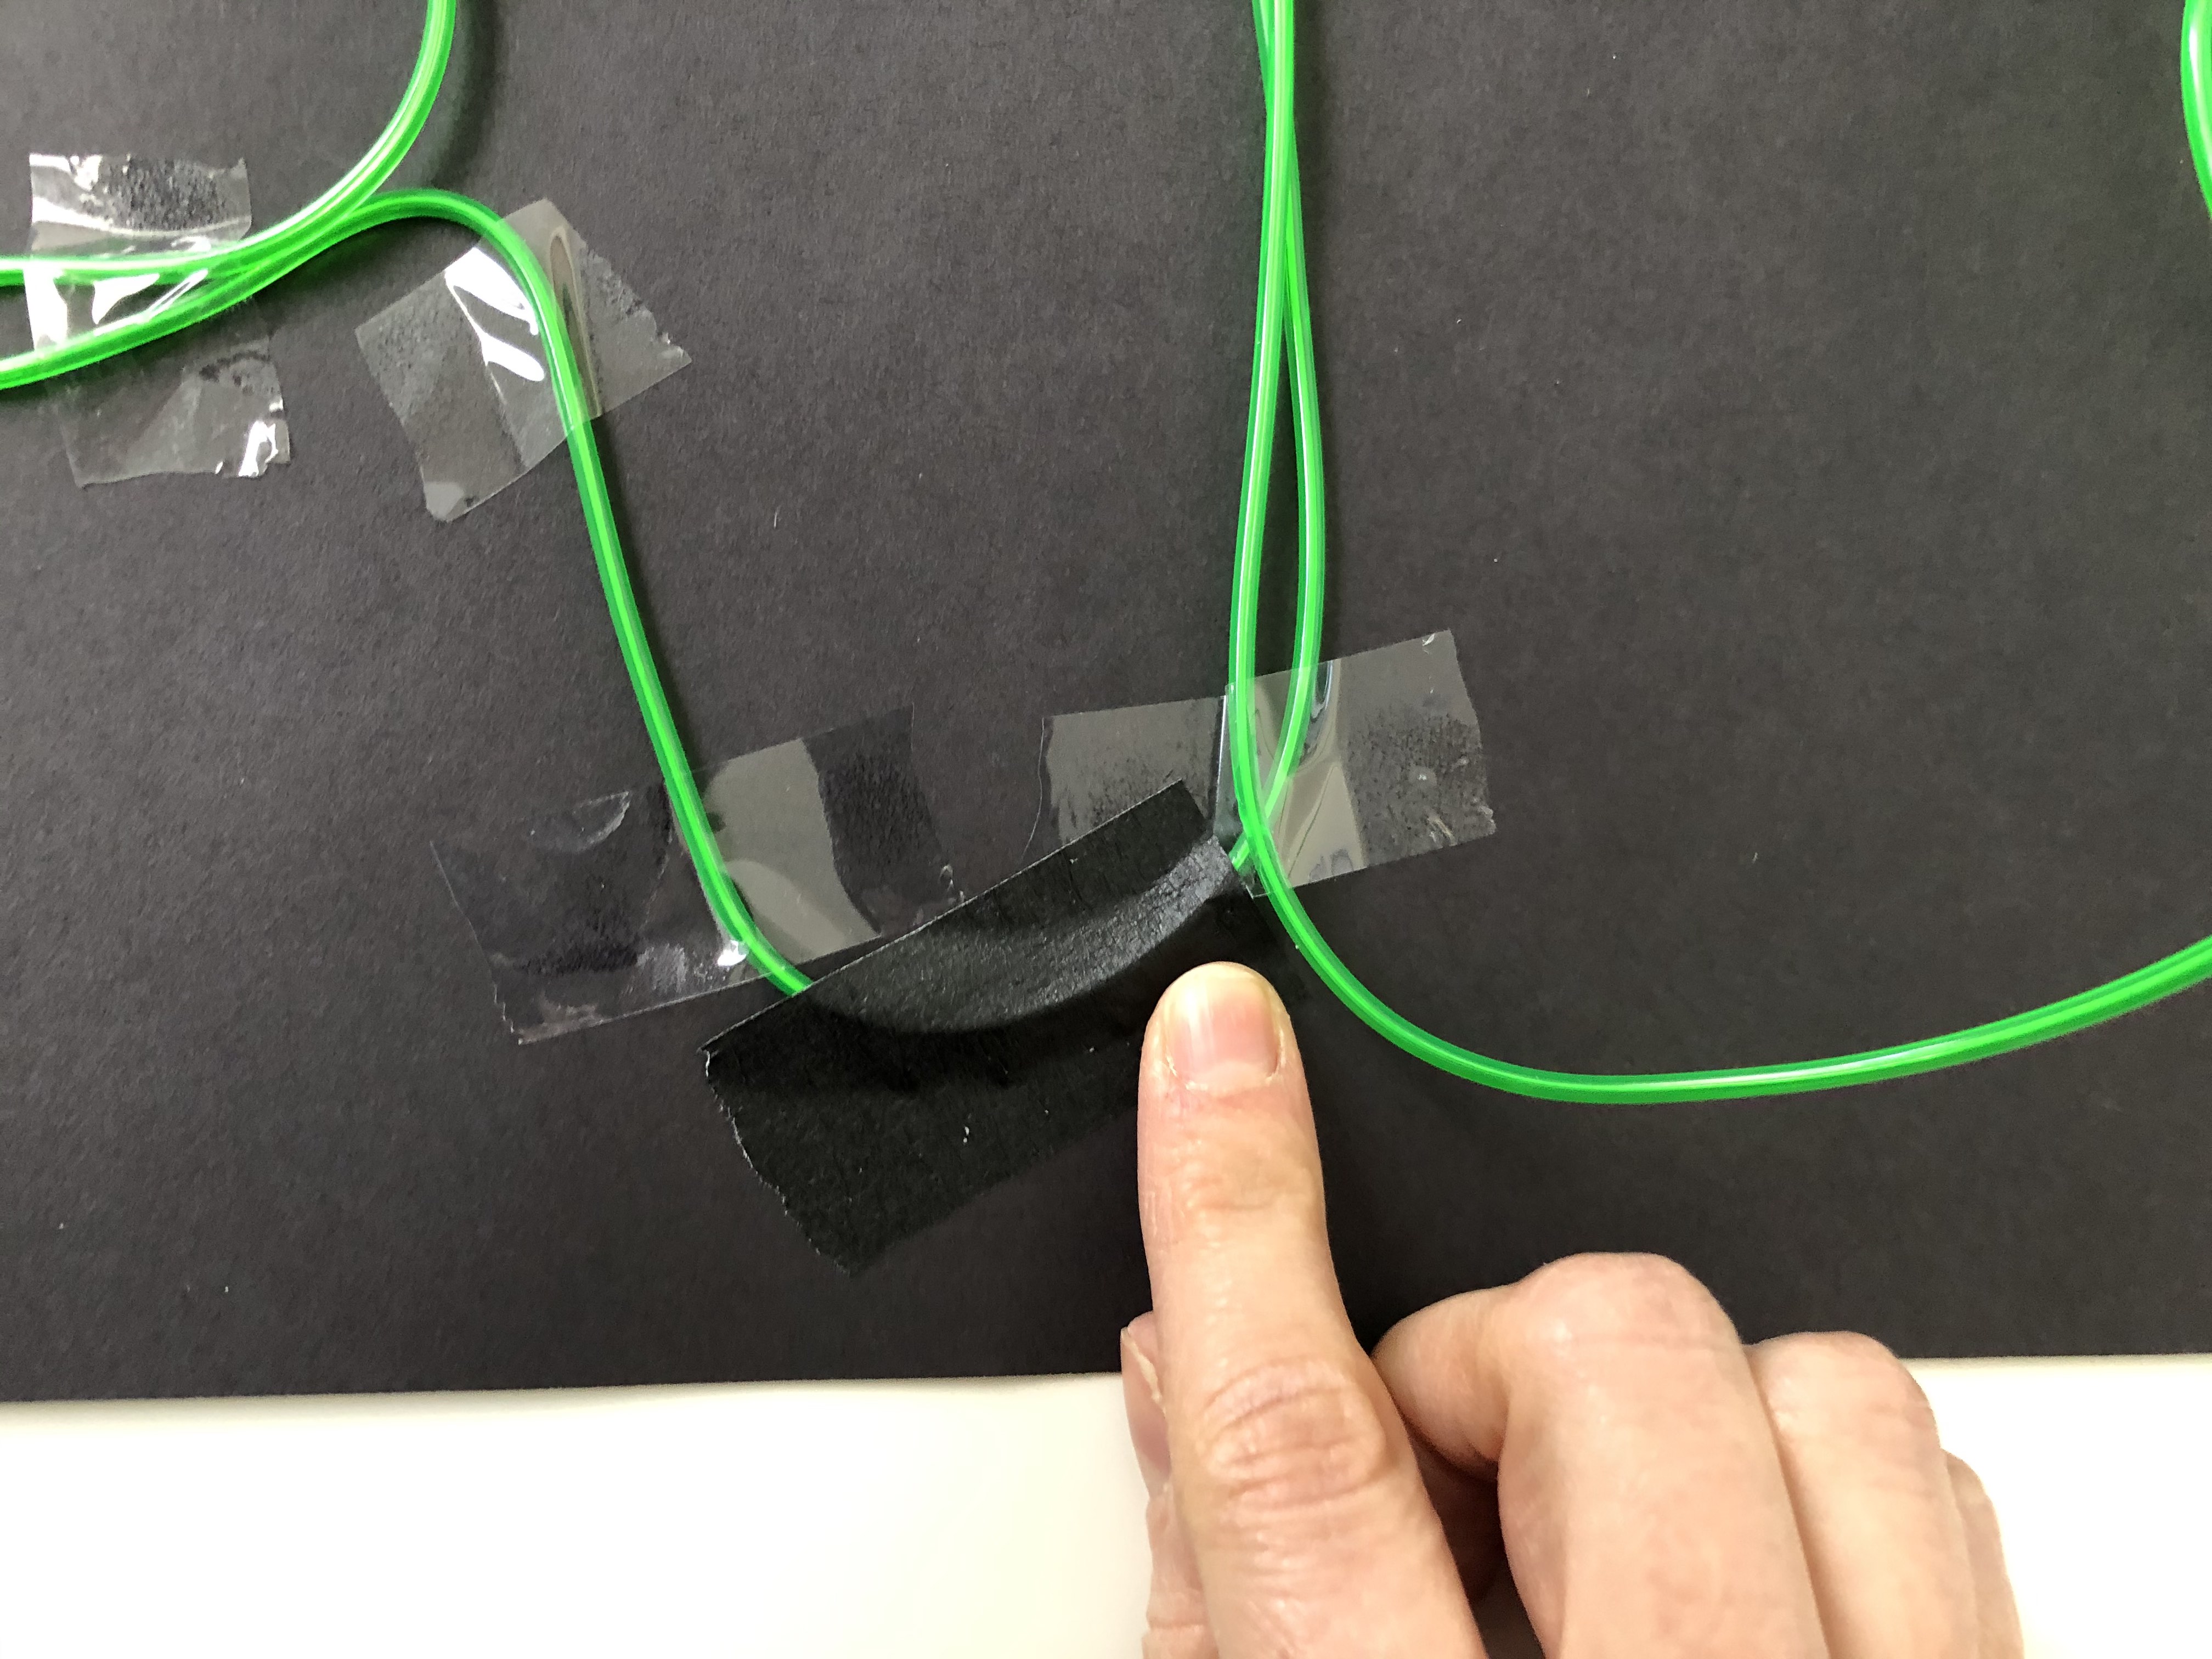
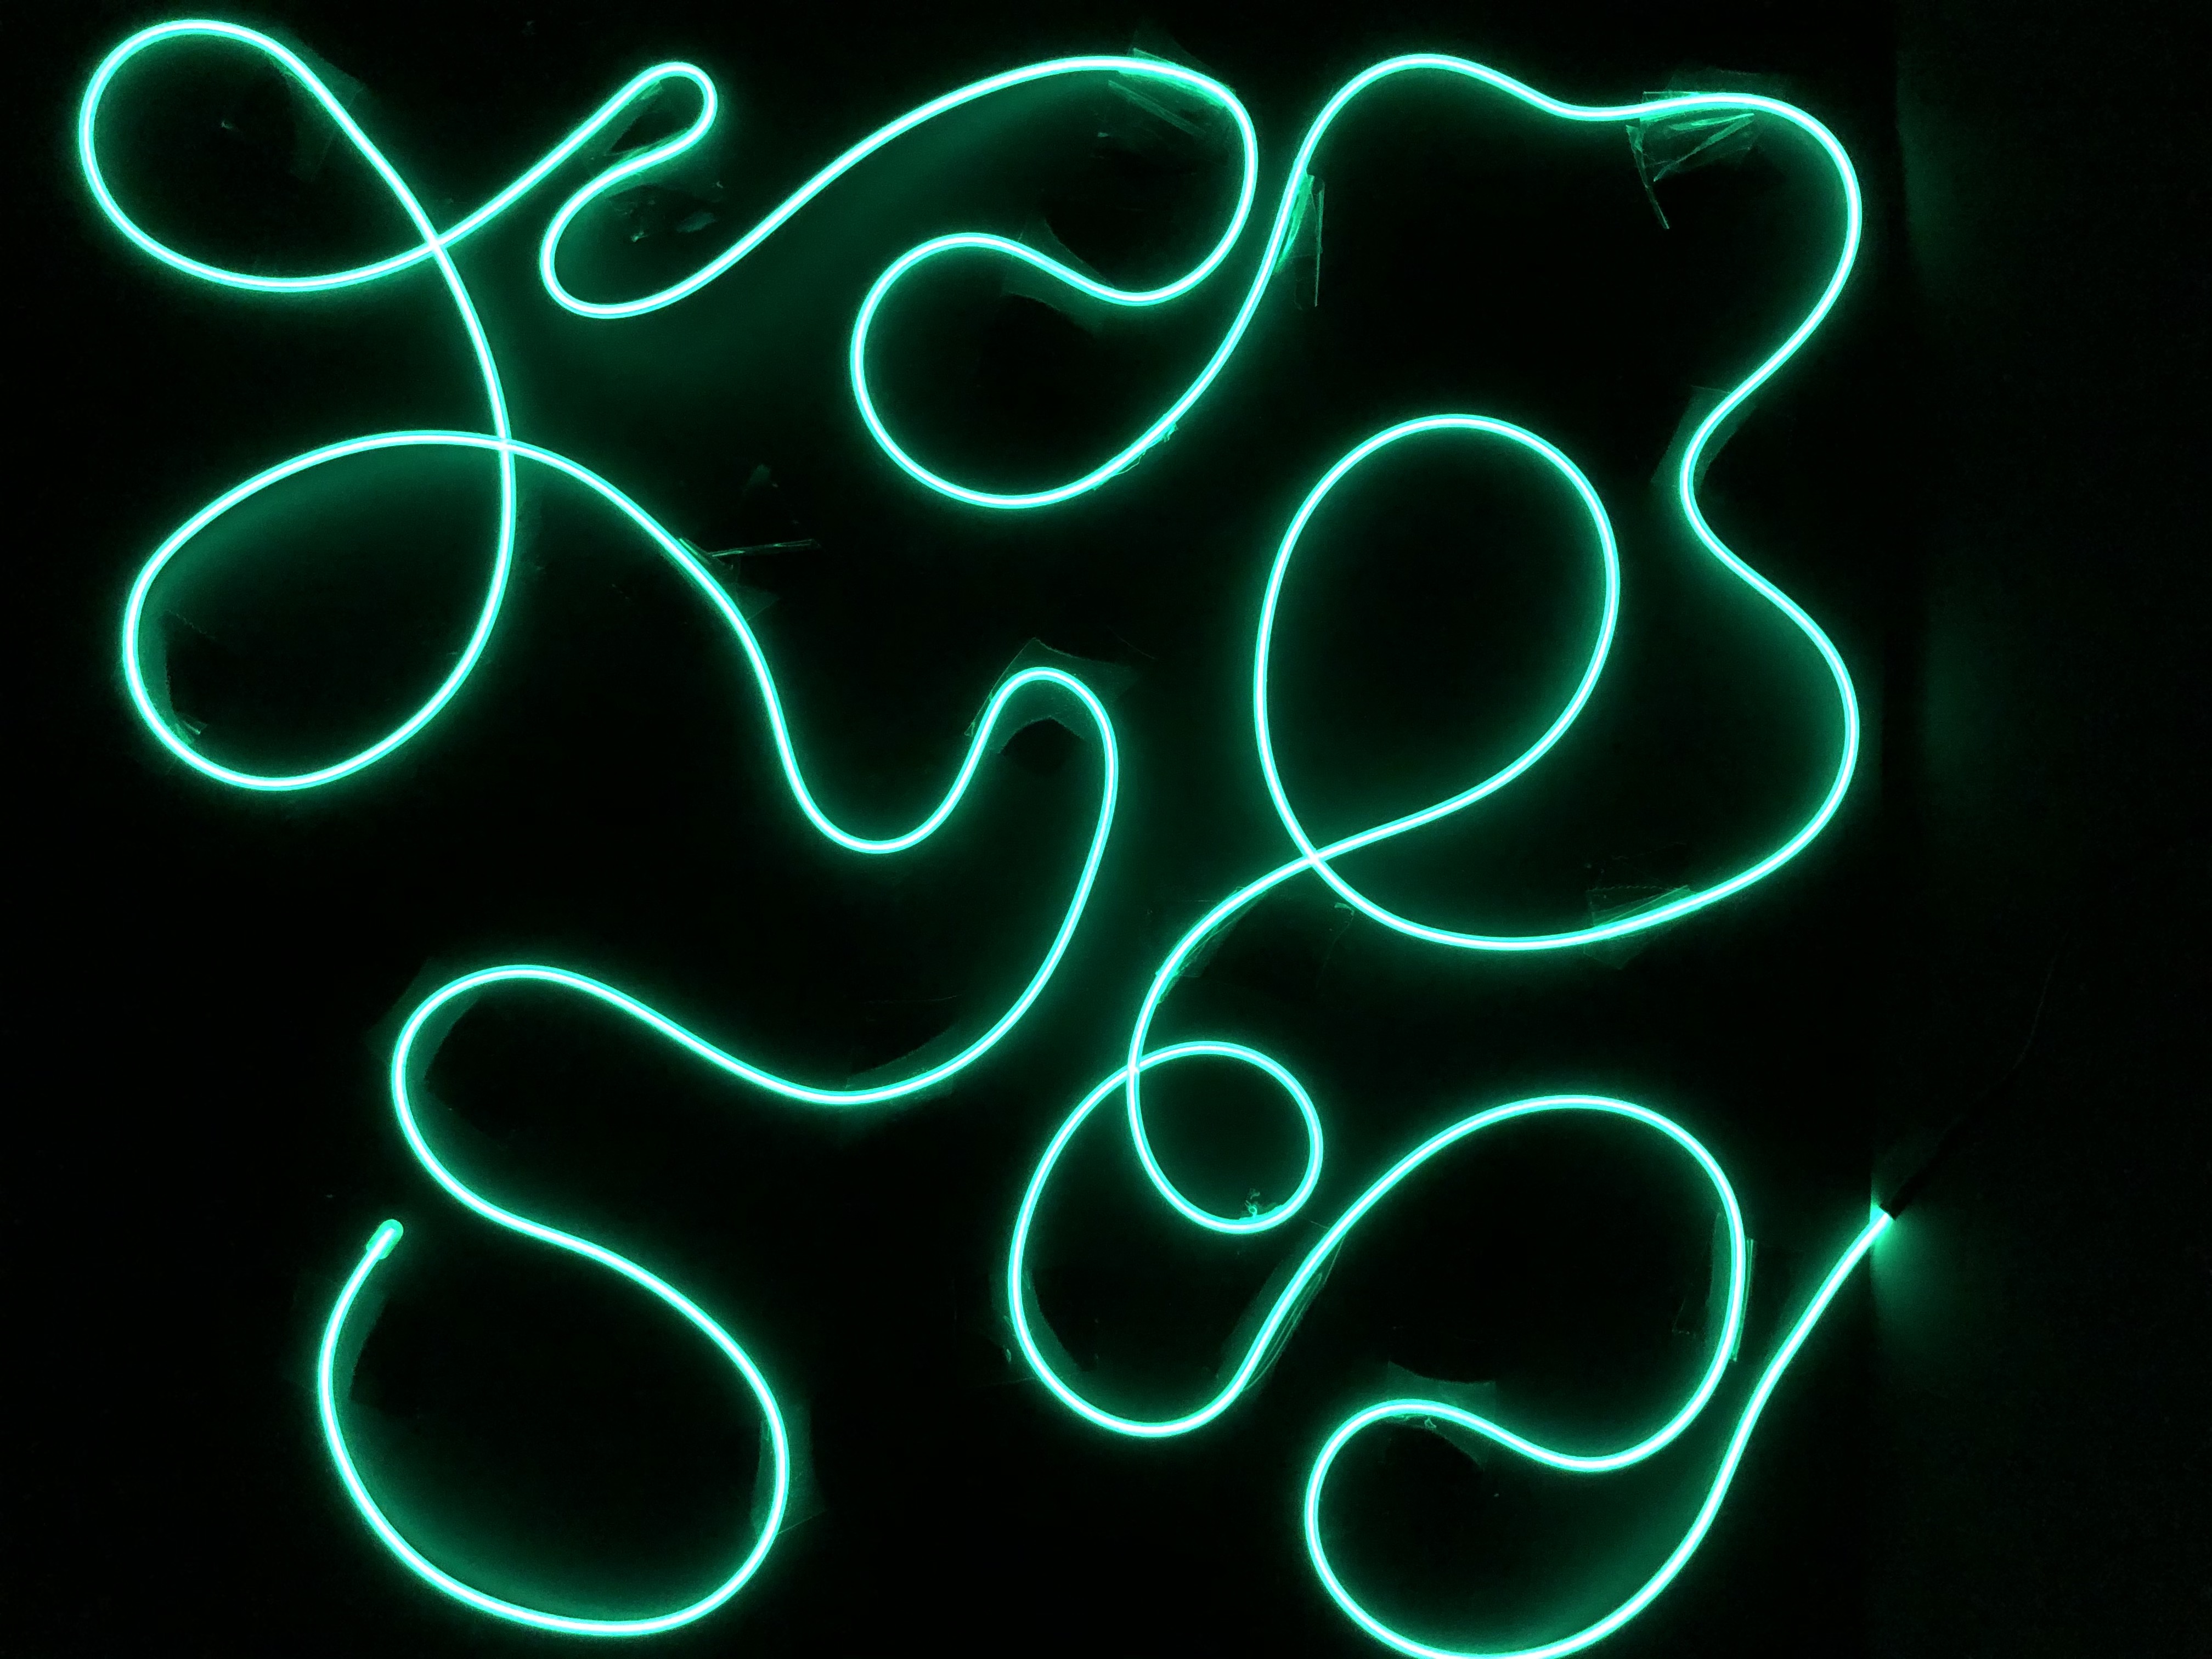
5. When you’re done, turn on your wire, turn out the lights, and see your creation pop! You can take a picture from above.

6. Carefully peel off the tape and create something new!Questions to explore:
How is using a wire to create an image different from using a pencil or marker?
Can you write your name or initials with the wire? In print or cursive?
How does your creation change when the room is dark?
What other household objects could you use in this artwork?
If you take a picture, experiment with where you stand and how you hold the camera. Can you change the way the picture looks by tilting the camera? Can you change how much of the artwork you see by zooming in or out?
Taping to the paper creates a flat image (or two-dimensional). Can you also create a sculpture that stands up (three-dimensional) with the wire? How?
Show us what you created! Send us pictures at youthservices@balibrary.org.
Grades 3-8: Cloud Slime
Create a cloud made of slime for a fun sensory experience. Register for the March Grades 3-8 Take-and-Make Kit here.
Your kit contains:
- 5 plastic cups
- 1 bottle of Elmer’s glue
- 1 plastic bottle of liquid starch
- 2 bottles of food coloring
- 2 popsicle sticks
- Instant snow
In addition to these items, you will need a ¼ cup measuring cup, and a 1 tablespoon measuring spoon.
- Pour ¼ cup of the glue into a plastic cup.
- Pour some of the liquid starch into one of the plastic cups.
- Add 2 tablespoons of liquid starch to the cup with the glue.
- Stir well with Popsicle stick.
- Add food coloring and stir well.
- Your should start to see your slime clump together.
- Put the slime on a surface that is okay to get messy, such as a plastic plate or bowl.
- Knead the slime together, pulling it back and forth and folding it over itself.
- Continue to add small amounts of liquid starch to your slime, and knead the slime. Your slime should start to feel less sticky and gooey. The more starch you add, the less sticky the slime will be. However, make sure to add the starch slowly because too much starch will make your slime rubbery.
- Once you are happy with your slime, pour the instant snow into one of the plastic cups.
- Add 2.5 tablespoons of water to the instant snow and stir.
- Knead the instant snow into your slime. You may have extra snow.
Check out the video below to see a visual!
Show us what you created! Send us pictures at youthservices@balibrary.org.
 Youth Services Librarian Allison
 -
February Take-and-Make Kits
Bring home a fun new project! Sign up from our Library Calendar and pick up a kit through our Parking Lot Pickup service between February 8-19.
Toddler & PreK: Create Your Own Puzzle
Use paint and stamping to create a unique heart-shaped puzzle that can be enjoyed again and again. Register for the February Toddler & PreK Take-and-Make Kit here.
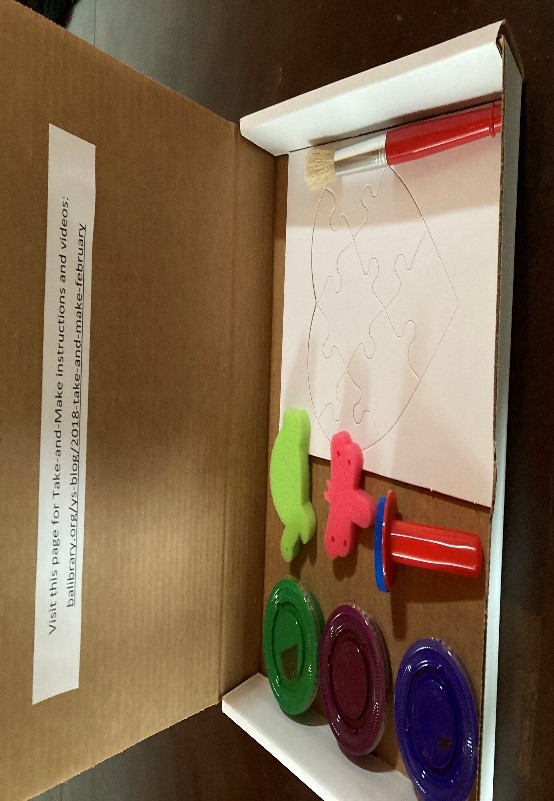
Your kit contains:
- 1 paint brush
- 1 sponge with handle
- 2 sponges (without handles)
- 3 containers of (different) colored paint
- 1 heart puzzle
Instructions:
1. Take the puzzle out of the box and place it on a flat surface. (You may want to place some newspaper down first.)
2. Open the paint containers and allow your child to choose which medium(s) they want to use (sponge, sponge with handle or paint brush). Have your child paint the puzzle any way they would like.
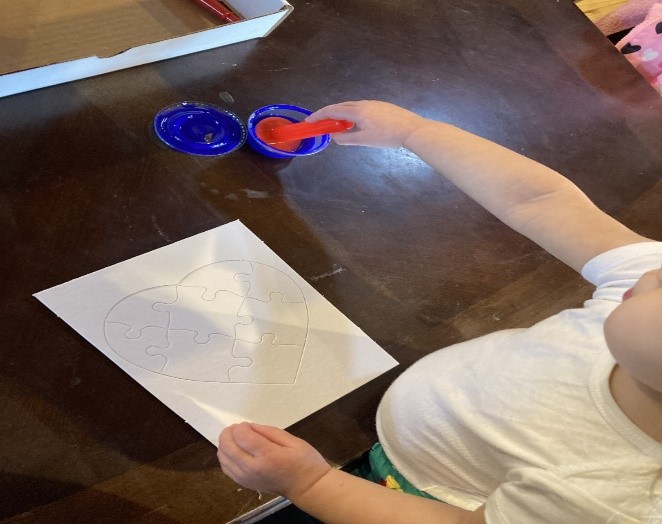
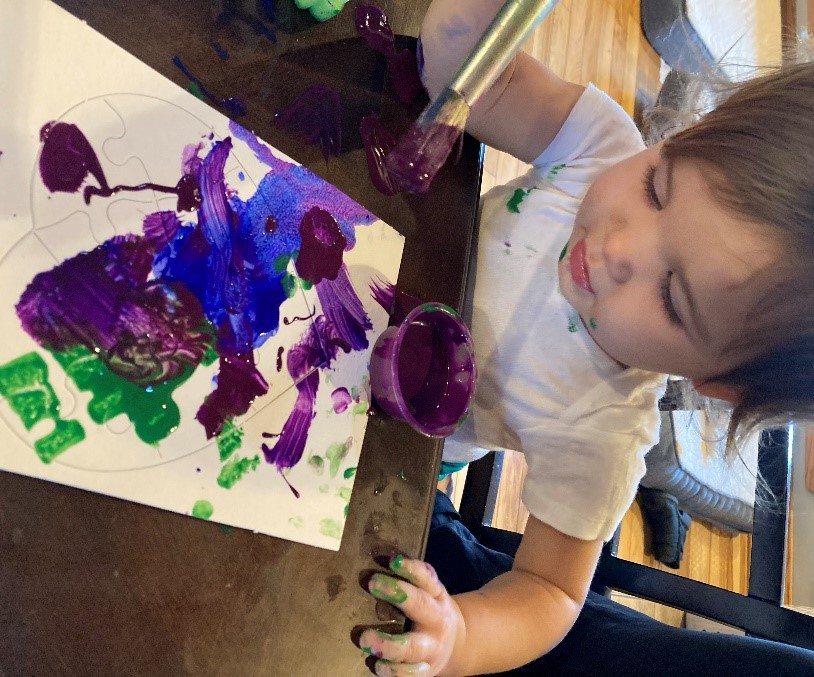
3. Once your child has finished painting, allow your puzzle time to dry.
4. Once the puzzle is dry, allow your child to put together their masterpiece puzzle - as many times as they want!
Talking points to consider:
- Talk to your child about the different colors of paint. Try having them identify each color individually.
- Have your child make a prediction about what happens when you mix two colors together - and then try it!
- Ask your child what each color makes them feel.
- Ask your child to tell you about their painting.
- Have your child identify something else that is the same color they are using. ("What else is blue?")
Show us what you created! Send us pictures at youthservices@balibrary.org.
Grades K-2: Pom Pom Picture Frame
Create a colorful picture frame for your favorite photo. Register for the February Grades K-2 Take-and-Make Kit here.
Your kit contains:
- One bottle of glue
- One wooden picture frame
- Pom-poms
Instructions:
1. Decide on a pattern for your picture frame: stripes, color patches, or random-rainbow! If you want, you can use a pencil and ruler to pattern your picture frame before you start.
2. Place small dots of glue on the frame, and press pom-poms down on the glue.
3. Once you're finished, let the frame dry for at least 1 hour.
4. Carefully remove the back panel, add a photo, and display!
Show us what you created! Send us pictures at youthservices@balibrary.org.
Grades 3-8: Styrofoam Printmaking
Learn the basics of printmaking and design your own art print with simple materials. Register for the February Grades 3-8 Take-and-Make Kit here.
Instructions:
1. Using the pencil, draw a design onto one of the foam plates. The marks you make with the pencil will show up in white. You will be unable to erase lines.
2. Squeeze some paint onto a tray.
3. Roll the paint onto your foam brayer.
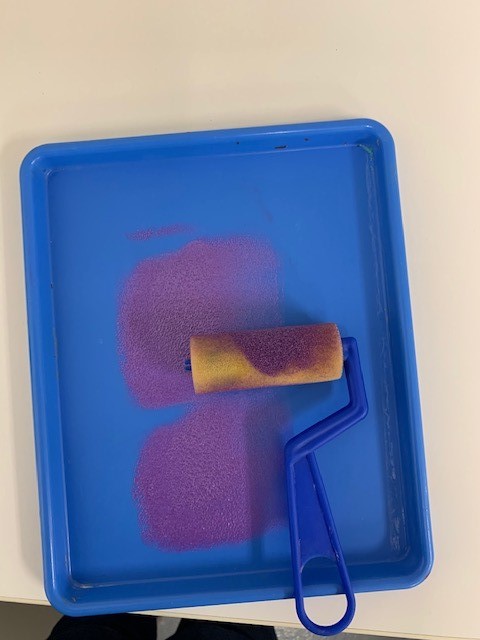
4. Using the brayer, cover your foam plate with paint. Press firmly onto the paint while you use the brayer, this will add more paint to your plate.
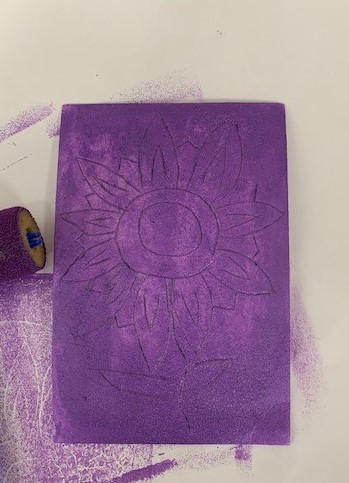
5. Place a piece of sulphite paper on top of the paint covered foam plate
6. Press down and rub all over the piece of paper. Try to get all of the corners.
7. Lift the paper up and see your print!
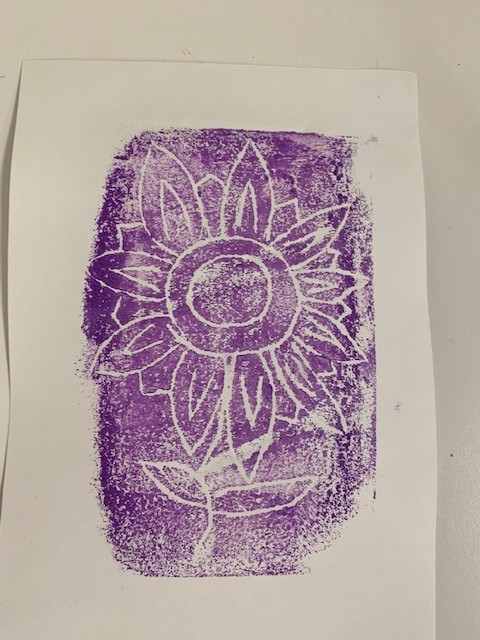
Tips:
- As you continue to make prints, you may need to go over the design again with your pencil.
- If the paint is very light on your print, try adding more paint to your brayer and pressing firmly down on the print as you roll the brayer.
- If you want more than one color on the print, roll paint on one section of the foam plate, wash the brayer, and then roll paint on another section of the plate.
Show us what you created! Send us pictures at youthservices@balibrary.org.
 Youth Services Librarian Allison
 -
And the Mock Caldecott Goes To...
You've checked out Mock Caldecott Kits, read the books, hosted discussions, and sent us your ballots in our first-ever community-wide Mock Caldecott Medal Vote. Five books were nominated, but only one will be crowned the Barrington Area Library's favorite picture book of 2020!
Here's a reminder of the nominees:

All Because You Matter written by Tami Charles, illustrated by Bryan Collier
Honeybee: The Busy Life of Apis Mellifera by Candace Fleming & Eric Rohmann
My Best Friendby Julie Fogliano & Jillian Tamaki
The Cat Man of Aleppo by Irene Latham and Karim Shamsi-Basha, illustrated by Yuko Shimizu
We Are Water Protectors by Carole Lindstrom, illustrated by Michaela Goade
And finally, we are pleased to share that the winner of the 2020 Barrington Area Library Mock Caldecott Medal is:
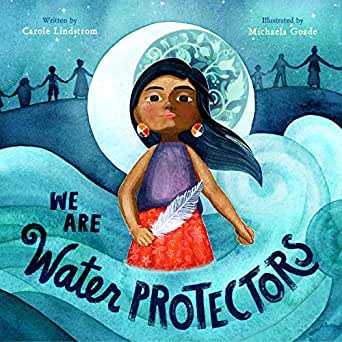
by Carole Lindstrom, illustrated by Michaela Goade
What a fantastic book! Great reading and voting, everyone. Thank you to all who participated!
Find out which book will win the real Caldecott Medal, awarded by the American Library Association, on Monday. You can even watch the Youth Media Awards announcements live at 8 AM (CST) - it's like the Oscars, but for people who love #KidsLit! (And don't mind waking up early!)
Find out more about ourMock Caldecott here.
 Youth Services Librarian Allison
 -
January Take-and-Make Kits
Bring home a fun new project! Sign up from our Library Calendar and pick up a kit through our Parking Lot Pickup service between January 11-22.
Toddler & PreK: DIY Activity Dice
Color and create your own movement dice game, then have fun rolling it again and again! Register for the January Toddler & PreK Take-and-Make Kit here.
Your kit contains:
- 1 cube-shaped box
- Velcro dots in two envelopes - keep them separated!
- Labels for the dice
- Con-Tact film
- Crayons
Icons used on dice labels made by Freepik from www.flaticon.comInstructions:
1. Assemble the cube box as your dice.
2. Have your child color the 6 Animal Action labels, 6 Song labels, and 6 blank labels. Decide together what the blank set will be. It could be types of dances, colors to seek and find, sounds to make - it's up to you!
3. Peel the backing off the Con-Tact film, then cover the front of the decorated labels to laminate them.
4. Place the 72 Velcro dots on the four corners of the back of each label. Place them as close to the corners as you can to ensure that the labels will line up. Take care to use only the Velcro from the envelope marked for the labels. The colored sticker on the envelope does not matter.
5. Place the 24 Velcro dots for the dice on the four corners of each side. Take care to use only the Velcro from the envelope marked for the dice. The colored sticker on the envelope does not matter. Some of the box's sides will be a little longer than the square labels, so it's okay if the Velcro are not precisely lined up with the corners.
6. Stick one set of labels to all sides of the dice, roll, play, switch, and repeat!
Show us what you created! Send us pictures at youthservices@balibrary.org.
Grades K-2: Design a Calendar
Personalize and decorate a calendar you can use the whole year. Register for the January Grades K-2 Take-and-Make Kit here.
Your kit contains:
- 9 colored pencils
- 1 sheet of stickers
- 1 blank calendar
- list of holiday dates
It might seems a little obvious, but the first piece to teaching kids about the calendar is to make sure they understand what a calendar is. A calendar is a series of pages that shows the days, weeks, and months of a particular year. It is a tool we use to help us keep track of the days, and it allows us to see when different events will happen.
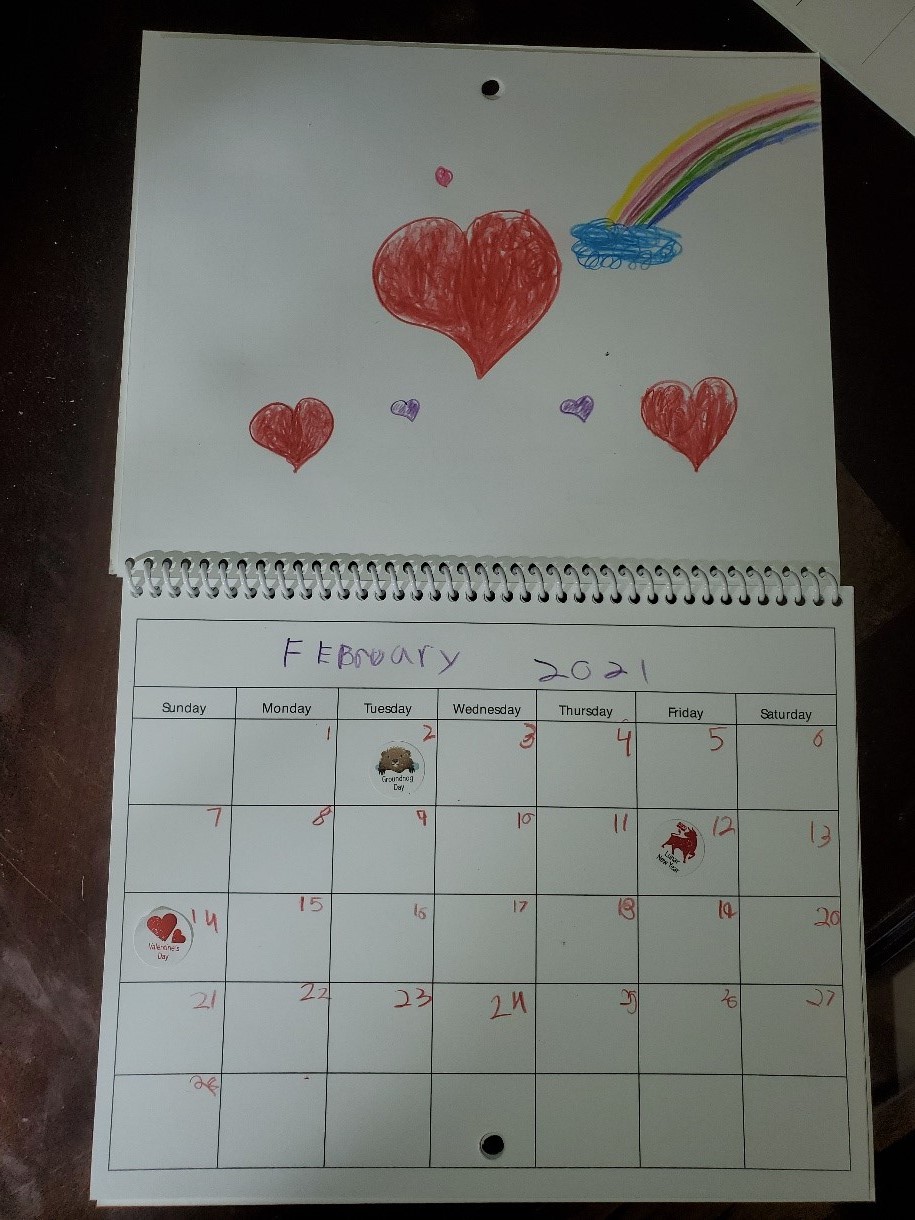
1. Flip open the calendar, in the long rectangle on the top of each calendar page, have your child label the months.
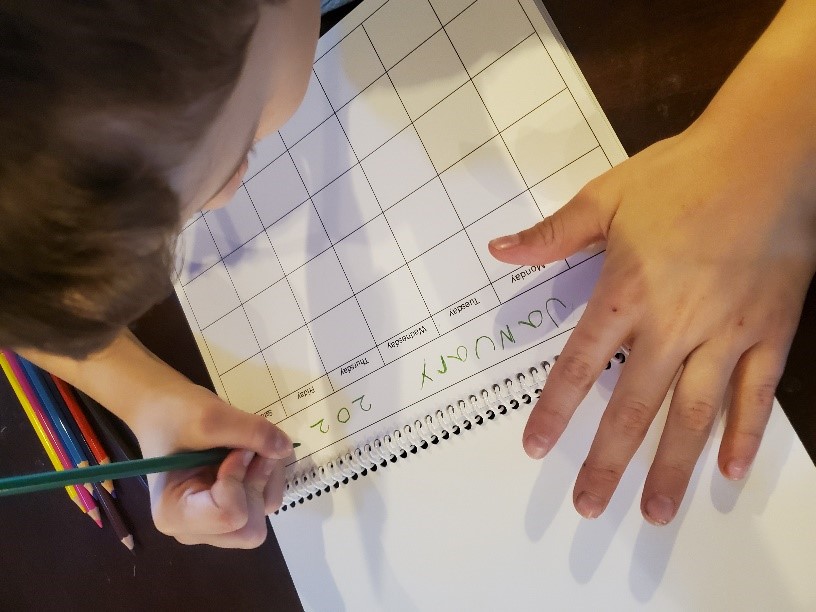
2. Have your child number the days of the month in the corresponding boxes.
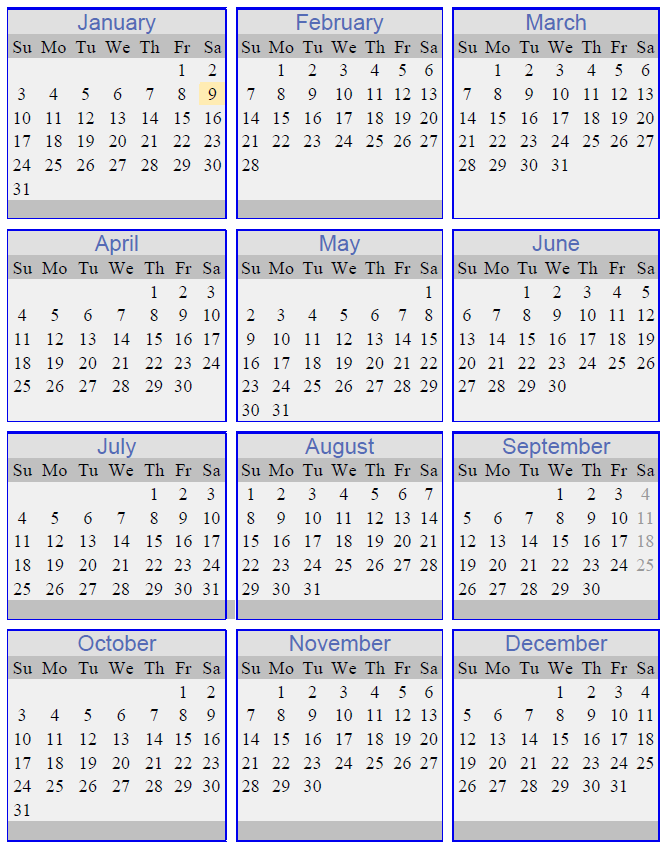
3. The holiday stickers correspond with the dates on the provided half sheet. Help your child locate the dates and add the correct sticker.
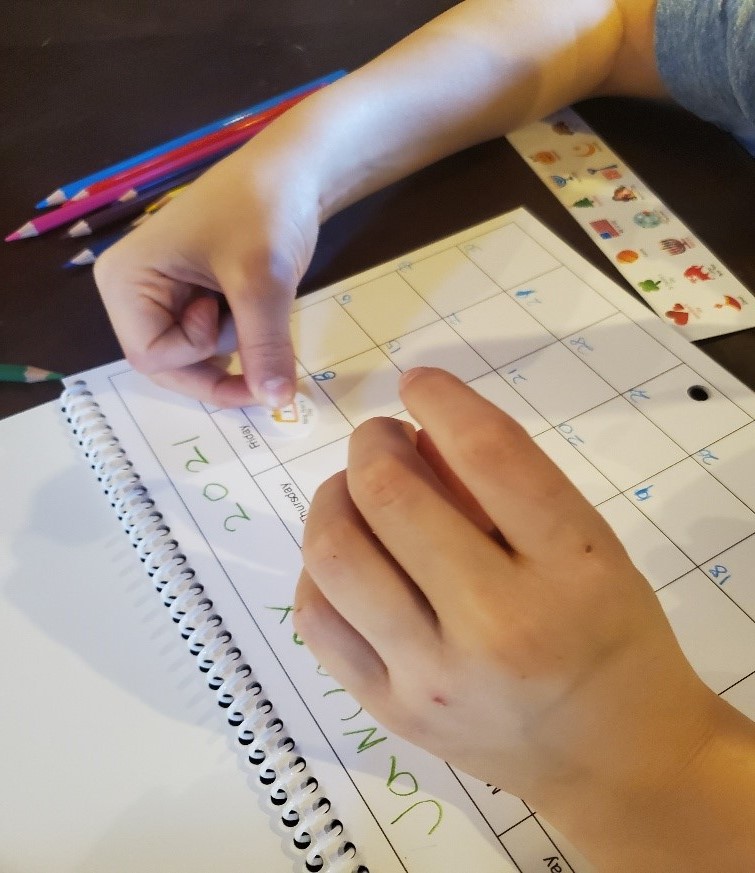
4. Allow your child to add dates that important to you and your family: birthdays, play dates, lessons, beginning of a new season, appointments, special plans, etc…
5. Use the provided colored pencils and have your child decorate the calendar however they choose. Feel free to use any material you have at home to add to the calendar design. Consider having your child cutting out images in unused magazines and make a collage.
More ideas to consider:
Research and discuss holidays that you do not celebrate.
Talk about how:
- Each square represents one day,
- A group of 7 days in a row is called a week,
- One week is equal to 7 days, and
- Each day of the week has a name.
- Show where the names of the days of the week are shown on a calendar.
- “If we are this day” (point to a square), “1 week later would be...” (point to square underneath).
- Ask them which square would be 2 weeks later, or 3 weeks later.
- Explain that a square above shows 1 week ago (in the past).
- Ask them which square would be 2 weeks ago or another number of weeks ago.
Show us what you created! Send us pictures at youthservices@balibrary.org.
Grades 3-8: Quirky Winter Terrarium
Create your own tiny winter scene, complete with snow and a miniature dinosaur! Register for the January Grades 3-8 Take-and-Make Kit here.
Your kit contains:
- Glass jar or cookie jar
- Container with instant snow
- 4 wooden blocks
- Glue dots
- Tacky glue
- 2 animal figurines
- 1 piece of greenery
1. Remove all of the items from the glass jar or cookie jar. Your kit will contain either a small glass jar with a gold lid or a cookie jar with a silver lid.
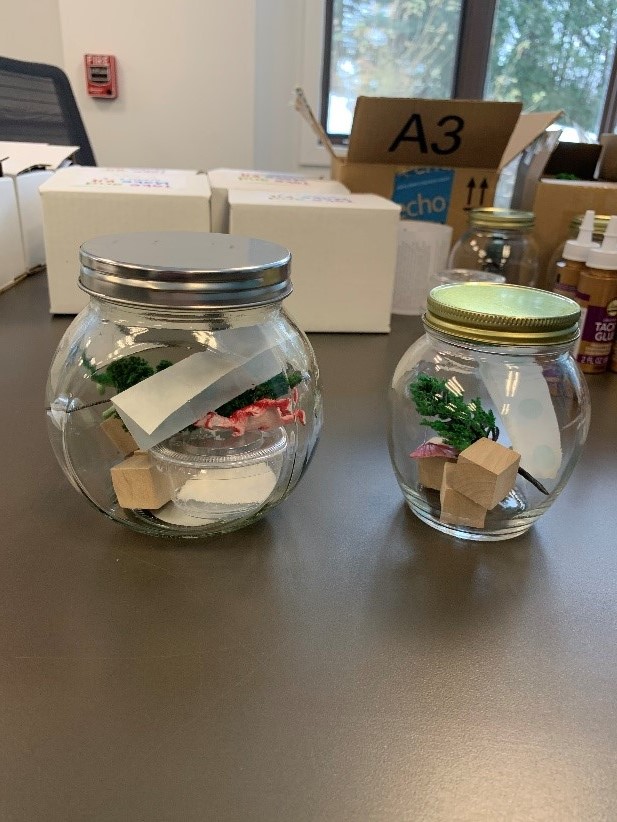
2. Attach your animal figurines to the wooden blocks with a glue dot. 1 or 2 glue dots should be enough to attach your dinosaur.
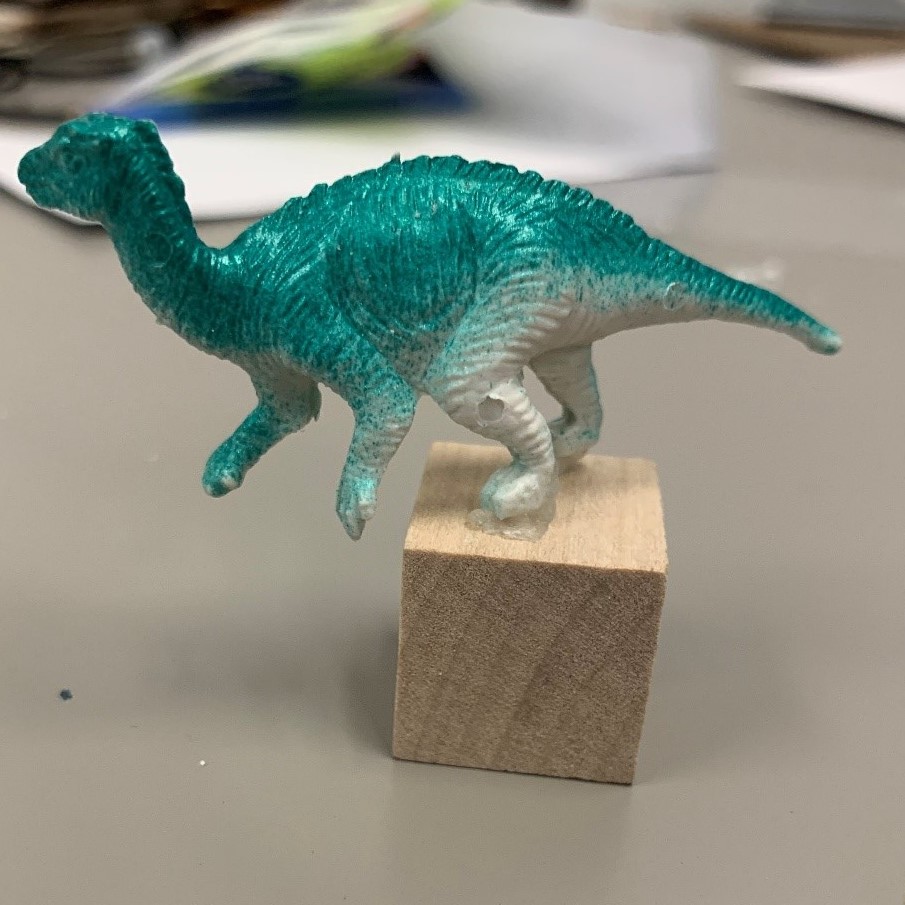
3. Attach your piece of greenery to one of the wooden blocks with a glue dot. You may need to secure the greenery to one of the sides of the block, instead of the top.
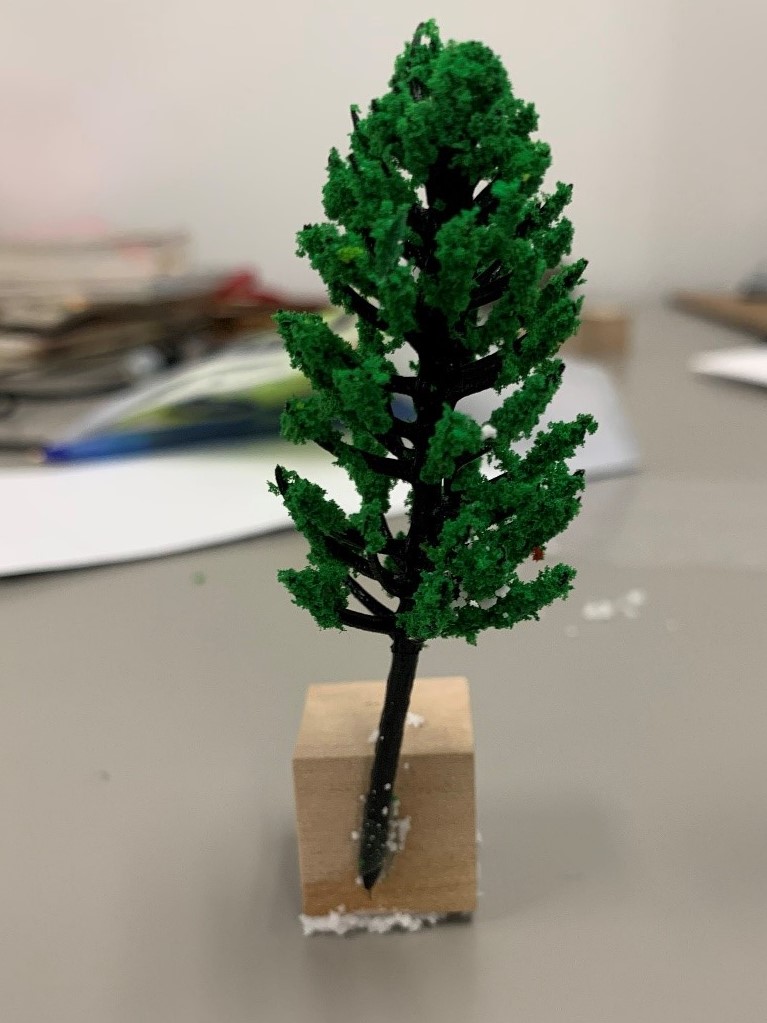
4. Have an adult cut the tip off the tacky glue bottle.
5. Using the tacky glue, glue your wooden blocks with the figurines and greenery to the bottom of the jar. If you have any remaining glue dots, you can also secure the blocks to the jar with a glue dot.
6. Let the glue dry completely.
Once you are done creating your scene, and the glue has dried completely, it is time to add your snow! Pay close attention to what type of jar you have. Depending on which jar you have, that will determine how much water you add to the instant snow.
7. Pour the instant snow into your jar.
8. If you have a cookie jar with a silver lid, add 1/3 cup of water to the jar.
If you have a glass jar with a gold lid, add 6 teaspoons of water to the jar.
Your snow will expand, and you will have finished your quirky terrarium! The instant snow will last about 2 weeks, after which it will start to shrink and gather moisture.
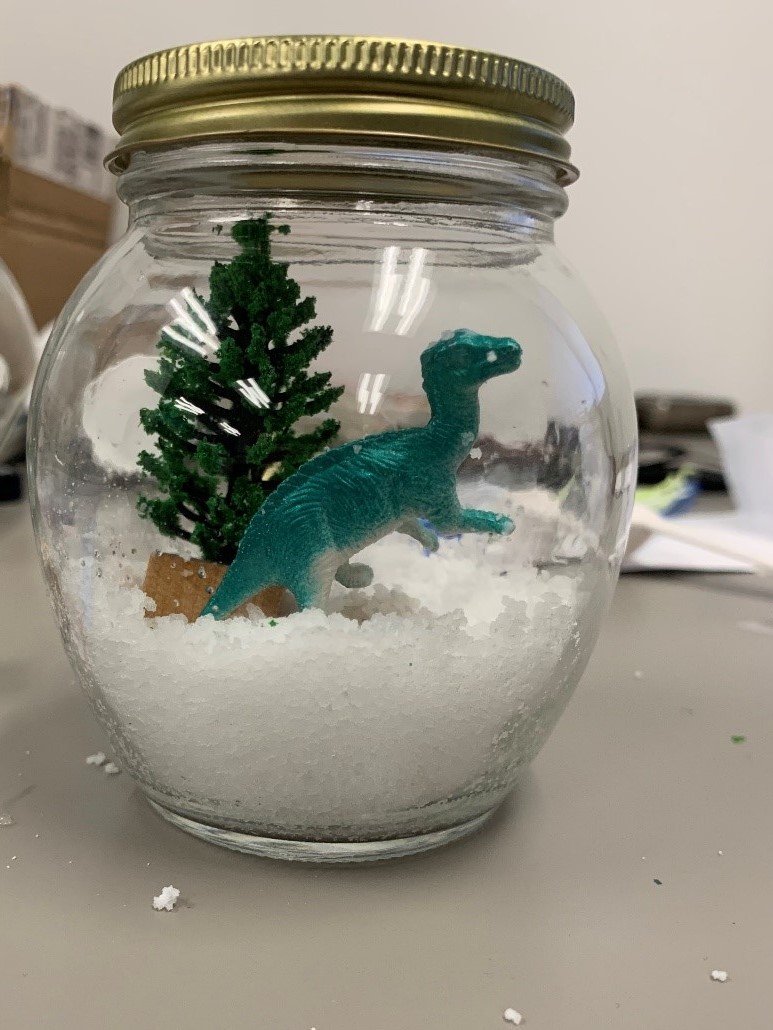
Show us what you created! Send us pictures at youthservices@balibrary.org.
 Youth Services Assistant Librarian Alyssa
 -
December Take-and-Make Kits
Bring home a fun new project! Sign up from our Library Calendar and pick up a kit through our Parking Lot Pickup service between December 7-18.

Toddlers and Preschoolers: Mail A Hug
Brighten someone’s day by mailing them a hug. Register for the Toddler/Preschooler Take & Make Kit here.
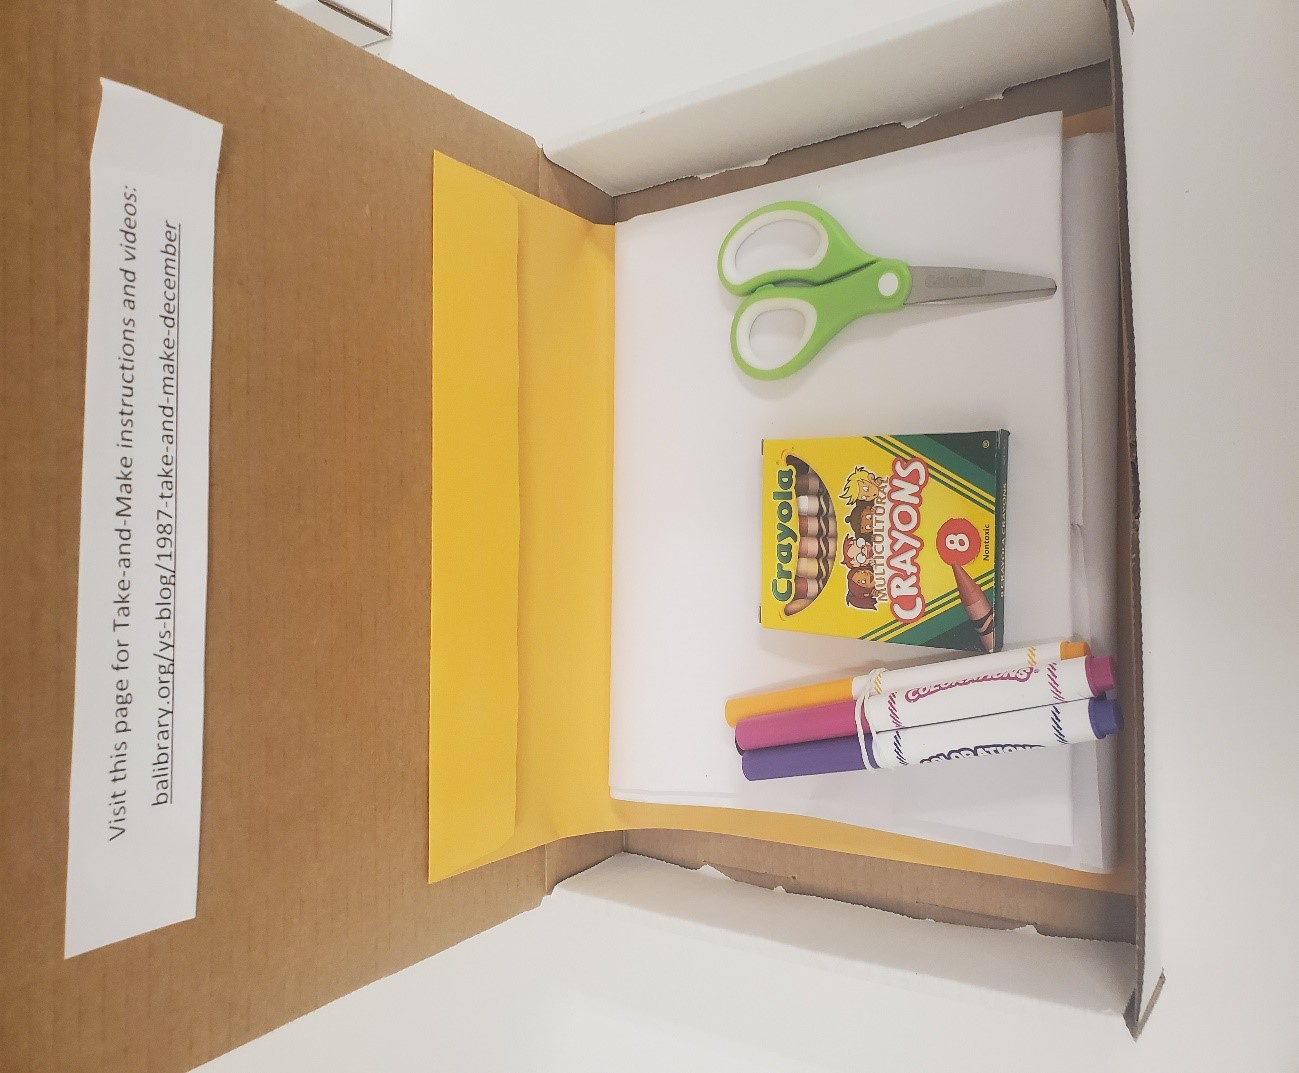
Instructions for Mailing a Hug:
1. Unfold the sheet of butcher paper.
2. Trace child’s head, arms and torso on paper.
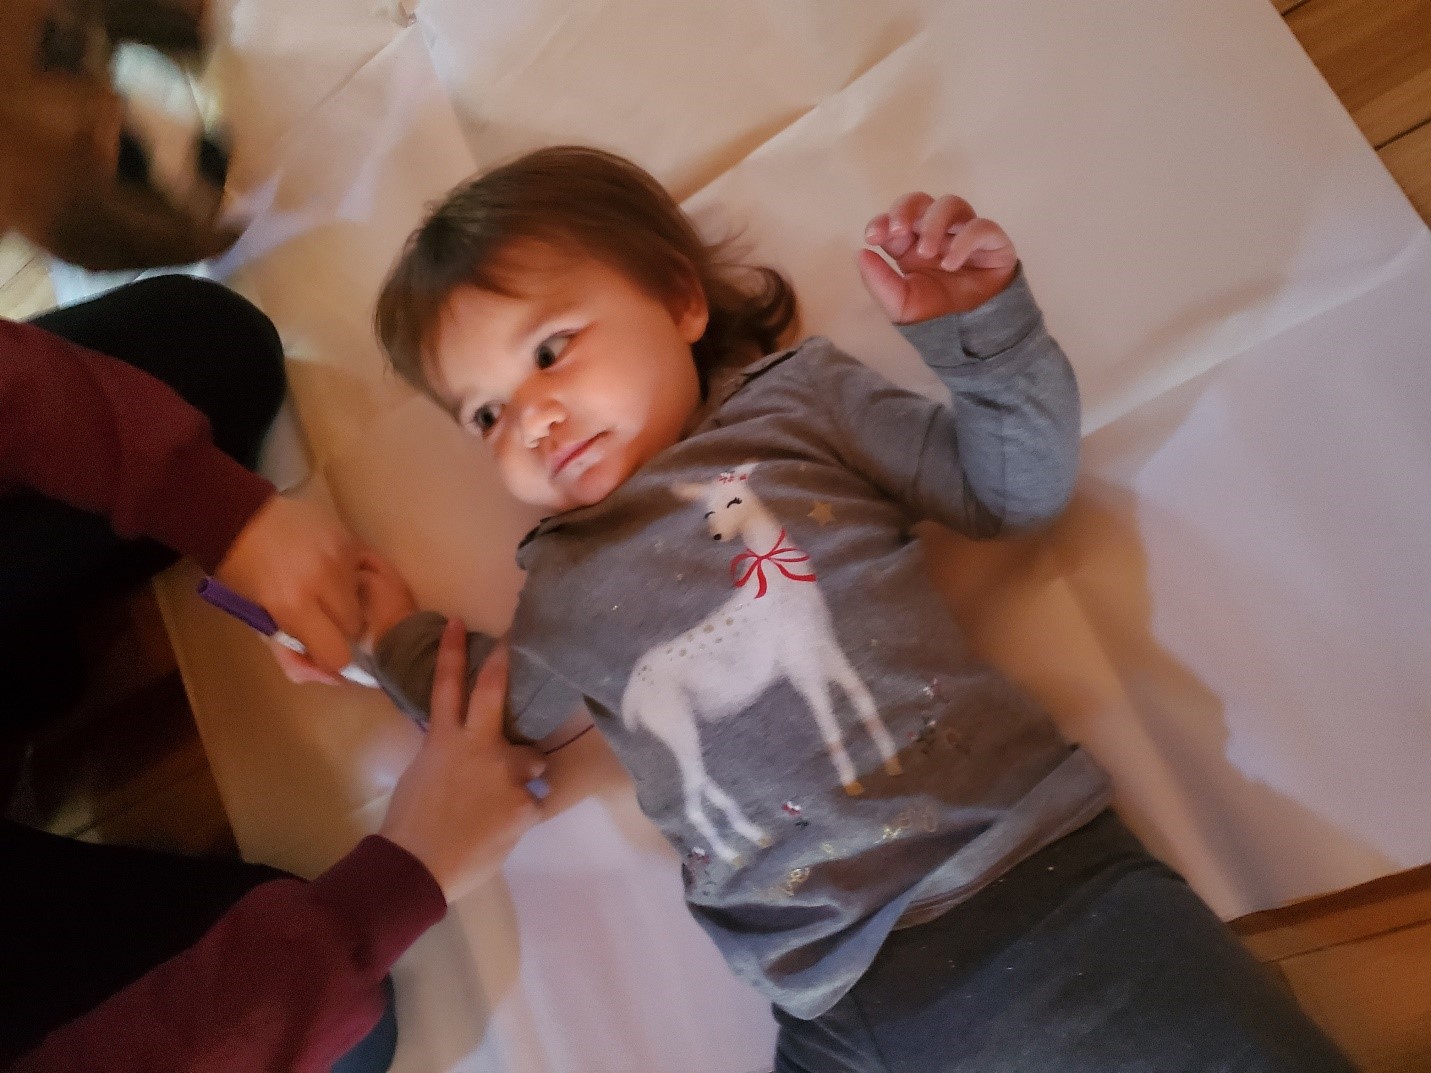
3. Allow your child to fill in and decorate their silhouette.
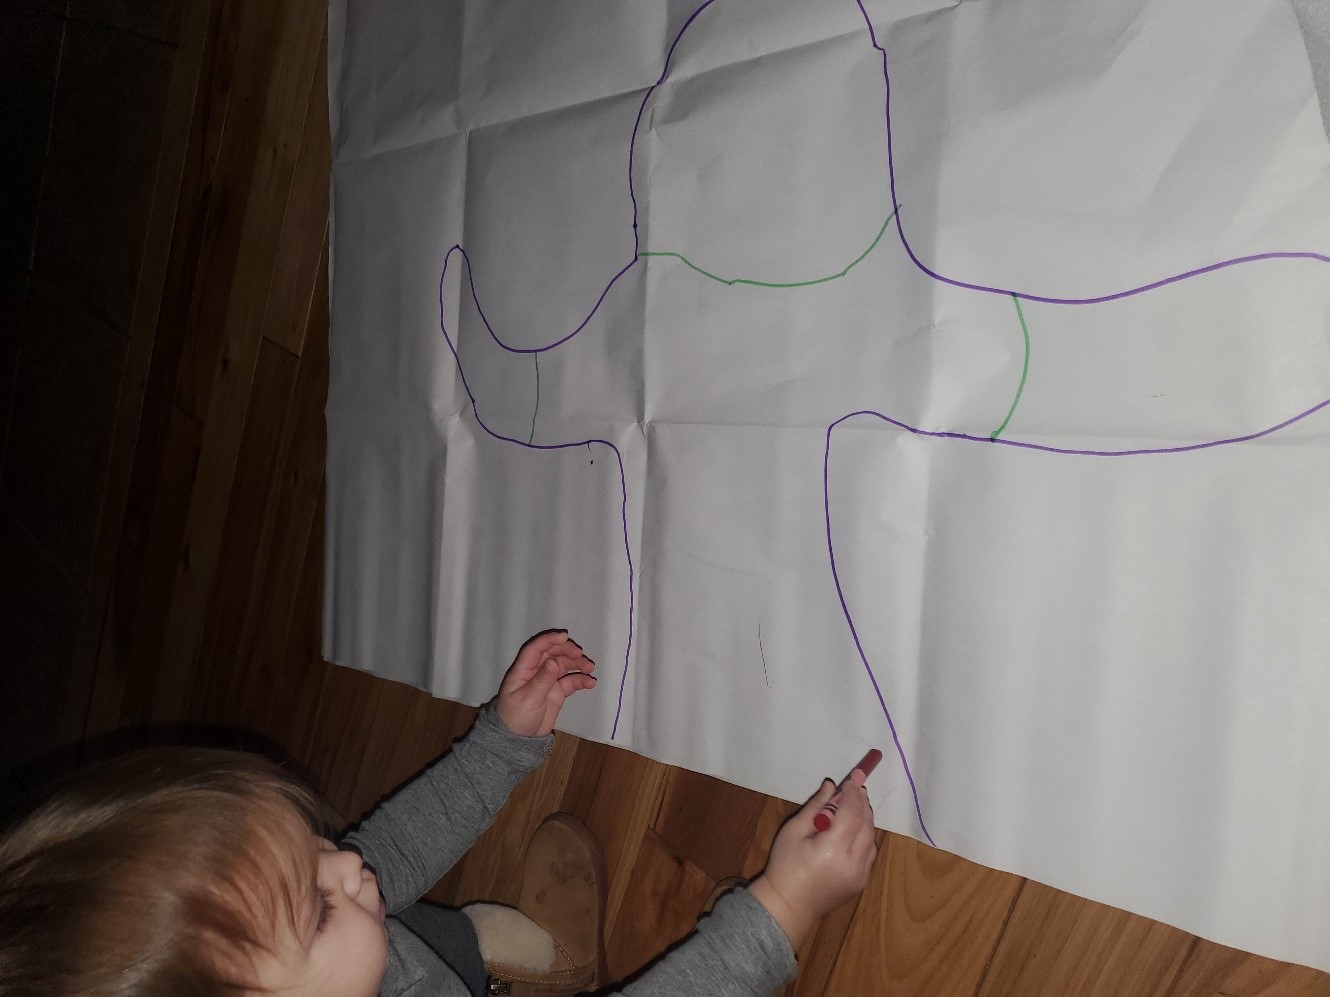
Ideas to consider: Talk to your child about different body parts and different colors.
Use the multicultural crayons to help your child determine the color of their skin and expand on the various skin tones we all have.
4. Cut around your child’s silhouette. If appropriate, allow your child to cut it themselves.
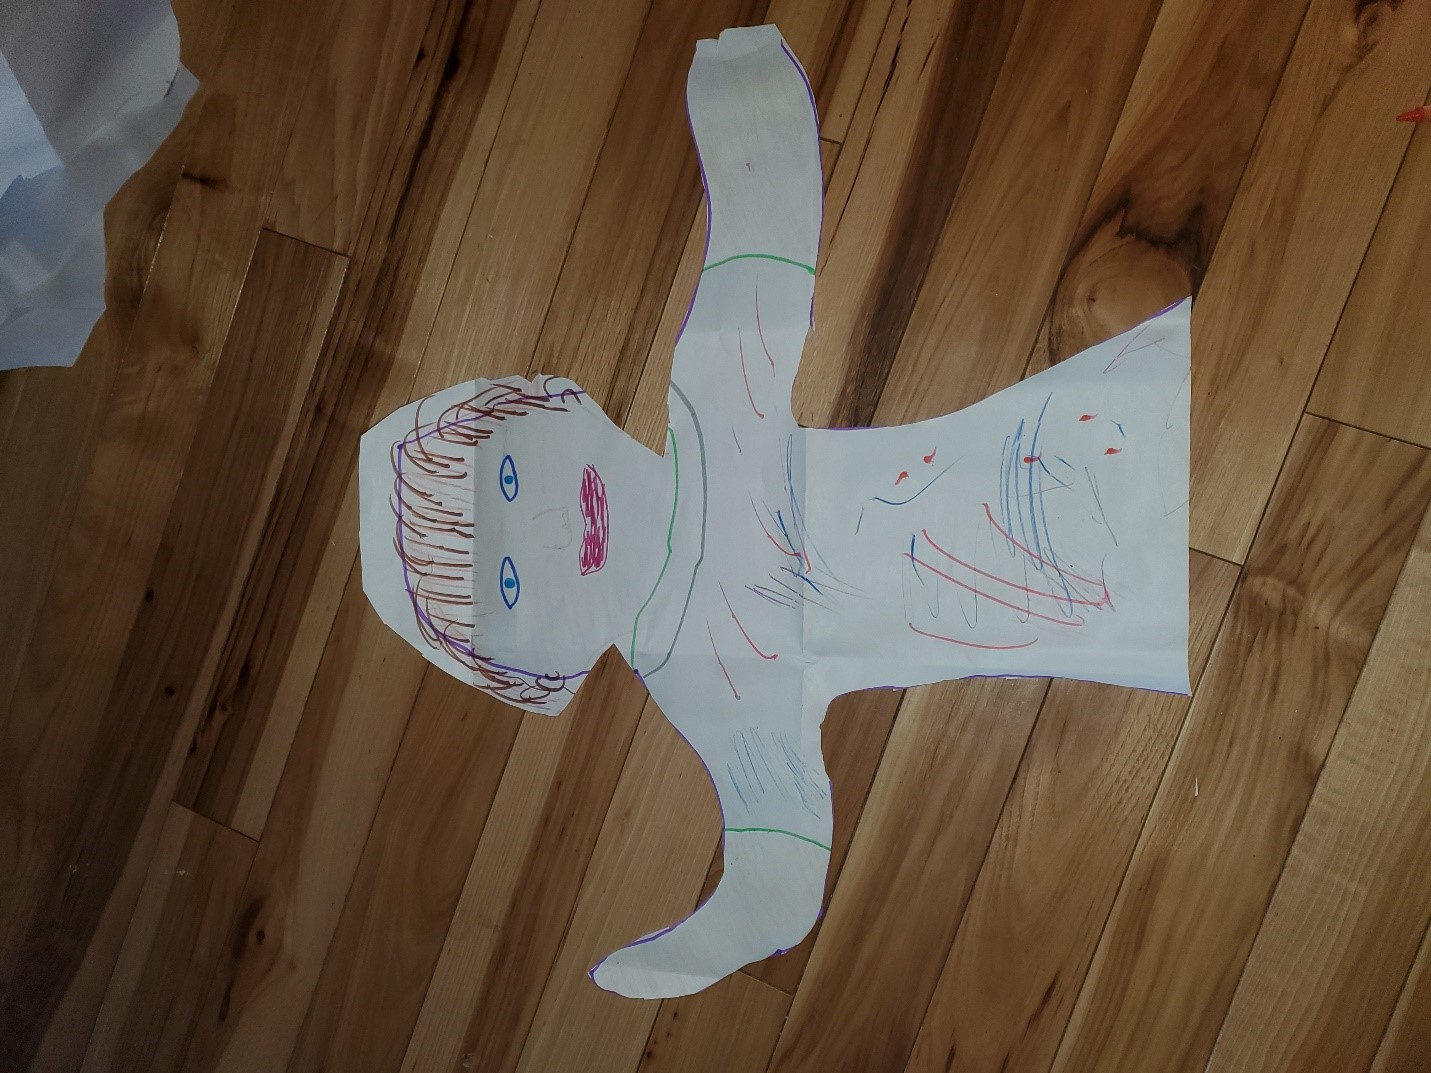
5. Fill in the provided letter (if desired).
See Venessa's original blog post that the inspired the Take & Make Kit!
Show us what you created! Send us pictures at youthservices@balibrary.org.

Grades K-2: Make Your Own Playdough
Make your own dough, then customize it with colors, scents, and textures. Register for the Grades K-2 Take & Make Kit here.
The kit has enough supplies to make two batches of playdough. Things you will need in addition to the items in the kit:
- 1 cup measuring cup
- 1/2 cup measuring cup
- 1/4 cup measuring cup
- 1 tablespoon measuring spoon
- warm water
- large bowl & mixing spoon
Instructions for 1 batch of playdough:
1. Measure 1 cup of the flour and pour into a large bowl.
2. Measure 1/4 cup of the salt and add to bowl.
3. Measure 1 tablespoon of cream of tartar and add to bowl.
4. Mix dry ingredients.
5. Measure and add 1 tablespoon of oil.
6. Measure and pour 1/2 cup of warm water into bowl.
7. Stir until the mixture combines and thickens. Switch to your hands to continue kneading to make a smooth dough.
8. Optionally, add several drops of food coloring, at least 15 drops to get a vivid color. Knead well with hands until no streaks remain.
9. Optionally, add some of the provided glitter.
10. Optionally, add some of the provided colored rice, tinsel, or anything else that might provide a unique sensory experience.
11. Optionally, add a drop of vanilla extract or essential oils for another sensory experience.
Watch the how-to video here:
Show us what you created! Send us pictures at youthservices@balibrary.org.
Grades 3-8: Pendulum Art
Make a one-of-a-kind painting when gravity and art combine in this STEM based experiment. Please note, this project can get messy! Register for the Grades 3-8 Take & Make Kit here.
Things you will need in addition to the items in the kit:
- Tape
- Ruler
Instructions for Pendulum Art:
1. Take the items out of the box.
2. Using the pencil, poke a hole in the bottom of one of the Styrofoam cups.
3. Poke 2 holes in the top of the cup directly across from each other.
4. Poke another 2 holes at the top of the cup directly across from each other.
5. Fold 2 paperclips into a W shape.
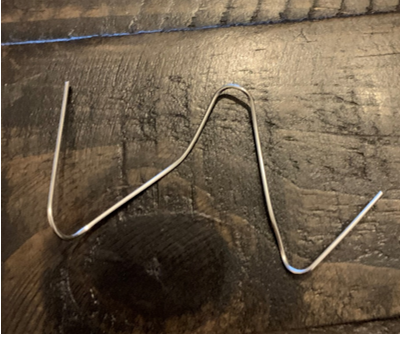
6. Tie one of the pieces of string to a washer.
7. Slide the washer and string through one of the bent paper clips so that it is hanging in the middle of the W.
8. Insert the paper clip and washer with string into two of the holes at the top of the cup.
9. Insert the 2nd paper clip into the remaining two holes. You may need to bend the ends of the paper clip a little to secure it around the cup. You have now made your pendulum!
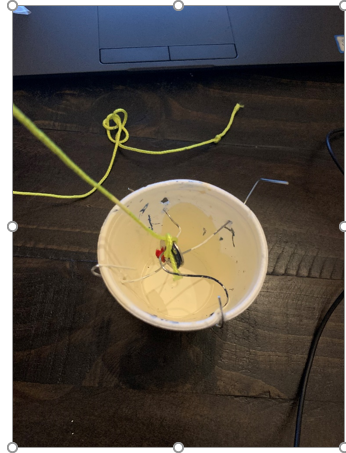
10. Spread the newspaper on the floor. Get approval from an adult about where you can make your painting. It will be messy!
11. Tie the pendulum to the wooden dowel
12. Tape the wooden dowel between 2 chairs or 2 tables
13. Place a sheet of cardstock below your pendulum and on top of the newspaper.
14. Start out by having the cup about 6 inches from the ground. You can adjust the height later.
15. Measure a 2 to 1 ratio of paint to water into one of the Styrofoam cups. You can start with 10 ml water and 20 ml paint.
16. Mix paint and water together. The paint should be fairly runny.
17. Cover the hole in the bottom of your pendulum with your finger and pour the paint into the cup.
18. Swing back the cup and let your pendulum fly! Paint should start to drip out of the cup.
19. Try swinging the pendulum in a circular motion.
*If your paint is not coming out of the cup, try adjusting the paint and water ratio. We started with a 2 to 1 ratio. Try adding a little more water to the mixture slowly and then a little more paint if needed.
As you make your pendulum paintings, experiment! What happens if….
- You adjust the paint and water ratio?
- Poke another hole in the bottom of the cup?
- Adjust the height of the pendulum?
- Add more washers to the pendulum?
- Add another color to your painting?
Watch the how-to video here:
Show us what you created! Send us pictures at youthservices@balibrary.org.
Family: Pom-Pom Party
For December only, enjoy a special box with an activity for everyone. Transform yarn into colorful pom poms for decorating gifts, trees, mantels, or yourself! Register for the Family Take & Make Kit here.
In addition to the Take & Make Box, you will need one sharp pair of scissors.
Directions to make a pom-pom:
1. Select a yarn color (or two, or three!) and a pom-pom maker. (There are four different sizes.)
2. Pull one half of the pom-pom maker away from the white circle. You should see a crescent shape now, pointing away from the main pom-pom maker.
3. Wrap yarn around the crescent, many times. The more yarn you use, the thicker and fluffier the pom-pom will be.
4. Once it's pretty thick, cut the end of the yarn. Don't stress about the end of the yarn - you can trim it later if needed.
5. Push the crescent, now wrapped up in yarn, back into the center of the pom-pom maker.
6. Pull the other half away from the center, and wrap this crescent in yarn. Try to do about the same amount of yarn, but don't worry about making it perfectly even.
7. Once both sides look about the same thickness, cut the yarn again, and fold up the crescents towards the middle. It should now look like a disc with fuzzy sides.
8. Find the seam running under the yarn strands. Wiggle your scissors into that little gap, and cut the yarn wraps across. The yarn should start fluffing out, but it shouldn't fall out of the pom-pom maker. Repeat on the other half.
9. Set aside the pom-pom maker, now bursting with yarn strands. Grab the extra yarn (or string you might have) and cut a short length, 6-8 inches or so.
10. Pull the thread through the pom-pom maker gap that you just cut along. Pull tightly and tie on the other side. Double or triple knot to keep it secure.
11. Pull the crescents away from the pom-pom.
12. Pull the two circles apart, so now your pom-pom is free.
13. Trim any long strands if you'd like to make the pom-pom as round as possible.
Watch the video to see how it's done:
Show us what you created! Send us pictures at youthservices@balibrary.org.
 Youth Services Assistant Librarian Alyssa
 -
Virtual Escape Room: Thanksgiving Escape
 Photo by Davies Designs Studio on Unsplash
Librarians Ann and Demitra can't get enough of virtual escape rooms. So we created another one for kids, friends, and family to enjoy, just in time for Thanksgiving! Work together to figure out clues, solve puzzles, and decode the cyphers to escape your Great Aunt Gertrude's house before Thanksgiving dinner.This escape room is designed for grades 3-8, but kids and adults of all ages can enjoy it. This is a great group activity to do over Zoom with friends and family. Solve the escape room as a group, by having the host of the Zoom meeting share their screen for everyone to see.
Ready to start? Click here to access the escape room.
Click here to access the answer key.
Want more? Find links to our other escape rooms below:
Looking for more fun activities? See a list of the library's upcoming events for kids.
 Youth Services Librarian Ann
 -
November Take-and-Make Kits
Bring home a fun new project! You can now register to pick up a Take-and-Make Kit from the Youth Services desk. Here are the instructions for each kit:
Toddlers and Preschoolers: Paint with Pom Poms
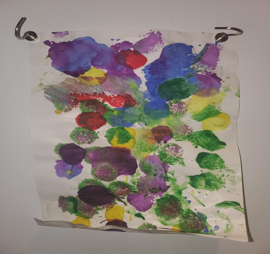
Pompoms are great for fine motor play. Before beginning the painting activity, you may consider taking an opportunity to allow your child to explore the texture of the pompoms. Additional activities to consider when allowing your child to manipulate the pompoms; providing spoons, tweezer and/or the provided clothes pins to allow for an unstructured play activity. If you wanted to add an additional educational activity you can add cotton balls and help your child create a pattern or use the pompoms to teach counting or one-to-one correspondence.
Let’s get started!
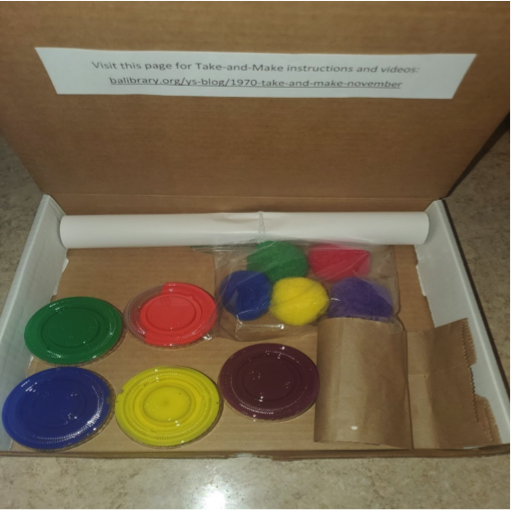
Unroll the rolled paper and place it on a flat surface.
Pinch one clothes pin, to each pompom. This is a great fine motor activity for your child to try.
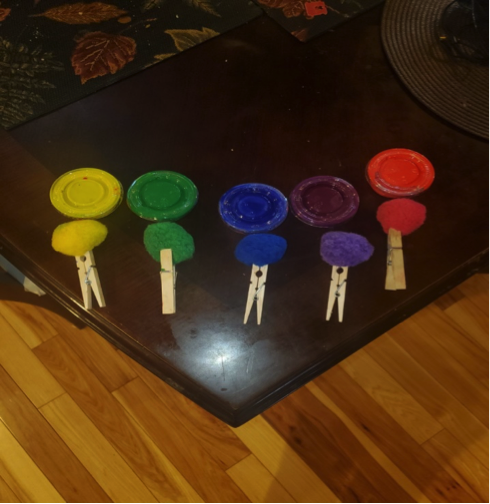
Have your child match the color of the pompom to the color of the paint. This is a wonderful opportunity to work on color recognition. (It will also help remind your child which pompom goes with which paint).
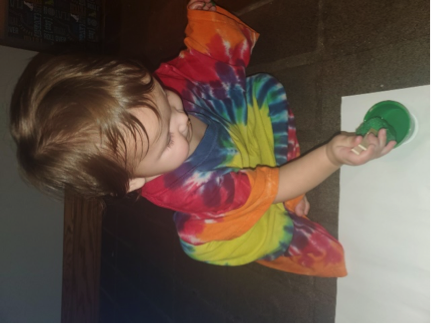
Now that you and your child have created pompom paint brushes, let your child explore making dots and creating their master piece!
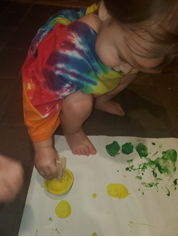
Register for a Toddler/PreK Kit here.
Grades K-2: Paper Lanterns
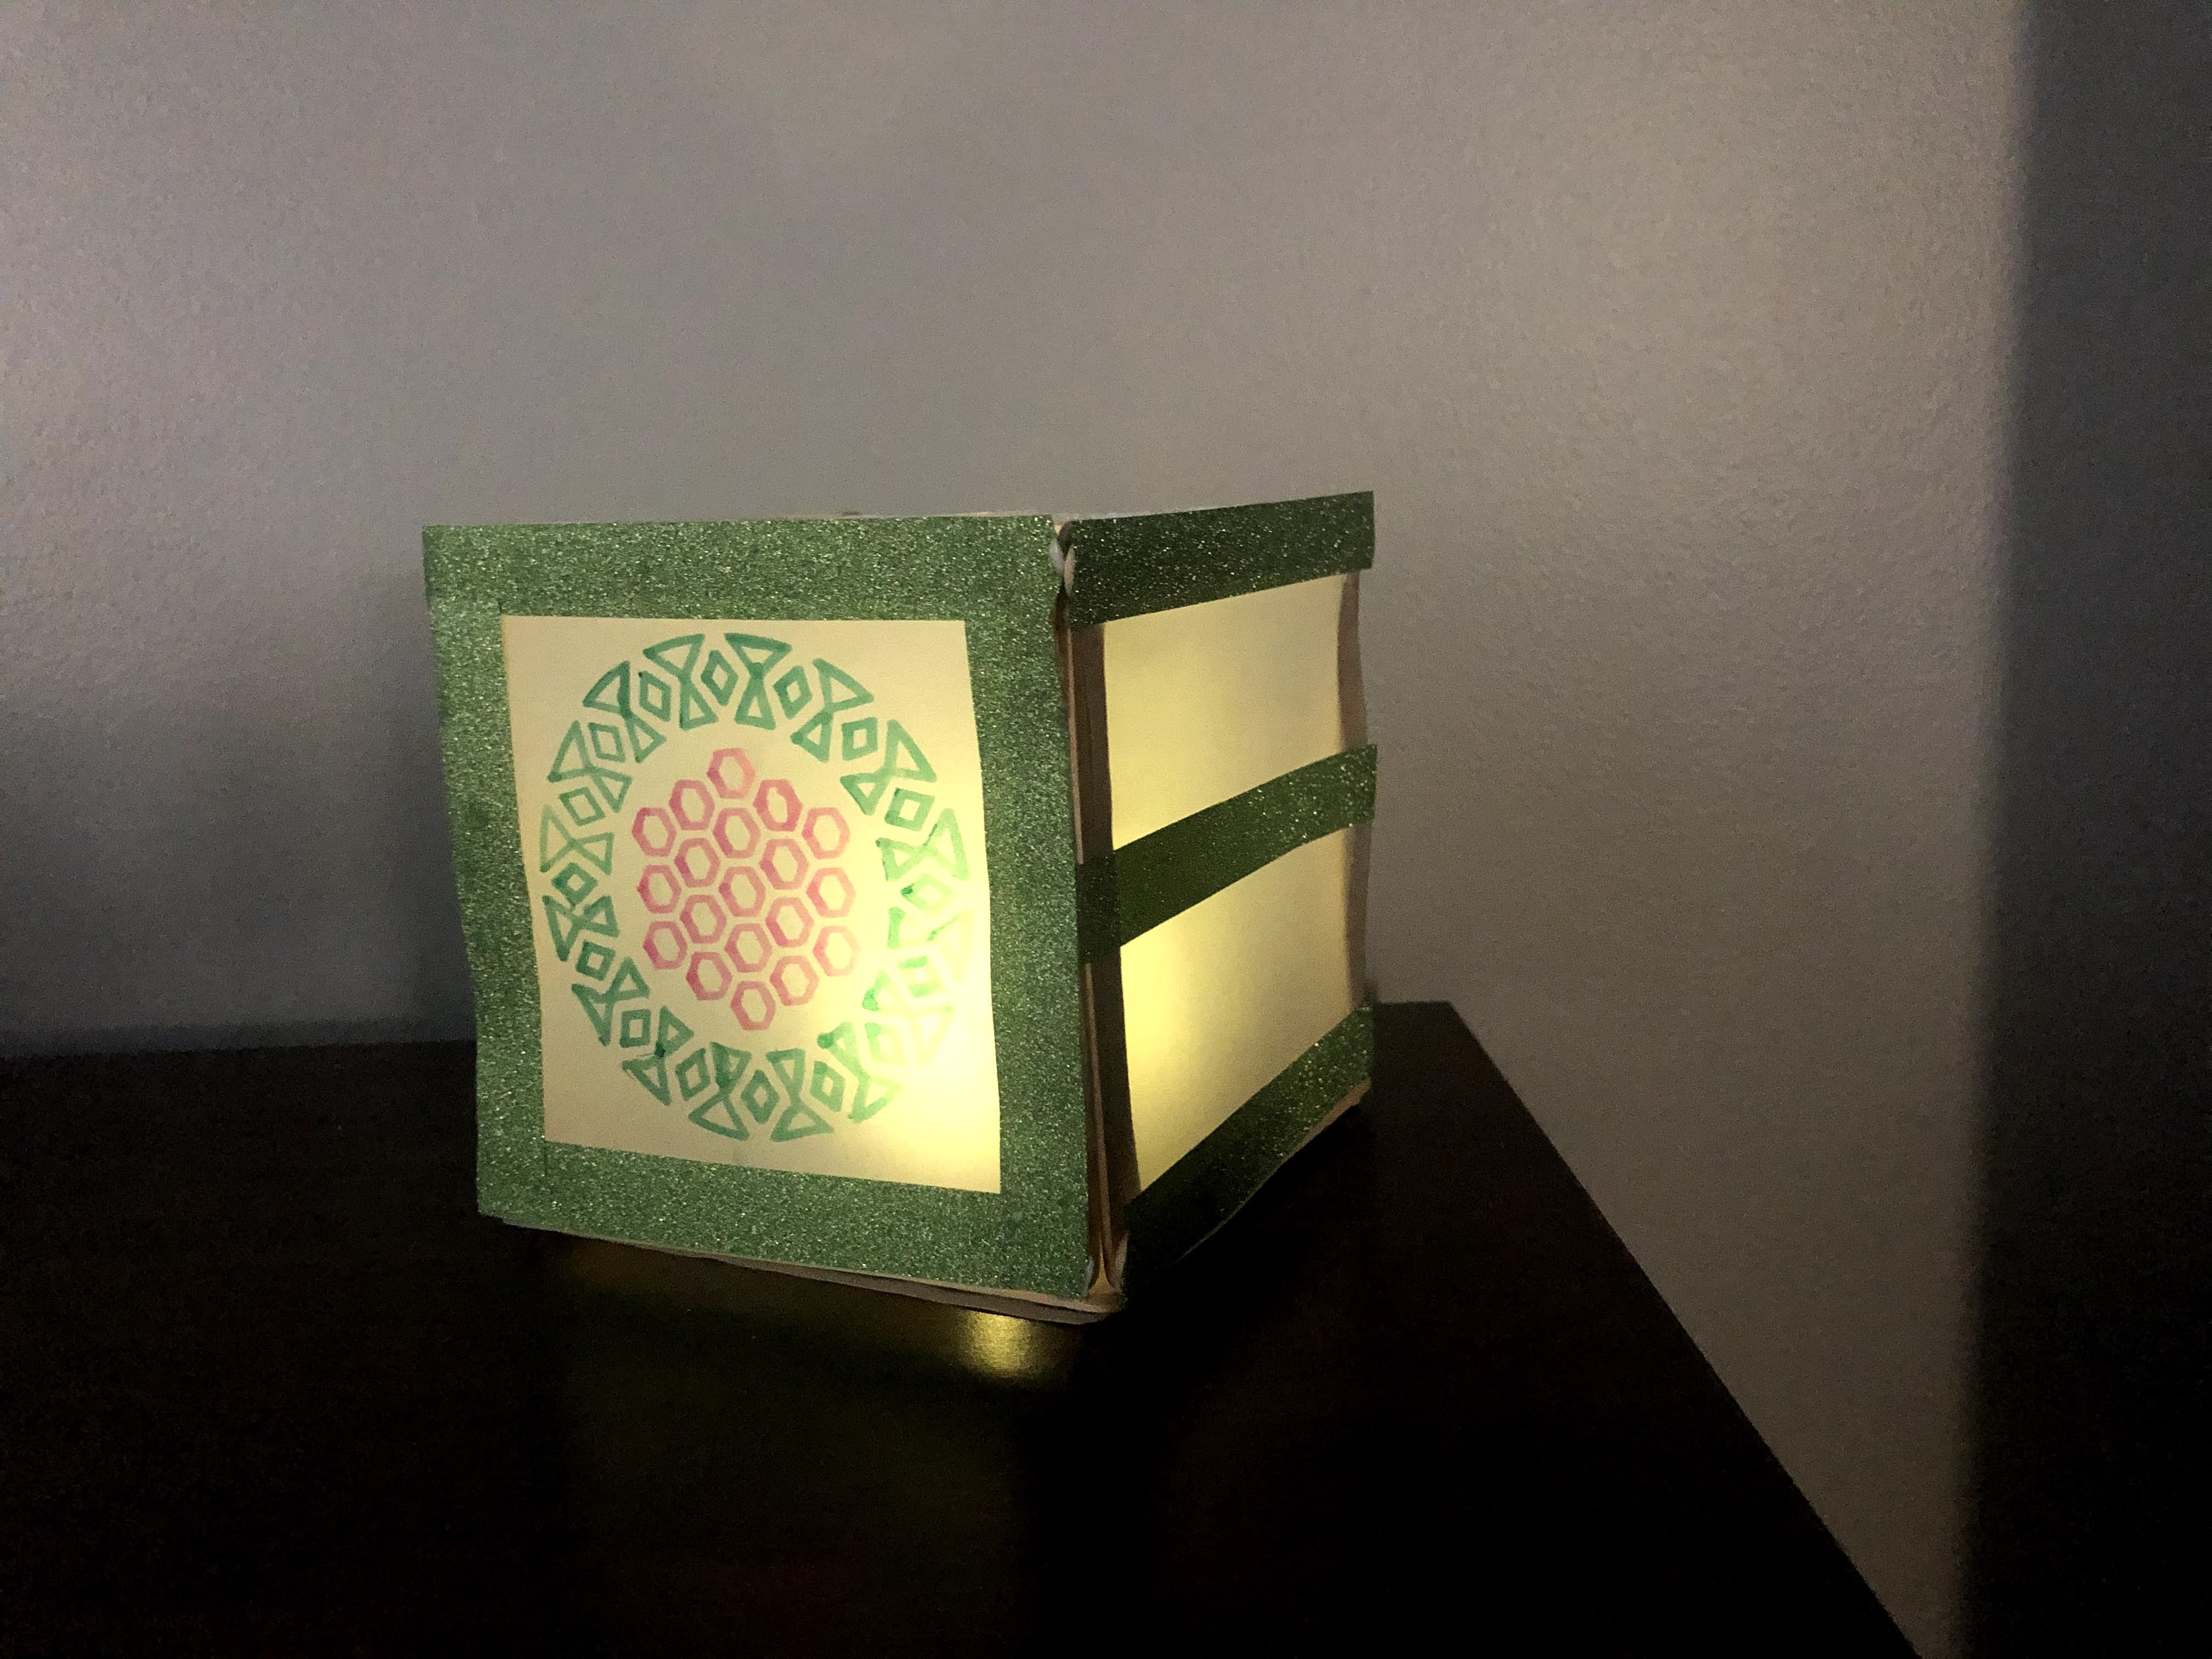
Things you will need in addition to what is included in the kit:
- Scissors
- Ruler
- Pencil
Instructions:
1. Take Items out of the box.
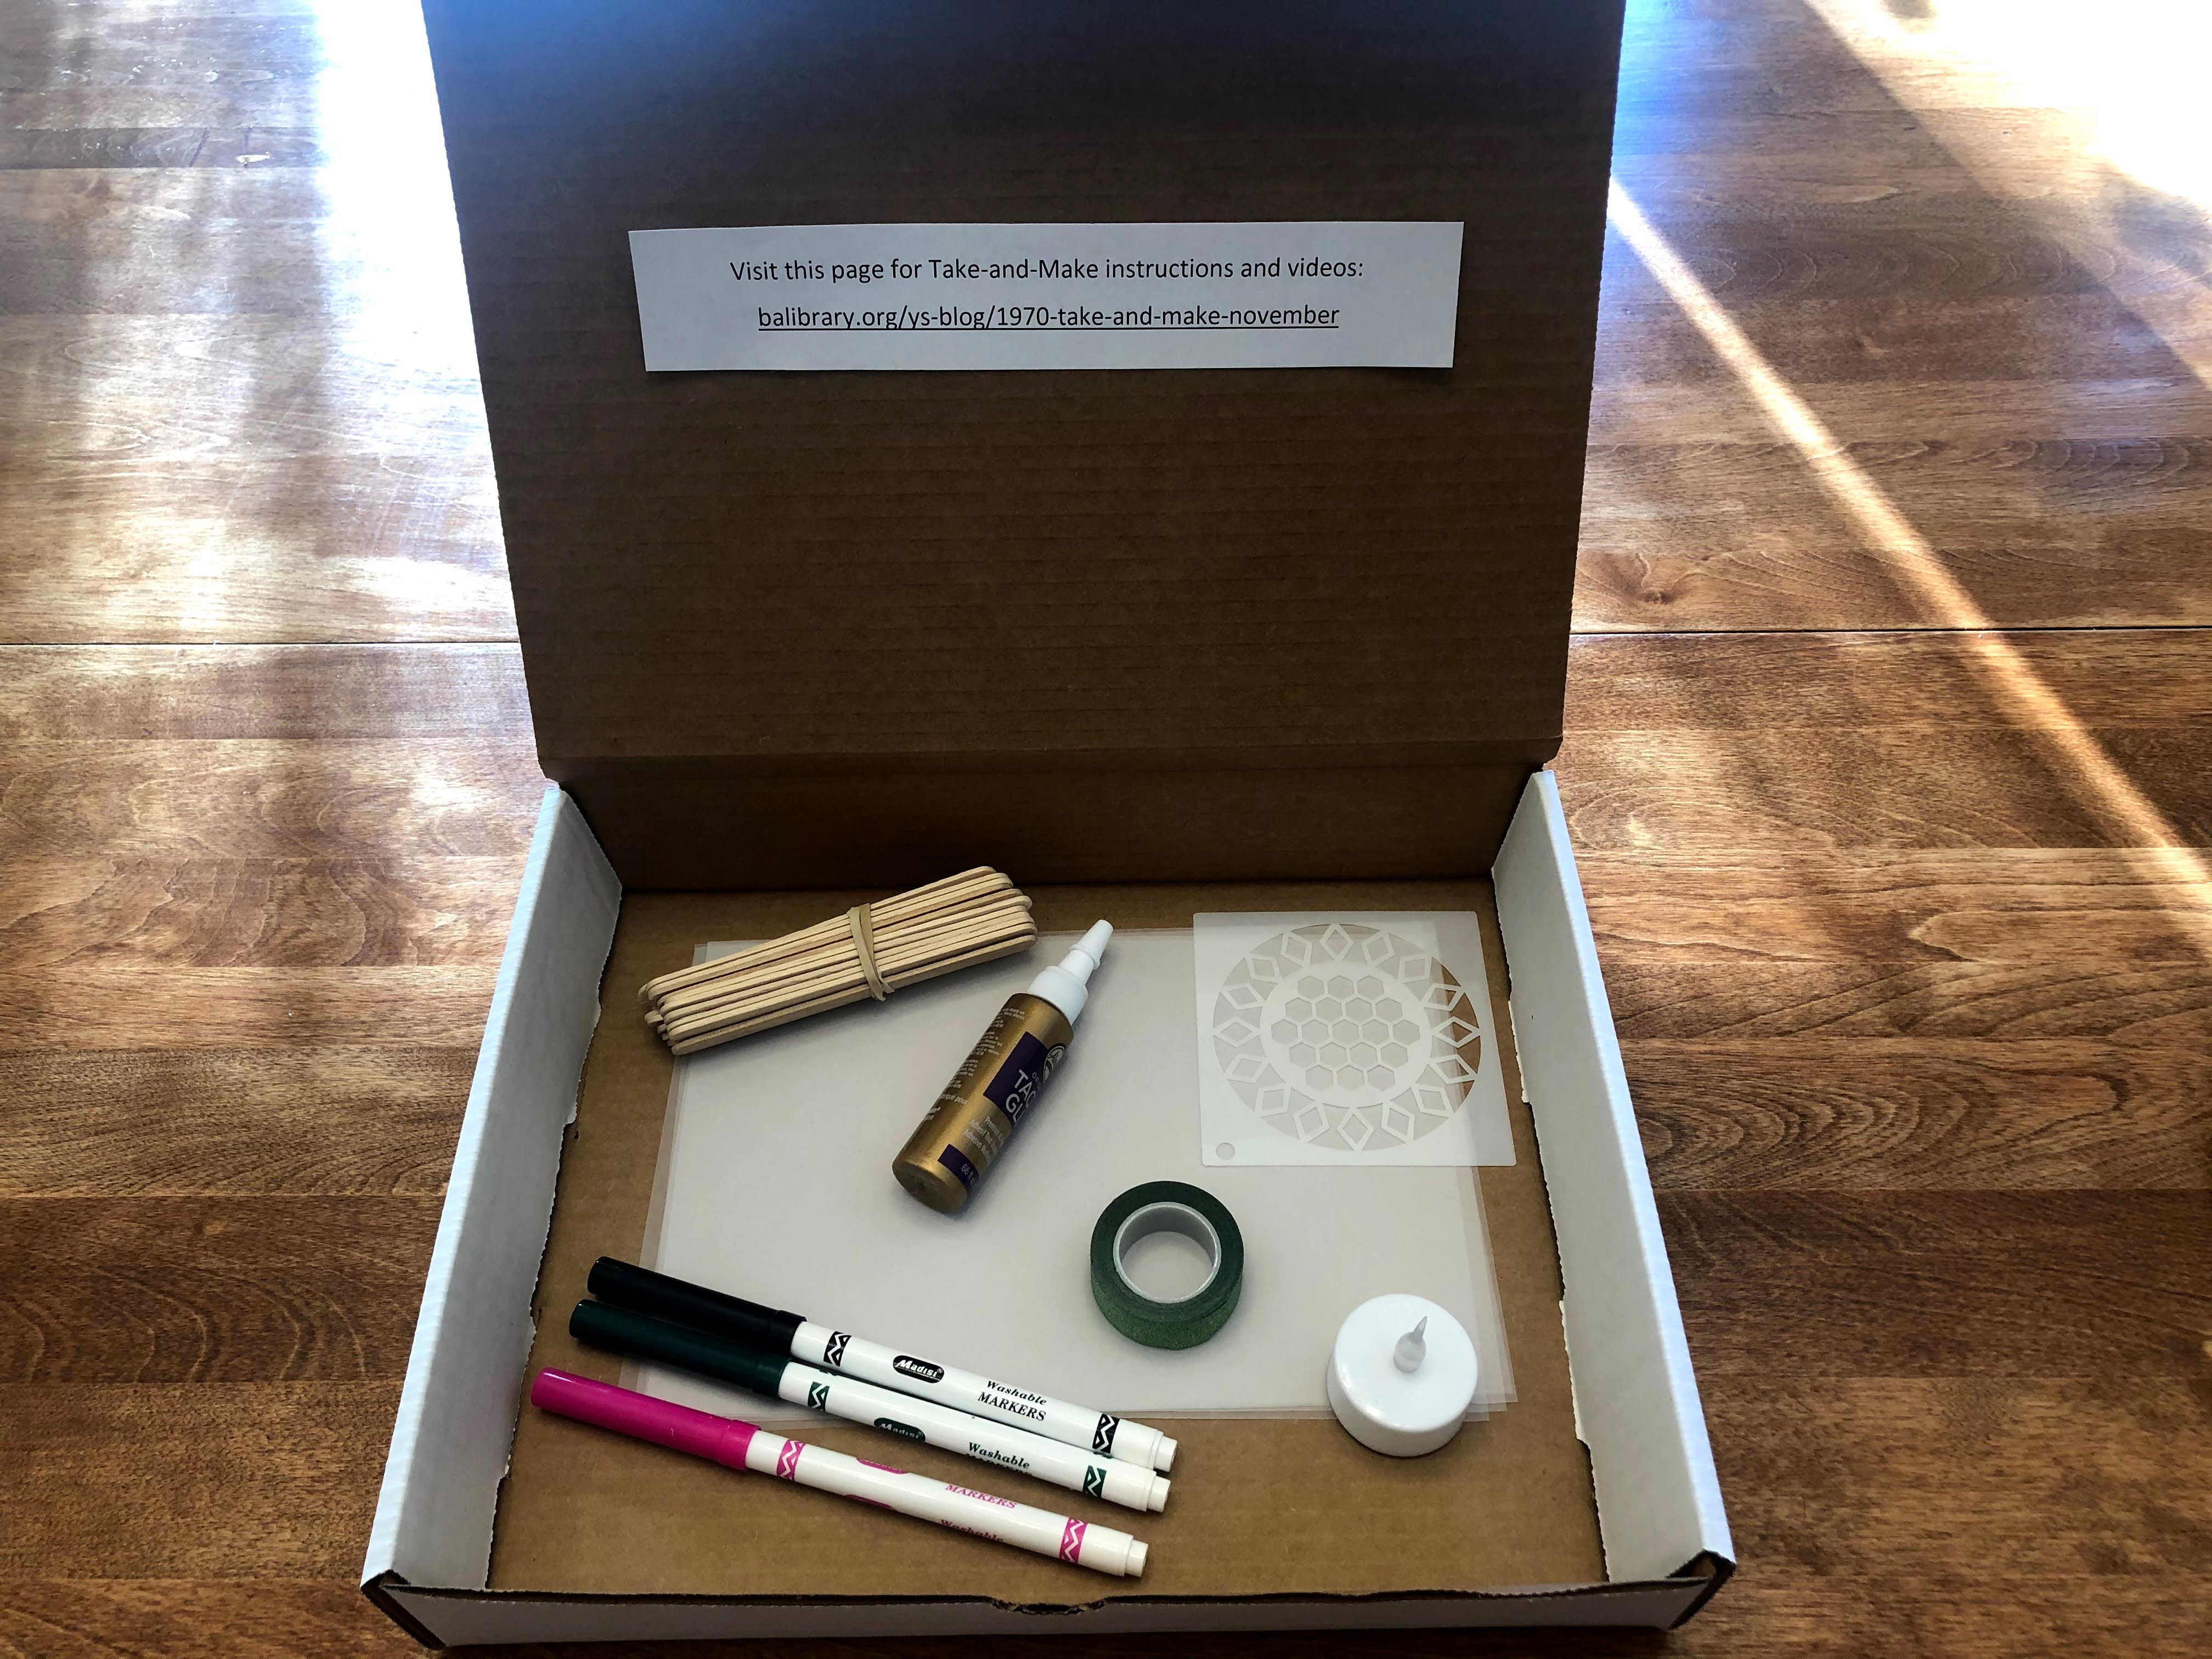
2. Gather extra supplies – scissors, ruler, and pencil.
3. Uncap the glue and snip the top of the applicator. Ask an adult to help!
4. Remove the rubber band from the craft sticks.
5. Create a square using 4 of the craft sticks.
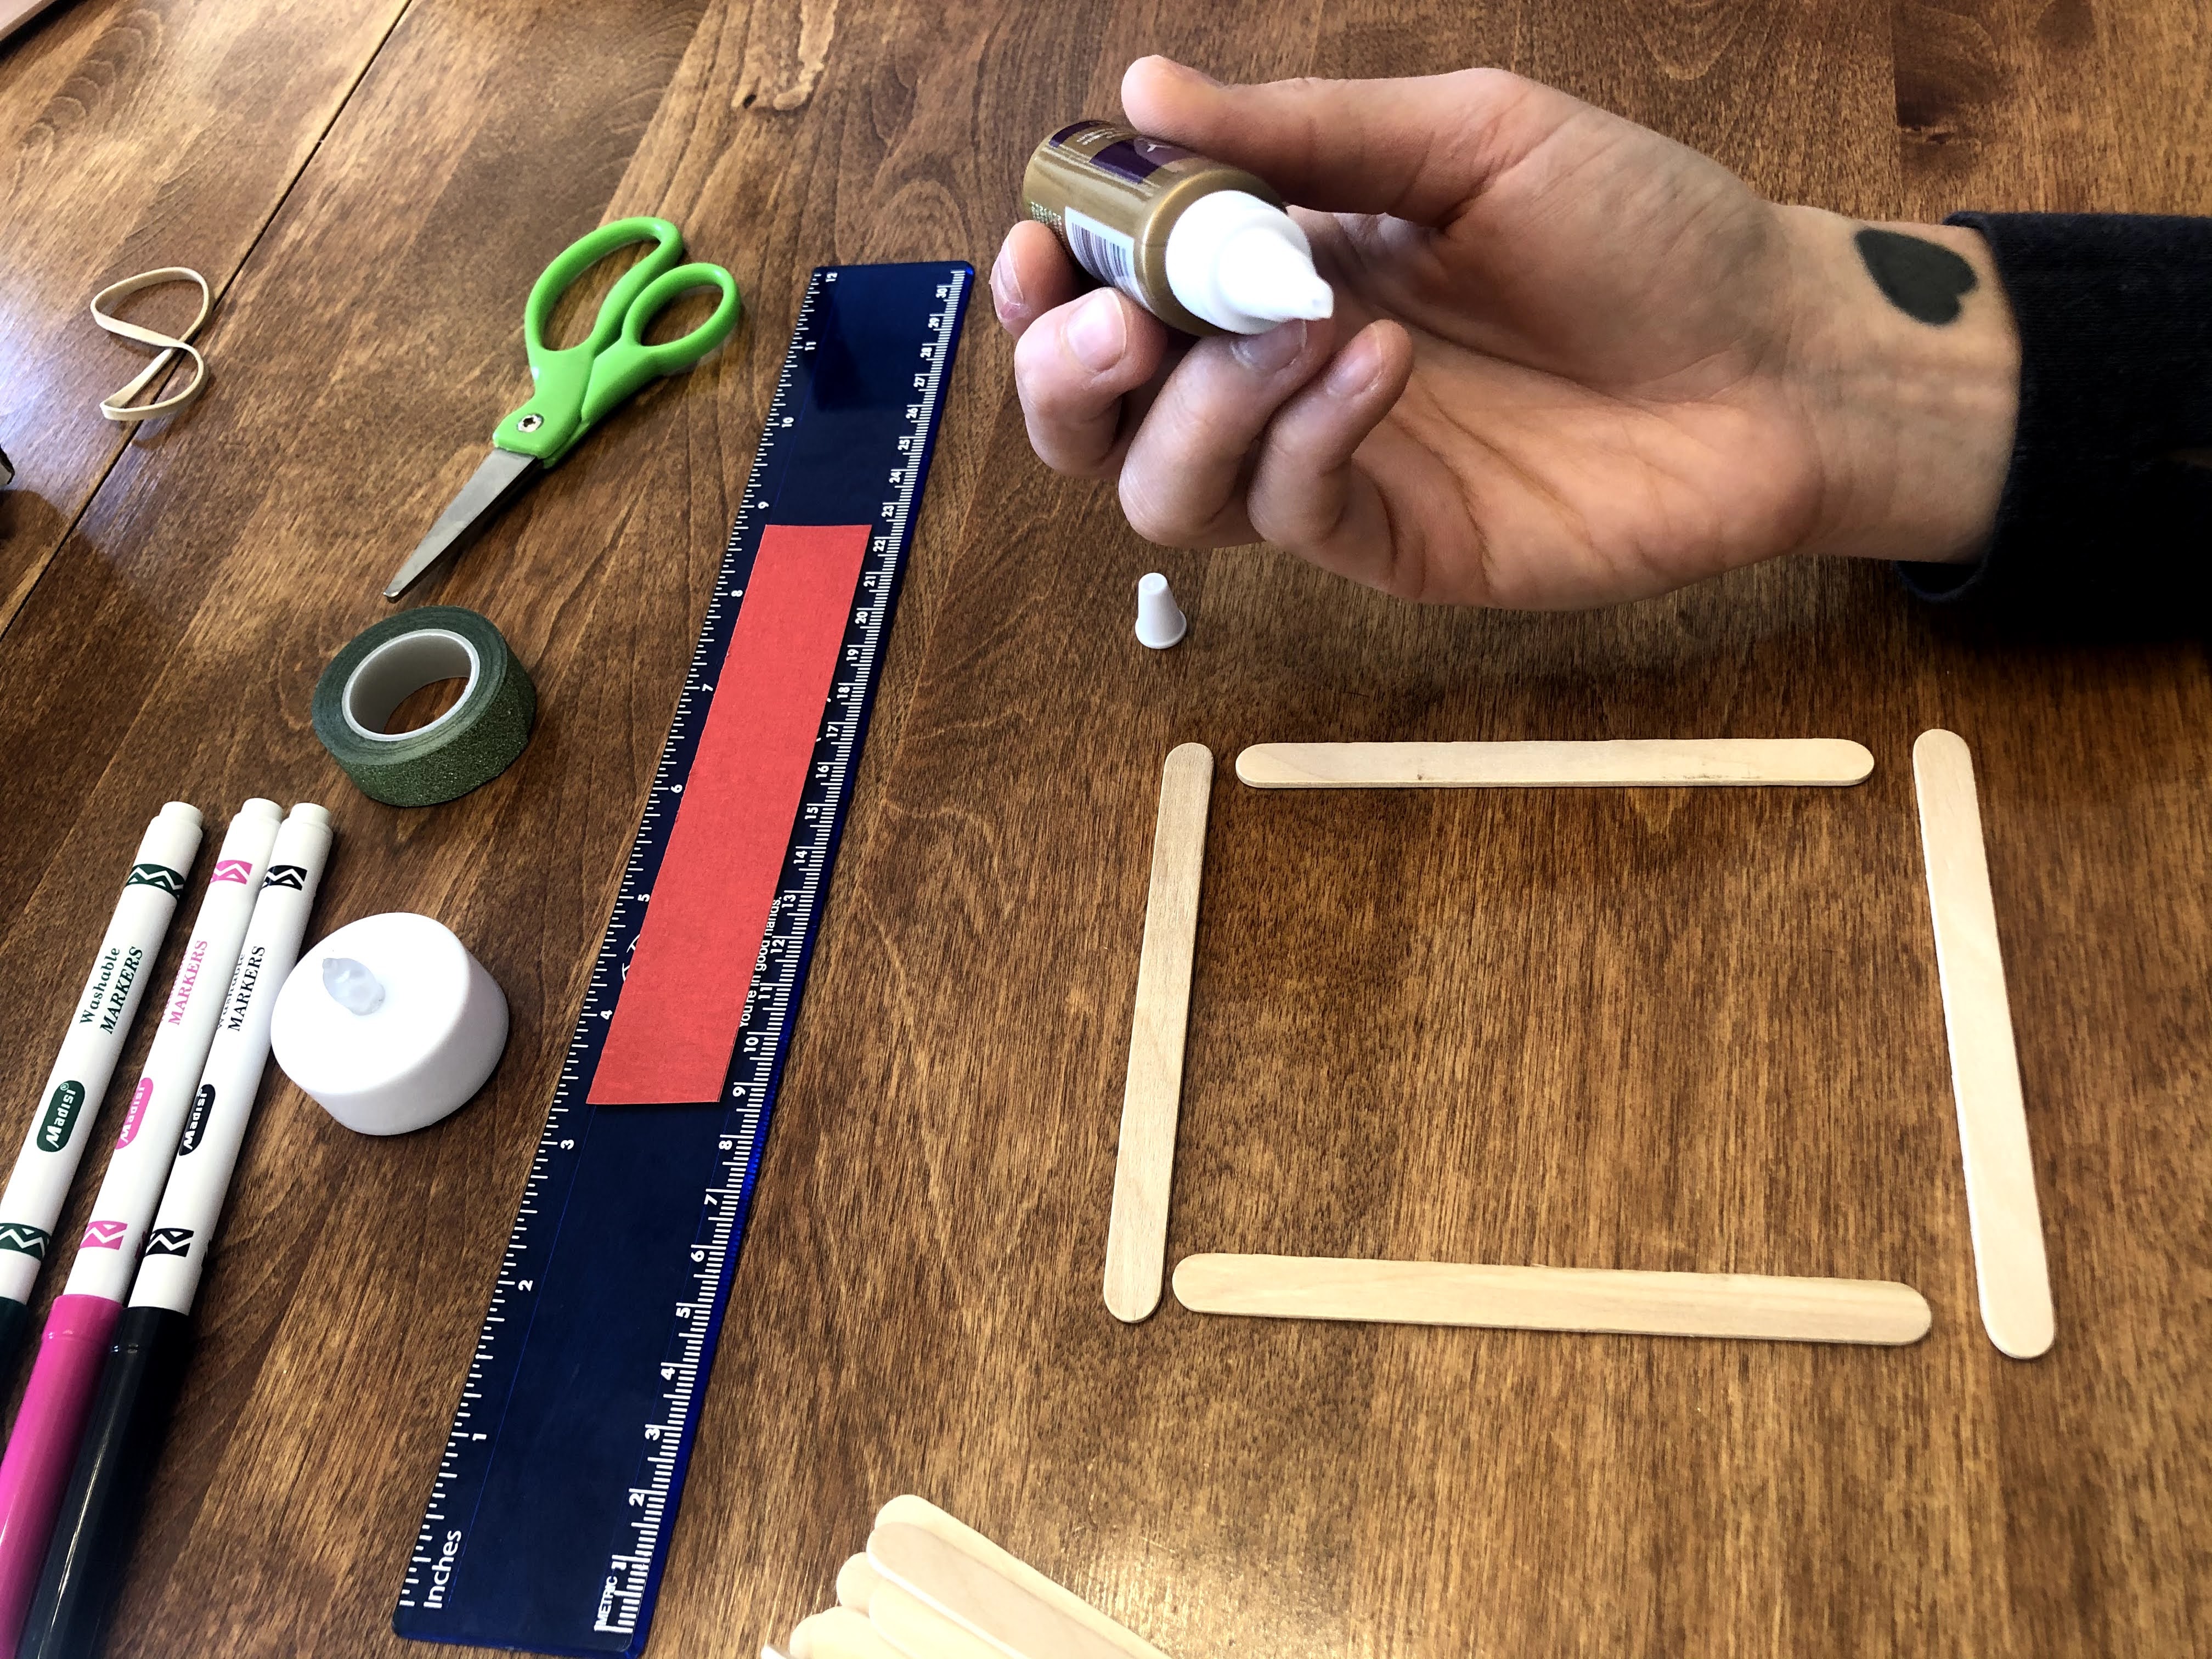
6. Place a dot of glue on each of the four corners of your square in between the craft sticks.
7. Repeat steps 5 and 6 until you have 5 squares.
8. Carefully set all but one square aside to dry.
9. Use your ruler to measure the side of the square.
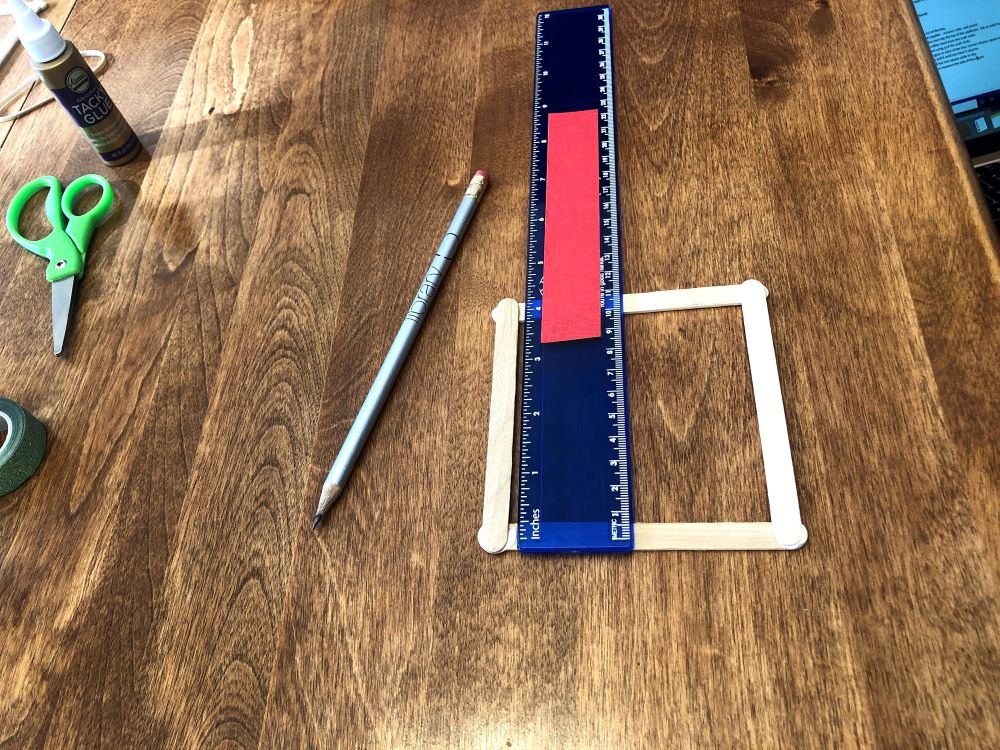
10. Now, using your ruler, measure out 5 squares on your tracing paper. If you cut your tracing papers in half first it will help you make sure you have enough paper to cut all of your squares.
11. Use your scissors to cut out all 5 squares.
12. Now it is time to decorate! You can decorate all 4 sides, just one or any number in between.
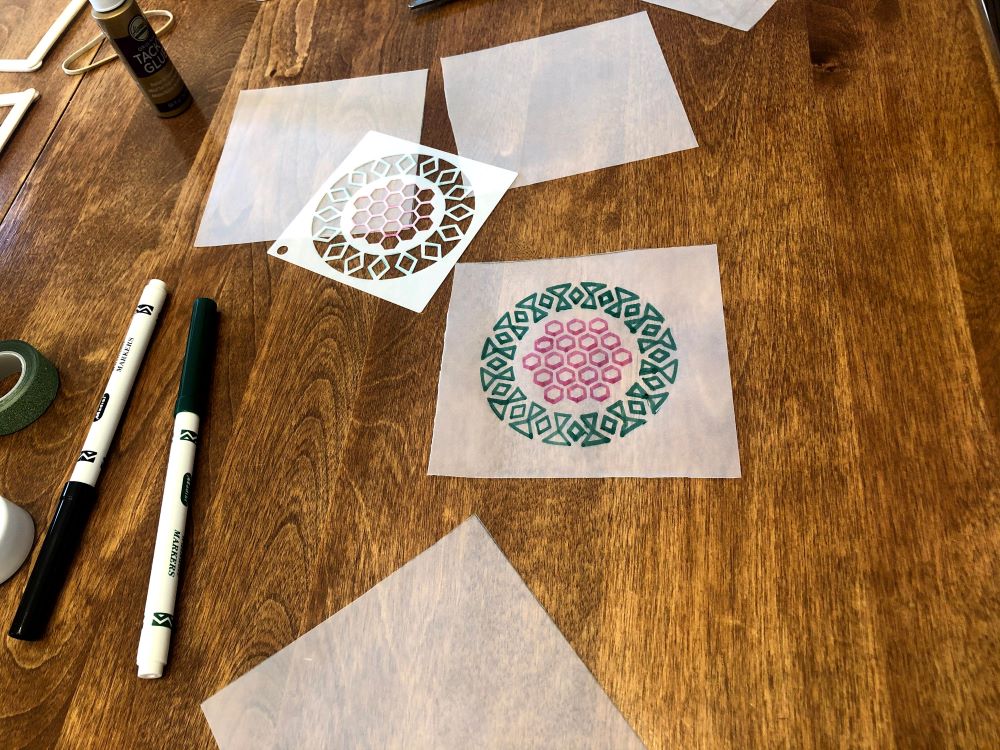
13. You can use your mandala stencil and markers, or you can use your markers to make any design you want! Remember one of the squares goes on the bottom, so you don’t need to decorate that one.
14. Glue each of the paper squares to the craft stick squares. You don’t need much glue, just a dot on each corner of the craft stick square.
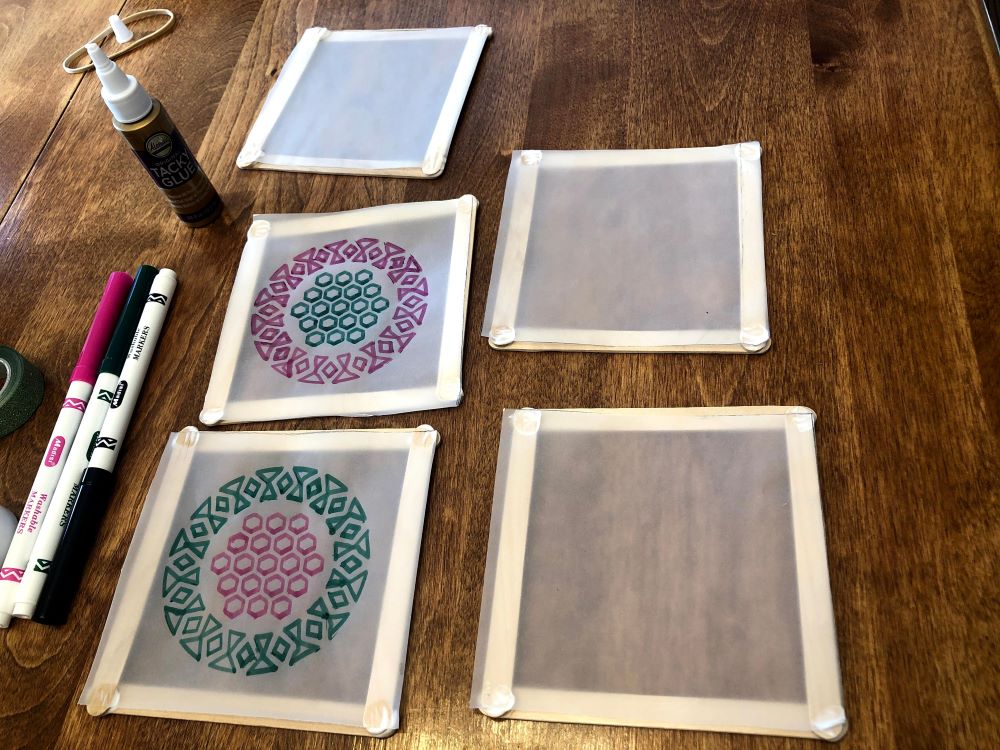
15. Let all the glue dry before moving on to the next step.
16. Use your washi tape to add some flair to the sides of the lantern.
17. Assemble the lantern by gluing the squares together to create a cube with an open top. You may need an adult to help with holding the pieces in place as the glue sets.
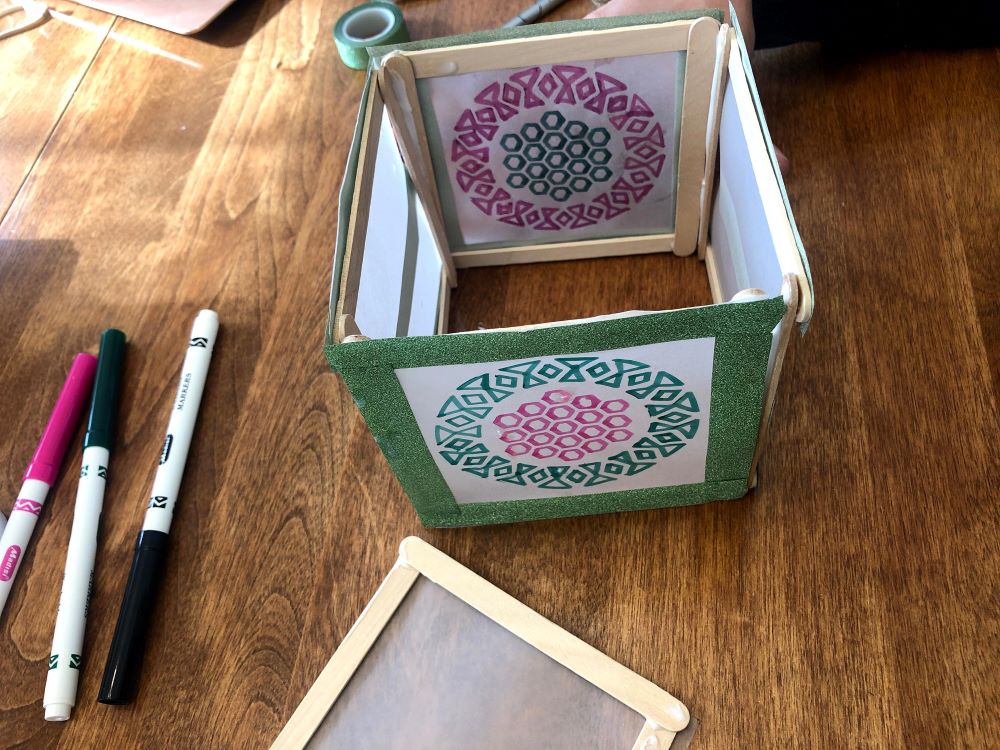
18. Wait for project to completely dry.
19. Turn on the LED tealight and place in the lantern.
20. Enjoy the glow!
Register for a Grades K-2 Kit here.
Grades 3-8: Washi Tape Bookmarks
- Cut strips of washi tape.
- Decorate a bookmark with the strips of washi tape however you like.
- Loop a tassel through the bookmark's hole.
Register for a Grades 3-8 Kit here.
 Youth Services Assistant Librarian Alyssa
 -
Code a Game in Scratch
Have you ever wanted to make your own computer game? Well, using the website, www.scrach.mit.edu, you can code your own game!
Scratch is a free coding software designed to teach kids how to code. Anyone can learn to use Scratch. Scratch is great for beginners because it uses drag and drop coding. Drag and drop coding lets users build a sequence of code without needing to type in a specific coding language, such as Java or Python.
In the video below, I'll show you how to add characters, move your characters, collect items, create enemies, and keep score. I'll show you one way to code these situations. However, be sure to experiment! You may find a different way to code your game.
Coding is a skill that takes practice, creativity, and perseverance. If you find yourself frustrated with your coding, take a break and come back to your code. Look at your code step by step and try to think about what each line of code is doing. Try taking apart a block of code and look at what each step does by itself. Look at your list of coding blocks, and see if one of them might help your code. Scratch also lets you see how other users code projects. Try looking at the code in similar games on Scratch.
After you code, take a mindful moment. Take a moment to close your eyes and breathe slowly. Acknowledge your feelings both positive and negative. Breathe deeply as you accept that these are valid. Coding is a new skill! Be patient with yourself.
 Youth Services Librarian Ann
 -
October Take-and-Make Kits
Bring home a fun new project! You can now register to pick up a Take-and-Make Kit from the Youth Services desk. Here are the instructions for each kit:
Toddlers and Preschoolers: Texture and Leaf Rubbing
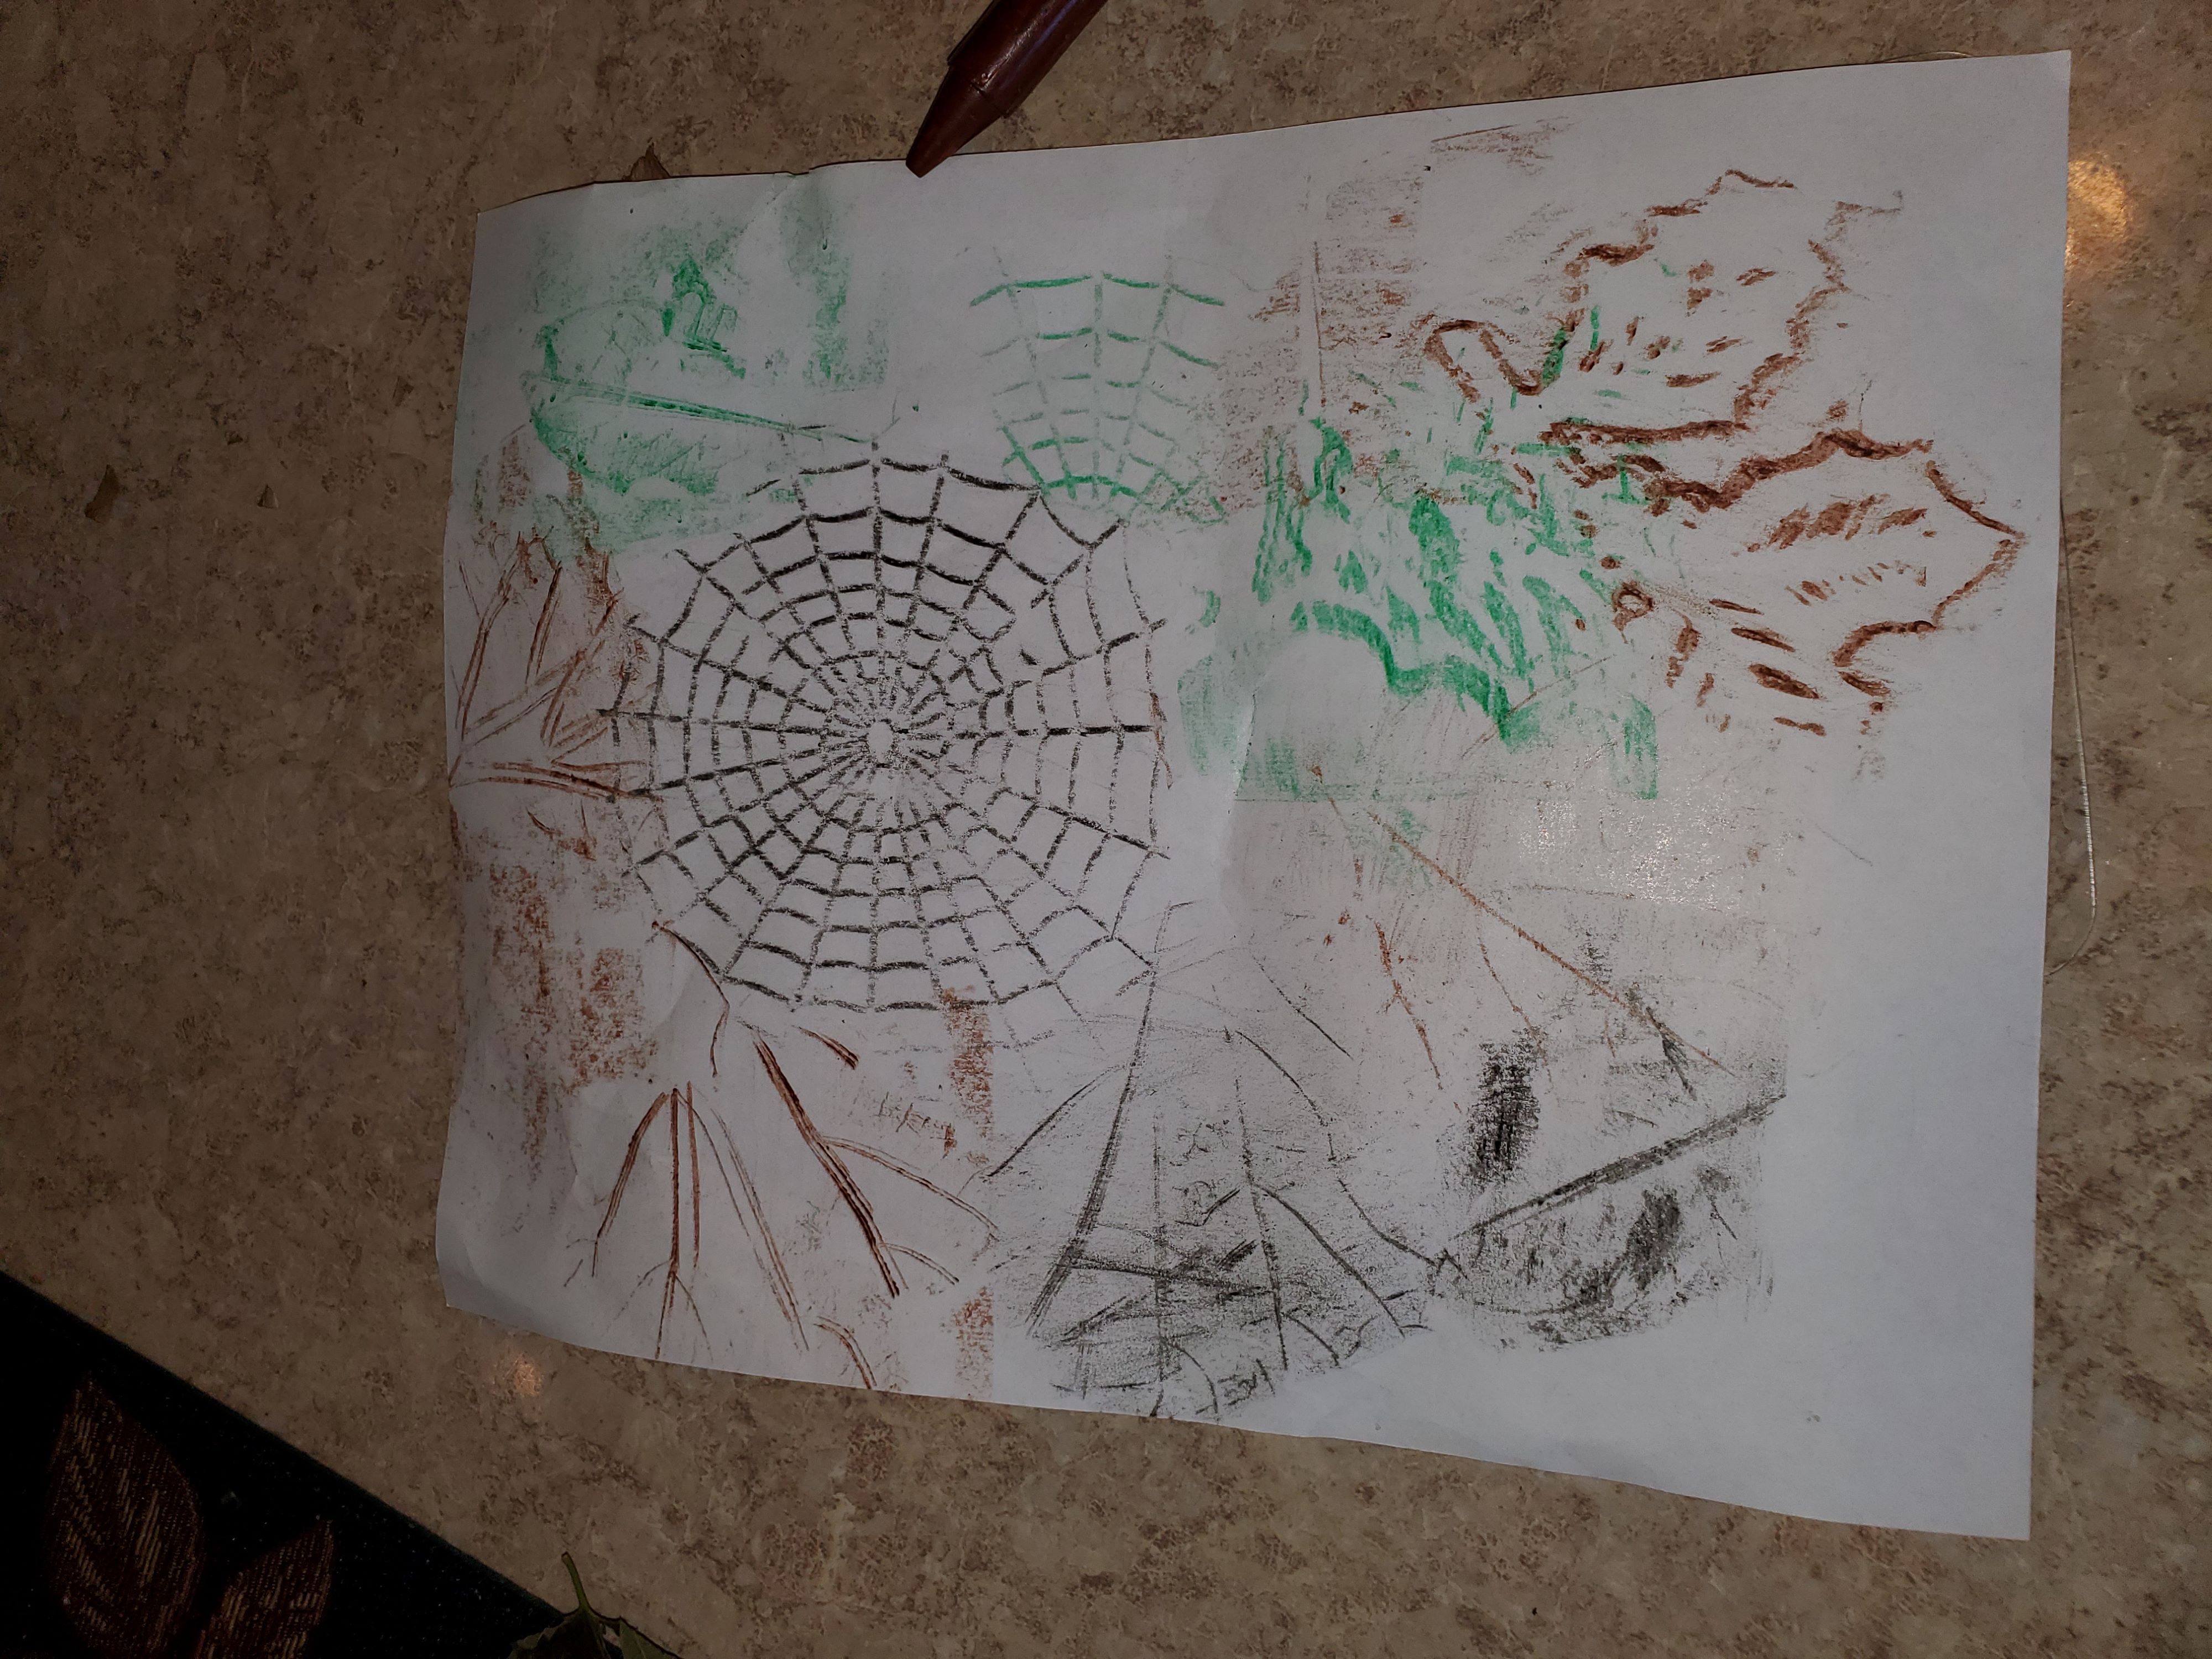
Young children create fascinating patterns and designs, while engaged in tactile exploration of natural materials.
Materials provided for texture and leaf rubbing:
- (4) rubbing crayons
- (1) Textured rubbing plate
- (1) Textured leaf rubbing plate
- (1) Tote bag
- (6) sheets of lightweight paper


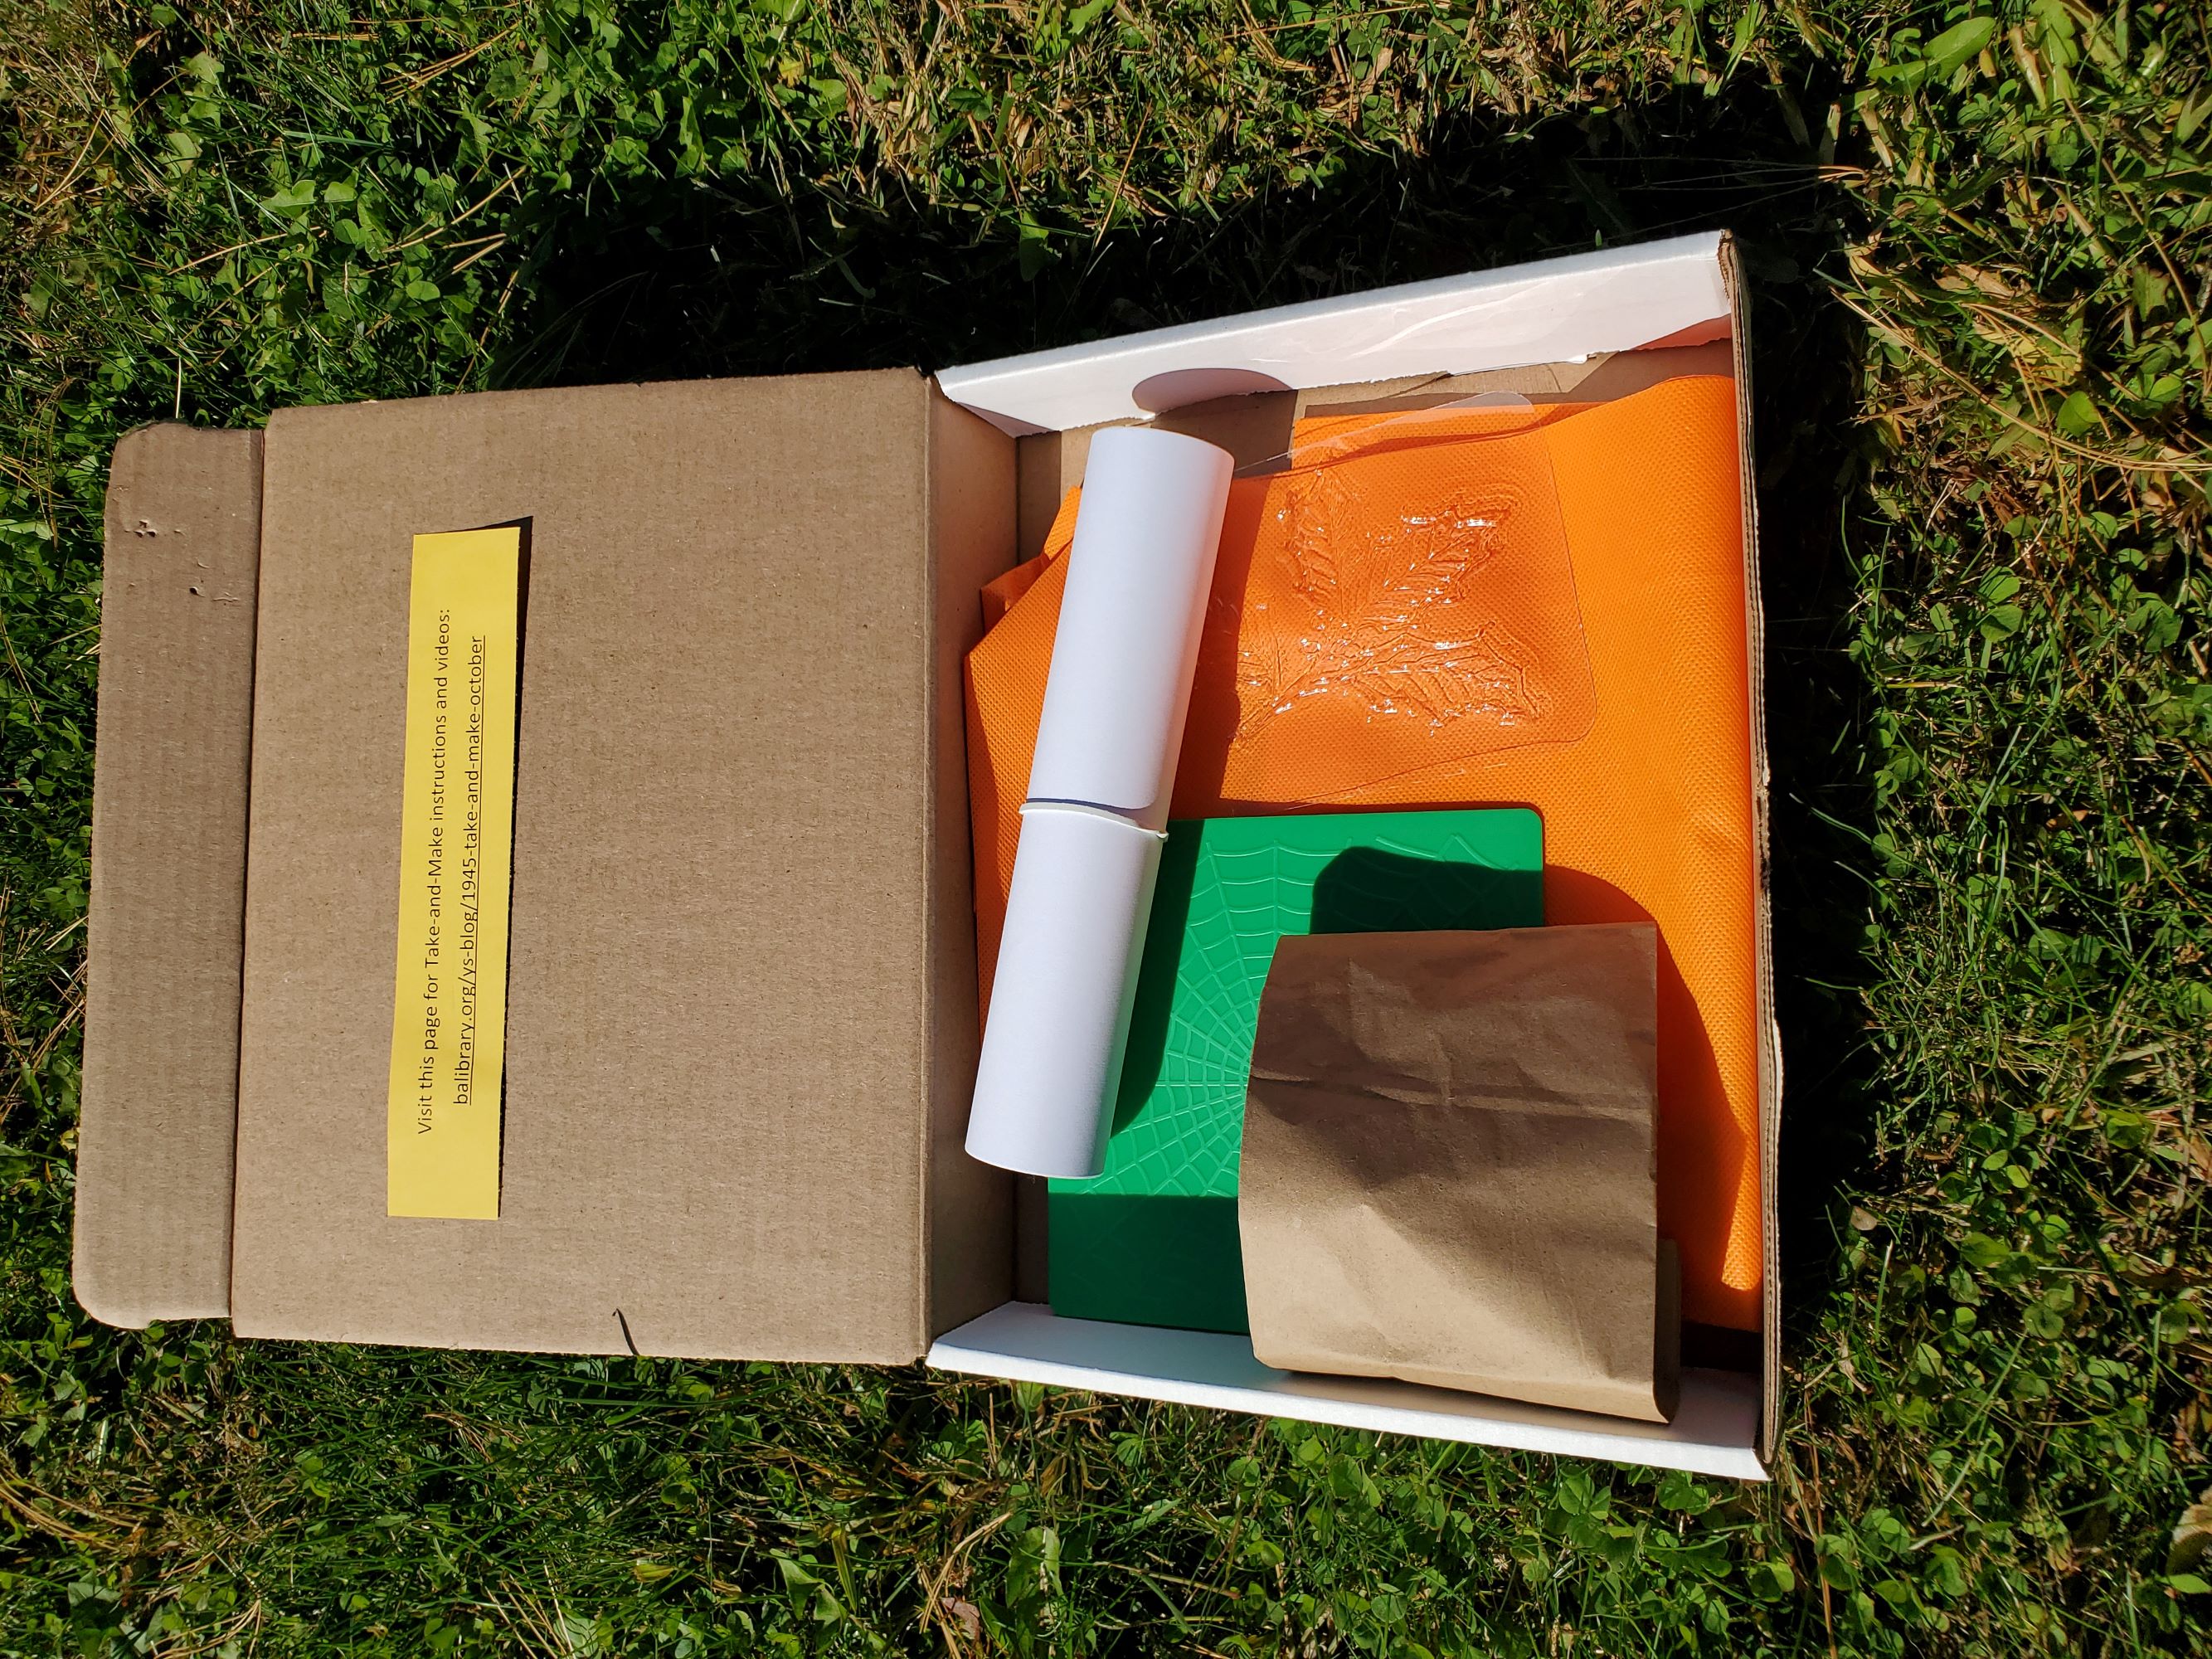
You will need to collect leaves of different shapes and sizes.
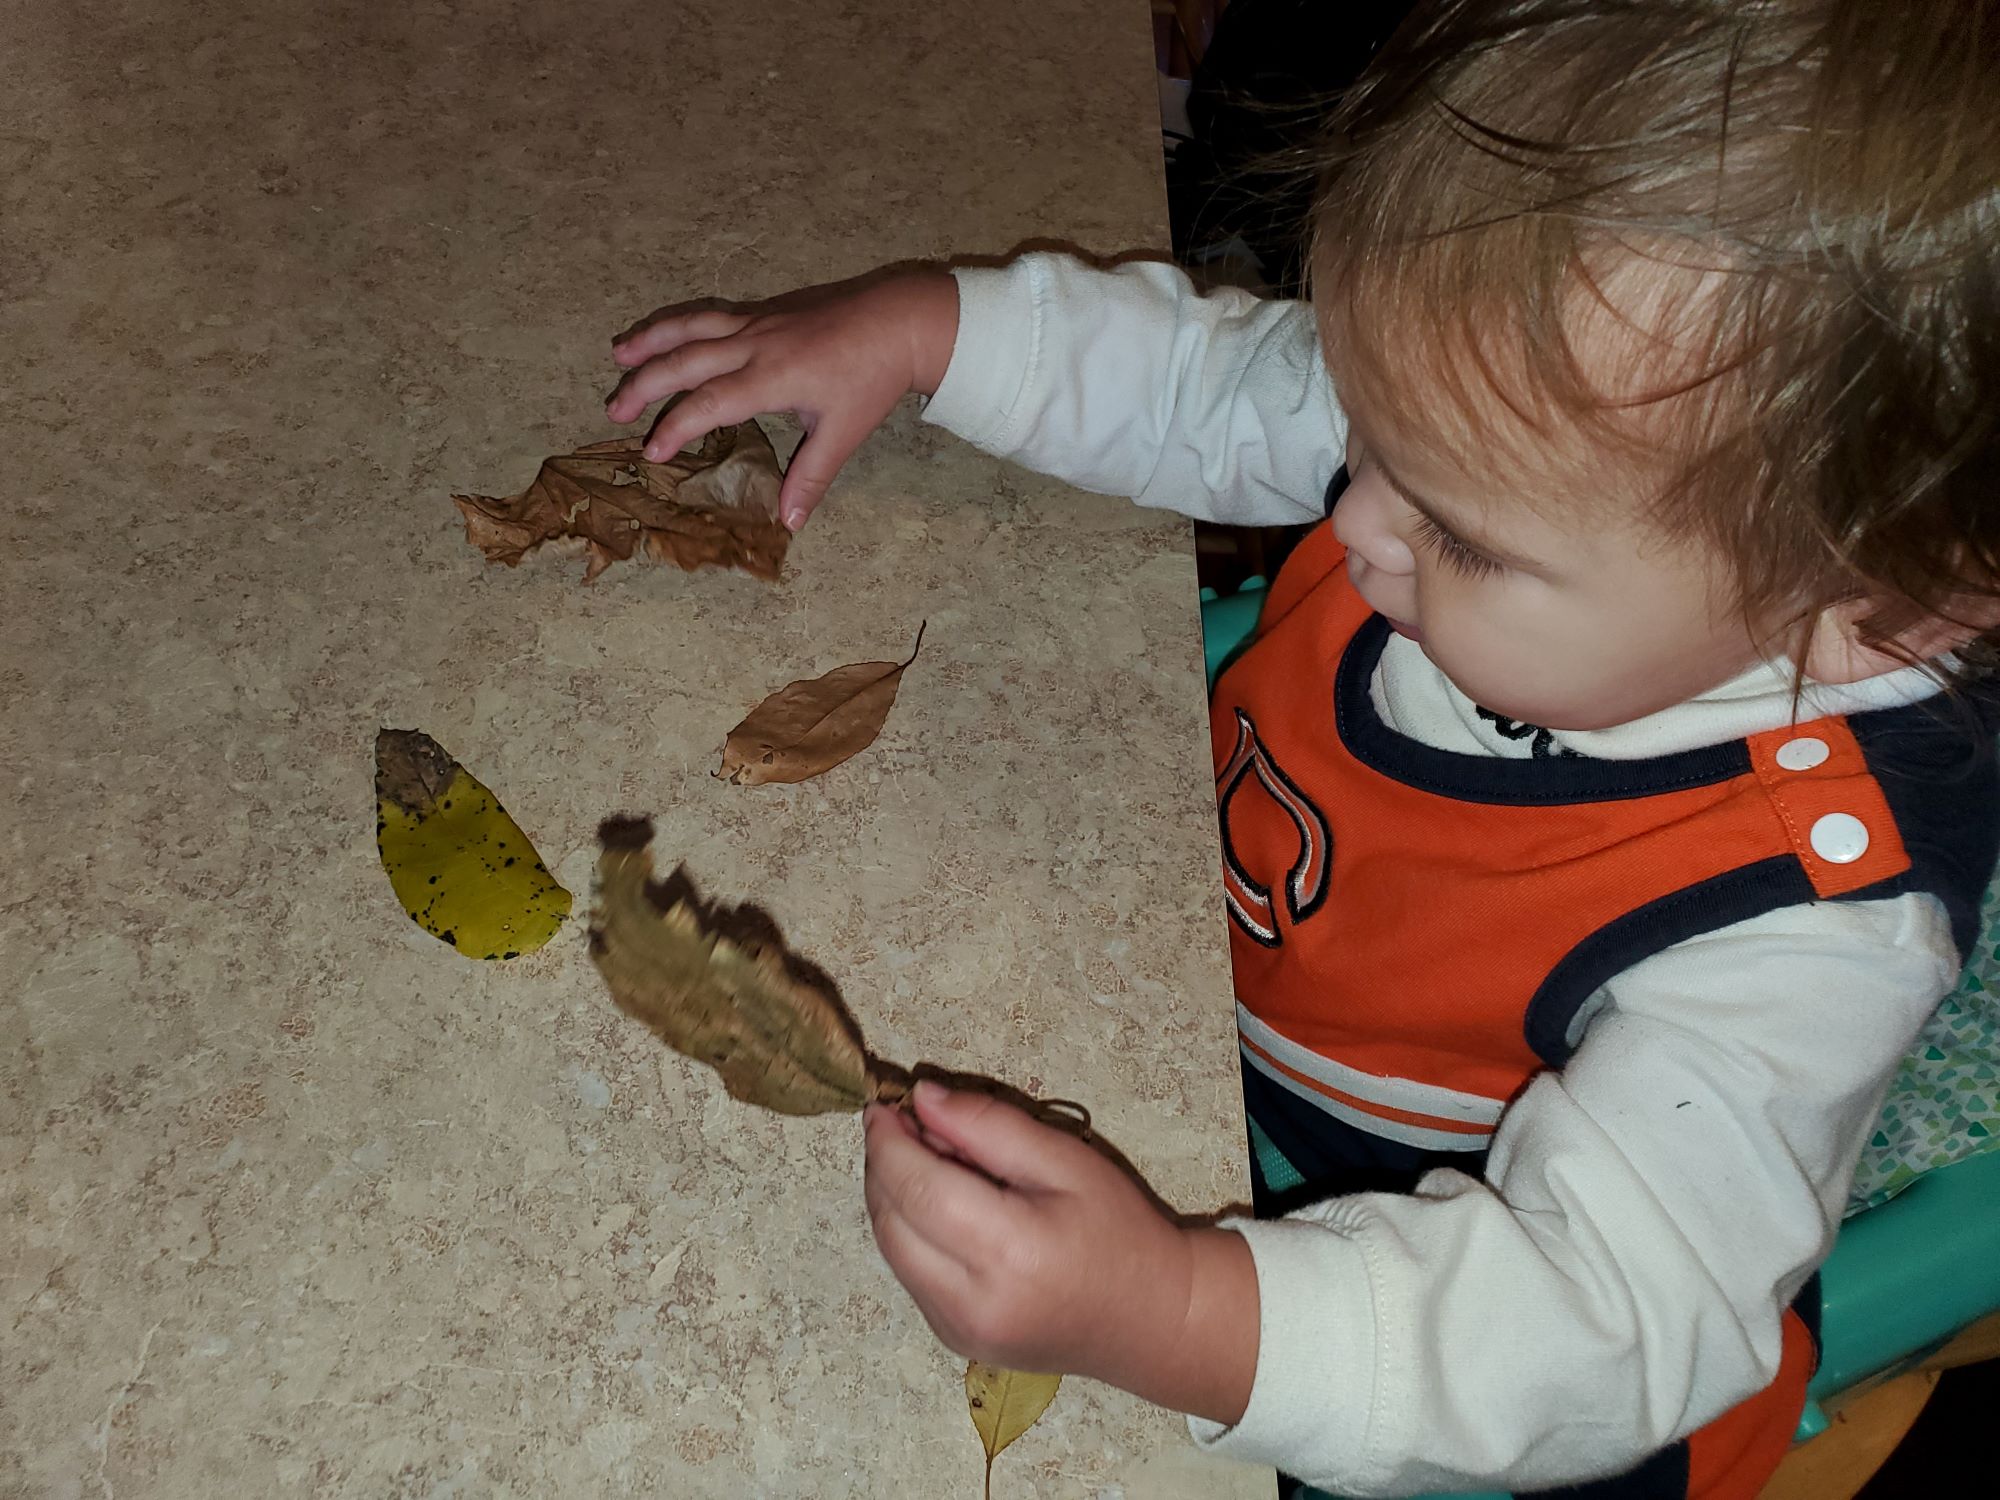
Directions:
1. Gather Leaves
Grab your tote bag and head out for a nature walk. Collect leaves of various shapes and sizes. Make sure the leaves are dry. (Flatter leaves work better, so do newly fallen ones).

Conversation ideas for your walk: Ask your child to talk about what they see. Point out different things like animals (birds, squirrels, etc) and plants (trees, flowers, budding leaves, etc). Ask your child to find something of a specific color.
2. Return Home
Remove your leaves from the bag. If other items were collected, consider having your child sort the different items.
Possible points to discuss:
- Each leaf is different in size and shape - none of them are exactly the same!
- Talk about the different textures of the leaves. How does the leaf feel?
3. Position a leaf.
Find a flat area to work. Place a leaf with its bottom side facing up.
4. Place paper over the leaf.
Put a sheet of paper over the leaf.
5. Rub a crayon.
Rub the side of a crayon over the leaf. As you do this, you'll see the colored areas start to take the shape of the leaf.
6. Rub over the entire leaf.
Continue until you've rubbed over the entire leaf.
7. Remove the leaf.
Remove the leaf from under the paper. This completes the basic steps for making a leaf rubbing.
8. Make more texture rubbings with the textured rubbing and leaf rubbing plate provided.
Try using different colors. You and your child can compare and contrast the differences between the textured plates and the actual leaves.
Don’t be afraid to overlap the leaf rubbings to create a stunning picture! Enjoy!
Grades K-2: Leaf Rubbing Resist Art
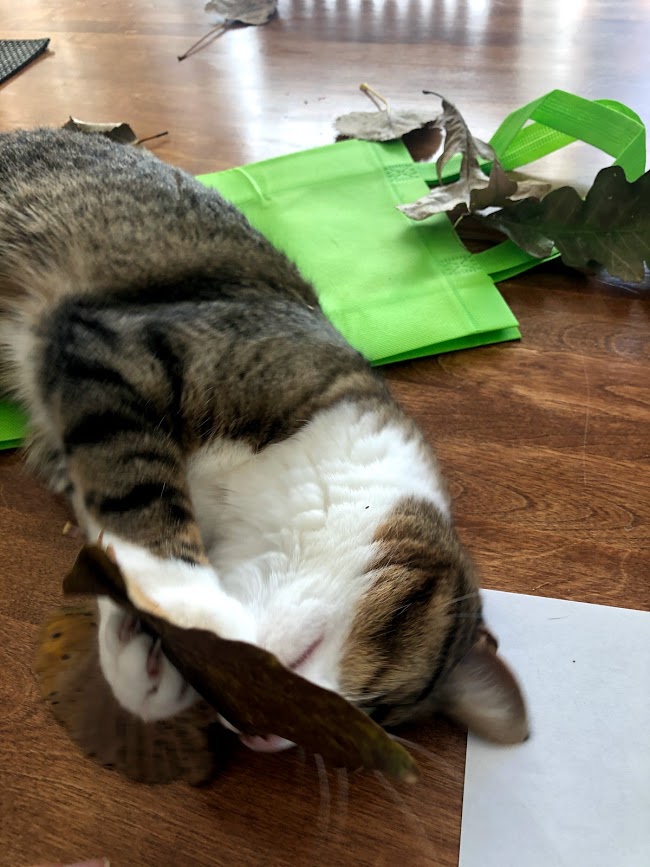
(Cat not included!)
Things you will need in addition to the what is included in the kit:
- Leaves!
- Cup of water
Instructions:
1. Take the items out of the box.
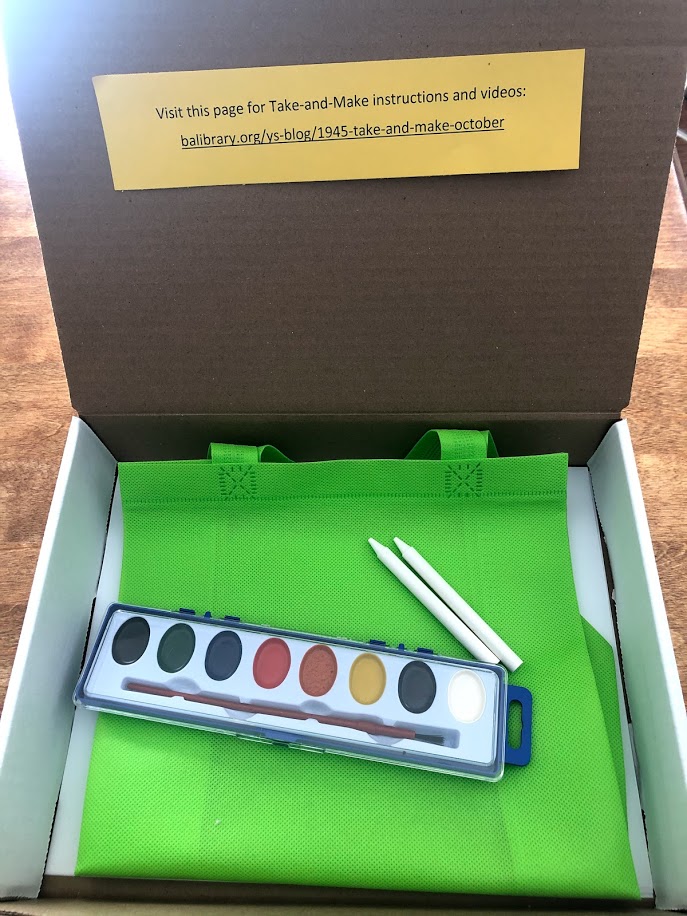
2. Use your bag to go on a leaf hunt! (Make sure you go with a grownup or have permission to go leaf hunting on your own.)
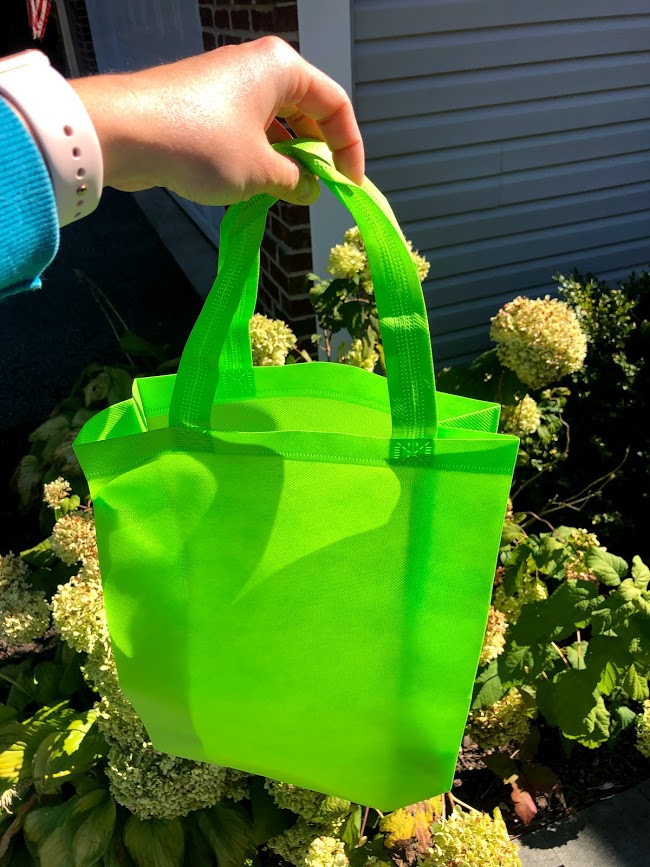
3. Gather leaves that aren’t too crunchy or too soft.
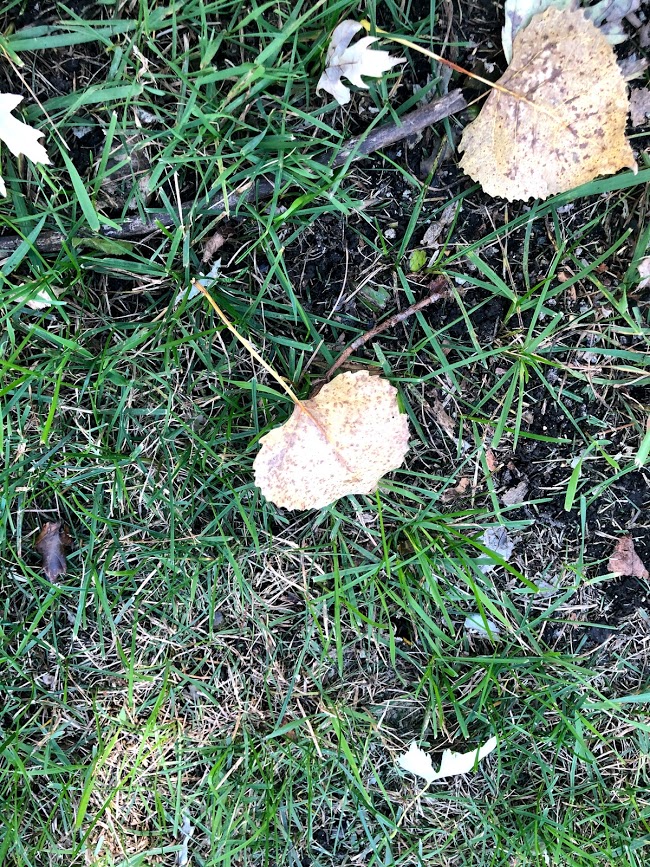
4. Take your leaves back inside.
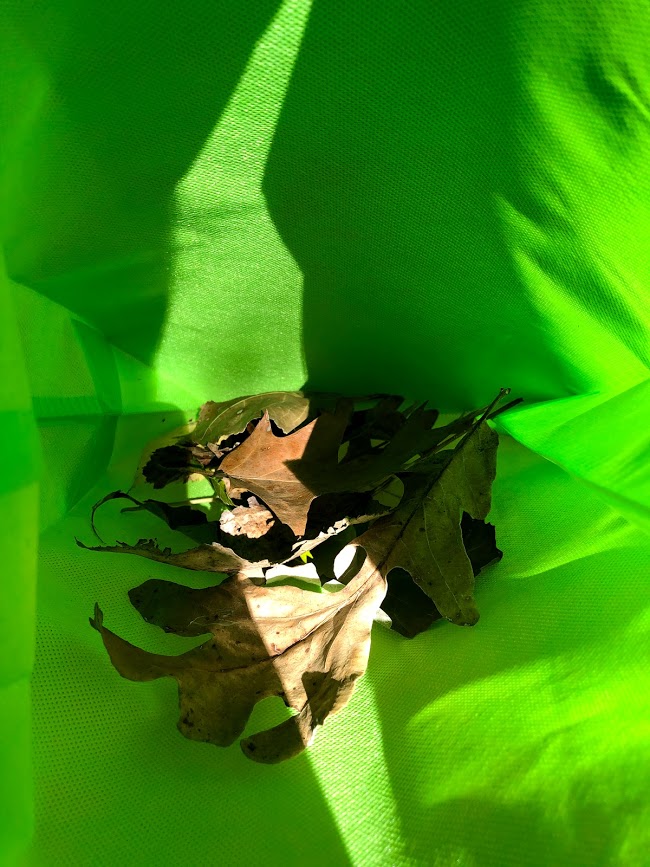
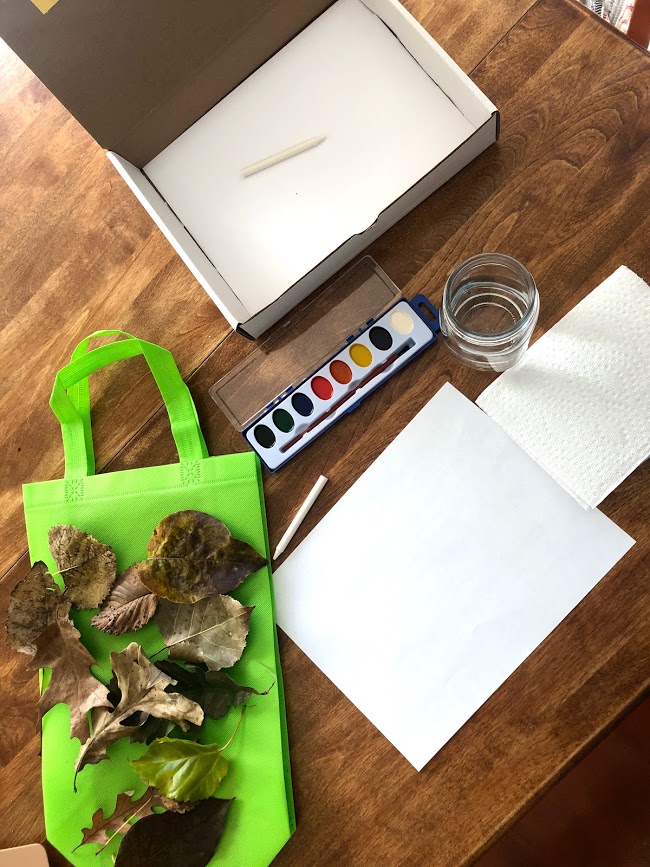
5. Fill a cup with water.
6. Place leaves under one piece of paper.
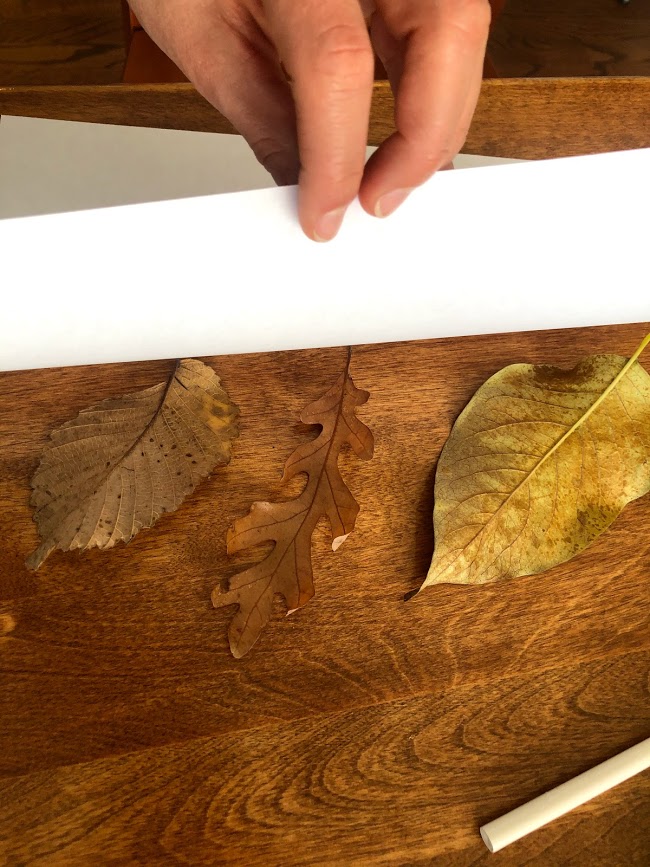
7. Rub over the top of the paper with a white crayon. Make sure to use the side of the crayon.
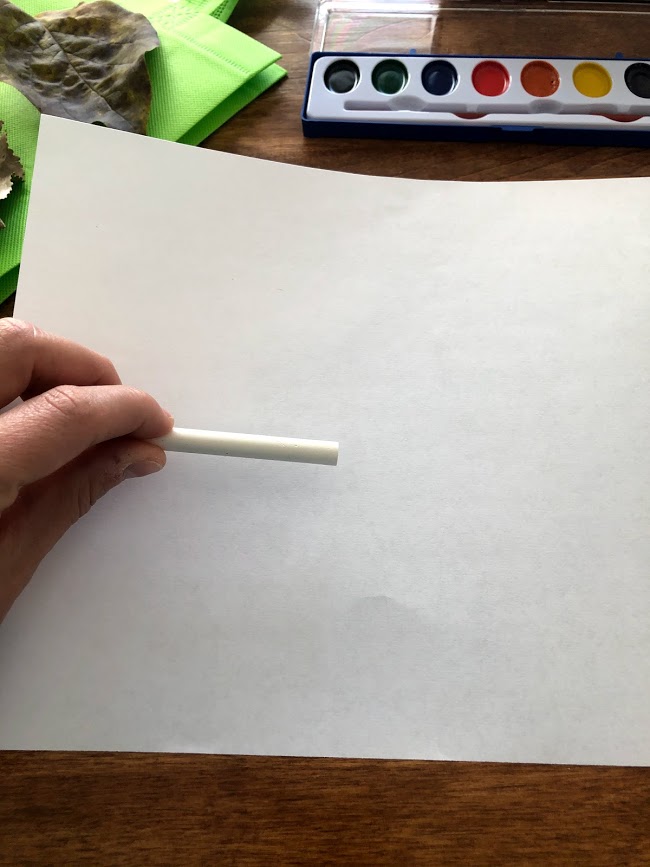
8. Remove the leaves from under the paper.
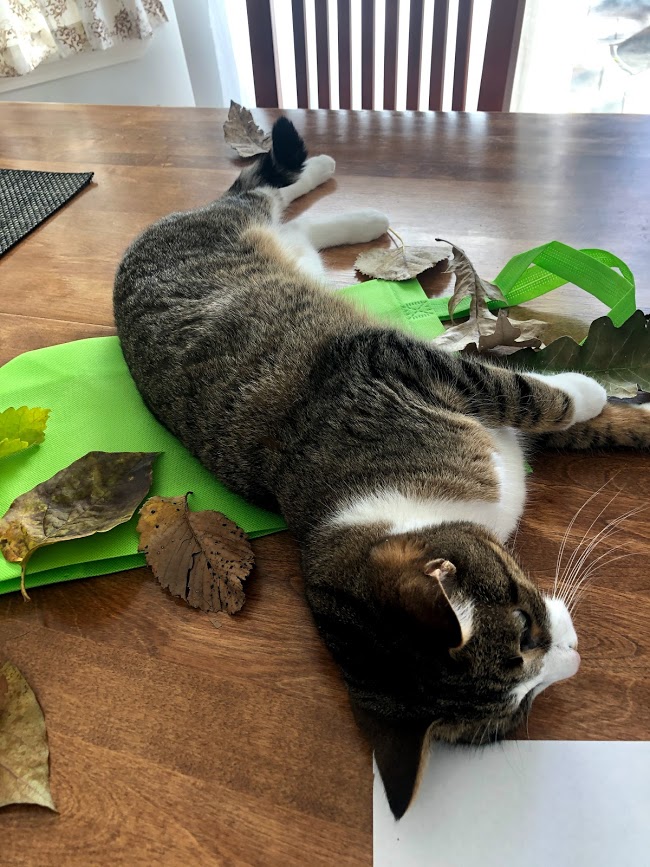
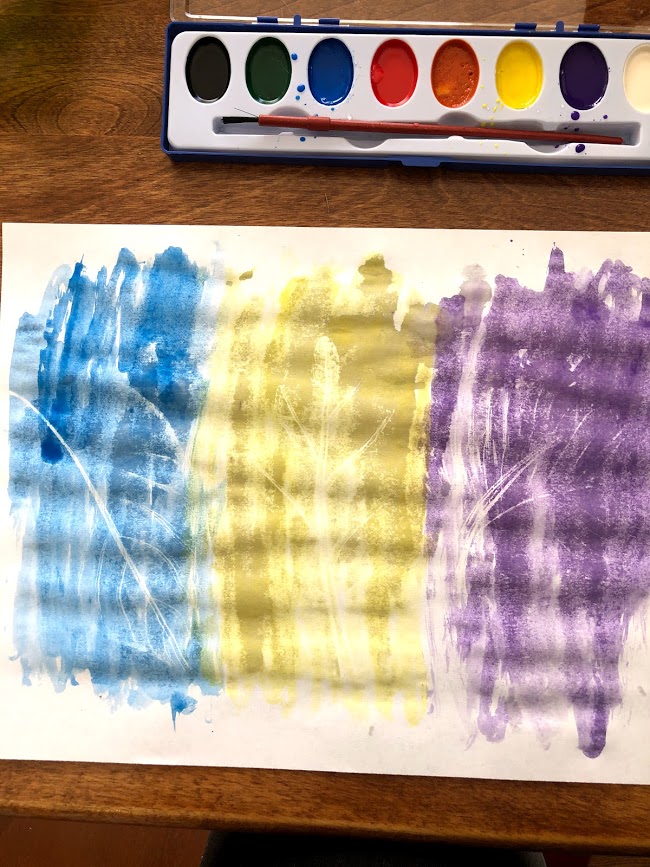
9. It won’t look like much since it is white crayon on white paper, but this is where the watercolors come in. Use your water to wet your brush and apply the watercolors to the paper.
10. Watch how the leaf rubbings take shape as the areas with the crayon wax resist the watercolors.
11. Let dry and enjoy your masterpiece!
Grades 3-8: DIY Sparkle Bowls
Make a glittery, decorative bowl through a fun and relaxing process.
Mod-Podge takes several hours to dry completely. This project works best if you have two days to complete it.
Note: Sparkle Bowls are not food-safe!Use your Sparkle Bowl to hold trinkets, coins, jewelry, or other small items -not food or drink.
In addition to the kit, you will need:
- Newspaper or scrap paper
- Scissors
Instructions:
1. Lay out a sheet of newspaper or scrap paper to protect your tabletop.
2. Pour some glitter into one container of Mod-Podge and stir with the craft stick to combine. You can use a little, or a lot! The more glitter, the more sparkly your bowl will be.
3. Place the silicone mold, curved side up, on the table.
4. Paint the glitter-glue over the surface of the mold, then cap the glue and rinse out your paintbrush.
5. Let the bowl dry completely - this will probably take a couple hours. The Mod-Podge will dry clear, so you’ll just see the glitter once it’s dry.
6. Paint a second coat, cap the glue and rinse out your brush again, and let the bowl dry again.
7. You can do a third or even fourth coat if you'd like a stronger container.
8. Once the sparkle bowl is completely dry, carefully peel the silicone mold away. Trim the edges with scissors.
9. Reuse the supplies as many times as you wish!
Watch this video to see how to make Sparkle Bowls:
 Youth Services Assistant Librarian Alyssa
 -
September Take-and-Make Kits
Bring home a fun new project! You can now register to pick up a Take-and-Make Kit from the Youth Services desk or through Parking Lot Pickup. Here are the instructions for each kit:
Toddlers and Preschoolers: Spray and Drip Painting
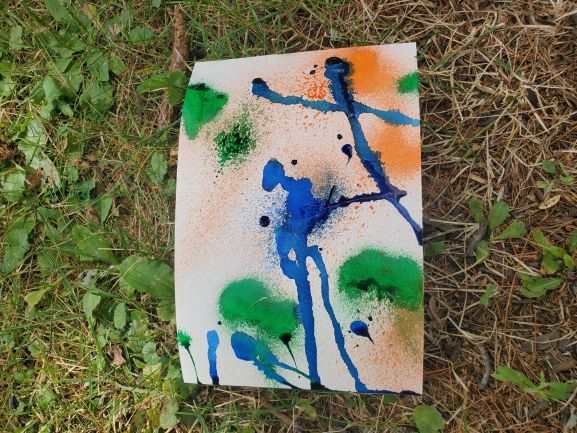
Materials provided for Spray and Drip Painting:
● Watercolor paper (3)
● Spray bottles filled with liquid watercolor paint (3)
● Pipettes (3)
● Empty plastic containers (3)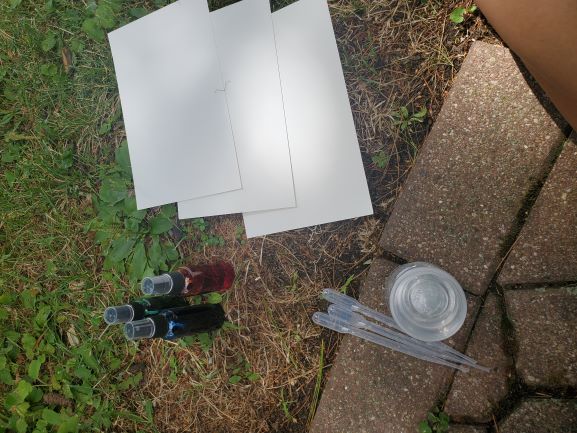
Spray (Bottle) Painting: help strengthen grip and control while having fun spray painting with a
spray bottle!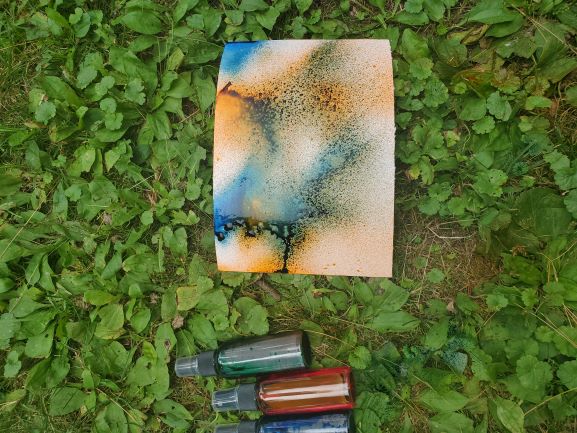
Directions:
● Arrange the watercolor paper in an area that you envision best for this activity- We
highly recommend somewhere outdoors! (Outside on the grass, thumbtacked to a tree,
clipped to an art easel).
● Provide your child with the prefilled squirt bottles and let them go to town!
● You will need to allow this to dry. We recommend leaving it in grass and placing rocks
around the edges to avoid it blowing away.
Drip Painting: Using pipettes is a great way to strengthen fine motor skills and help get little
hands ready for writing.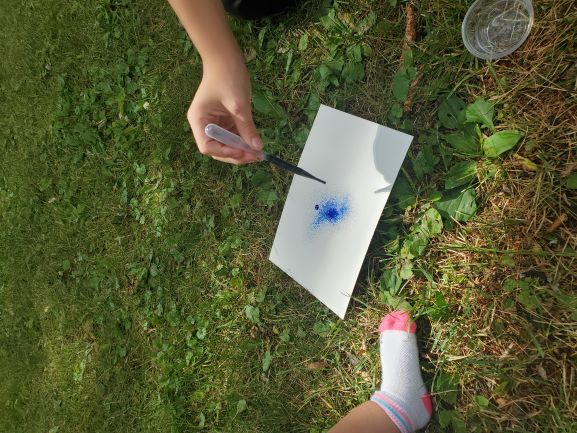
Directions:
● To use the pipettes, pour some of the liquid paint (found in the squirt bottles) into the
plastic cups.
● Squeeze pipette, place squeezed pipette in paint cup, release finger grip to suck up paint
● Squeeze pipette over paper to release paint.
Extras!
Looking to turn this into an educational activity?
- Add letters or numbers for your child to spray or drip on as you call them out. This
activity would be great for letter recognition, letter sounds, hand grip, fine motor
control, and following directions.
*Adding water to the liquid watercolor paint will give you more paint but less vibrant colors.Grades K-2: Tissue Paper Painting
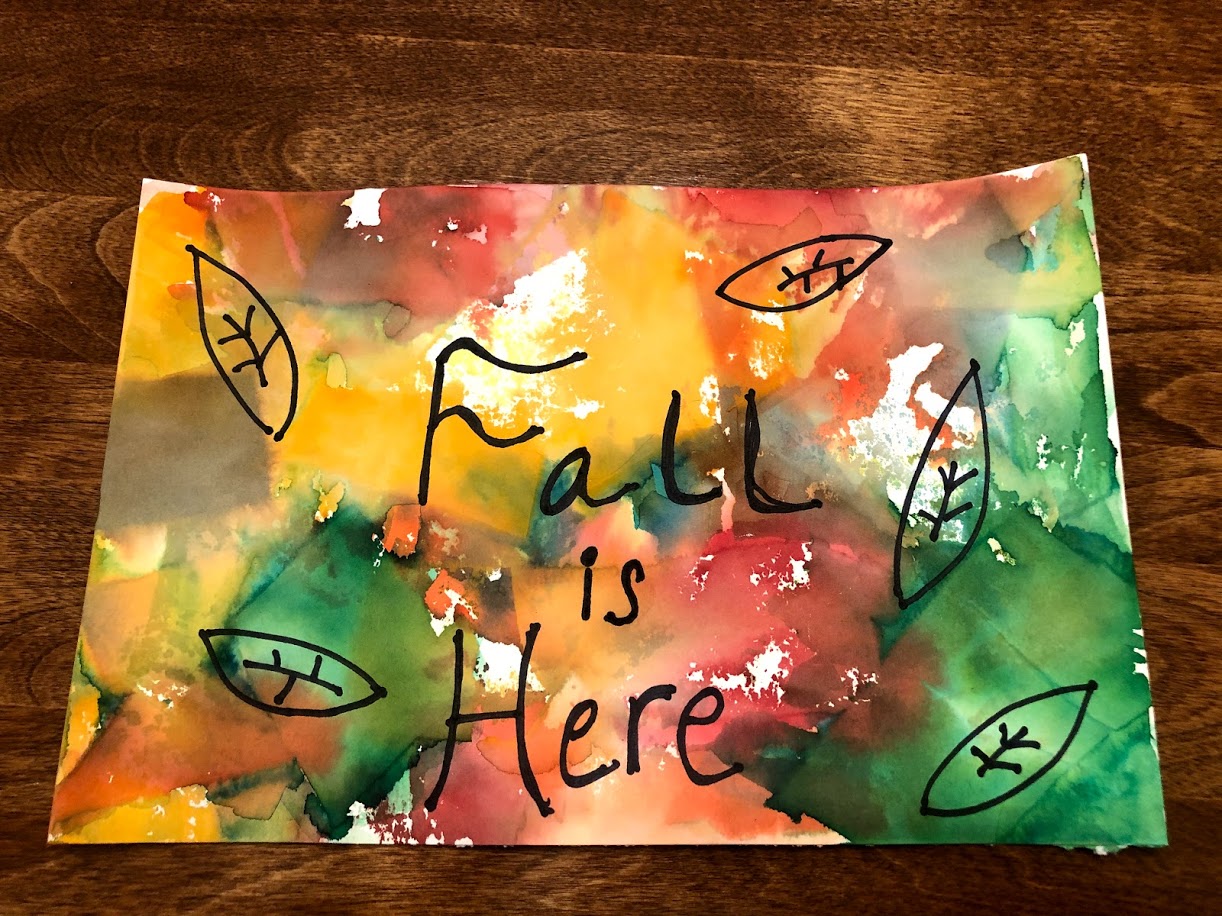
Things you will need in addition to the items in the kit:
-cup of water
-scissors
Directions:
1. Take the items out of the box.
2. Cut the colored tissue paper into smaller shapes. A variety of sizes and shapes will make your artwork more interesting!
3. Arrange your tissue paper shapes onto one of the white watercolor papers.
4. Use your paintbrush to apply water all over the tissue paper. Make sure to get everything nice and wet so the colors bleed through.
5. Wait for the paper to dry.
6. Remove the now dry tissue paper from the watercolor paper and discard.
7. Enjoy your watercolor masterpiece as is or...
8. Use the watercolor art as a background for more art with your black permanent marker!
Grades 3-8: Kindness Rocks
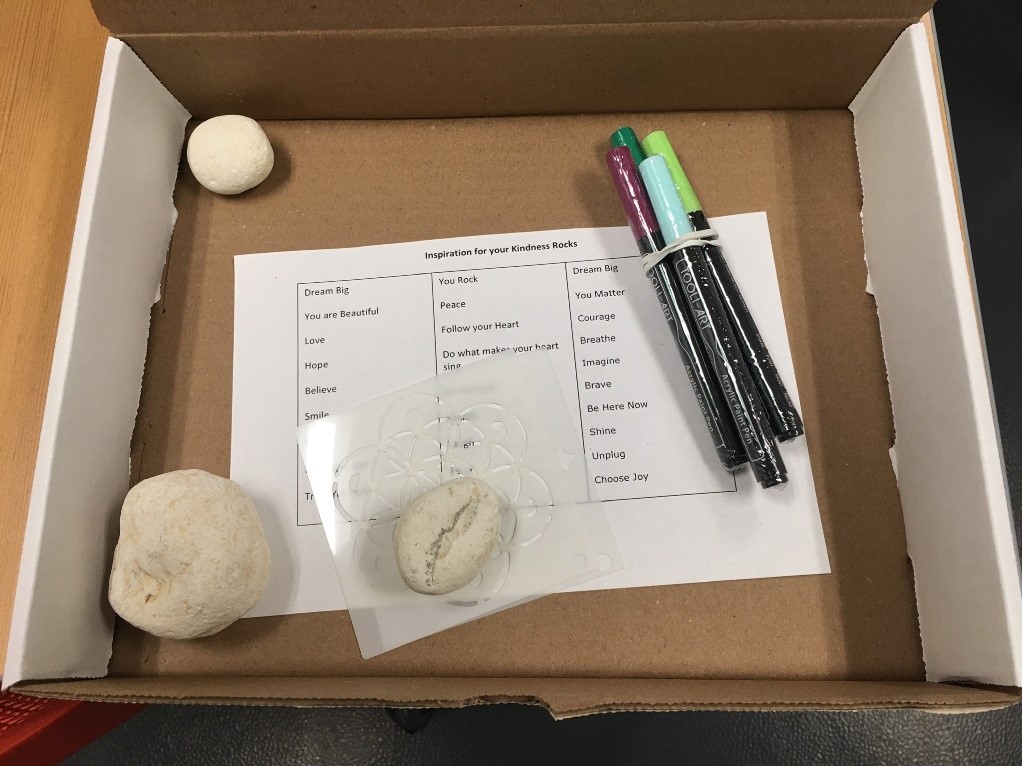
1. Take your rocks, markers, mandala stencils, and phrases out of the box.
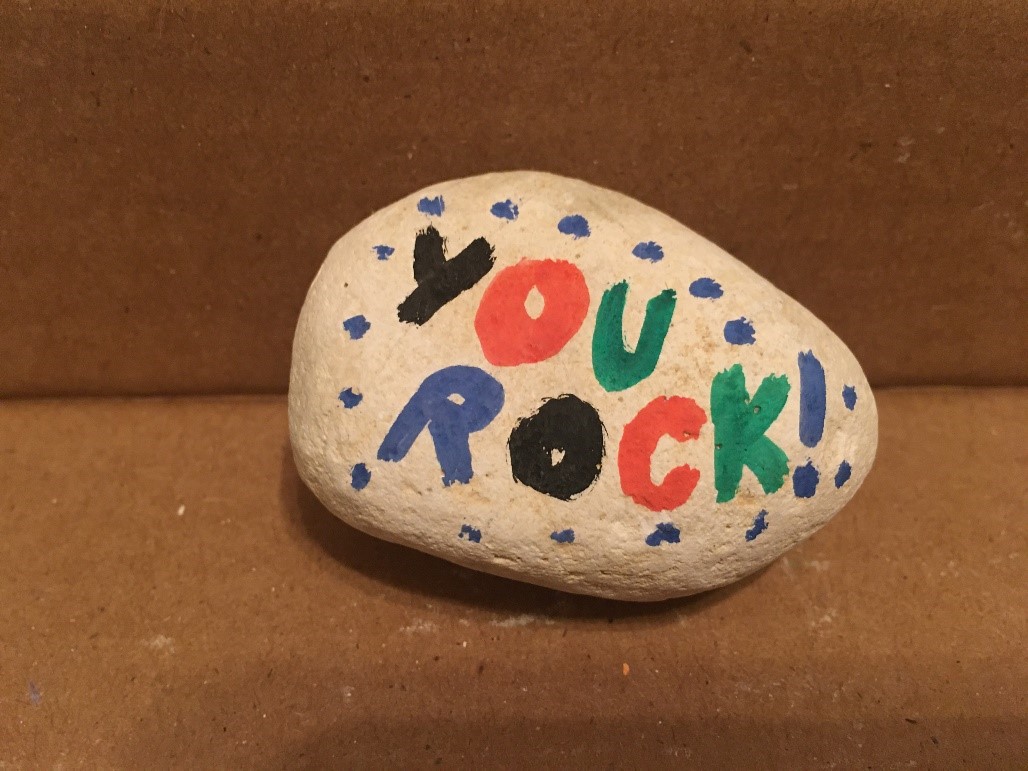
2. Take some inspiration from the phrases sheet and use the markers to write something nice to a loved one…
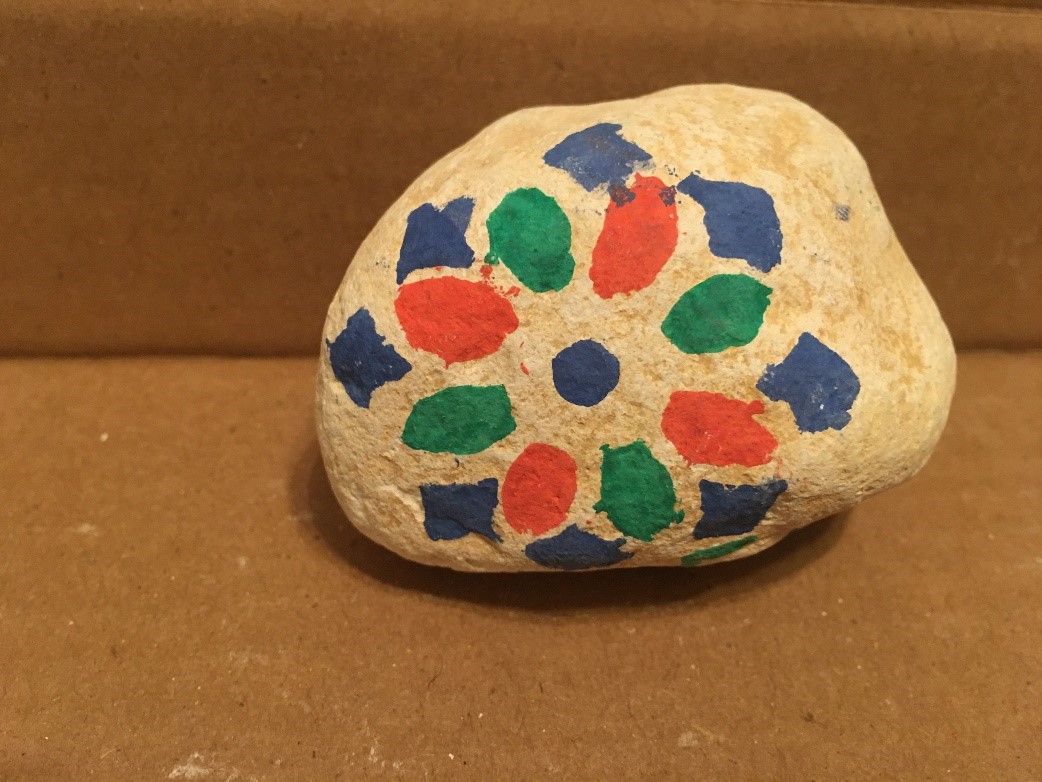
3. …use the mandala stencils to make a calming design…
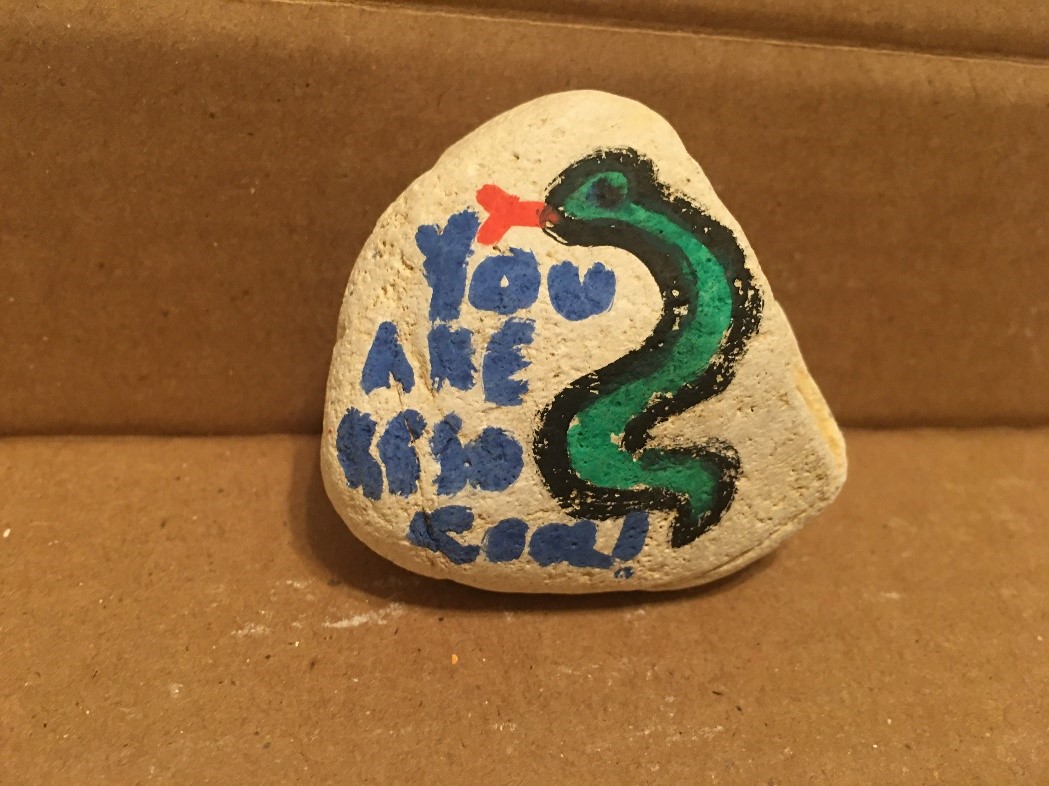
4. …or just draw something silly and sweet to give to a pal.
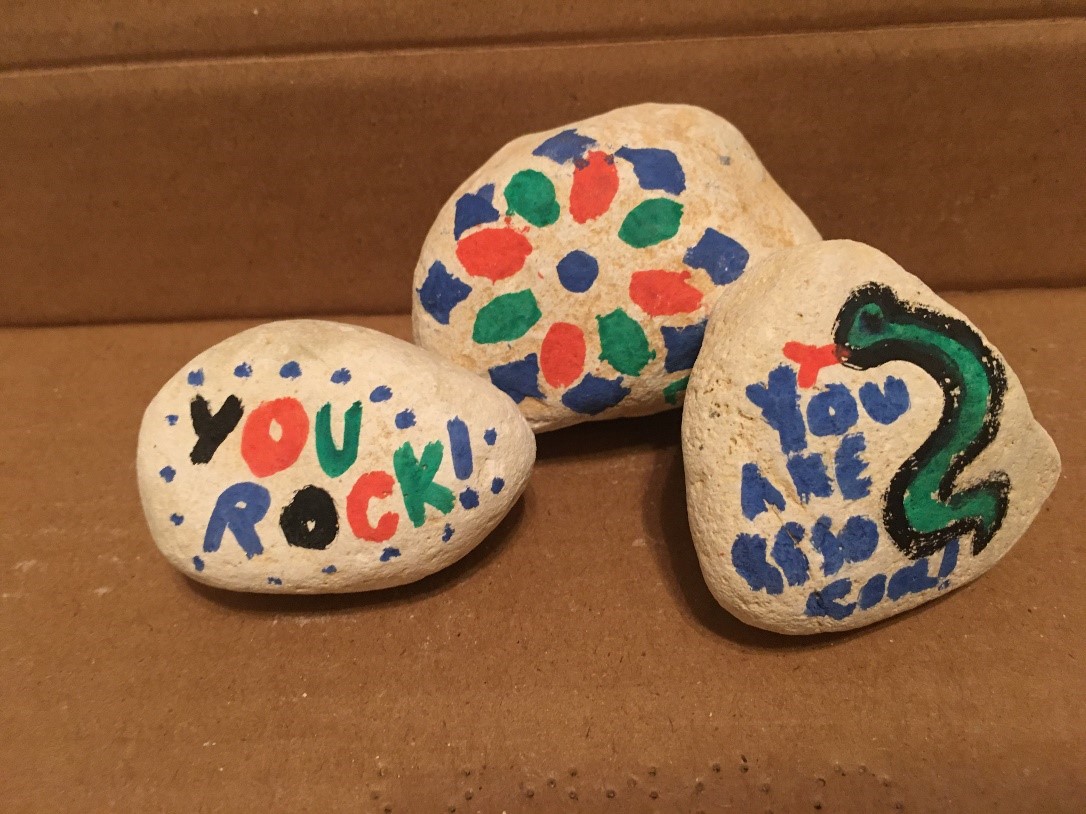
5. There’s only one rule for making kindness rocks: do it with kindness!
6. Once you’ve made a kindness rock, give it to someone you care about.
 Youth Services Assistant Librarian Alyssa
 -
5 Ways Your Child Can Fight Anxiety -- and Have Fun, Too
We live in an unusual, sometimes frightening time, and it’s only natural that your little one may be a little stressed out. Now that school is back in session, that stress may have doubled -- but don’t worry! Here are 5 fun, anxiety-busting activities the whole family will enjoy.
1. Calm Down Jars
Using warm water, glitter, glue, and a jar, kids can create a simple sensory object that can aid in stress reduction. Children can focus on the dancing glitter, practice deep breathing, or simply distract themselves by shaking the jar. Calm down jars offer a simple introduction to mindful practice -- consciously focusing on a present moment or object without worrying about the looming, larger concerns in your life.2. Worry boxes
Worry boxes are exactly what they sound like -- kids can make little boxes, write down their worries, and put those worries away in the box. This symbolic exercise affords children a sense of control over their anxieties, allowing them to create boundaries for intrusive thoughts and stressors and putting them out of sight for a while… and maybe out of mind, too.
Slime isn’t just fun to play with -- it can be therapeutic, too. Manipulating slime can be an enjoyable source of sensory stimulation for little ones.
Playing with slime can also give children a sense of control over their environment. COVID totally transformed the way children interact with their peers and environment -- it changed what behaviors are acceptable or unacceptable, where they can go, who they can be around, etc. -- and retaining a semblance of control can help ease a troubled mind.
Plus, slime is justfun.
Blowing bubbles can help children practice deep breathing, which regulates anxiety. Bubbles can’t be formed by sharp, violent exhalations; they can only form when the blower is gentle and deliberate. This simple deep breathing exercise can help children regain a sense of control over their own physiological response to anxiety or stress.
Kids -- and adults -- can also visualize their anxieties flowing into the bubble. When the bubble pops and disappears, so does the image of whatever’s bothering the blower.
5. Coloring
Children can use coloring as a gateway to mindful practice: when you color, you give in to “the moment” and shut out big, intrusive thoughts as you devote yourself to this simple activity. Extraneous thoughts are pushed to the side, allowing children to “meditate” while coloring.
Looking for more fun activities? We’ve got you covered:
- 8 Activities for Treating Anxiety in Children
- 10 Therapist (and Child)-Approved Activities to Support Kids with Anxiety
- 31 Days of Sensory Play Ideas. Kid Approved!
Why these activities can help:
- 9 Reasons Kids Calm Down Coloring
- Amazing Benefits of Making Slime with Kids
- Blow Anxiety Away on a Bubble
- What Is Mindfulness Coloring?
- Why is my kid obsessed with slime?
- Why Putting Worries in a Box (or Jar) Calms Anxious Kids
 Youth Services Librarian Chris
 -
Can You Escape the Library?

Photo by Markus Winkler on Unsplash
Here at the Barrington Area Library, we are big fans of escape rooms. Since, we can't hold an escape room at the library, we decided to create a virtual one! See if you can solve all of the puzzles, find the clues, and escape the library!
The escape room can be done individually or in a group. If you find you are having trouble, try the escape room as a family!Ready to start? Click here to go to the escape room.
Looking for more fun activities? See a list of the library's upcoming events for kids.
 Youth Services Librarian Ann
 -
August Take-and-Make Kits
Bring home a fun new project! You can now register to pick up a Take-and-Make Kitfrom the Youth Services desk or through Parking Lot Pickup. Here are the instructions for each kit:
Toddlers and Preschoolers: Chenille Stick Weaving
Young children work on fine motor skills and create a unique piece of three-dimensional art. Toddlers will want to master this new process. When you’re done, take it apart and make something new!
Inside the Toddler/PreK Box:
1 plastic canvas
10 chenille sticks
Bonus activity for older preschoolers - 1 craft paper bag w/ blunt plastic needle and yarn for simple sewing
Chenille Stick Weaving:
1. Take hold of a chenille stick and push it through one of the small holes in the plastic mesh.
2. Pull it through from the other side – a little or a lot, it’s up to you!
3. Take the same end and weave it back through the plastic sheeting.
4. Do this several times with each stick.


Simple Sewing (for older Preschoolers)
Preschoolers work on hand strength and fine motor skills, while exploring the basics of sewing.
1. Thread your plastic need with yarn.
2. Push the needle through one side of the plastic canvas and pull until the yarn is partially through.
3. Pull the needle through another hole, in the opposite direct.
4. Experiment with making lines and shapes, or simply enjoy pulling the needle through the mesh.

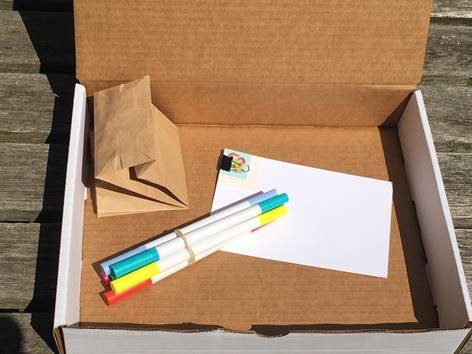
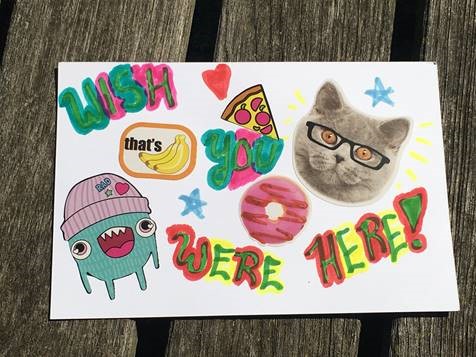
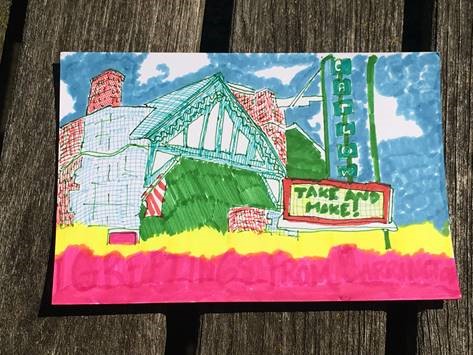
Grades K-2: Postcards
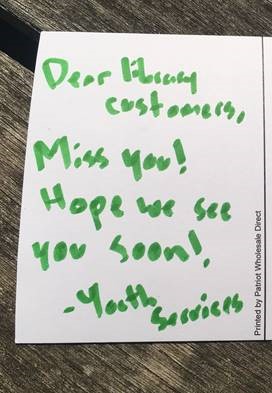
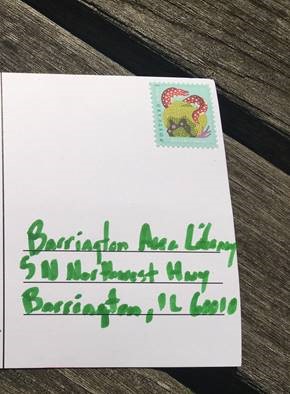
Let everyone know what a great summer you've had with a fun, personalized postcard!
Make a Postcard:
1. Take your postcard, stamp, markers, and sticker bag out of the box.
2. Decorate your card with stickers…
3. …or draw something cool with your markers (or both!)
4. Write a nice message to someone you care about on the back…
5. …and make sure you write down their address and stick on a stamp, too!
6. Now you can mail your postcard (make sure a grown up helps you with this part)!
Grades 3-8: Ombre Dip Dye
Lower fabric gradually into a dye bath to create a cool textile effect: gradual layers of lighter and darker color.
In addition to the Take-and-Make Kit, you will need:
A plastic tarp or large garbage bag
A plastic container for the dye, big enough to hold the entire bandana, but less than 12 inches wide on one side. (You could line the Take-and-Make box with a plastic bag and use that!)
A disposable plastic bag
Water - between 2 and 3 cups should do it
Paper towels to catch spills
Some stackable items - boxes, cans, etc. These should be around 4-6 inches high, about the same size & shape, and you might get dye on them! I went with 4 tissue boxes.
Ombre Dip Dye:
1. Lay out the tarp or large trash bag to protect your work surface. Doing this outside is a great idea!
2. Place your container on the tarp, then create two stacked towers around the container, around 18-20 inches tall. The dowel rod will sit on top of the stacks, and the bandana will hang into the container.
3. Use the binder clips to attach one side of the bandana to the dowel rod. Set aside.
4. Put on the gloves, then add water to the top line of the dye bottle. Shake, then pour into the container. Add some more water, until there's just enough liquid so the bandana will rest in the liquid. (This will depend on the size of your container.)
5. Carefully set the dowel rod on top of the stacks, making sure the bottom edge of the bandana is getting wet.
6. Wait about 3 minutes, then carefully add 2-3 more bottles of water to the container (to dilute the dye). Holding the dowel rod in one hand, carefully remove the topmost blocks from the stack, and rest the dowel rod on the lower levels. Once again, make sure the fabric is hanging in the liquid.
7. Wait another 3 minutes. Continue in this way, diluting the dye bath and lowering the rod, until there are just a few inches of fabric not dyed.
8. Get the plastic bag ready, laying it open next to the dye bath. Carefully raise the dowel rod, allowing the drips to fall into the bath for a few moments, and then gently wring out the fabric with your gloved hand, making sure not to touch the topmost part of the bandana.
9. Place the bandana in the plastic bag, keeping the dowel rod at the top of the bag, and bring it to a sink.
10. Leaving the dowel rod attached, carefully rinse out the bandana, allowing the water to move from the top to bottom. Keep rinsing until the liquid runs clear.
11. Remove the dowel rod and wash the bandana in your washing machine, alone, on cold settings. You can dry it in the dryer, or let it air dry.
 Youth Services Assistant Librarian Alyssa
 -
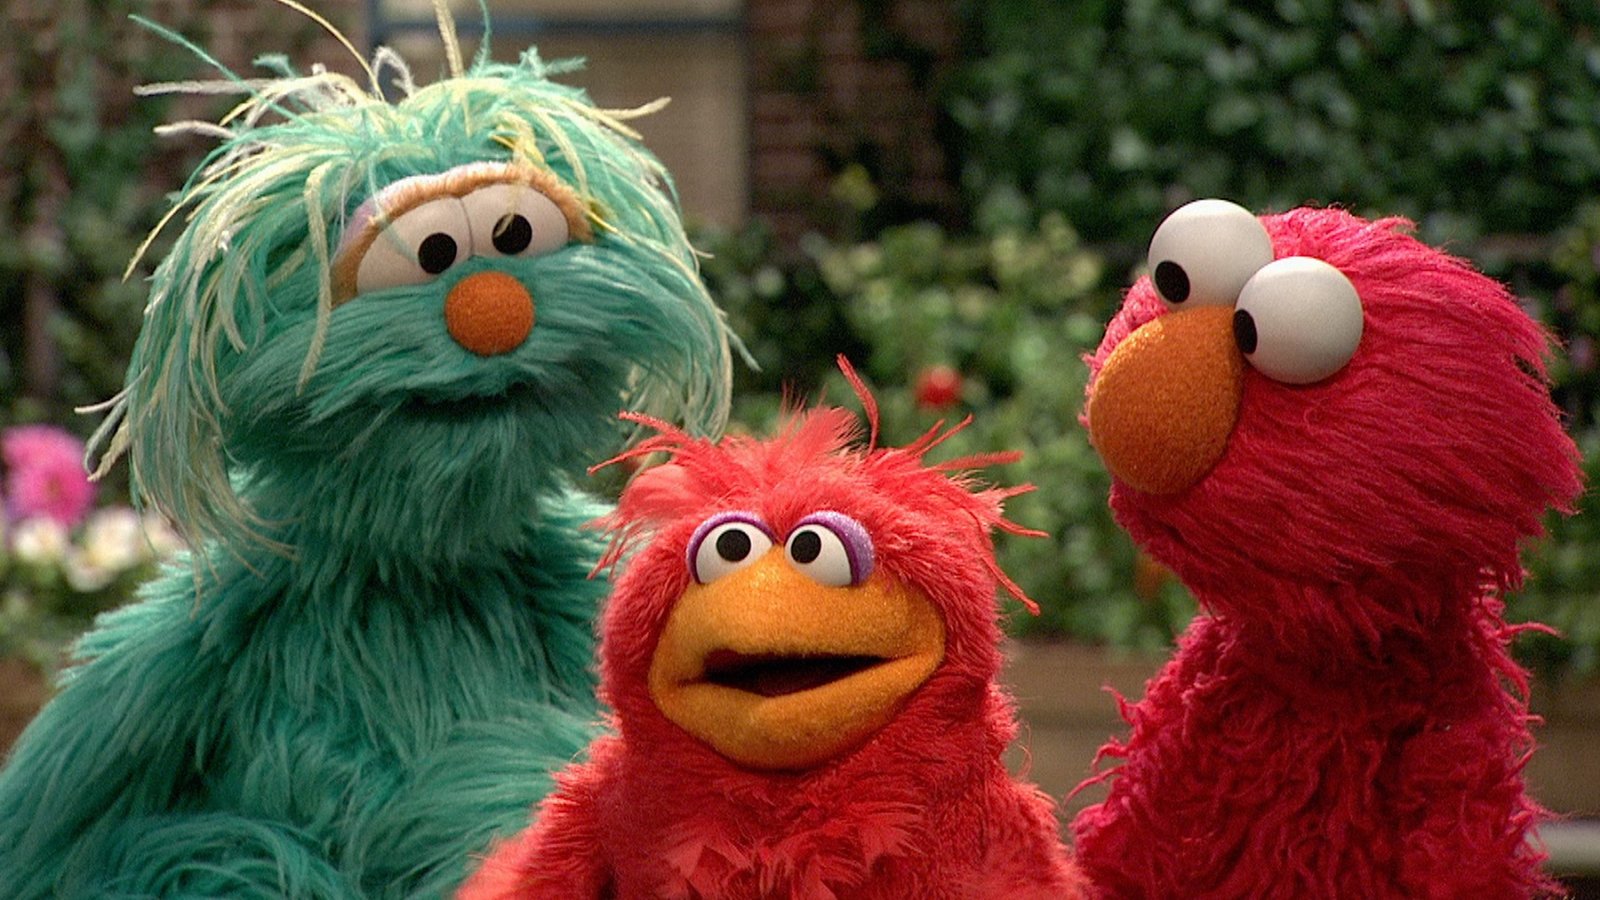
Sesame Street on Kanopy Kids: Elmo Finds a Baby Bird
Watch “Elmo Finds a Baby Bird” on Kanopy Kids using your Barrington Area Library card number to log in, and come back to this blog post to enjoy some family activities that will enhance your child’s learning around the episode.
Here are some questions that will help you unpack some of the topics in the episode with your child.
- When Elmo and Rosita find the baby bird, they can’t figure out what the baby bird is trying to tell them. Have you ever tried to communicate something to someone, but they couldn’t understand you? How did that feel?
- “Chasing the cheese” was a silly and fun way for the inhabitants of Sesame Street to get some exercise. How have you been moving your body and exercising lately? Can you think of a fun and silly way to get some exercise with your family this summer?
- During Elmo’s World, Elmo asked children how they play with their pets. Do you have a pet? If so, how do you play with your pet? If you don’t have a pet, have you ever played with a friend or relative’s pet? What did you do?
Below are some other activities to try as a family.
- Check out some of Audubon’s resources on birds! Here’s some information onwhat to do when you find a baby bird near your home,some activities on Audubon for Kids,how to make a DIY birdfeeder, or take a look atsome adorable baby bird photos.
- Watch theSesame Street crew’s NPR Tiny Desk Concert!
- Complete someSummer Reading activities to earn your Wellness Warrior badge! You can try a new fitness activity, take a walk or bike ride with your family, and so much more.
- Dance is exercise too! Sign up for our Watch Live: Family Concert with Tunes with Tim on Monday, July 27th at 10 am.
- Try eating or cooking with a new fruit or vegetable (with your grownup of course!). Here’s a smoothie tutorial by Cookie Monster. What did you eat and/or make? Make sure you log your activity to help earn your Summer Reading Garden Guru badge!
 Youth Services Assistant Librarian Stefanie
 -
Take-And-Make Kits at the Library
You can now register to pick up a Take-and-Make Kit during the Barrington Area Library’s Parking Lot Pickup hours, bringing a fun new art project home to explore. Here are instructions for each kit:
Toddlers & Preschoolers: Contact Paper Stained Glass and Nature Art
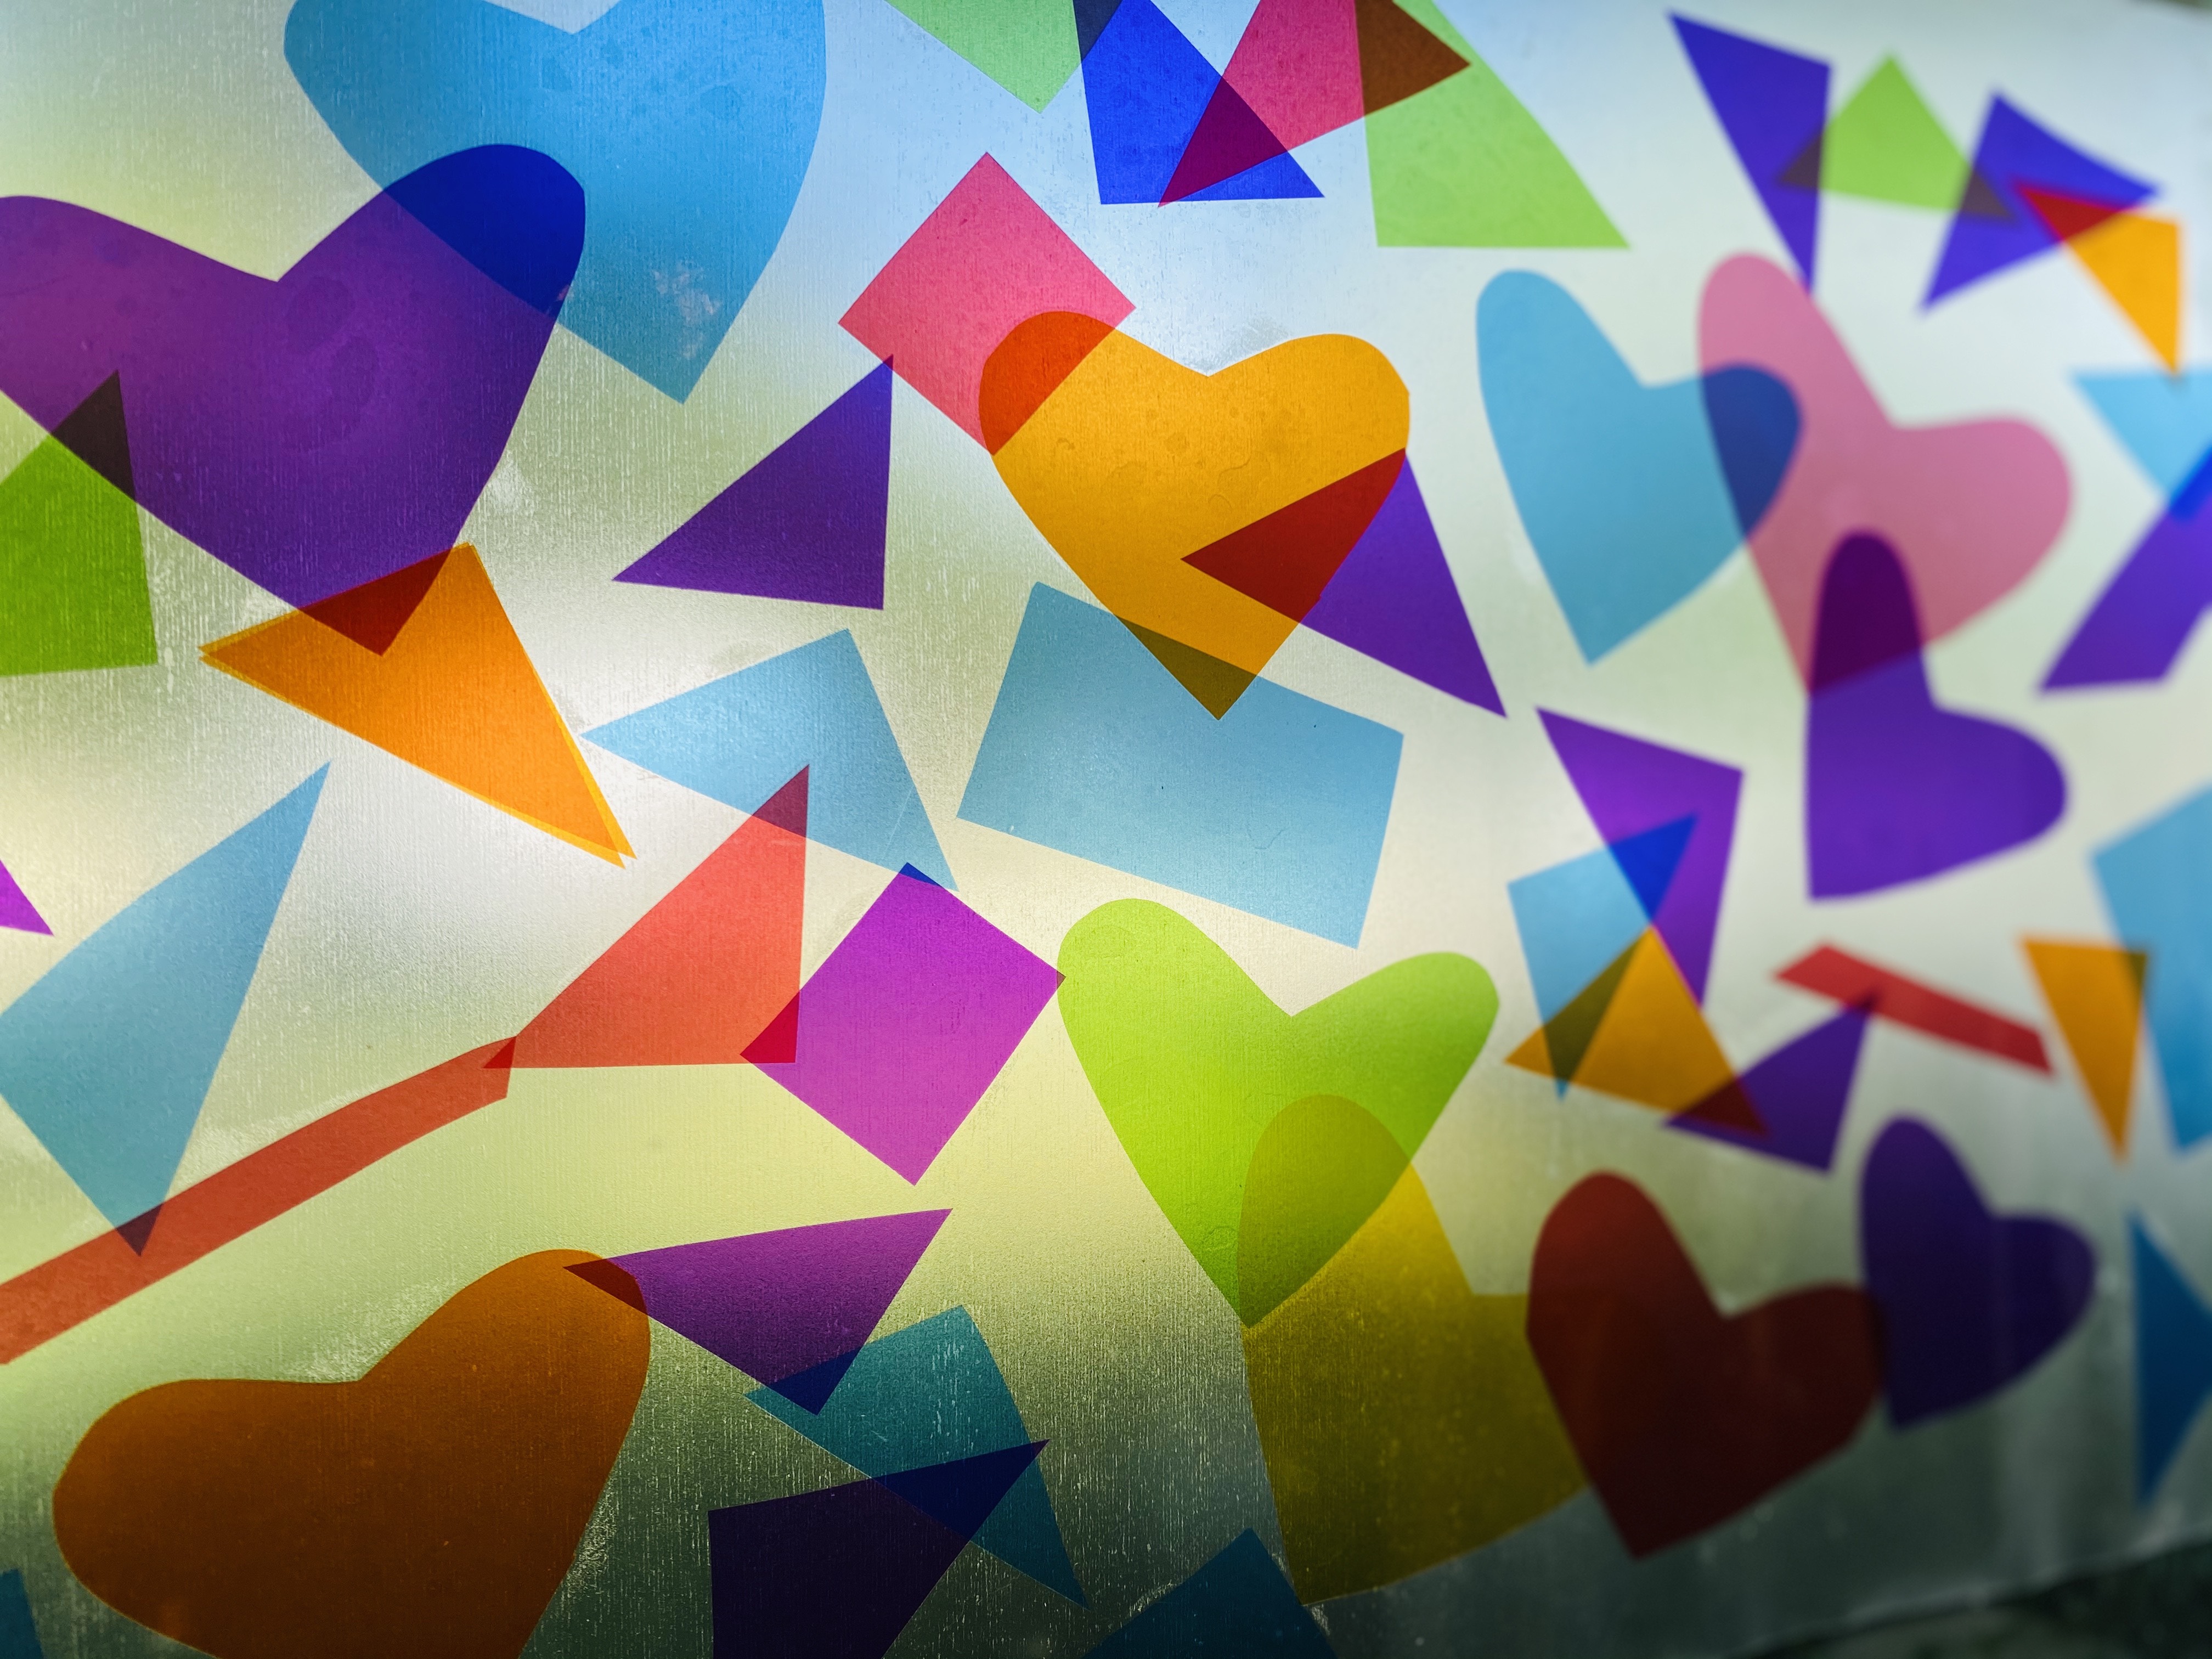
Contact Paper Stained Glass
- Cut out different colored shapes from the cello paper.
- Remove the backing from the contact paper, carefully setting the sheet down sticky-side up.
- Press the cello paper down onto the sticky contact paper.
- Display your artwork in a window, letting the light shine through.
Contact Paper Nature Art
- Go outside, gathering up small leaves, sticks, and flowers.
- Remove the backing from the contact paper, carefully setting the sheet down sticky-side up.
- Press the objects from nature down onto the sticky contact paper.
- Feel free to add any other materials from your own supplies.
- Display your artwork!
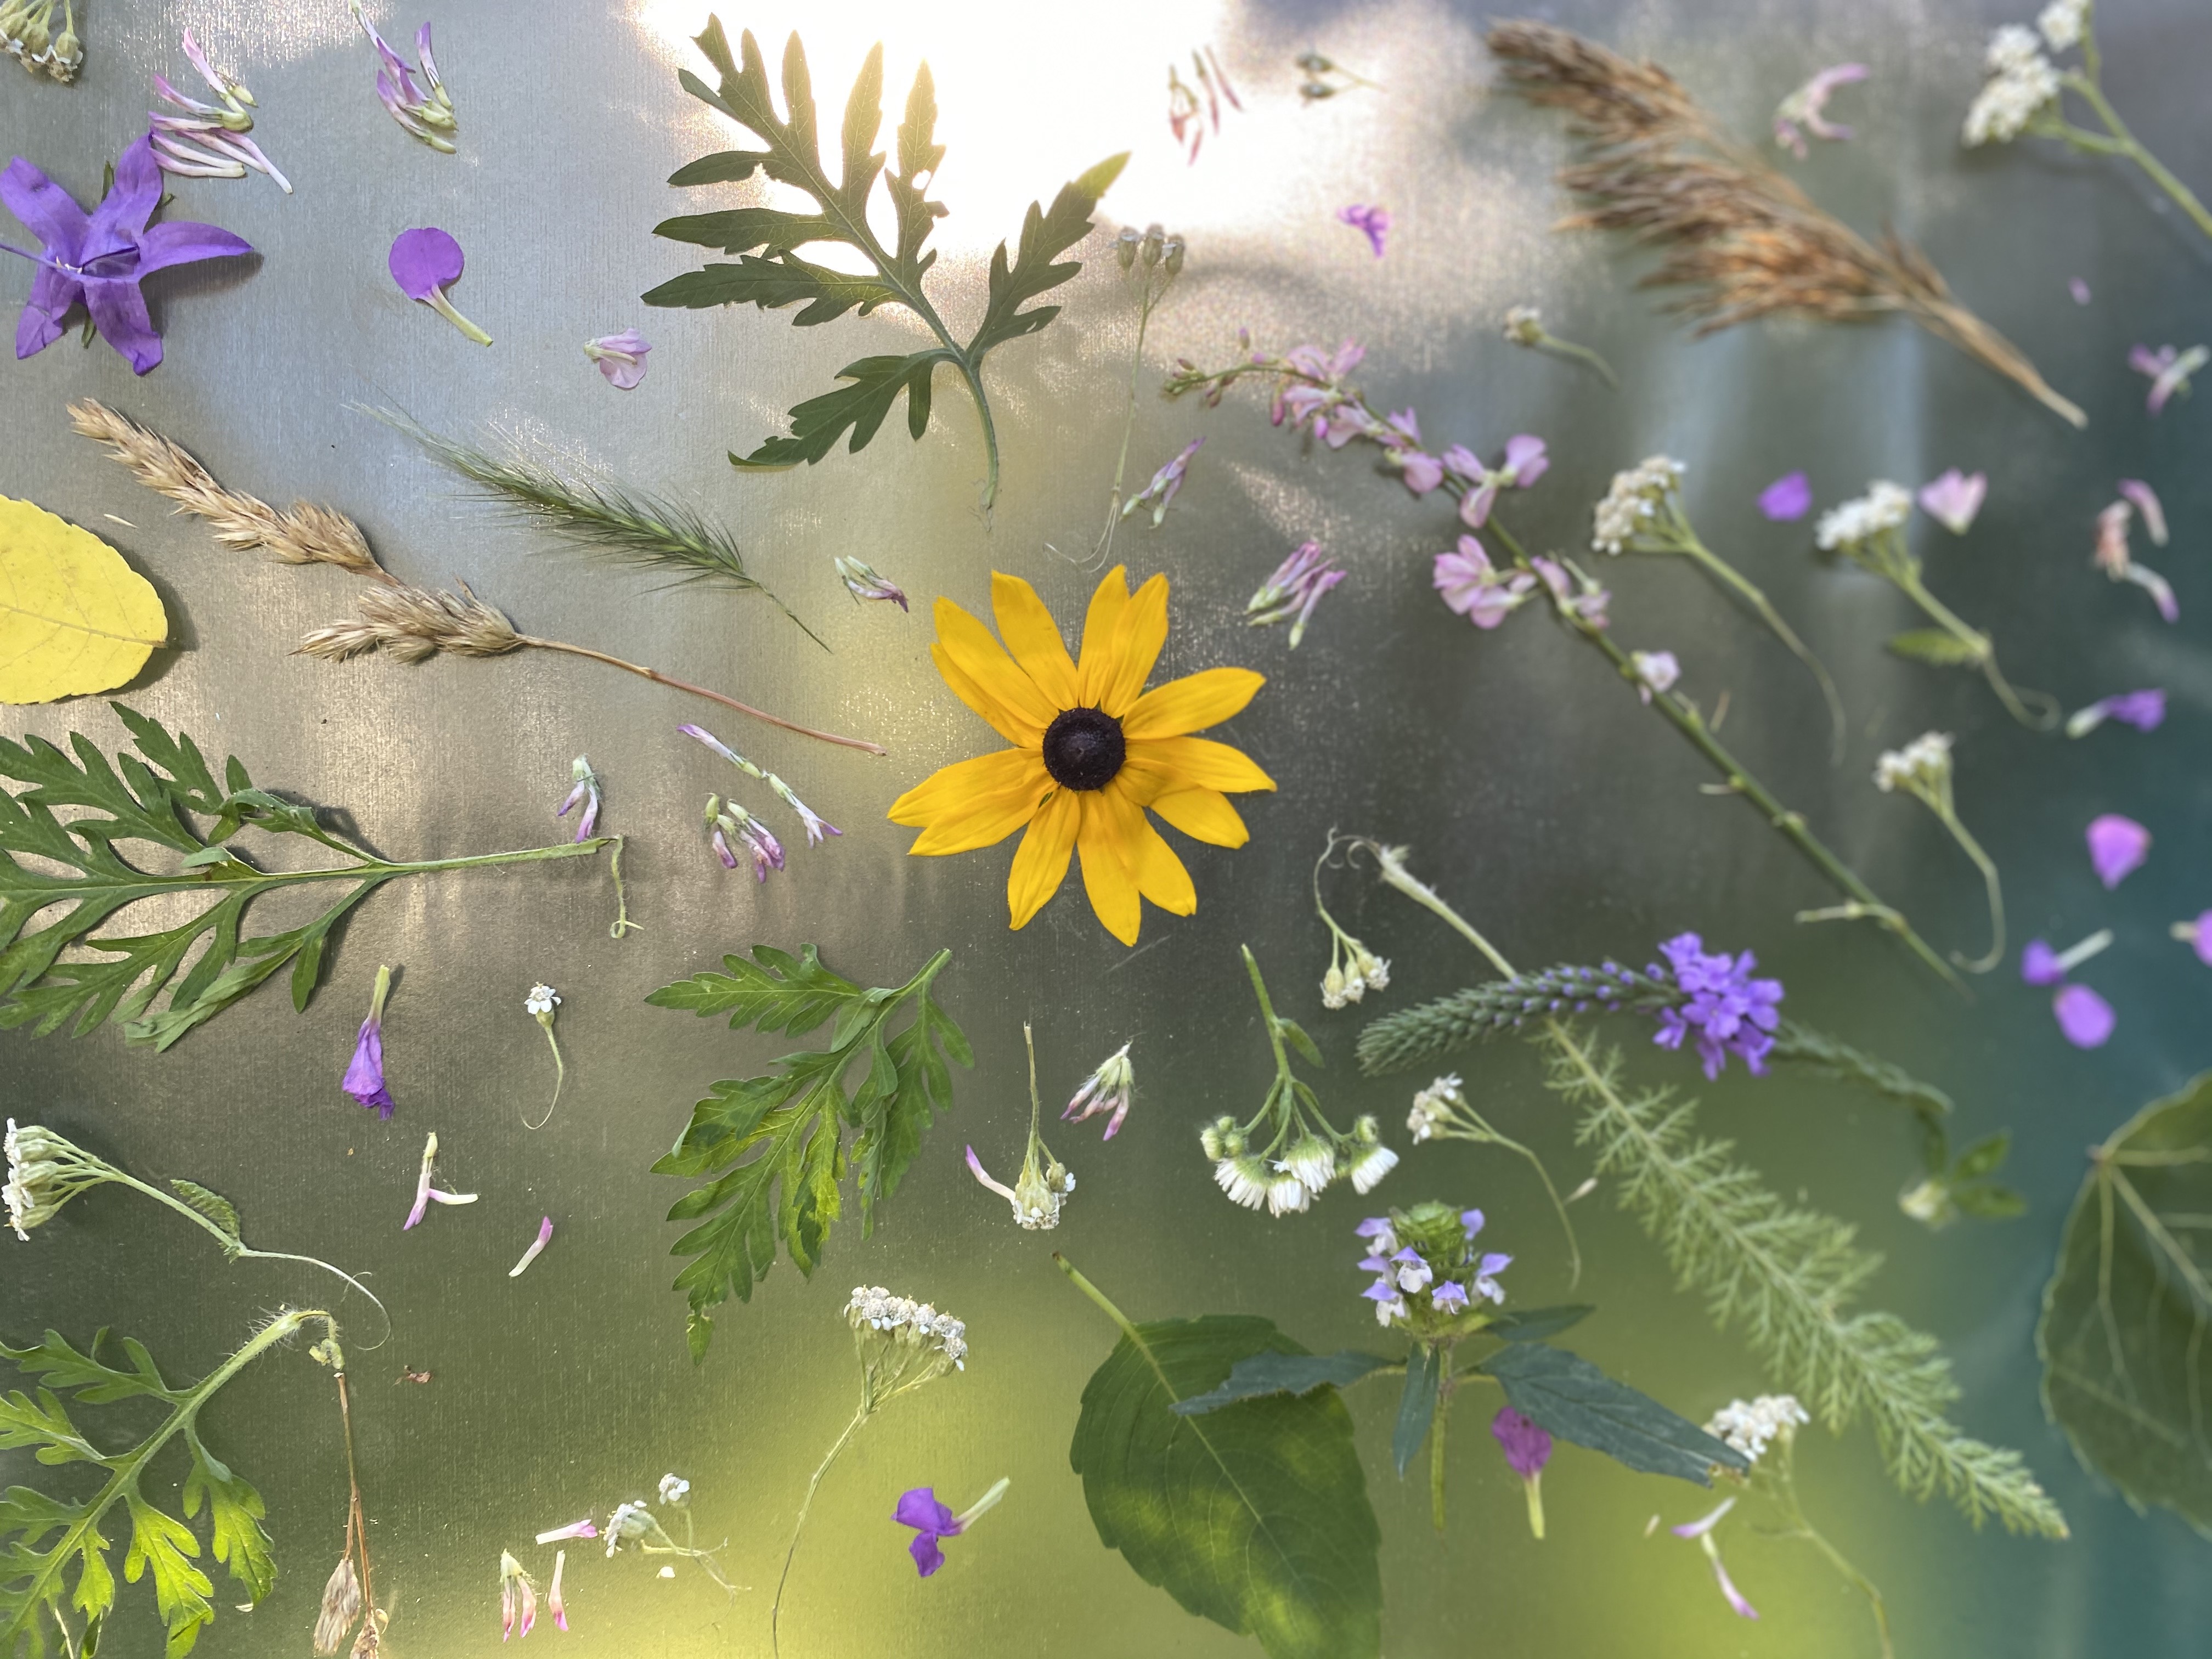
Grades K-2: Sidewalk Stained Glass
Turn your sidewalk or driveway into a work of art, while having fun in the sun.
- Find a square of sidewalk or driveway, or make a large square or rectangle out of tape.
- Stretch and stick a piece of painter’s tape, any size, across the space in any direction.
Stick another line of painter’s tape in a different direction. - Keep going to create different geometric shapes.
- Once your square of sidewalk is broken up with a good number of lines, start coloring in the shapes with sidewalk chalk.
- Use one color for each space.
- Once all the visible pavement is colored over, pull off the painter’s tape.
Grades 3-8: Sun Prints
Use the power of the sun and objects from nature to create beautiful designs.
- Find some objects you’d like to print - leaves, flowers, rocks, or anything you’d like to use to make a print.
- Once you are ready with your objects, remove the blue sun-printing paper from the manila envelope.
- Place the paper in the sun, and then immediately place your chosen objects on the paper.
- Allow to sit in the sun until the sun-printing paper turns very pale blue, about 2 minutes.
- Remove the objects from the paper, and quickly remove the paper from the light.
- Immediately soak the paper in a container of plain tap water for about 1 minute.
- Dry flat.
 Youth Services Librarian Allison
 -
5 Nonfiction e-Books to Keep You Busy
Check out one of these e-books, available on Overdrive, and full of fun activity ideas to keep hands and brains occupied!
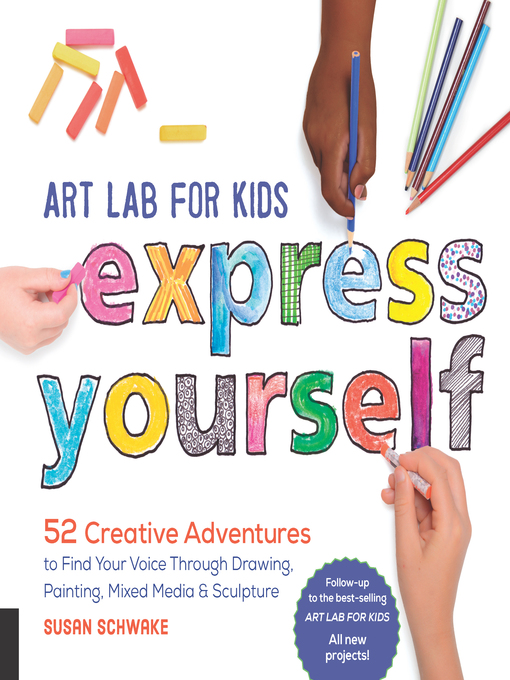
With full color photographs to inspire, this fun collection of art activities encourages children to create freely, using their own thoughts and experiences as a guide.
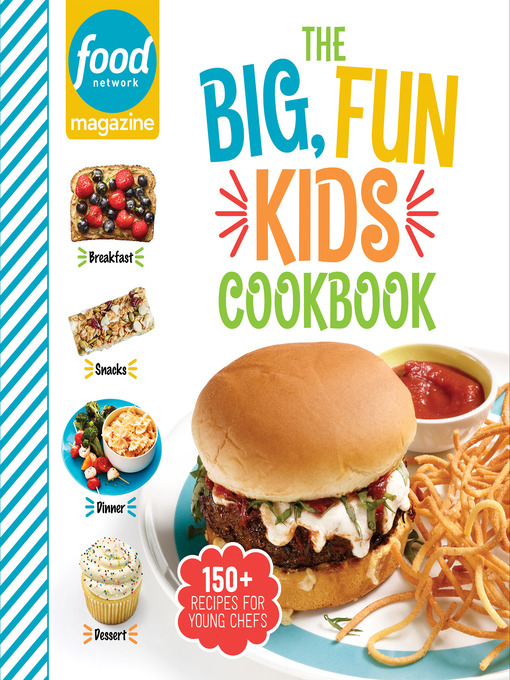
The Food Network Magazine created this colorful recipe collection just for young foodies.
 The Complete Baking Book for Young Chefs
Brought to you by the genius minds at America’s Test Kitchen, this recipe book offers over 100 sweet and savory baked goods.
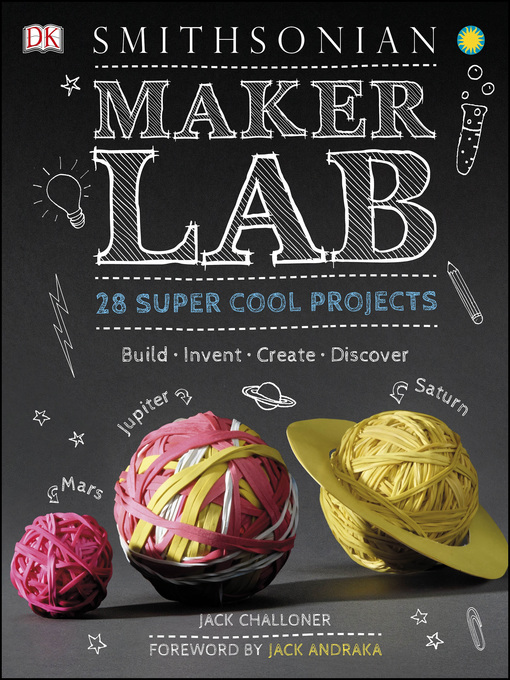 Maker Lab: 28 Super Cool Projects
 This award-winning science book is bubbling over with entertaining and educational experiments for budding scientists.
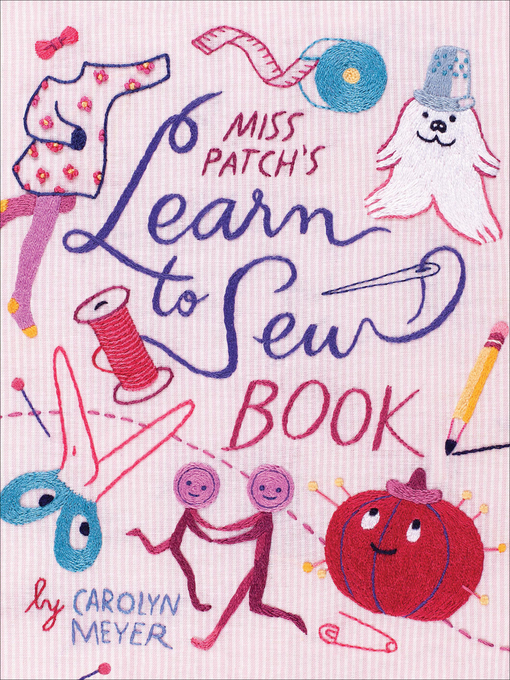 Miss Patch's Learn to Sew Book by Carolyn Meyer
Although this book was originally published in 1969, the simple instructions and adorable illustrations still work for today’s young crafters.
Need more activity ideas? Keep tuning in to our blog for at-home ideas, or check out Creativebug, our database with how-to videos on fun crafting and art projects.
 Youth Services Librarian Allison
 -
Spine Poetry
Did you know that April is National Poetry Month? I don’t know how you feel about poetry, but it has always been a little intimidating for me (I even took a whole class on poetry in college and it’s still kind of scary!). I never know how to start a poem, what I should even write about, and the most nerve-wracking part for me is sharing what I’ve written with a loved one or friend.
If this sounds like you--I have a solution. Spine poetry! So, that thing that’s sticking out on our bookshelves at the Barrington Area Library, you know, the one with the title of the book on it? That’s called the spine! If you have a few books lying around at home, take a look at their titles. How can you arrange them so it looks and sounds like a poem? Here’s one that I wrote with some of my books at home.
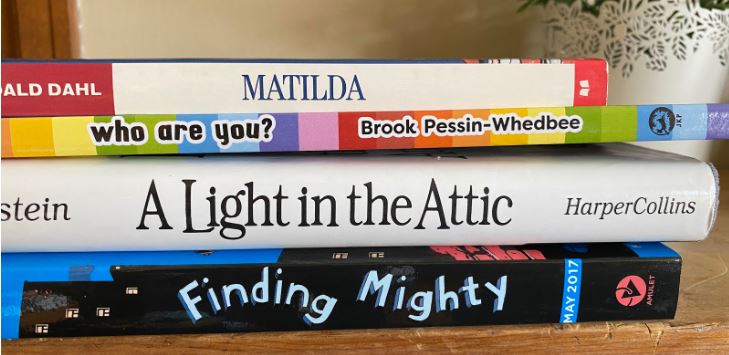
Matilda,
Who are you?
A light in the attic,
Finding mighty.Myfiancé, Erik, wrote this one.
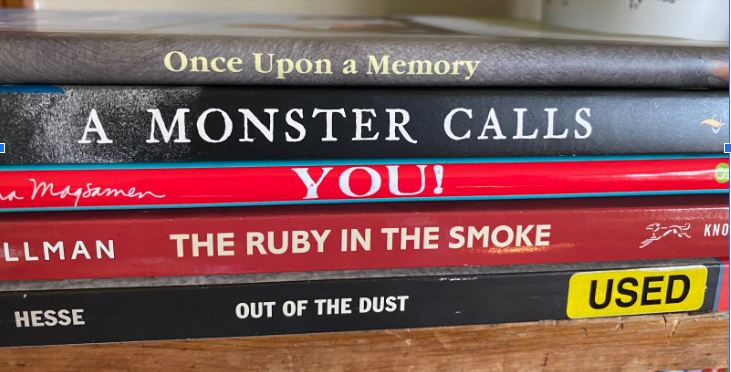
Once upon a memory,
A monster calls…
YOU, the ruby in the smoke,
Out of the dust.Spine poetry takes some of the pressure off for those of us who are a little intimidated by writing poetry. You already have a pool of words to work with, now you just have to figure out the best way to arrange them. After writing a few spine poems, you might even gain the confidence to try writing poetry on your own!
Snap a photo of your poem, or type it up, and send it to us at youthservices@balibrary.org by Friday, May 8!
Mindful Moment
Writing a mantra is similar to writing a poem. A mantra is a phrase that you repeat to yourself throughout the day to help you get through it. It can be something like “today is going to be a good day,” or “I can breathe through this moment,” or “I am thankful.” Think of a mantra that will help you through today. Take a deep breath and repeat it to yourself three times. Repeat as many times as you need to throughout your day.
 Youth Services Assistant Librarian Stefanie
 -
5 Ways Teens Can Celebrate National Poetry Month
“April is the cruellest month, breeding
Lilacs out of the dead land, mixing
Memory and desire, stirring
Dull roots with spring rain.”
- -- T. S. Eliot
Wow. It’s like heknew everyone would be cooped up 24/7 in April 2020. I don’t know about you, but this whole pandemic thing is making me feel a little… claustrophobic. And bored! So. Bored. I think we all have a lot of complicated feelings about our current situation, and it’s easy to let those feelings stress you out or make you feel a little… hopeless.
And it’s okay to feel that way! This is a tough time for everybody -- you can’t hang out with friends, everything is closed (my favorite Vietnamese restaurant is closed for the month and this makes me sad), and the future feels uncertain. And that’s not evenmentioning the whole “you’re still going to school” thing.
So what do we do with these feelings? We can’t just bottle them up and ignore them -- that wouldn’t be healthy. Maybe we should find some ways to express the way we feel and (hopefully!) have some fun doing it.
April is not only the cruellest month,it’s National Poetry Month. Sure, the month's almost over, but let’s celebrate together anyway! Here are 5 ways teens can celebrate National Poetry Month.
Oh -- one more thing! And when the Barrington Area Library reopens, be sure to check out some of our great poetry collections!
1. Check Out the National Poetry Foundation!
Reading poetry is the best place to start. The National Poetry Foundation has put together a lot of great resources to help you dip your toes into the world of poetry, including podcasts, articles, and most importantly, poems. They also have a “Featured Poet” section where they introduce you to a classic poet. Make sure to take a look at the “Poems for Teens” section on this page -- they’ve put together an anthology of poems you might enjoy.
2. Watch a Poetry Slam!
It’s important to remember there’s no “right” way to write poetry. I’ve noticed that a lot of people think poetry has to be written a certain way, or that some subjects aren’t worth writing about. Don’t sweat it! Poetry is, above all, about self-expression. If it matters to you it’s worth writing about. Poetry slams are a great way to showcase this.
“Okay, Chris, but what’s a poetry slam?” you might ask. Poetry slams are competitions in which people perform their own spoken word poetry in front of an audience and a panel of judges. They can be local, national, or even international. The beautiful thing about a poetry slam is that it features a variety of people talking about what matters most to them -- they get to make themselves seen and heard in front of an audience.
Youth Speaks is a great way to introduce yourself to the world of poetry slams. It features poetry by teens from all over the country, including the Chicago area. You could try watching some at random or look for poems relating to things that are personally important to you.
3. Can You Haiku?
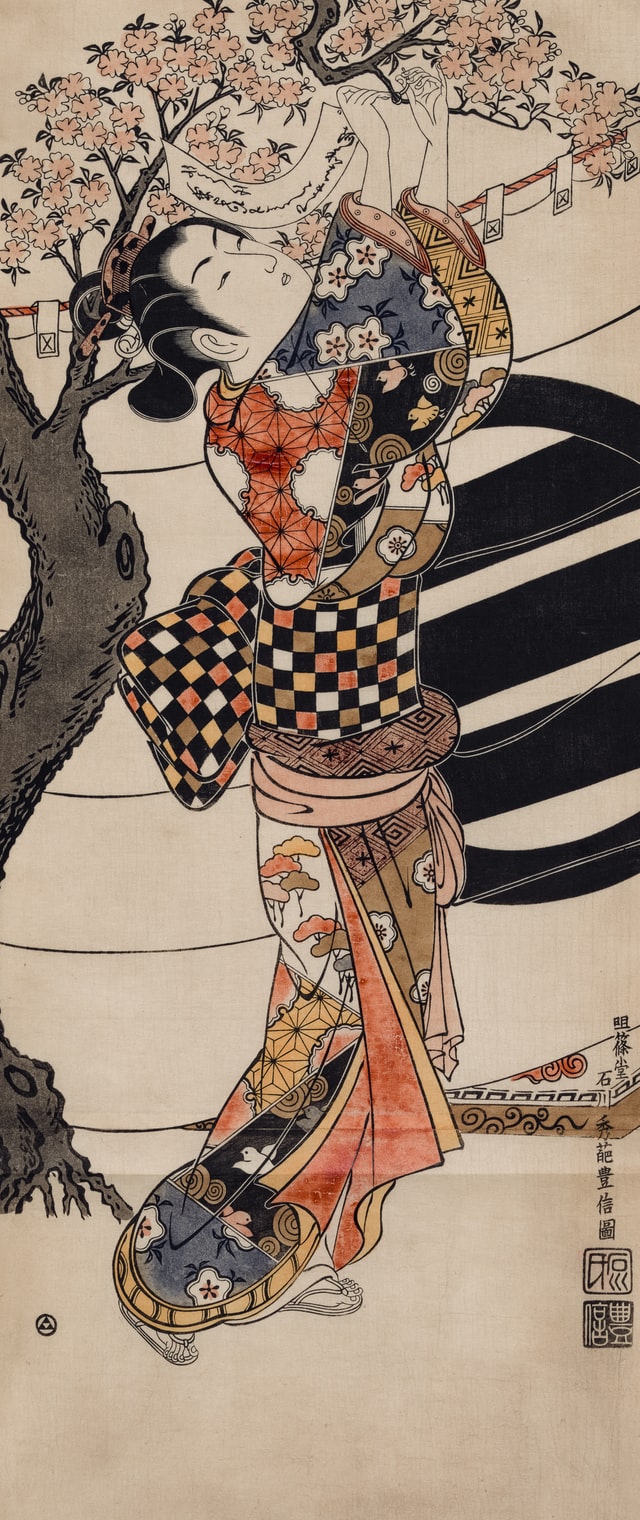
Poetry doesn’t have to be long or complicated. Sometimes the beauty of a poem comes from its simplicity. Haiku is a Japanese poetic form that emphasizes simple language, immediacy, and our relationship with nature.
Haiku are only three lines long, and often contain only 17 syllables. That’s 5 syllables in the first line, 7 in the second, and 5 in the third. This isn’t actually a rule of haiku, though -- the poets who created it certainly didn’t restrict themselves to only 17 syllables.
When you write haiku you’re trying to capture a snapshot of something that’s happening. For example, here’s one of the most famous haiku, by the poet Basho:
“The old pond;
A frog jumps in --
Water sound.”See?
Haiku doesn’t have to be serious, either. Here’s a poem by another famous haiku poet, Issa:
“New Year’s morning --
Everything is in blossom!
I feel about average.”Since you’re stuck in quarantine, why not try flexing your haiku muscles? All you have to do is sit and watch as the world unfolds around you, and when you think you’re ready jot down three simple lines.
In the meantime, check outTeen Ink. They feature poetry by teenagers,for teenagers.
4. Blackout!
Poetry doesn’t have to come out of thin air. Sometimes you can use things you already have to create something new. For example, try blackout poetry!
All you need to make blackout poetry is a marker and an old book, magazine, or newspaper you don’t need anymore. Use the marker to draw a square around the words or phrases that jump out at you. Your mind will slowly form a story or poem out of the things you’ve picked.
Remember: it’s okay if you “mess up.” Sometimes writing takes you somewhere unexpected, so just go with it!
If you’re looking for inspiration check outNewspaper Blackout.
5. Most Importantly, Express Yourself!
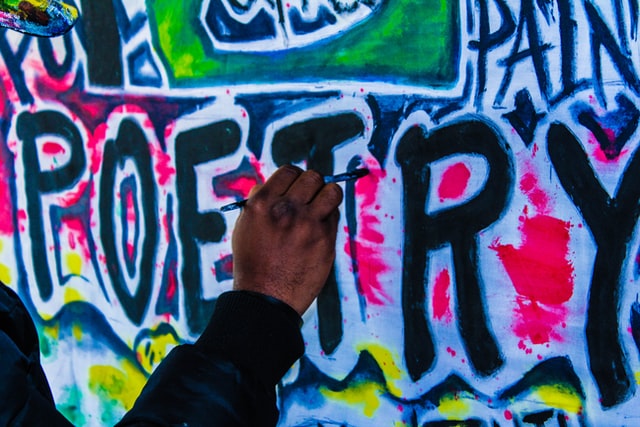
Write whenever the urge hits you.Now that you’ve got a few different types of poetry to explore, why not write some? It doesn’t matter if it’s “good” or not -- it’s yours, and you made it, andthat’s what’s important.
Even if you never show another person your poetry, you should be proud that you wrote it.
Snap a photo of your poem, or type it up, and send it to us at youthservices@balibrary.org by Friday, May 8!
Mindful moment
Get up, stretch, and go outside. Take a walk. What do you see? What do you hear?
That’s poetry.
 Youth Services Librarian Chris
Page 2 of 2

 The Big, Fun Kids Cookbook