From memes to green screen, here are common projects you can create in Studio 1 and Studio Kids. For more in-depth coverage of the software used, visit Linkedin Learning.
Create a meme: Photoshop
Green Screen Effect: iMovie
Green Screen Effect: Photobooth
Save iMovie Project (Studio 1)
Program a Character: Alice*
Record a Song: Garage Band
Scan Drawing into Sketchbook Pro*
Save iMovie Project (Studio Kids)
*Tutorials with an asterisk use software only available in Studio Kids
Create a Meme in Adobe Photoshop
You’ve probably seen them all over the internet- a picture with a funny phrase above and below a picture. These are called memes. You can create your own meme by adding a photo to Photoshop, and adding text to the image.
Open Adobe Photoshop

Find a picture to meme and drag it onto the desktop
Drag and drop your image into Photoshop
(Optional) To delete your image, click on the x below the top toolbar
Memes usually have text above and below the subject. Click the text icon to add a message, then change the font to Impact and size to 36 pt. or larger
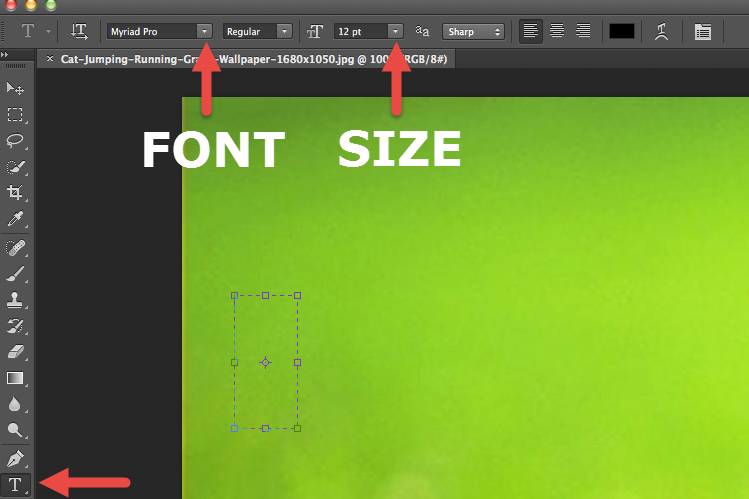
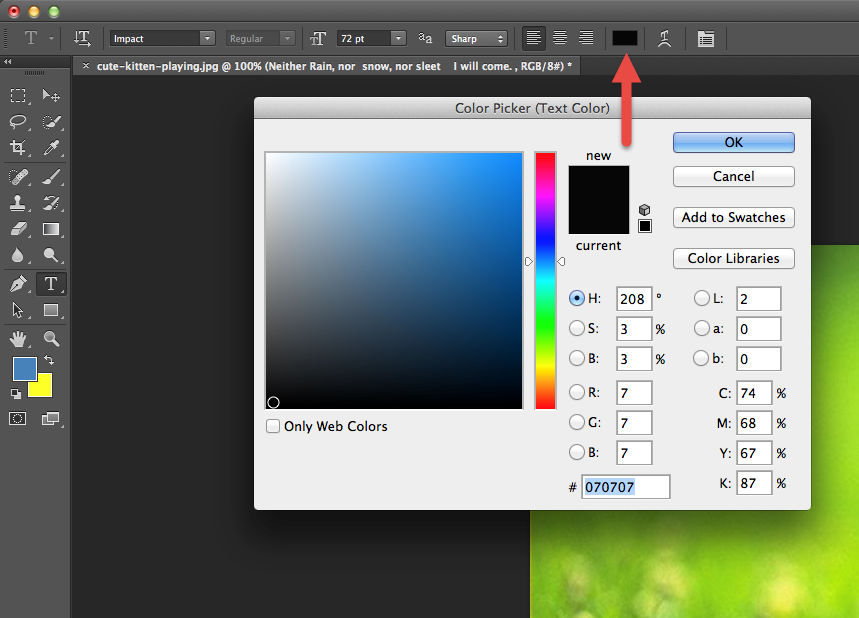
To change the color of the text click the color square on the toolbar at the top and a color picker will open. Note: memes are typically white
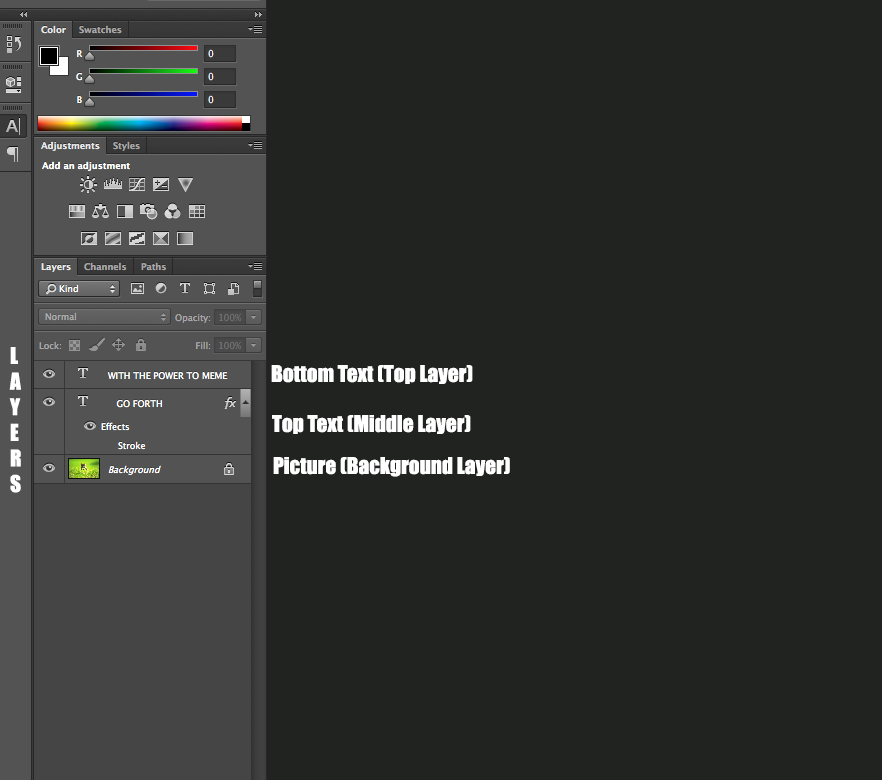
As you add more text and effects to your image, you’ll notice that layers appear on the right side panel. These layers allow you to edit different areas of your photo without effecting areas you don’t want to change. If you find that Photoshop does not let you edit an effect, check that you are in the correct layer
To add a black outline around the text, hold down control and right click on your text layer to pull up a menu. Select Blending Options

Select Stroke from the Blending Options menu
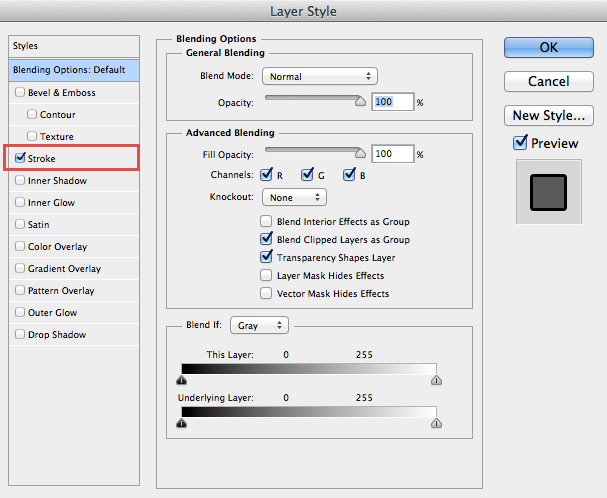
Your text should now have a black border around its edge. If your text is in two different layers, you may have to do this twice
Congrats, you have now completed a meme in Photoshop!

Green Screen Effect: iMovie
Take a picture or video of yourself in front of the green screen
Import your footage onto the computer
Open iMovie and click the create button, select movie, and choose a theme and click create

Select a picture from the desktop folder, Green Screen Backgrounds

Drag the image into your timeline (lower half of the screen)

Drag and drop your green screen footage on top of your background

Click on your green screen footage in the timeline
Click Adjust above the video preview window

Click the drop down arrow in the box that says Cutaway and select Green/Blue Screen

You will now see yourself in front of a new background

Press command + Shift + 3 to save a screenshot to the Desktop
Optional: To remove the pan effect on the video, highlight both clips in teh timeline and click Adjust > Crop > Fit

Green Screen Effect: Photobooth
Open Photo Booth
A pop up will appear and you will see yourself on the display. The camera is in the iMac monitor on the far left (a green light is on at the top of the monitor)
To change the angle of the camera, gently tilt the computer monitor
Click the effects button
Scroll through the effects options, until you see boxes that say User
Backdrop 1, User Backdrop 2.

Find a picture to use for the background
Drag and drop the image into one of the backdrop squares. If your picture does not go into the square, double check that your image is in a picture (jpeg or png file) format. Saving the image as a jpeg or png file will ensure that it is in a picture format.
Click on your backdrop. Photo Booth will tell you to step out of the frame. This allows the picture to cover the entire frame. Quickly step out of the frame.
If you did not step out of the frame in time close and reopen Photo Booth
Step back into the frame. Press the camera button when you are ready to take your picture.

Program a Character: Alice
Make a Character Move and Talk in Alice.
Double click on the icon Alice 3
Select a background for your project
Click Setup Scene.

There are several categories people, places, and things, which you can add to your program. You can browse by class hierarchy, theme, or group. When you find something you like, click and drag it into your background
You can add as many characters, and objects to the background as you like. On the right hand toolbar you will see options to rotate, resize, and move your objects around the scene (translation)

When you are done adding and positioning objects to your program, click edit code.
Click on the character that you want to move. Under the procedures tab there is code that lets you make your character talk, think, move, or change its appearance.
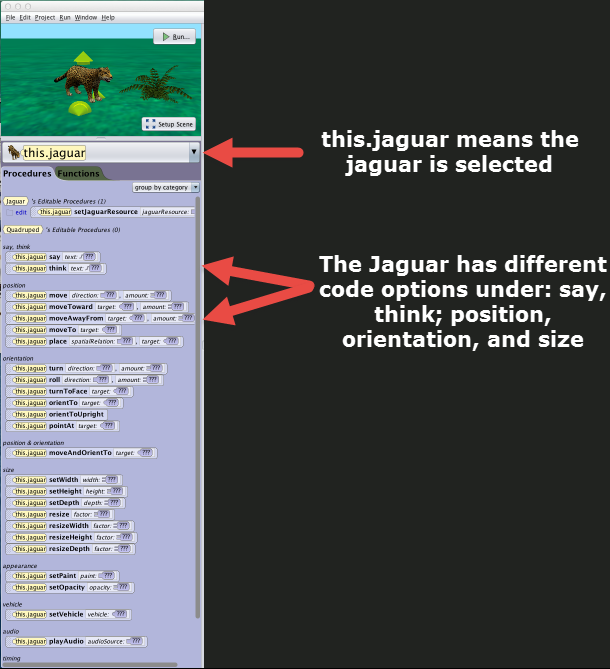
Under the position section, drag the code: ![]() into the scene screen. Click the direction, and amount that you want your object to move.
into the scene screen. Click the direction, and amount that you want your object to move.
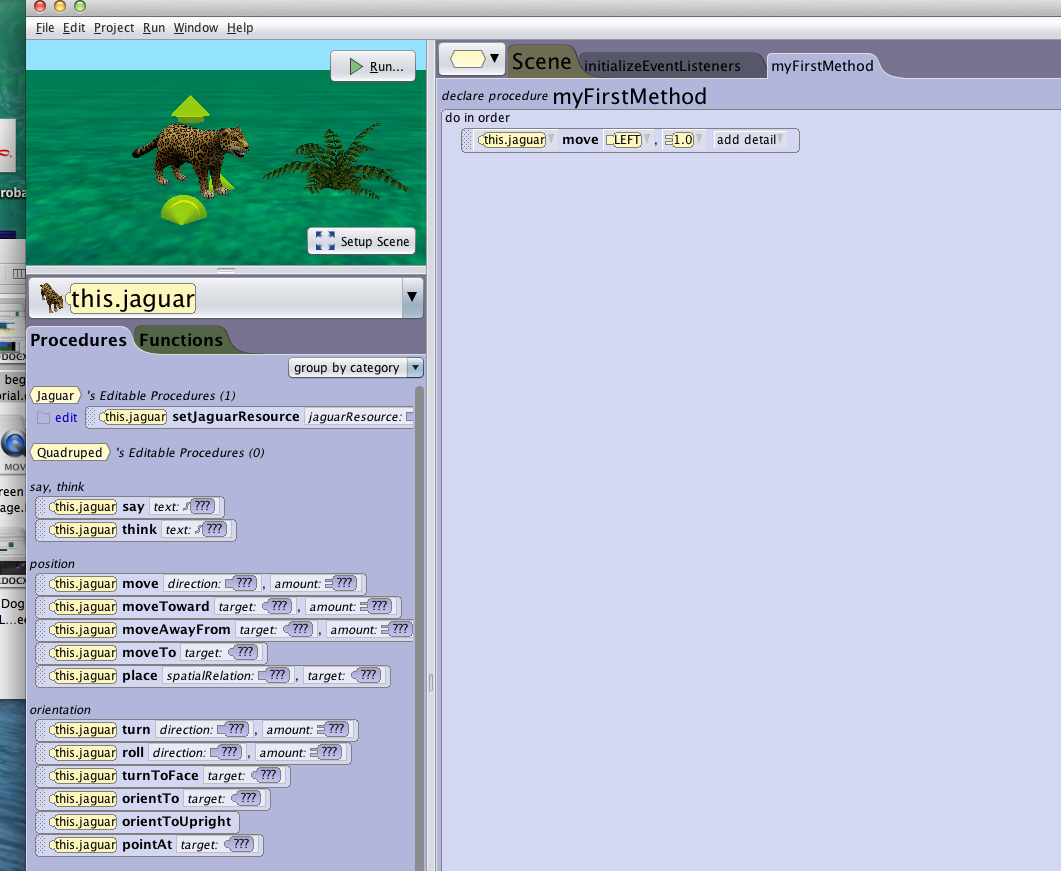
Under the say, think section drag  directly below your move.direction code. Your object can say “Hello”, or you can type text for your character to say.
Click Run to see your object move and talk
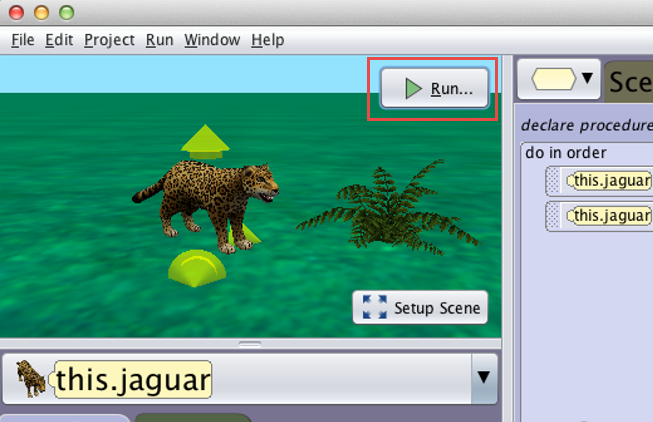
Congrats, you have just made an object in Alice move and talk! Try adding more code to your characters.
Record a Song in GarageBand
Double click on the program, GarageBand
When GarageBand opens, it gives you a variety of options for instruments
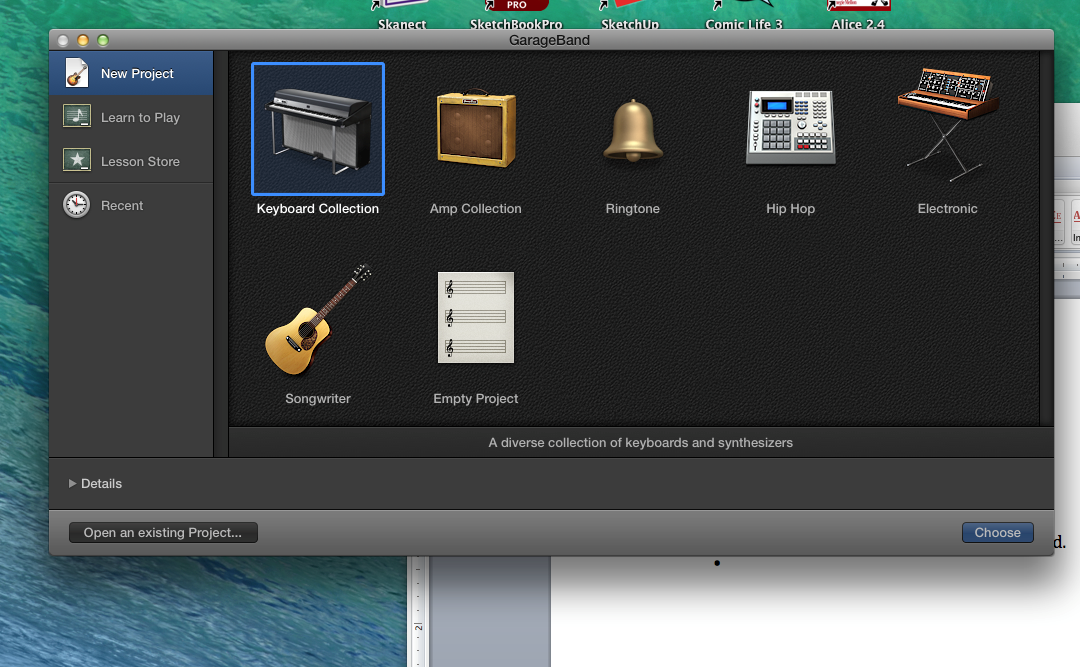
Select one of the options. If you are unsure which one to pick, click Empty Project
When you touch the keyboard, you should now hear sound
If you don’t hear anything, turn the volume up on the computer keyboard and make sure the speakers are on
The panel on the left shows you what instrument you are playing
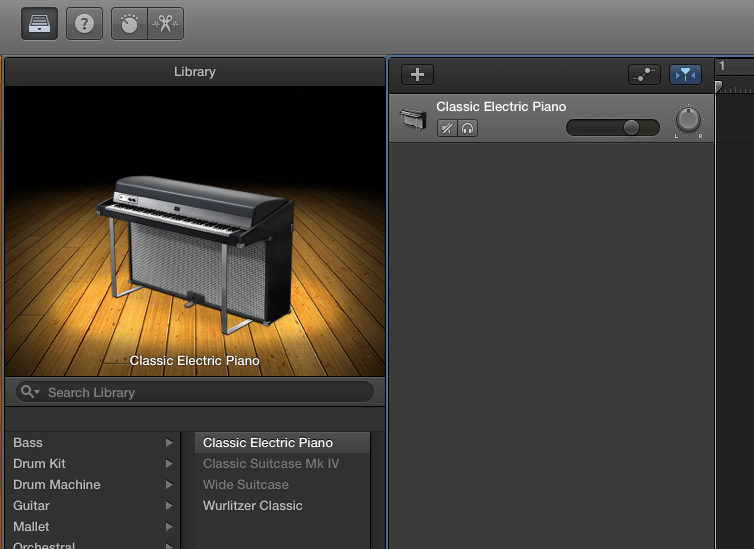
You can change your instrument by clicking on the list of musical instruments on the left
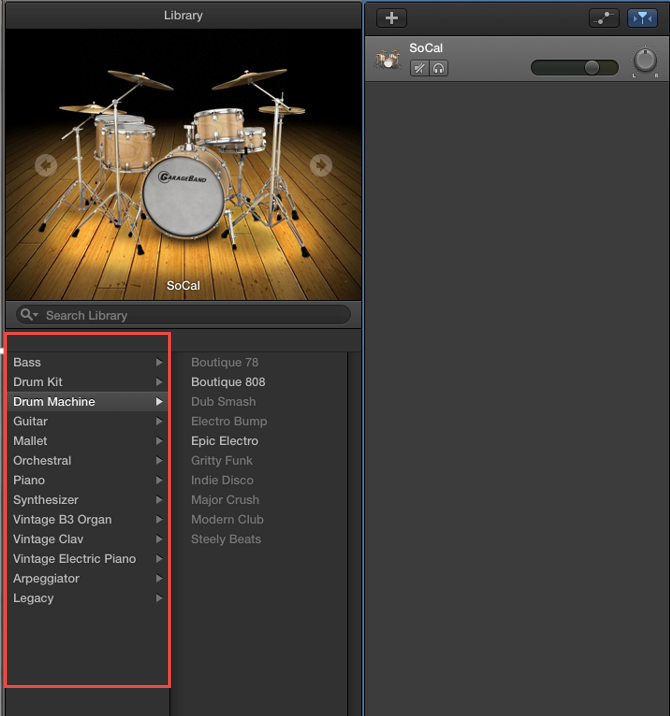
To add another instrument, or to change from the keyboard to the microphone click the + button.
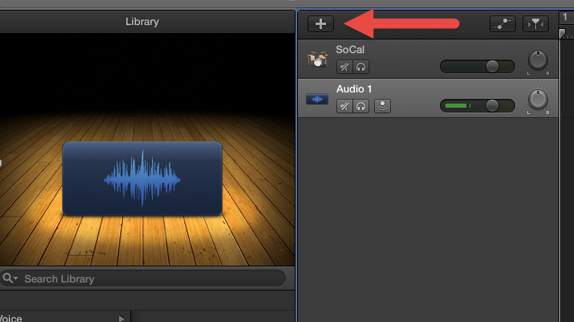
A box will pop up. Select the microphone icon for the microphone
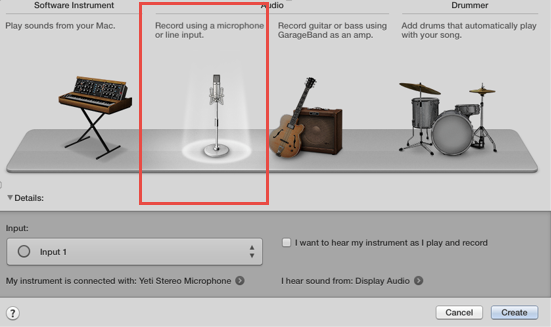
When you are ready to start recording your song press the record button.

To save the file click Share > Export Song to Disk. This will create a file on the desktop which you can then email or save to a flash drive

Scan a Drawing into Sketchbook Pro
Press the On button on the Canon scanner
Open the scanner, place your drawing face down on the glass and close the scanner
Press the autoscan button on the scanner
A window will pop up with a picture of your scan

Double click on the Sketchbook Pro icon
![]()
Click File > Open > Pictures> Select your scanned image
The scan will now appear in Sketchbook Pro
If you do not see the brushes toolbar on the left hand side, click the brushes button on the top toolbar

To change the width of the brush stroke, double click and modify the size or slant of the stroke
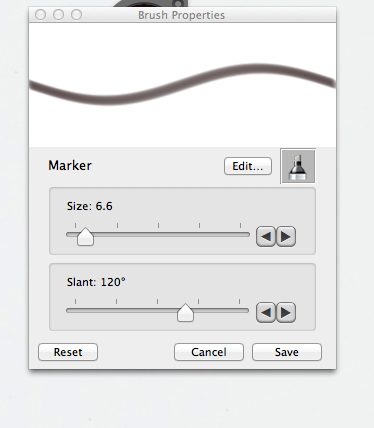
Brush color is shown in the color palette in the upper left hand corner. Click the color to open the color wheel and change colors

Use the zoom feature to make the image easier to edit. To zoom in use the scroll button on the mouse
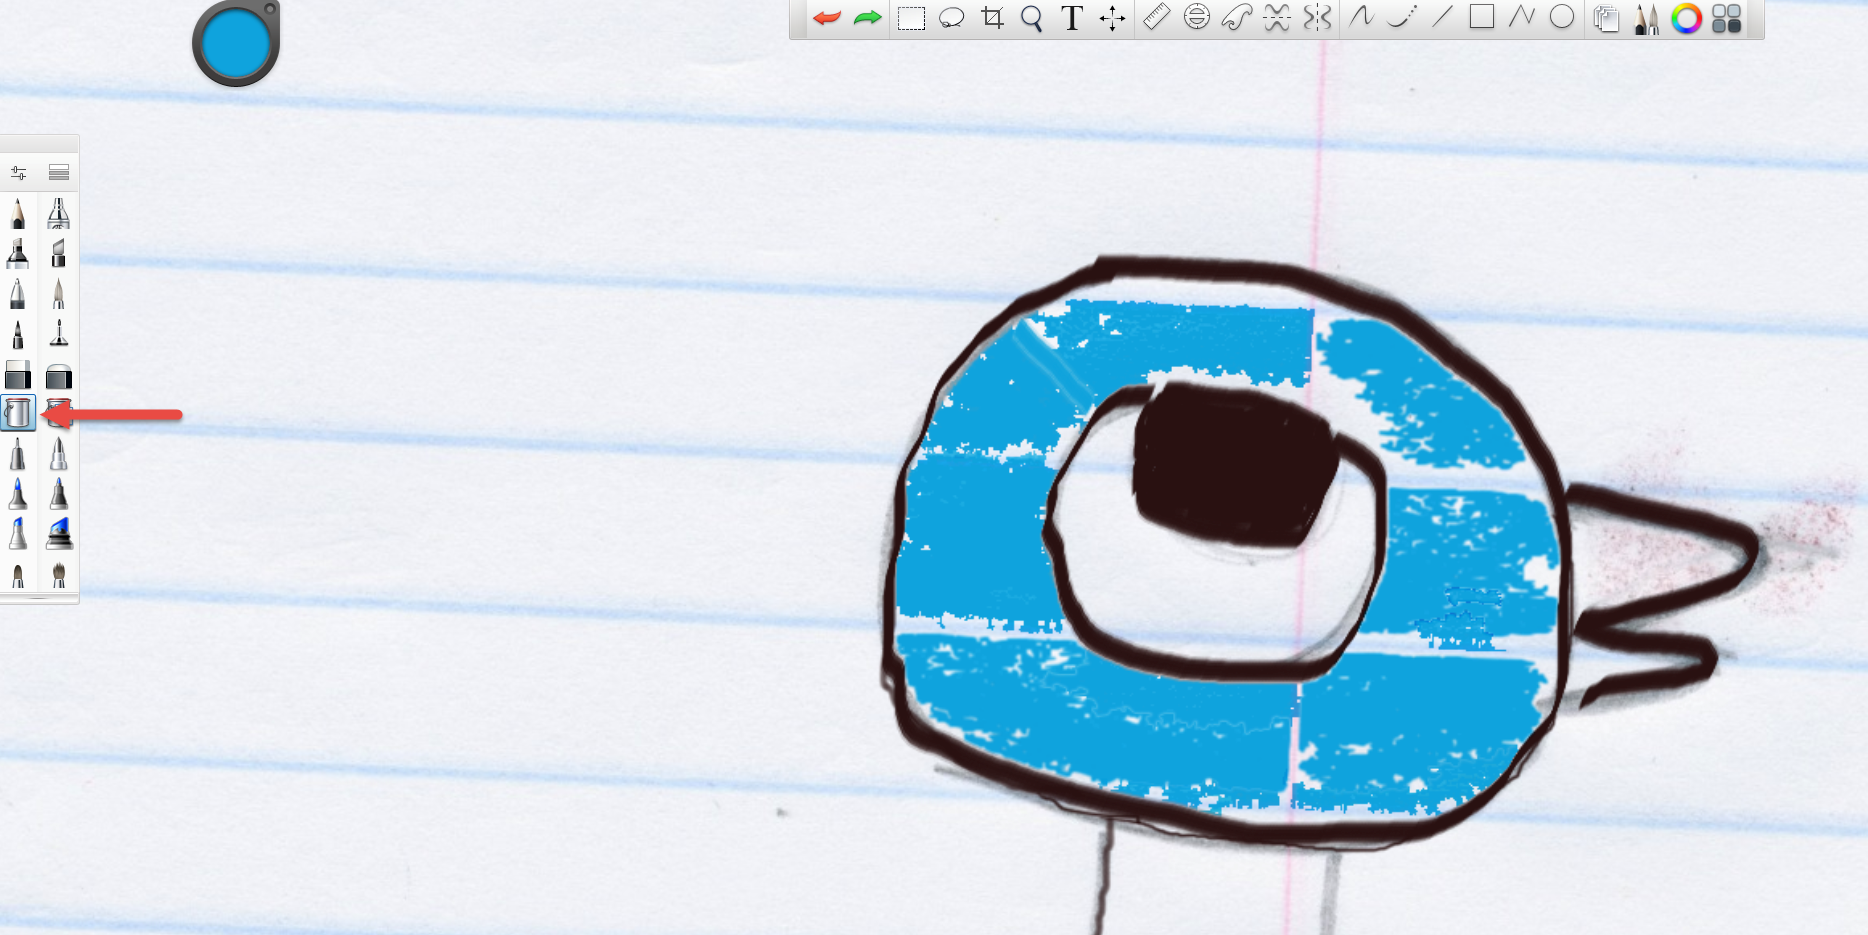
The bucket icon in the brushes toolbar will let you quickly fill in large blocks of color
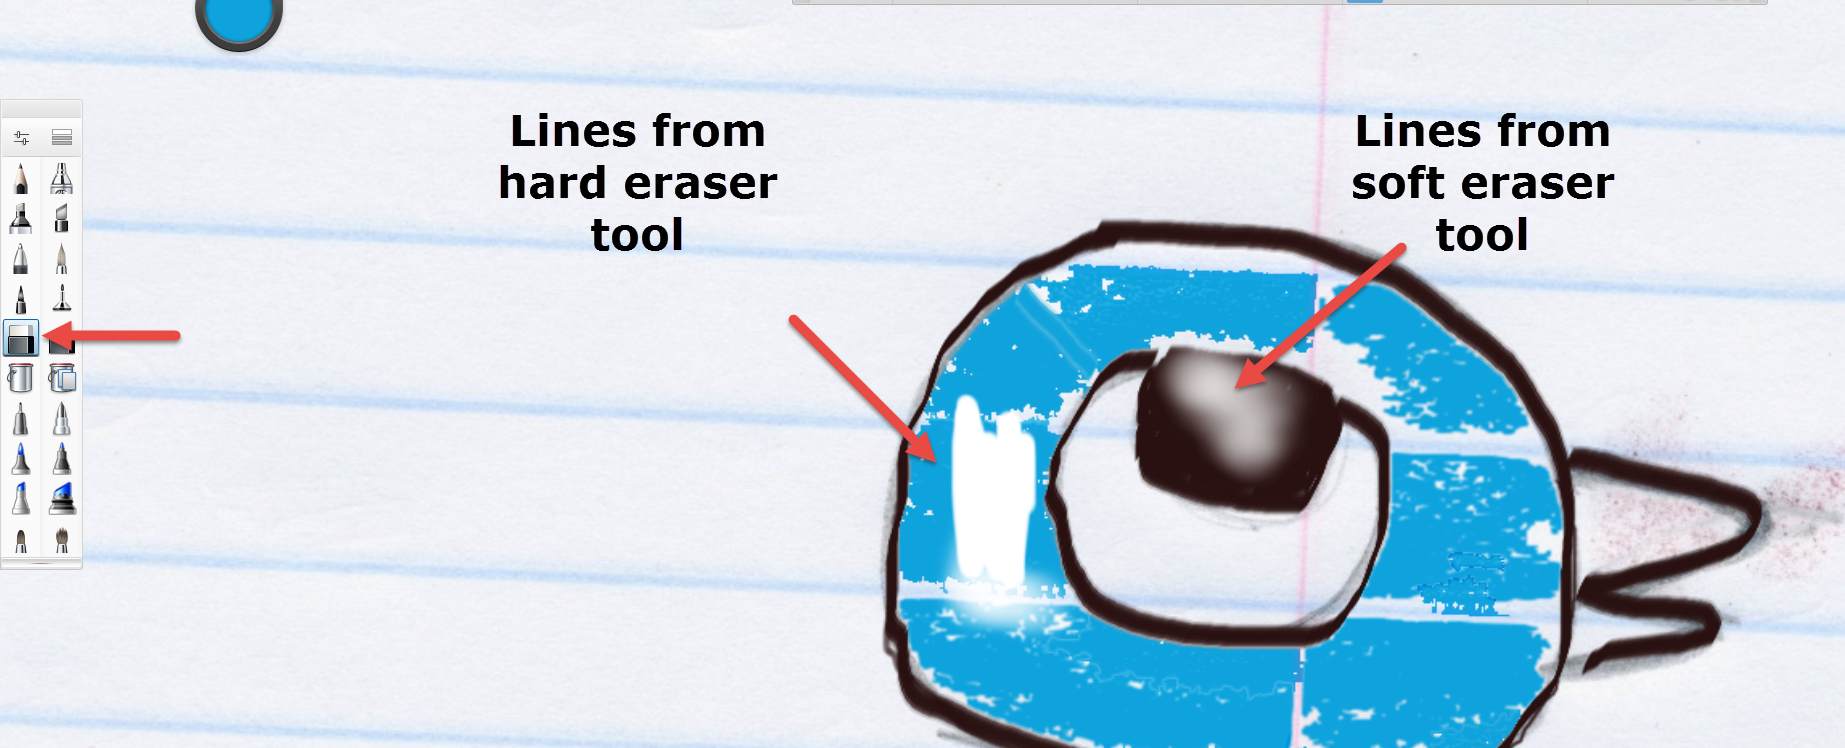
To erase click the undo button, or select the hard or soft eraser on the brushes toolbar. A hard eraser makes strong white marks and a soft eraser gradually erases, creating a blending look
Sketchbook Pro has lots of other fun tools that will enhance your drawing. Try some out, and have fun creating!
Save iMovie Project (Studio 1)
-
• Click on a blank section of the Desktop
-
• At the top of the screen click Go > Home > Movies
-
• Drag iMovie Library to USB drive
Opening the saved project
-
• Click on a blank section of the Desktop
-
• At the top of the screen click Go > Desktop
-
• Open the USB
-
• Drag iMovie Library into the iMovie folder
Save iMovie Project (Studio Kids)
Save Project
• Click on a blank section of the Desktop
• At the top of the screen, click Go > Desktop > Movies
• Drag iMovie Library to USB drive
Open Project to Edit
• Click on a blank section of the Desktop
• At the top of the screen, click Go > Desktop > Movies
• Open the USB
• Drag iMovie Library into the iMovie Folder and choose replace
• Open iMovie and your project will appear
Studio 1
Studio 1
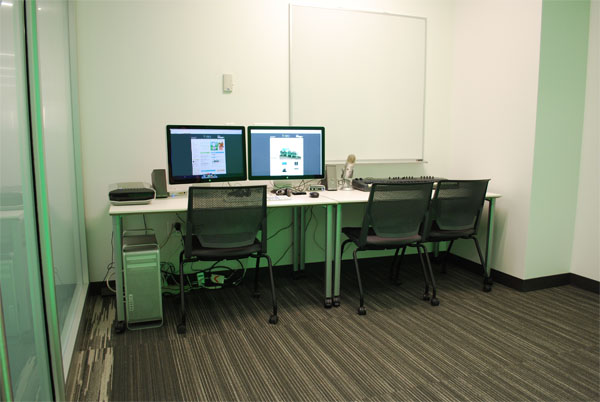
Located on the first floor in the Business & Technology Center, Studio 1 is a great place to work on digital projects. Whether you want to use Photoshop, digitize photos, make a new musical composition, or work with one of the many pieces of hardware & software, Studio 1 has the tools you need.
- Reservations may be made one week in advance by Barrington Area Library cardholders.
- The studio may be reserved for a maximum of 2 hours. An extension is allowed if no other customers have a reservation.
- Reservations will be held for 10 minutes, after which the entire period reserved will be forfeited.
- Cardholders from other libraries may use the space on a walk-in basis for one hour at a time. An extension is allowed if no other customers have a reservation.
- Room capacity: Four
Reserve Studio 1
Barrington Area Library cardholders can make a reservation to use Studio 1 up to seven days in advance. The reservation may be made for two hours, with a room capacity of four people.
Additional Help
You may make a reservation and use Studio 1 independently, but if you think you might need additional help we have a number of resources:
- Make a 1:1 appointment with our Digital Services team
- Use LinkedIn Learning or Gale Courses
- Read our getting started guides
- Try one of our projects for beginners
|
|
|
|
|
|
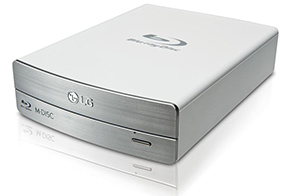
Blu Ray/DVD Burner
|
|
|
|
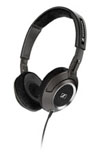
Sennheiser Headphones
|
|
|
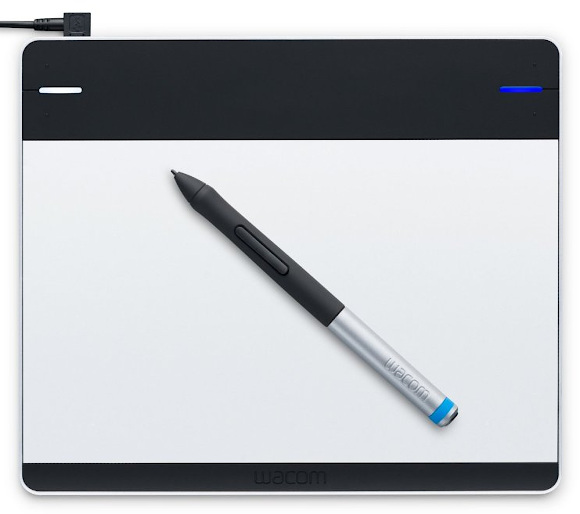
Wacom Tablet |
software
Adobe Creative Cloud
Adobe Acrobat Pro:Make custom PDFs & forms.
Adobe After Effects:Create 2D & 3D animations.
Adobe Audition: Record, edit, & mix audio.
Adobe Illustrator: Design & draw graphics.
Adobe InDesign: Publish print or digital text.
Adobe Lightroom CC:Photo editing application.
Adobe Photoshop: Photo editing software.
Adobe Premier Pro: Professional video editing software.
iLife '13
Additional Software
Final Cut Pro
Logic
Wondershare Uniconverter
equipment for checkout
Barrington cardholders can check out the following technology equipment for up to one week.
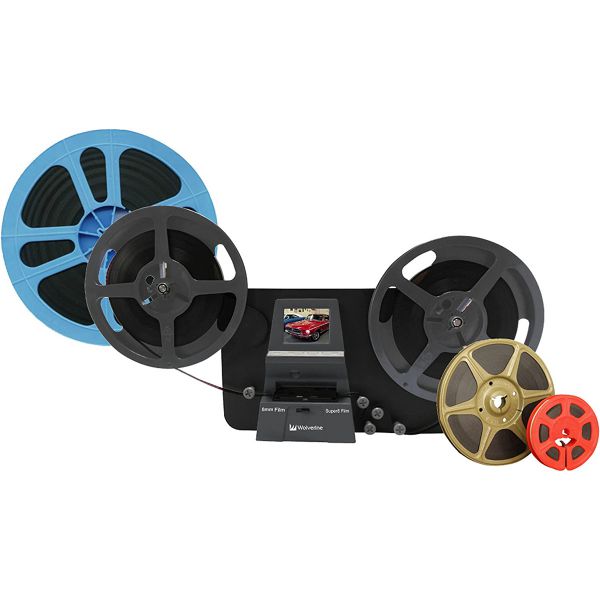
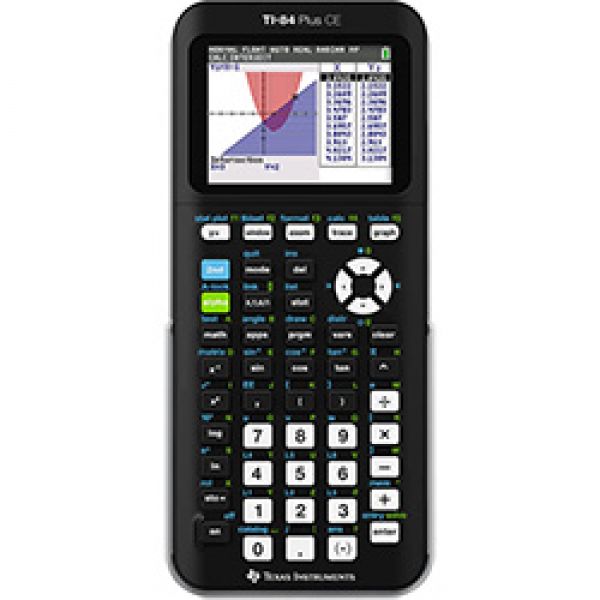
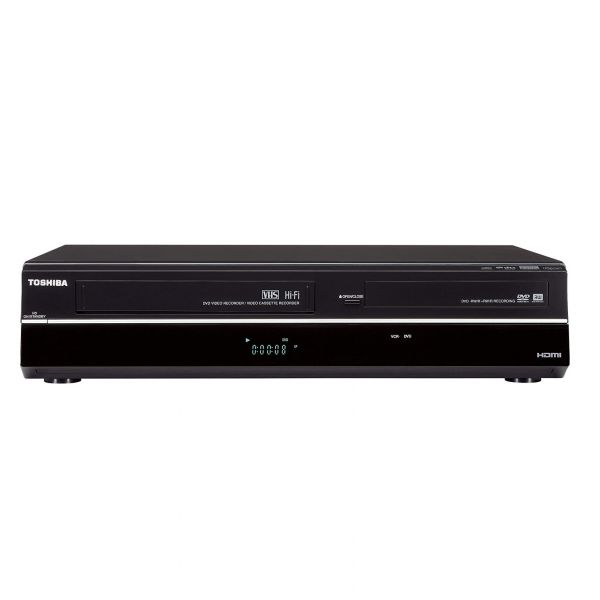
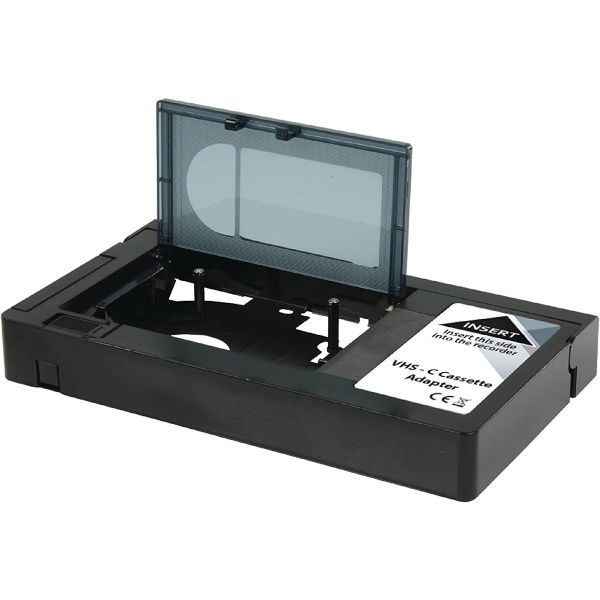
Instructions for the VHS to Digital Transfer Kit: Instructions for PC or Instructions for Mac. To burn the digital file(s) to DVD please use - Instructions to Burn a DVD on a Mac

The Adult Services department, located on the second floor, features a new space that can be reserved by customers in grades 9 and above to play PS4, Xbox One, Wii U, or, used as a collaborative study space. A selection of video games is provided, but you can play any compatible games rated T or below.
BALibrary Cardholders - Make a reservation now!
Non-Barrington Area Library cardholders may use the game room on a walk-in basis for one hour.
Video Games
PS4 |
|

An award winning game takes you through breathtaking landscapes.
|

Run, jump, & kick your way through the action-packed levels.
|
Xbox One |
|

No controller needed! Put on your favorite tune & grab a friend, or dance solo.
|

Stunning graphics will make you feel like you're a part of the NBA action.
|
Wii U |
|
|
|

Wind your way through a land of magic and conquer mind-bending obstacles.
|

Looking for fun Spring Break activities that are close to home and budget-friendly?
Look no further than the Barrington Area Library. From March 23-30, there's something
for your kids to enjoy every day - along with books, videos, computers and
lots of room to play and explore. Only a few events require registration and admission
is free. Come on over!
Art With Therese Wiser Workshops
Springtime Art, Thurs, March 29, 2 - 3 PM
Use colored pencils and watercolors to design a piece of spring-inspired art. Grades 1-2. Register using the green link.
Australian Dot Art, Thurs, March 29, 3:30 - 4:30 PM
Create a work in the style of aboriginal artists, using colorful shapes and dots. Grades 3-5. Register using the green link.
The Roz Puppets Present "The Emperor's New Clothes"
Fri, March 30, 10:15 - 10:50 AM
Children of all ages will enjoy this classic folktale about an emperor who is tricked by two weavers, presented by the colorful and lively Roz Puppets. 180 free tickets available in Youth Services 15 minutes before program. First floor meeting room.
Barrington Public Library District patrons who are homebound temporarily (30-day minimum), permanently disabled, or elderly and without transportation, may request home delivery. Call 847-382-1300 ext. 3300 and ask for BALibrary@Home Delivery for more details. The Library uses regular US postal mail delivery for this service.
Community Information Screen
Members of local nonprofit organizations may promote their organizations and events on the Barrington Area Library's Community Information Screen by submitting properly formatted PowerPoint slides to the library for display. The library provides the screen and can only provide minimal assistance in creating or editing content.
Slides may contain information about a local nonprofit organization or details about a specific event sponsored by a local nonprofit organization. The name of the nonprofit organization and the event must be significantly larger than the name and/or logo of any for-profit sponsor. The library reserves the right to determine whether and when slides will be added or removed from the slideshow. Due to the popularity of the screen, please note that submissions must be sent in by Barrington Area Library cardholders.
Each organization may have one slide in the slideshow at a time. Organization members may choose to have a slide appear for up to four weeks. Slides may be displayed longer only if space allows - this will be left to the discretion of the Library staff. Slides must be received via email (sent to Community@balibrary.org).
Formatting
The following formatting guidelines apply:
1. Slides should be created in PowerPoint, then saved as .JPEG files. PDF flyers may also be submitted, but be aware that this requires additional processing on the part of the Library staff and may delay your request.
2. Slides must have a width of 17 inches and a height of 11 inches. Landscape orientation is preferred over portrait.
3. Sound and video are not available.
Advertise your local non-profit group's upcoming events on the display screen in the Library Atrium. Slides are also displayed at the Library's second floor reference desk. Thousands of visitors come through our doors each month, making the screens an ideal place to tell the community what your organization has planned. Note: due to the popularity of this service, slide requests must be submitted by a Barrington Area Library cardholder on behalf of a local non-profit organization. You may receive an email asking you to confirm your library card number.
Slides may contain information about a local non-profit organization or details about a specific event sponsored by a local non-profit organization. The name of the non-profit organization/event must be significantly larger than the name and/or logo of any for-profit sponsor. The Library reserves the right to determine whether and when slides will be added or removed from the slideshow.
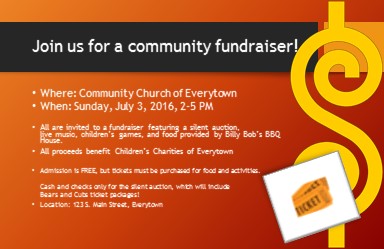
Click the image above to see an example of a finished slide.
The Library will display the slide exactly as submitted; be sure the slide is accurate and includes all pertinent details, such as date, time, and location.
Email your slide as an attachment to Community@balibrary.org. Indicate the starting date and the number of weeks you'd like the slide to appear.
You may request up to 4 weeks of display time. More than 4 weeks' time will be left to the discretion of the Library staff, depending on the total number of requests at that time.
The Library recommends using PowerPoint to create slides for the Community Information screen. PowerPoint is available on many computers and it is simple to use.
Don't have access to PowerPoint? You may also email a flyer/poster and our staff will make a slide. Flyers and posters may be PDF, .jpg, or even Word documents, but the document must be at least 8.5" X 11" (11" X 17" is preferable) in order to properly display. Documents in landscape orientation are preferable, but we will work with portrait orientation, too. Send your documents via email to: Community@balibrary.org.
How to create a slide:
1) Open up PowerPoint and select a "Blank Presentation" or any of the colorful designs on the opening screen.
2) Before you begin to design the slide, go into the "Design" tab, choose "Slide Size," then choose "Custom Slide Size.
3) Enter width as 17", height at 11".
4) Back under the "Home" tab, you may want to choose a different Slide Layout, depending on if you want just text, or text plus images. At any time, click the "Design" tab to see other background colors and styles.
5) Now, type in text and insert photos or images to inform people about your upcoming event or service. Be sure to include all the relevant details, such as location, date, and contact information.
6) When your slide is ready, click the "File" tab, then select "Save As."
7) Choose a location on your computer where you would like to save the file.
8) Give your file a useful name (like "FundraiserSlide") then, in the dropdown menu called "Save As Type," choose "JPEG File Interchange Format."
Key:
Green circle on black background indicates book return.
Black circle on green background indicates book return and pick-up lockers.
View Larger Map
The Barrington Area Library offers a variety of ways for you and your family to borrow and return materials. You're always welcome to stop in and browse, but you can also browse our online catalog, place holds on items with your BALibrary card, and receive them via:
- Parking Lot Pick-Up;
- Borrow By Mail;
- Automated pick-up lockers in five convenient locations - scroll down to see locations and hours.
See book returns and pick-up lockers on a Google map.
Book Returns:
Main Library: look for the drive-up return box in the northeast end of the parking lot, by the X sculpture, 505 N. Northwest Highway
NEW! The Arboretum of South Barrington, 100 W Higgins Rd, South Barrington - the book return is next to the Arboretum offices, near Pinot's Palette, Smallcakes, and Star Cinema Grill.
Barrington Hills Village Hall, 112 Algonquin Road
Barrington High School, 616 W. Main St, Barrington
Barrington Middle School Prairie Campus, 40 Dundee Road
Barrington Middle School Station Campus, 215 Eastern Avenue
Barrington Train Station, 201 S. Spring Street.
Charles E. Brown Park, W. Long Grove Road near Laurel Drive, Deer Park
Medical Office Center One at Advocate Good Shepherd Hospital, 27790 W Highway 22, Barrington - this is a medical building, west of the main hospital building
Hoffman Estates Park District Willow Center, both outdoor and indoor, Algonquin and Lexington Roads
Marketplace of Barrington, Kelsey Road & Route 59
South Barrington Park District, both outdoor and indoor, Tennis Club Lane
Pick-Up Locker Locations:
Have items delivered to an automated locker at a location near you. To request delivery, search the Library's online catalog, click on "Request Item, and then choose your pick-up location. When items are ready to be picked up, you'll receive an email or text message from the library.
Pick-Up Locations/Hours:
Main Library, outdoor, 505 N. Northwest Hwy (located in the parking lot, near the drive-up book return)
Open 24/7
Barrington Hills Village Hall, indoor, 112 Algonquin Road
Open 24/7
Barrington Train Station, indoor, 201 S. Spring Street
Mon-Fri: 5 AM - 10 PM
Hoffman Estates Park District Willow Center, indoor, Algonquin and Lexington Roads
Hours:
Mon-Fri: 7 AM - 9 PM
Sat-Sun: 9 AM - 1:30 PM
South Barrington Club, indoor, Tennis Club Lane
Hours:
Mon-Fri: 5 AM - 10 PM; Sat-Sun: 7 AM - 9 PM
Frequently Asked Questions:
Where are the lockers located?
We have lockers at five locations: The Main Library building, South Barrington Park District; Willow Center/Hoffman Estates; Barrington Hills Village Hall; and the Barrington Train Station. For addresses and hours, see "Pick-Up Locations" above.
How do I get material out of a locker?
- At the Main Library, Barrington Hills Village Hall, and Barrington Train Station: enter or scan your BALibrary card number and the locker with your materials will automatically open.
- All other locations: enter your seven digit phone number (your phone number without the area code) into the keypad, then press the # ENT key. The locker with your materials will automatically open.
Items are officially checked out to you when placed in the locker, so there's nothing more you have to do to check out the items. Items are held in the lockers for 6 days. If an item is not picked up, it is considered "returned" to the library when lockers are emptied. All sites with pick-up lockers also have return drops, but in addition, you can return items to any of ten return drops located throughout the Barrington Area Library District. For a complete list of our return drops, see "return drop boxes" above.
When will my library items be delivered?
Customers are notified by email or text message that items are being delivered for pick-up. The notification will provide specifics about date/time for pick-up. Materials are held in the lockers for 6 days.
Prearranged group visits are available for schools, preschools, governmental units, non-profit organizations, and businesses in the Barrington Public Library District. Library staff can provide library tours, technology workshops, research tips, book talks and story time presentations.
For school visits or tours of the Youth Services Department: contact the YS Department via email. A librarian will contact you to confirm visit arrangements. Please allow two weeks' notice.
For group visits for adults: please contact the Adult Services Department via email. A Librarian will contact you to confirm visit arrangements. Please allow two week's notice.





 Test your lead foot & race through challenges in Need for Speed.