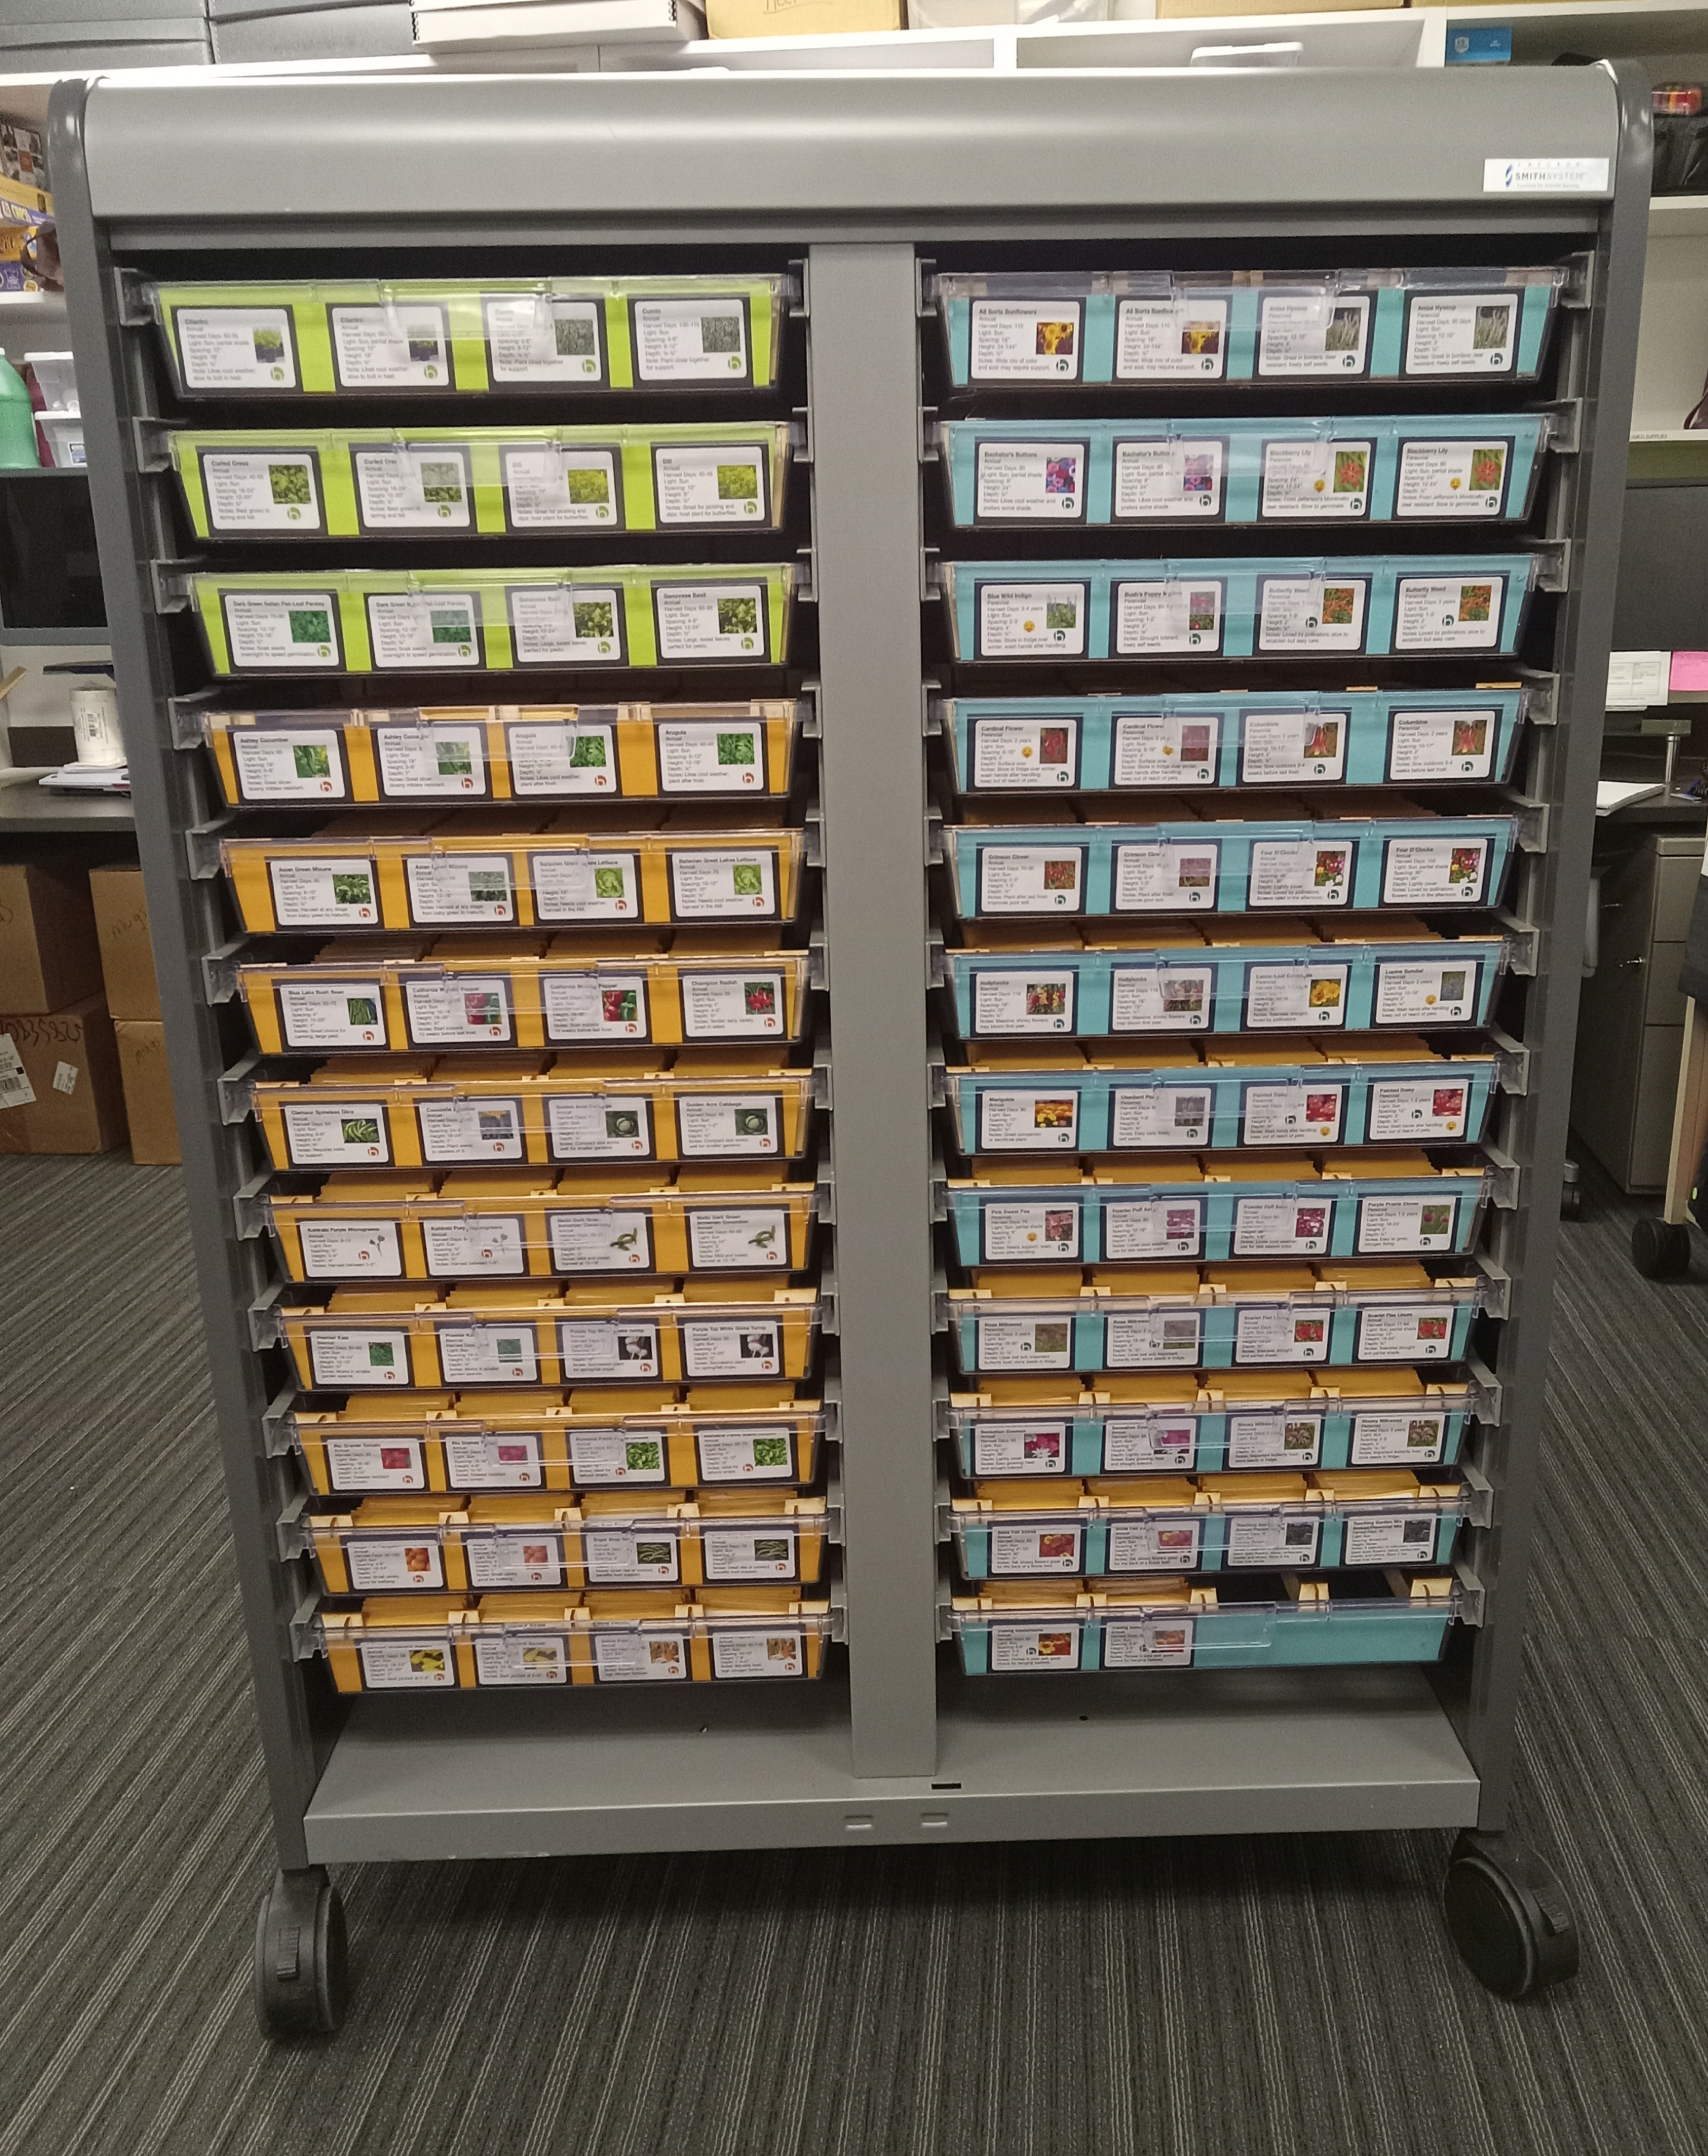
It’s nearly time for our Seed Library Launch, and we know that lots of you have been looking at the online lists of the seeds we’re offering this year. With 55 different options, though, we know it can get overwhelming. We’re here to help!
Here are some options for tricky situations that our customers ask about all the time.
- For gardens that often fall victim to pests like Japanese beetles, marigolds can act as a sacrificial plant. Many insects will eat the marigolds first, and are more likely to leave your other plants alone.
- Have a particularly soggy spot like an area next to a downspout? Try planting blackberry lily, cardinal flower, obedient plant, and some milkweeds. Veggies like arugula and cabbage tend to be tolerant of wet feet, too. Just avoid hard skinned produce like watermelon that can burst with too much late season watering.
- Black-Eyed Susans and butterfly weed do well in sandy soil.
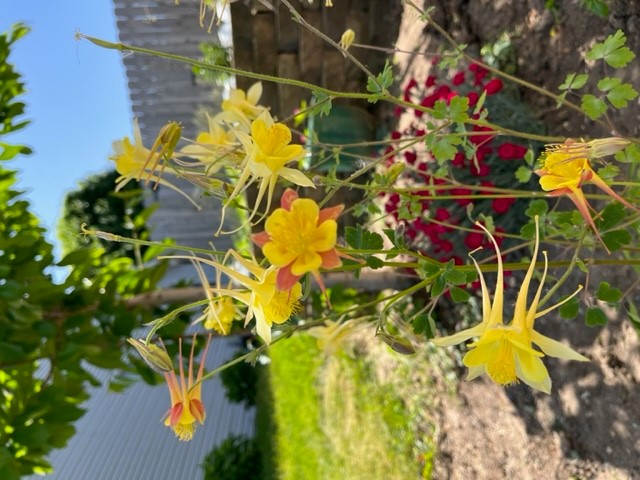
- Coneflower, anise hyssop, and columbine tend to be more deer resistant.
- For poor soil, try butterfly weed, sunflowers, crimson clover, and trailing nasturtiums.
- If you’re trying to cultivate a prairie space, consider our Teaching Garden Mix, blue wild indigo, Bush’s poppy mallow, coreopsis, purple prairie clover, Black-Eyed Susans, and milkweed.
- For more traditional landscaping, try hollyhocks, painted daisies, cosmos, and zinnias.
- For hanging baskets, trailing nasturtiums can work well.
- Any herb can work in a container garden. Veggies like arugula, beans, peas, and cabbage can all work in pots, they may just be smaller than those grown in a garden.
- Popcorn, pumpkins, squash, scarlet flax linum, zinnias, herbs, and obedient plant are all fun to grow with kids.
- If you’re looking for tall plants for the backs of your beds or along fence lines, try hollyhocks or sunflowers.
- Clemson spineless okra, Ashley and Armenian cucumbers, sugar pie pumpkins, sugar peas, and summer crookneck squash all like to grow on trellises.
Need recommendations? We’ll have lots of experts on hand for our Seed Library Launch on Thursday, February 1 from 10-4, when Master Gardeners will be available to answer questions and help with seed selection. You can also contact the Master Gardener help desk, or reach out to librarian Liz Kirchhoff anytime.
It’s hot out there! When the weather is this hot and sticky, there are a few things that you can do to help your garden. For the most part, high temperatures are no big deal if it’s just a day or two, but more prolonged heat waves can stress and sometimes even damage your plants. Signs of stress include wilting, leaf rolling or cupping, blossom/fruit drop, bolting, and even scalding.
An obvious first step is to water, but mindfully. The prevailing wisdom is that it’s generally best to water in the morning, since less water is lost to evaporation, and plants and soil have time to dry before the cooler night air. If you’re noticing that your plants look really droopy though, it’s generally best to water right away. If at all possible, water slowly over an hour or two instead of a quick soak with the hose. A thick layer of mulch can help the soil retain more moisture, and protect delicate roots. If your plants are in containers, consider moving them to a shady spot for the day. When there’s excessive heat in the forecast, you should also avoid things like pruning, fertilizing, and using chemicals. Keeping your beds weed free can also help, since your plants won’t be competing for resources.
Most importantly, make sure that YOU stay cool and hydrated. Try to work early in the morning, or during the early evening hours when it's the coolest outside. Take lots of breaks, and drink lots of water.
It’s hard to believe that we’re already halfway through the growing season! Here at the Library, we’re already thinking ahead to what seeds we’d like to offer in the Seed Library beginning in February of 2024. Over the next month, we’ll start ordering seeds from our vendors, gathering from plants growing in our Teaching Garden and Prairie, and accepting surplus flower and veggie seed donations from our customers. Before we do, we’d like to hear from you. What would you like to grow next year? Any new varieties, or things you had trouble finding this year? Let us know using this form.
If you find that you have leftover seeds as you harvest this fall, we’d love to include those in the Seed Library. While we can use any seed donation, we’re especially looking for tomato and pepper seeds this year-they are our most requested seeds, and are also the most expensive (by far!) for us to purchase. Just put your surplus seeds in an envelope labeled with the variety and your contact information, and leave it with the staff at the Customer Service desk at the front of the Library.
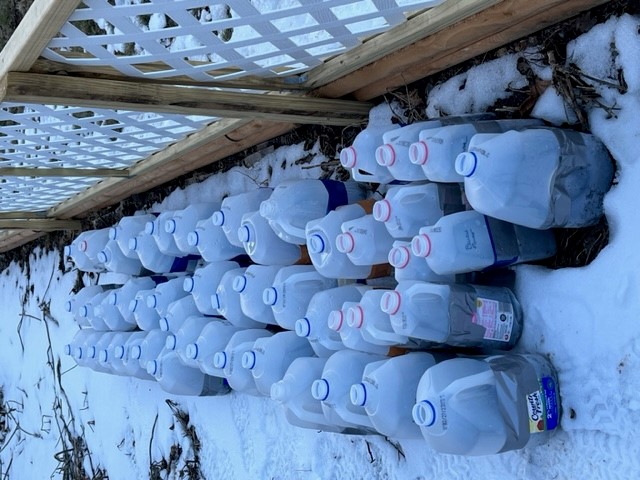
Even though it’s a method that’s been around for years, winter sowing has recently drawn lots of attention as an easy and frugal way to start strong seedlings outdoors much earlier than you’d normally be able to in the Midwest. There are lots of different ways to do this, and it’s honestly hard to go wrong.
To start winter sowing, you’ll want a plastic container ideally at least 8-10 inches tall. Empty milk and water jugs and rotisserie chicken containers are ideal. Most commonly, you’ll see milk jugs. Start by rinsing the jug out well, and throw the top away. Flip the jug upside down and use a knife or a drill to add four holes to allow water to drain.
Using your knife or a pair of scissors, cut the jug all the way around, leaving the handle attached as a hinge.
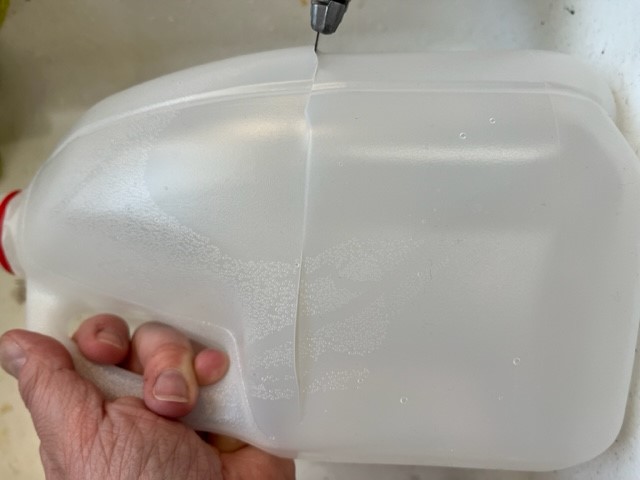
Once you’ve done that, you’ll be able to flip the top of the jug open like a lid. Using a sharpie, write the name of the seed on the inside and outside of the top of the jug. Add about four inches of regular potting soil (NOT garden soil), plant your seeds, and cover them lightly. Moisten the soil so that the seeds don’t blow around, and flip the lid back onto the jug. Using a piece of duct tape, attach the top and the bottom to create a mini greenhouse.
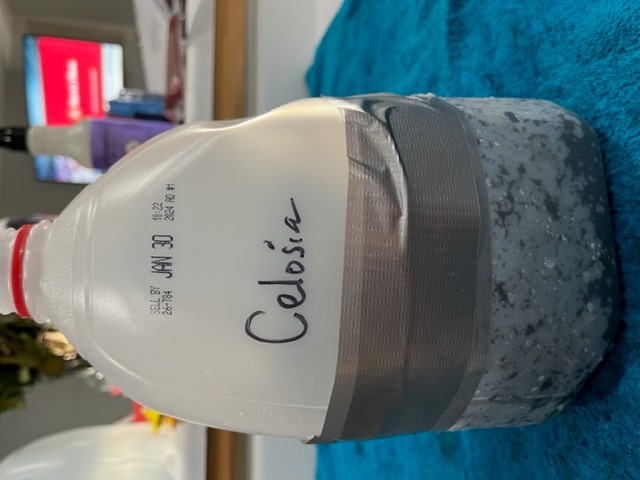
Put your jug outside in the sun, and leave it for the rest of the winter. The hole at the top will allow snow and rain to keep your soil moist, and the seeds will germinate when they would naturally outside. Because the seedlings are exposed to cold and the wind for their entire lives, they tend to be far hardier than seeds started indoors or at a nursery, and you won’t need to harden them off. Eventually your seedlings will be several inches tall, and you’ll be able to plant them. You can choose to either tease the roots apart and plant them one at a time, or you can cut the soil and seedlings into chunks and plant them in hunks.
Lots of people wonder when it’s too late to winter sow for the year. A good general rule of thumb is that if you still need a jacket or a sweatshirt at night, you still have time!
By now everyone has probably heard that a great way to support the monarch is to plant milkweed in your garden or landscape. It’s pretty easy to grow-it just needs a sunny spot and relatively well drained soil. Before you plant your milkweed, though, you’ll want to stratify it, or expose it to cold for a prolonged period. This replicates the winters here in the Midwest, and it helps to wake up the seed and encourage it to germinate come spring. The easiest way to do this is to store your seed in a paper bag in the back of the fridge. The minimum is generally 30 days, but you can keep it in the fridge over the winter if you like, too.
So you’ve stratified your seed, planted it, and you’ve got your healthy new plant for the monarchs. Now what? Toward the end of summer, you’ll see that the pods are getting big. You’ll know when to harvest those when you squeeze them gently and they pop open. Snip about ⅓ of them off (you’ll leave the rest for the birds and for the plant to reseed itself), squeeze them until they open, drop them into a paper bag, and let them dry out for a few weeks.
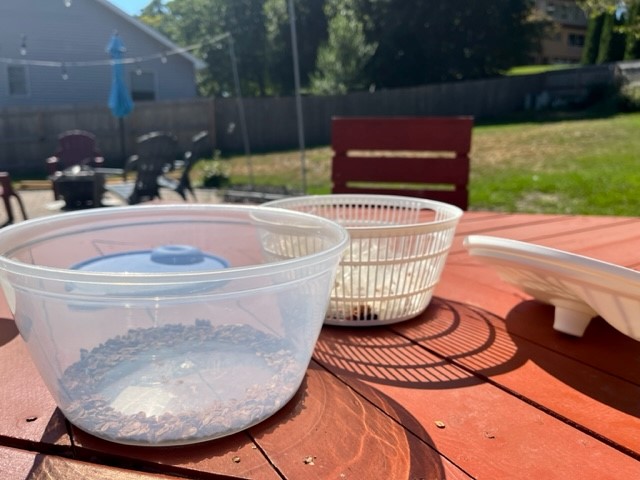
There are a few ways to remove the milkweed silks (the white fluffy bits) from the seed. If you plan to reuse the seed yourself, you don’t really need to remove it at all, it’s just helpful if you’re donating it or giving it to a friend. The most common way to do this is to remove the silks and seeds from the pod and discard the empty pod. Drop the silks and seeds into a big paper bag with a handful of pennies, close the top, and shake the bag. Snip a small corner off the bottom of the bag and the seed will fall out. I’ve found it helpful to clip the bottom corner of the bag closed and repeat this process until I’ve gotten all I can. Discard the silks, and you’re good to go.
Another way to process the seeds is to drop the seeds and silks into a salad spinner. You’ll need to add something to knock the seeds off (what the pennies do in the bag), so I use a handful of clothespins. Give it a good spin, and your seeds will fall through the strainer and into the bottom of the salad spinner bin. When you’re using the salad spinner method, skip the drying time before hand to get more seed. Both ways work, but I was able to recapture more seeds with this method than by using the classic paper bag.
The recent news that the migrating monarch butterfly is now classified as an endangered species has spurred new interest in cultivating plants and spaces that can host and feed our pollinators. Even small spaces can make a big difference, so consider creating a small pocket pollinator garden or prairie space. To start, you’ll want to mow your grass as short as possible. You can find great native seed mixes at Prairie Moon; just make sure that you select the right seed for our region (zone 5b) and how much light your space gets. Seed mixes generally have good instructions; you’ll notice that many of them encourage you to mix them with sand and broadcast by hand. This helps to ensure an even distribution of your seed. Because seed is basically designed by nature to be light and mobile, it’s helpful to add a light layer of mulch to retain moisture and hold it in place. Fall is an excellent time to do this work, since many native seeds need to cold stratify (basically, go through freeze/thaw cycles) to germinate in spring. If you’d prefer to do it in spring instead, you still can! Storing your seeds in the refrigerator or freezer over winter will mimic natural cold stratification. Just follow your seed packet instructions.
In spring, your new garden will likely need some watering and weeding, but as it grows, you’ll notice that it may require a bit less upkeep than your regular garden does. Because native plants are already adapted to our spaces, they generally need less watering, pest control, and pruning once they’re established. Win win!
This fall, our Teaching Garden area will be expanding with a Prairie. If you’ve ever walked through our Teaching Garden, you’ve probably already seen the area we’ll be using, a grassy space along the tree line between the library and the Garlands. Before we created our Teaching Garden in 2021, the site was home to a wooded area overgrown with buckthorn and weeds slowly choking out healthy trees and understory plants. Our landscape architects planted native plant plugs in the area nearest the trees, and while those thrived in the sunny spaces near the garden, they struggled to survive in the shade of the trees. Over the past year or so, weeds have started to compete with the native plants, so we’re taking a more active role in the area to preserve this space for our vital pollinators. We’re partnering with the University of Illinois Extension Master Naturalists to clean the area up and maintain it going forward. To begin, we’ll remove all the weeds from the spaces. Then we’ll be collecting seed from the sunny area and resowing it to promote new growth. Finally, our landscapers will mow the shadiest portion of the area, and we’ll seed it with local seed gathered by the Citizens for Conservation. A light layer of mulch will hold the seed in place until it has a chance to germinate in spring.
Going forward, the Teaching Prairie will host regular workdays and classes taught by Master Naturalists, designed to teach you to identify native plant species, provide habitat for vulnerable pollinators, and create and care for your own prairie spaces. Watch our newsletter for more information!
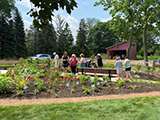
Big changes are coming to our Teaching Garden area over the next few weeks! Fall will be here soon, so it’s nearly time to put our garden to bed. We’ll have a last minute taste of summer this week, but you can expect that the weather is going to cool down soon. Every garden is different, but to put ours to bed, we start by collecting seeds. If you’d like to learn how, stop by our Teaching Garden on Tuesday during workdays, or register for our program on collecting and sowing seed on September 29. We’re able to gather a lot of seed from our spaces, and we keep some of it to plant in spring, send some home with our seed collecting volunteers, and save the rest of it for our popular Seed Library. Once our seed has been collected, we’ll have an end of the season party to cut and share our flowers with volunteers and customers. Only then can we really put the garden to bed. With the help of our Master Gardeners, we do what’s called a chop and drop, where we cut our annuals to the ground. Instead of gathering and composting the foliage, we leave it where it falls and mulch thickly over the top. Over the course of winter, the plant material breaks down in place, and enriches the soil for spring. This is one of the easiest and best things you can do for your future garden, and it’s much less labor intensive than many of the alternatives. The only exceptions to our chop and drop are plants with many seeds (like tomatoes) and weeds. You’ll want to remove those from your garden and either dispose of them or compost them. Once you’ve finished this part of your garden clean up, you can plant any bulbs or tubers that you typically fall-plant for spring. That’s it!
One final note before you put your own garden to bed: it’s always really helpful to take pictures (and even write yourself a few notes!) before you do so. Winter is long here in the Midwest, and it’s so easy to forget what was successful, and what you would change come spring planting. This can also help you remember where perennials are, so that you can plan your spring garden around them.